- July 31, 2018
- Nail care
- Anna Mordosova
Every self-respecting woman should have well-groomed hands. Even having nice, expensive clothes won't help make a good impression if the wearer has dirty or broken nails. And confidence and self-respect will disappear after the first contemptuous glance of the interlocutor towards this seemingly insignificant detail. You need to constantly take care of your hands, getting a manicure at least once every two weeks.
It is absolutely not necessary to have long nails, painted with unusual patterns and sparkling with multi-colored rhinestones, but the basic points must be observed: cleanliness, absence of hangnails, the same length. Tidy nails, covered with ordinary colorless varnish, already add a fair amount of elegance to the overall look.
Standard skin care involves regular use of moisturizer. To keep your nails always in order, you need to renew your manicure about three times a month. Today's beauty industry is rich in specialists in this field who will be happy to help you. But from time to time situations arise when it is not possible to visit a specialist in a timely manner.
Therefore, giving yourself a beautiful manicure at home is an essential skill that guarantees a flawless appearance regardless of the circumstances.
Let's consider the main points of this subtle art.
Preparatory stage
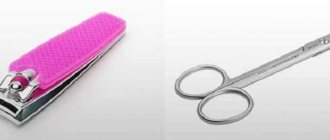
- Remove old varnish. In this case, use special soft products that do not contain acetone. Soak a cotton pad, a piece of gauze or cotton wool in the solution and apply it to the surface of the nail, leaving it there for a certain time so that the product has time to soften the varnish coating, facilitating its easy removal.
- Use a file to remove all excess from the nail plates, giving them the desired shape. Just do not use a metal file; it can damage the fragile base of the nail. When doing a manicure with your own hands, file the nail in one direction, otherwise it will begin to peel off in the future.
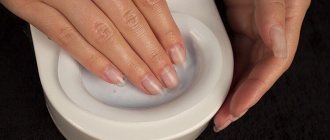
- Pour warm water into the container. If desired, you can add sea salt and lemon juice to it. Dip your fingers into the solution and hold for 2-3 minutes.
- Dry your hands with a napkin.
How to choose a design
Choosing a design is, of course, not an easy task. Because there are so many options, but you need to choose something. Firstly, you should build on your tastes and preferences. Stylists advise those with fair skin to choose cooler shades, as well as red or burgundy. For dark-skinned people, an excellent option would be light, delicate shades - peach, pink, greenish.
The never-fading classic French jacket is always in fashion. You can only diversify it with different colors, and also decorate one or two nails with a pattern.
More recently, lunar manicure has burst into fashion and taken a leading position. In this case, the nail plate is covered with any tone, and the hole remains its natural color, or is painted over in a different color. A moon manicure decorated with rhinestones or sparkles looks great.
Not the last place in the nail design parade is occupied by mirror shades. Gold, silver, turquoise playing in the light will not leave anyone indifferent.
When choosing a manicure design, a common mistake is choosing the color of the polish to match the color of your clothes. There is no need to do this so that the nails do not merge with the silhouette. It is better to choose a varnish that matches the light of your skin and hair. Moreover, you change outfits every day, and high-quality varnish lasts 5 days, and if we talk about shellac, then all 20.
A monochromatic manicure design will never go out of fashion. But to create a highlight, you can apply a design, dots, line on one nail - it doesn’t matter, the main thing is to somehow highlight it. This will add some unusualness and will look quite interesting.
Whatever color and design you choose, the main thing is that the nails are well-groomed, there should be no cuticles, and the length on all nails should be the same. And we should not forget about the skin of the hands, which should be moisturized, not dry or cracked. Always be beautiful and irresistible, we hope our tips will help you with choosing a manicure design.
/ 1850
https://youtu.be/https://youtu.be/Y4g7W0Lk7FA
_
Classic manicure
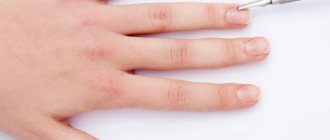
This type of manicure is called edged. First of all, the skin near the nail (cuticle) is cut with scissors or special nippers, having previously treated all the tools with alcohol. Alcohol is also useful in case inexperienced movements cause damage to the skin.
Use a spatula or orange stick to peel away the skin. Use cuticle cutters or scissors to cut them off. Work very carefully. If the injury has already been caused, do not forget to use alcohol as quickly as possible to disinfect the wound.
The best part remains - a light massage of your hands and nails using cream. Now let them rest a little so that the cream can be absorbed well. Creating a beautiful manicure with your own hands at home at this stage is considered complete.
How to do a manicure: simple tips from experts
We have already told you why now is the time to give up any coatings and switch to nude nails. Today it's time for simple tips on how to do a manicure at home
@verawandel
We asked the founder of the Bunny nail cafe chain of studios, Antonina Krolivets, to talk about the rules of home manicure. She immediately got worried: “Can we not do a home manicure? We can file our nails, “bite off” hangnails, take care of cuticles, push back, smear, do a spa, but not a manicure, please?”
Chromat
We thought for a second. But we decided that it was still possible. On this occasion, the studio masters gave us personal advice. We publish them as is.
“By using antiseptics, we not only kill germs, but also dry out the skin,” says Alena Zakharchuk. – Collagen gloves from the American company Voesh cope well with this problem. Active substances penetrate the layers of the epidermis and retain moisture in it, eliminating dryness and toning.” All you have to do is put on gloves while watching a movie, and within half an hour your skin will be transformed.
Collagen gloves, Voesh
“It happens that due to a missed visit to the specialist, burrs appear. This is normal,” explains Alena. And recommends softening the cuticle. At home, Panacea cuticle product with natural almond and avocado oils works great. The oil comes in a convenient stick packaging with an applicator. Relieves inflammation, softens the cuticle, slowing down its growth. If you use it morning and evening, the cuticles will look well-groomed and will not dry out, creating hangnails.
Cuticle oil stick, Panacea
Lifehack: use an orange wood stick to gently push back cuticles. Then they won't overgrow so much. “I recommend doing this on wet cuticles, immediately after washing dishes, taking a bath or wet cleaning the house, when the nails and cuticles are well softened,” says Alena.
Giada
For those who have removed gel polish and want their nails to grow back faster, Alena recommends Nagelfalz-Öl nail and skin oil from Baehr. With regular use 2 times a day, the oil restores fragile, thin, brittle and split nails. Wheat germ oil, tea tree oil and vitamins promote healthy nail growth.
Step-by-step instruction
Manicurist Marina Dmitrenko tells how to do a spa manicure. You will need:
- Keratin gloves. They soften the cuticle and make the skin of the hands softer and smoother
- Orange wood pusher stick
- File 240 grit (file for European manicure)
- Cuttings
Halpern
Subsequence
1. Give your nails length and shape. During quarantine, it is better to keep your nails natural in shape and have a minimum length (up to 1 mm of the free edge);
2. Put on keratin gloves and massage the cuticle area and side ridges. This step will replace cuticle remover (remover) or soapy water. It contains a complex of oils and keratin that moisturize and soften the skin to the desired stage.
3. After 5-10 minutes, cut off the ends of one glove to free the nails. Remove excess cream with a napkin.
4. Using an orange stick, you can easily push back the cuticle without pressing on the nail. If the cuticle is sensitive, it is better not to overdo it.
5. Using cutters, cut the burrs across so that new ones are not created. It is not recommended to touch the cuticle. How to get involved in the process.
6. Using a file along the side rollers, move towards the tip of your finger to remove rough skin. You can add a little water. Processing rollers with a file is safer at home. It is important not to use cutters: you can catch “living” skin, the cut may be uneven, and the skin will become rougher faster. As a result, new hangnails will form, and the manicure will deteriorate faster.
7. Apply cuticle oil and remove the glove. Rub the cream into the skin.
Tools
“When choosing a file, it is important to look at the abrasive,” says Marina. “You shouldn’t use a rough file: it will do the job faster and may seem to be of better quality, but such an abrasive leads to nail separation, injures the skin and does not polish it.” A 240 grit file is recommended. You can use glass: its coating is soft enough for delicate work and is well suited for natural nails.
@verawandel
Today, many companies produce lines of manicure tools for home use. I recommend files for European manicure. They have a convenient shape, so you can easily treat the side rollers and even the cuticle area.
cutters “without a heel” (the lower part of the cutting blade): with such lower parts there is a risk of cutting off excess with this part. It is better to choose brands that specialize in professional tools: they have the right sharpening and good metal.
Post-care
“The main thing in care is hydration and nutrition,” says manicurist Olya Storozhuk. Another stage is baths with salt and essential oil, which perfectly strengthen and restore nails and skin of the hands. Especially if your nails are after gel polish. This is also a pleasant procedure that also works as aromatherapy. As for the coating, it is best to go without it. But if you want at least some, then clear nail polish will do. It will even out the nail plate and add shine. You can combine the coating with a glass of wine and your favorite movie. Just an opportunity to take your time, sit and dry the varnish, just like in the good old days.”
European manicure
The European type of manicure eliminates any trauma to the skin, being considered completely painless and safe. But here you will need 5-8 procedures to make your nails look perfect. This method is optimal for people with very delicate skin and blood vessels located close to the nail.
- Treat your nails with a special cuticle softener. Keep the emulsion on the nail as long as it is written in the instructions for the product.
- Use a spatula or stick to remove dead skin. Be careful not to put too much pressure on the nail. Remove only the layer that can be removed without effort.
- Use a napkin to blot the remaining emulsion and apply a product that slows down cuticle growth.
- Lubricate your hands with cream and give a light massage.
If the cuticle is too hard and there are a lot of hangnails, you must first do a trim manicure, and then move on to a European one. During the transition period, combine both methods.
Varnish coating
What easy and beautiful manicure at home would be complete without regular nail polish?
Start the procedure by removing any remaining cream and excess moisture.
- Regardless of the painting method, the first layer should always be applied as a base. It’s very good if you use special products. Various beneficial substances are added to them. Using the base, you will achieve evenness of the nail plate. In addition, the nail, which has received additional nutrition, is reliably protected from the aggressive effects of the varnish. And the durability of the manicure on hands treated in this way will be guaranteed.
- First, stir the varnish well. Squeeze the brush slightly. If the portion of varnish is too large, the drop will spread unsightly, staining the skin. Start coloring with your little finger. Place a drop of polish at the base of the nail in the center of the plate. Then stretch it to the top edge. Then paint the side parts in the same way (from base to top). Try not to get the varnish on your skin. Lightly move the brush along the top end edge of the nail, as if sealing it. Dry the varnish.
- Apply a second coat.
- If the varnish accidentally gets on the skin, it can be removed with a toothpick.
- Each layer must be dried well.
- Once completed, try not to get your hands wet for an hour.
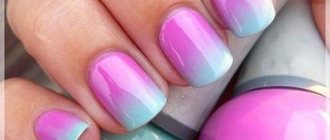
Gradient manicure
A method of smooth transition from one color to another. Here's how to make this beautiful manicure at home step by step:
- Take a fine-pore foam sponge and cut it into small pieces. You can also use eyeshadow sponges. It will be even more convenient with them.
- Apply varnish of the selected colors onto a waterproof surface. The varnish blots should touch each other.
- Using a needle, connect the edges of the spots and mix the resulting palette.
- Blot the polish with a sponge and apply to the nail.
- Let it dry, then coat with sealer. Instead of a fixative, you can use a colorless varnish with glitter.
- Dip a cotton swab into nail polish remover and remove any rough spots or dirt.
The second version of this manicure:
- Paint your nail in a basic tone.
- After the varnish has dried, apply a different color with a sponge, trying to blend the areas of contact.
- The top of the nail can be painted with a third color.
- Cover the resulting pattern with a fixative.
Gradient manicure will be perfectly complemented by all kinds of decorative stones.
Water method
There are many varieties of this method of nail decoration. Let's consider the most original of them - marble manicure.
- Fill a small cup with water until it reaches the rim.
- Place some varnish in the middle.
- When the first tone has spread, place another color in the center. Move the needle along the surface, forming a pattern. Do not immerse the tip deep into the water.
- Cover the skin near the nail with tape or apply a layer of rich cream.
- Bring your hand to the water, placing your nail parallel to the design. Lower your finger and use a circular motion to remove all the polish from the surface.
- Dry the coating, remove the tape or remove the cream. Clean dirty areas with a cotton swab soaked in cleaning liquid.
- Apply a sealing layer.
The ideal utensil for creating such designs would be a plastic cup. Do not use quick-drying varnishes for water-based manicure so that you have a couple of minutes left to create a design and apply it to the nail.
Red manicure
Evelina Khromchenko's absolute favorite is red manicure. It's suggested by a fashion expert as a fashionable alternative to translucent coverage. Bright red polish tends to match any shape and length of nails. It is also able to add zest to any look and effectively contrast with everyday combinations of things. Don’t forget that red nail polish is the embodiment of passion, femininity and seductiveness.
Khromchenko herself likes to rely on a plain red coating without unnecessary decorative frills. She can rely on such a laconic and stylish design both on weekdays and on special occasions.
But you don’t have to limit yourself to a solid red coating. This varnish goes well with various fashion accents:
- geometric patterns;
- transparent inserts in the “negative space” style;
- unobtrusive shiny accents;
- framed;
- drawings in the style of minimalism;
- play of matte and glossy textures.
Lunar manicure
Take two colors of polish. They may not even match each other in tone, for example pink and blue. For a gala evening, black and red, red with a golden moon, black with a silver crescent will look good.
- Apply the base tone and dry.
- Glue the stencil strips at the base of the nail in the form of a semicircle or triangle. Paint the remaining surface with a different color.
- Dry, remove the stencil and secure the design with a special product.
- Draw a gold strip along the edge of the moon, decorating it with rhinestones.
Beautiful lunar themed manicure designs at home look amazing on any length of nails.
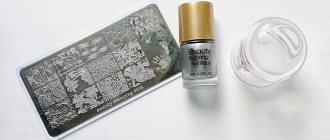
Minimum set for manicure with gel polish
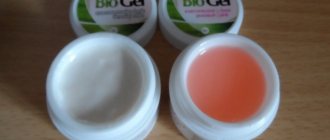
How to do a manicure at home with gel polish? There are heated debates on the Internet about the difference between gel polish and shellac (longevity of wear, harm to nails, which is easier to remove). Part of the female audience believes that there are no differences at all. All you have to do is try both, and then choose the option for yourself. In general, the strategy is the same as with regular varnish. It is also important to stock up on the necessary supplies and tools. To the already purchased arsenal you need to add: a special lamp for drying (UV or LED, they differ in price and speed), a set of gel polishes (preferably two or three colors), brushes (two pieces, one for application, the other for home nail design) , base and finishing product.
minimal set of tools
Manicure at home: a classic of the genre
Affordable manicure for beginners - French . It looks great on any length of nails, fits almost any look and looks very neat and elegant. Making a French manicure is easy even for a beginner. A stencil is glued onto the prepared nail so that the edge remains free, it is painted with white varnish and allowed to dry. The stencil is removed and the selected shade of varnish is applied in two layers. It is advisable to put a fixative on top. When performing a lunar manicure, the nail hole is painted in a contrasting color. You can do it using a stencil, when the base of the nail is sealed, then all the steps are similar to the French one. The second option is using a brush, but this method requires some skill and experience. Here, the base color is first applied to the entire nail. When it dries, semicircles are drawn near the base of the nail with a thin brush.
French manicure. 1. Degrease the surface of the nails. 2. Cover the nails with a base.
French manicure. 3. Draw a line along the edge of the nail with a thick white varnish using a brush or stencil.
French manicure at home. 4. Carefully correct the border using a brush. 5. Cover with top in one or two layers.
Classic French manicure
Secrets of high-quality manicure at home.
To make the “smile” even, before drawing it, place small dots along the line, starting from the middle, and then draw it with a brush.
Manicure at home: using stickers
A simple manicure for beginners - water-based or glue-based stickers. Their fundamental difference is that water-based stickers need to be kept in water so that they separate from the paper base, while adhesive stickers are separated from the base and immediately transferred to the nail. Both options are applied to the varnished nail plate and carefully smoothed out. It is important to remember to remove the transparent film from the sticker before placing it in water. On top everything is covered with a protective layer of varnish.
Manicure with stickers at home. 1. Degrease the surface of the nails. 2. Cover the nails with a base. 3. Apply colored gel polish with a sticky layer. 4. Cut out the stickers according to the shape of the nail, then lower them into water for 30 seconds. and carefully remove the top colored layer from the paper backing.
Manicure with stickers at home. 5. Apply the sticker to the nail, press it with your finger and smooth it out with a sponge.
6. Apply top coat in one or two layers. Be sure to seal the edges!
Secrets of high-quality manicure at home.
When performing a fashionable manicure with stickers, be sure to seal the edge of the nail. To do this, put a lot of topcoat on the brush and carefully move along the end of the nail.
Manicure at home using accessories
A beautiful manicure is obtained by choosing additional decorations in the form of rhinestones, pearls, beads, plastic and metal appliqués. The size of the rhinestone determines how it is secured. Small rhinestones are easy to put on wet varnish, medium ones - on drops of transparent varnish, which are applied to well-dried varnish, large ones - on special glue. The parts are placed using tweezers or a regular toothpick. Finally, in all three cases, cover the nail with a fixing layer. In the same way, the manicure is decorated with pearls and beads. Ready-made plastic and metal applications replace hand painting. They are laid out on a fresh layer of varnish, allowed to dry, and a finishing coat is applied on top.
with rhinestones. 1. Apply the base coat first. 2. Apply one or two layers of colored gel polish with a sticky layer. 3. Apply top. 4. Attach rhinestones. 5. Dry in a lamp for 3 minutes. 6. Take the thinnest brush, wet it in the top coat and carefully outline each rhinestone (slightly going to its edge). 7. Dry the finish coat well in the lamp again.
Manicure at home with rhinestones.
Secrets of high-quality manicure at home.
For manicures with metallic appliqués, rhinestones or pearls, it is best to use gel polishes with a sticky layer. In order to firmly fix the decor on your nails, additionally carefully trace each rhinestone along the edge with a thin brush with topcoat, slightly going over its edges, then dry thoroughly in a lamp. If the decor is quite voluminous and large, then repeat this manipulation twice.
[pro_ad_display_adzone id=”9403"]
Manicure at home: with velvet sand
Velvet sand is a fairly new invention in the world of nail design. Besides all the other benefits, it is easy to apply. There are two ways to do this. The first is to apply it to colored polish and immediately sprinkle sand onto the nail, then press it with your finger, making sure that the sand lies evenly along the edges of the nail. The second is not to press the sand, but wait for the varnish to dry and brush off the excess with a brush. If you wish, you can sprinkle not the entire nail, but make a design.
Video instructions for manicure with velvet sand at home.
French manicure
The classic French jacket never goes out of style. Previously, it was customary to use only 2 colors: pink and white. Now there are no such restrictions. Therefore, you can safely create, creating fancy inflorescences on your own nails.
- Apply 2 coats of base tone (clear, pink or nude).
- Separate the top of the nail using a stencil and cover it with white or colored polish.
- Don't forget about the fixative.
- Decorate with rhinestones and sparkles. You can draw thin, lace-like curls, small designs (bows, polka dots).
Experiment with French manicures on nails of different lengths using stencils of suitable shapes, such as V-shaped. Fantasize and create your own unique image.
Materials
There are now many materials available for coating and painting nails. A novice designer can try to draw a design on his nails with the most ordinary varnish. You need to choose a rich shade, but make sure that it goes well with the background color. Having applied dots with dots, you need to try to carefully stretch them with a needle, creating leaves or streaks. Gel polish is a more professional material; it requires drying in a special lamp. Since such a material is fluid, it is unlikely that it will be possible to create thin lines or draw lace patterns. But abstraction is quite possible. Gel paints, despite their similar name, are a completely different material. They have a bright pigment, without requiring several layers. The dense consistency does not spread and is capable of creating small details and fine lines.
On the base of the gel polish, already dried in a lamp, you can paint with watercolors. True, such technology is already within the power of experienced craftsmen and requires training. You will first have to draw the contours with a simple pencil or acrylic, and then paint the blank with watercolors.
Newspaper manicure
An original and yet uncomplicated method. This manicure can be done at home.
- Apply a layer of base.
- Next is white varnish.
- Moisten pieces of newspaper, glue and dry.
- Apply several coats of topcoat.
There are many options for newspaper manicure: gluing newspaper to the entire nail, using separate parts (you can lightly burn them), replacing a newspaper page with a dollar. For female students, such a manicure on their hands in the form of a cheat sheet is just a lifesaver.
How to paint with different colors
The design technology and the choice of tool for applying it will depend on the type of paint used. Let's look at techniques for different materials:
- With regular nail polish you can create fairly simple and general compositions. By stretching the drops with a needle, the maximum that can be drawn on the nails is petals or artistic curls.
- Gel polish is applied “wet on wet”. It has a high fluidity and is well suited for French manicures and abstract designs. The main background layer needs to be dried well, and fancy patterns should be created from drops of different colors applied on top of it.
- Gel paint may vary slightly in consistency. A thicker one is suitable for thick lines, and a liquid one will help draw small details and thin lines. But a very liquid one can spread during drying.
- The watercolor drawing will look quite original on the nails. A white background base, which must be thoroughly dried, is best suited for such paints. A watercolor drawing is applied according to the principle of coloring. That is, you need to draw the outlines of the composition with a simple pencil, and then apply paint. After they dry, apply and dry the top coat.
- Acrylic is a material that requires dilution with special liquids. They are easy to draw clear and thin lines, but you need to choose the right brush. Oil-based acrylic is not suitable for nail design, as it prevents the fixative from polymerizing in the lamp.
Each material is good in its own way, so you can make your choice.
Gold scattering on red
- First, as always, comes the colorless base.
- Glue the stencil strip in the middle of the nail plate.
- Paint your nails red.
- Apply a sprinkle of gold glitter polish on top.
- Secure the pattern with a special means.
A photo of a beautiful manicure at home with such a fabulous design is attached.
Little secrets
- There is a special product for degreasing nails, which can be replaced with alcohol or wine vinegar if necessary.
- Do not keep bottles of varnish in the open sun or near heating devices. When cool, it adheres better to the nail plate.
- Thickened varnish can be thinned. Nail polish remover or solvent will do.
- Clean the failed nail immediately, without waiting for it to dry.
- To remove dirt from the skin, use a manicure spatula dipped in nail polish remover.
- Do not dry the varnish with a hairdryer or under running water.
- To whiten your nails (after gardening or picking berries), wipe them with lemon juice.
- A simple recipe for brittle nails: cut a lemon and soak your nails in it for 10 minutes. The procedure must be performed 3 times a week.
- Bath for peeling nails. Dissolve a large spoonful of sea salt in a glass of hot water. Cool to an acceptable temperature. Keep your hands in the solution for about 15 minutes. Also do the bath 3 times a week.
And always wear gloves.
A manicure at home can be much better than a salon one. To do this, it’s enough to practice a little, use your imagination and master several successful techniques.
Secrets of a perfect manicure at home
Well-groomed hands are not a fashion fad, but a woman’s calling card. Graceful hands say a lot about the health, neatness and organization of a person. Every self-respecting woman, whether she is a housewife or a businesswoman, should find time to take care of the smoothness of her hands and a neat manicure.
Why should women take such careful care of their hands?
Women's hand skin is thinner than men's. Not many people know that there is very little subcutaneous fatty tissue in the skin of the hands, as well as sebaceous glands. That is why their process of hydration and restoration occurs slowly.
In addition, every day, women's hands experience stress from changes in water and air temperature and are exposed to the negative effects of harmful substances contained in cleaning products. Irregular hand care leads to dry skin, wrinkles and hangnails.
How to care for your hands at home?
Secrets about hand care for most women are limited to moisturizing, removing cuticles and applying varnish. Not all ladies, unfortunately, use rubber gloves when cleaning and do not moisturize the cuticle at least once a day to prevent the appearance of microcracks. Meanwhile, the skin on your hands is as delicate as the skin around your eyes.
What to do to preserve her youth and beauty?
1. The main rule of proper care for hands and nails is systematicity. At least twice a week, pamper your fingers and nails with baths containing iodine, sea salt and essential oils. Use a hand scrub once a week. It is easy to make from available materials such as honey, salt or coffee.
2. Water dries out and destroys the skin of your hands. It is recommended to dry your hands and apply moisturizer after each contact.
3. Don't forget about the cuticle product. They well moisturize the nail plate and keratinized skin around it. Ideally, the products should be used regularly - morning and evening.
4. Hands should be protected from excessive exposure to sun, wind and cold. To do this, in the summer, before going outside, apply hand cream, and in the winter, wear gloves made from natural materials. This way your hands will not sweat and become dehydrated.
5. Proper nutrition and vitamins will help get rid of brittle and brittle nails. Focus on foods such as cottage cheese, seafood, fresh vegetables and fruits. Vitamins A, E and C will be useful.
Rules for home manicure
Beautiful hands are not a luxury, but the result of regular care and quality manicure. It is not always possible to find time to visit a manicurist. Making your nails beautiful at home is not difficult if you follow simple rules:
1. Cuticles don't always need to be trimmed. Just moisten it and push it away with an orange or bamboo stick. This procedure reduces the chances of damaging the nail root or the skin around it.
2. Nails should be filed in one direction. This technique causes less damage to the nail plate and protects it from delamination.
3. To maintain the shine and beauty of your nails, use an acetone-free polish remover.
There is no need to be lazy and leave your hands without care and attention, because they create the first impression of their owner.