Many fashionistas are interested in what is needed to apply gel polish at home, what equipment is needed on the list? It may be different, but the main elements must be present.
What do you need to cover your nails with gel polish? First of all, manicure tools, because without proper preparation of the nail bed you will not get a beautiful and neat manicure. For this you will need:
- nail scissors;
- cuticle nippers or scissors;
- orange sticks or pusher;
- file for processing the free edge of the nail;
- grinding file to give a matte finish to the nail plate.
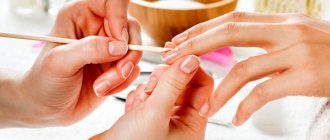
Preparatory stage
For a manicure with gel polish, you should especially carefully prepare your nails before applying it to avoid peeling and rejection of the material. If you are afraid to use scissors or nippers to remove cuticles, you can replace them with special cuticle softeners. They are applied directly to the treated area for a few minutes, and then easily removed with an orange stick or pusher. After using the substances, you must wash your hands thoroughly with soap to avoid irritation and peeling. These products are quite aggressive and should not be left on the skin for more than five minutes.
To apply gel polish at home, you need to purchase special materials and equipment. Today on the market you can find a gel polish starter kit, which usually includes:
- hybrid, UV or LED lamp for drying materials;
- degreaser;
- primer;
- base for application;
- colored gel polish;
- top or top coat;
- sticky layer remover.
What should be in a kit for gel polish at home?
Before applying gel polish, you must carefully prepare your nails so that the coating adheres well and lasts a long time (or at least until removed).
The most optimal manicure is considered to be working with a milling cutter, but few people can afford such a device at home. Therefore, we do a trim manicure or push back the cuticle.
For manicure you need:
- file for natural nails;
- metal pusher/scraper with rounded ends - to push back the cuticle and pterygium well;
- nail clippers or cuticle remover (when working with a cuticle remover, it is important to degrease your nails well after it, it affects the wear/detachment of gel polish);
- buff, but not a polisher (buff has all the same sides, we don’t need to polish the nails, they need to be given a slight roughness for adhesion to the coating).
After preparing the nails, it’s time to coat, so what you need to have in your gel polish kit :
- Drying/UV lamp, hybrid or LED (24 or 36 watts) - which one will be purchased subsequently will need to be considered when purchasing gel polish;
- A brush for removing dust from nails - needed for cleaning nails after a manicure, and will also help remove glitter from the skin and rubbing;
- Lint-free napkins - so that no fluff or lint remains on the coating;
- A product for removing stickiness and degreasing nails - also known as clinser;
- The base for gel polish is the first layer of coating so that everything sticks well;
- Gel polishes of the desired colors, you can start with one or two and then buy more;
- Top coat is the final protective layer, it is what gives shine or matte;
- Cuticle oil - applied at the end of the entire design manicure, moisturizes and helps restore the skin. It is this that creates the shine around the nail in all photos with gel polish manicure. In general, you can consider it a whim and replace it with a good hand cream.
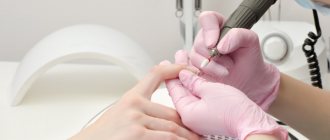
Where to begin?
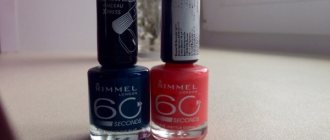
Applying gel polish requires the mandatory use of special lamps with UV or LED rays. The latter dry the coating in an average of 30 seconds, while ultraviolet rays process it for at least two minutes. It should be remembered that lamps with LED beams do not always cope with gel polishes, or rather, not with all types. Therefore, hybrid lamps are the ideal option for coating today. They successfully combine UV and LED rays, they are suitable for absolutely any materials and significantly save time. It is best to use them, but they are the most expensive. Therefore, everyone must decide for themselves which lamps to purchase for work.
In order to start applying the gel coating, you need to carefully treat the nail plate and be sure to get a manicure. Then go over your nails with a special buff file to remove their natural shine. This will help the materials adhere better to the surface. A gel polish manicure should begin with degreasing the nail plate using a special product or liquid to remove the sticky layer and degrease the nails.
To ensure better durability and extend the life of your manicure, you must use a special primer. It will provide better adhesion between the natural plate and the base layer, which is necessary if your nails do not hold the coating very well. For home application and if your nails hold the polish well, you can do without it. The primer can dry on its own in the air, or drying is necessary, for which a special lamp is used.
You can start with a base coat. It is simply necessary for coating with gel polish, otherwise it will not stick to the nails. This requires some skills, without which it will not be possible to apply the material correctly. The main rule when applying a base coat is to seal the free edge of the nail. This is the main difference from a regular home manicure, which only requires careful application of the material. The base layer is dried in a lamp.
Gel polish coating step by step
- First, the preparatory stage : the nail plate must be treated with BAF for nails. Give the nail the required shape using nail files, level the free edge of the nail plate and thoroughly clean it of dust. Please note: it is necessary to remove the topmost keratin layer from the nail plate, remove the gloss, and make the surface matte. This is necessary so that the applied material lays down easily and evenly and adheres to the nail plate.
- Degrease the nail , especially if before applying colored gel polish a manicure was done using oil and cream, then be sure to clean the nails of their residues. This can be done with boric acid.
- Take the base coat (Base Coat) on a brush and apply it to the pre-treated nail plate with rubbing movements from the end of the nail plate to the nail cuticle. Then we make direct movements in the opposite direction from the cuticle to the end of the nail. You should try not to touch the cuticle itself and the skin around the nail. We polymerize in an LED nail lamp for 30 seconds , do not be afraid to overexpose, as this lamp has a reverse report timer and will not allow you to overexpose the gel polish to ultraviolet rays.
- Colored varnish is applied . Colored gel polish can be applied in one or two layers. You should try to make the layers as thin as possible. Each layer must be polymerized in an LED lamp for 30 seconds . Pay special attention to the end of the nail; it must be carefully painted. This must be done carefully, because the aesthetic appearance depends on it. See the picture for how to apply gel polish correctly.
- To fix and give our coating an additional and deep shine, it is necessary to use a top coat (Top Coat). Also, don’t forget to pay attention to the ends of your nails. Polymerize in an LED lamp for 30 seconds . This coating will give your nails a glossy look and protect the color of the polish.
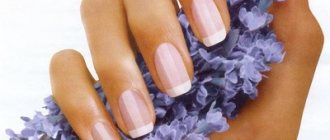
That's all! Beautiful nails are ready. Your nails are flawless. Gel polish is a unique nail coating. It remains on the nail plate for about two to three weeks.
You need to complete the procedure with a nourishing cream. Hand cream “Living Oils” provides effective hand skin care. Regenerates and softens the skin, has anti-inflammatory properties.
Subtleties of applying color coating
After the base coat, the base coat is applied. This is the colored gel itself, when using which you must follow certain rules. In order for the entire manicure to be smooth, without unnecessary bubbles and defects, you need to make several thin layers, each of which must be dried in a lamp. Gel polish, or shellac as it is also called, requires special care when working. Each color layer should be applied to the edge of the nail, otherwise the coating may peel off. In addition, the material should not get on the side rollers and cuticle. This will not only create an unkempt appearance, but can also cause an allergic reaction.
Painting your nails with gel polish carefully the first time will not be so easy. After all, the entire surface should be completely covered with it, and it is important not to get it on the skin. The material has a thick gel texture that takes some getting used to. It has to be applied to the nail in thin layers, otherwise there is a risk that it will boil in the lamp or form unsightly bubbles. And if it gets on the skin or flows onto the rollers, which often happens, the gel polish coating will have a very untidy appearance. Here it will be necessary to immediately remove it from the skin before drying it in the lamp, otherwise it will be difficult to get rid of it. You may even have to reapply all the layers.
After color coating it is necessary to use a special topcoat. It will give not only shine, but also excellent durability. These substances can be either matte or glossy, with or without a sticky layer. Which materials to choose for applying gel polish is up to you, depending on the desired result and preferences.
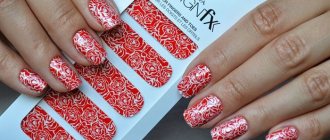
The top coat is applied in one layer, sealing the free edge of the nail. Sometimes the plate is covered with several layers of topcoat, mainly to secure the design elements. What they will be: rhinestones, stickers, bouillons or foil is up to you to decide.
Nails properly coated with gel polish have a very beautiful and well-groomed appearance. A neat and tidy manicure makes a woman especially attractive. The materials used for manicure may be different, and both regular and gel polish should be used.
Applying varnish at home is not at all difficult, you just need to have certain knowledge and skills. Then a novice master can easily cope with the task of creating a coating, because the main thing is to follow the technology and be especially careful. Gel manicure must be removed with special tools or a cutter. It's not as fast as removing regular nail polish, but its appearance and durability make you forget about the inconvenience.
Doing a gel manicure at home is not a difficult task, but you need to have special equipment and the necessary materials. If you plan to constantly give yourself a long-lasting manicure at home, it makes sense to purchase all the tools and do it yourself. This will allow you to save a lot of money on visiting beauty salons. And if you don’t get a manicure often, it’s cheaper to use the services of a nail service so that the materials don’t have to lie around.
Beginner's starter kit
Beginners should not rush to buy everything at once. This is especially true for those girls who want to cover their nails only for themselves and their friends. To carry out the first procedures, only the most necessary materials and tools will be enough. Gradually, you will be able to purchase other little things that will make the process easier.
You can find ready-made gel polish kits on sale. What does it include? This is usually the minimum list of materials needed to get started.
- Lamp (UV or LED).
- Degreaser and disinfectant (2 in 1).
- Base coat (base).
- One or two colored gel polishes.
- Finish coating (top).
- Sticky layer remover.
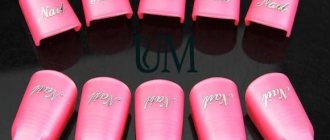
When purchasing, you should pay attention that there are gel polish kits for covering nails with and without a lamp. But this is not the entire list of what may be useful. To perform a manicure you will need good scissors or tweezers, a pusher or orange sticks, files of different hardness, and cuticle oil. Lint-free wipes, buff and primer will also help you perform the procedure efficiently. It is better to purchase all kinds of decor (rhinestones, stickers, foil, ribbons, glitter, powder, rubbing) as needed.
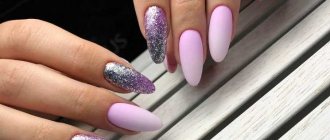
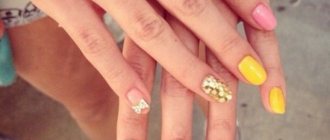
Photo of nail polish coating
Even more photos at the link: Gel polish photo.