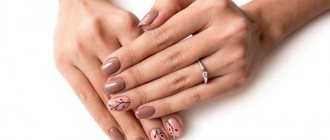
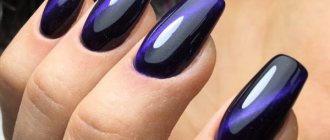
Beautiful and well-groomed nails are the treasure of every girl. They charge her with confidence and good mood for the whole day.
Manicure is the fastest growing trend in the beauty industry. Long nails are replaced by a short, discreet manicure; bright, saturated shades give way to a moderate color palette.
How to make polish matte
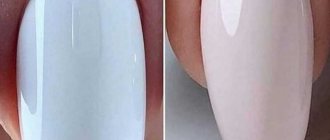
Special attention should be paid to nail polishes. Keeping up with fashion trends in coatings is even more difficult, because the stores offer a lot of all kinds of products for decorating nails. Most of them are glossy varnishes, but matte finishes are no less popular in the last season. There is no need to spend money on a new jar of varnish. In our article we will tell you in detail how to make any varnish matte.
Soda treatment
Another easy way to make your polish matte is to treat your nails with baking soda. It will quickly and effectively remove shine in seconds. Moreover, this wonderful transformation occurs so quickly that you must stock up on all the necessary materials and tools in advance.
For the “soda manicure” you will need:
baking soda; fine mesh strainer; small soft makeup brush; a plate of water; base coat; nail polish.
How to make a matte manicure using baking soda:
- Sift the soda through a strainer. There should be no lumps or large particles left in it, otherwise they will spoil the appearance of the manicure.
- Polish your nails and give them the desired shape, cut off any overgrown cuticles. Clean the surface of the nail plates.
- If necessary, apply a base coat and wait until it dries completely.
- Choose any glossy polish and paint the nails on one hand. Leave the second one without varnish for now. If you paint your nails on both hands at once, there is a risk that while you are working on the polish on one hand, it will have time to dry on the other.
- While the varnish is still liquid, treat it with soda. To do this, take a makeup brush, dip it in baking soda and gently brush over your nails.
- Leave the baking soda on your nails for a few seconds. During this time, it will penetrate the structure of the varnish and remove unnecessary shine.
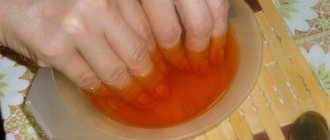
- Then brush off the baking soda or dip your nails in a bowl of water to rinse it off.
- If there are still particles of soda on your nails, then dip the brush in water and go over again where necessary.
- Now do a matte manicure on your second hand.
After you wash off the baking soda with water, the matte effect will be barely noticeable. It will only appear when the nails are completely dry.
When matting varnish with soda, remember several important points:
Choose a brush with soft bristles. If you use a brush with hard bristles, it will leave streaks on the varnish. When processing wet varnish, do not forget to dip the brush in soda every time before touching it. If this is not done, the fluff will stick to the varnish and leave unnecessary raised marks. Apply the baking soda evenly, leaving no gaps. Otherwise, the nails will remain glossy against the overall matte background. Don't apply top coat on top. It can add an unwanted shine and ruin all your efforts.
Matt varnish using steam
The most popular and elementary way to matt glossy varnish is to treat the nails with steam from boiling water. The undoubted advantage of this method is its 100% matte effect, comparable to professional varnishes. The technique does not require any money and can be done quickly and easily at home.
The disadvantages of this method include insecurity. Proximity to fire and intense exposure to steam can leave burns on your hands, so matting must be done carefully.
To perform a manicure you will need:
- base coat
- base varnish
- container with boiling water
To give your manicure a matte finish, follow these steps:
- carry out preliminary preparation of nails - give the necessary shape, remove the cuticle
- Apply a base coat to the nail surface and wait until it dries completely.
- The next layer will be varnish, which you want to make matte. Apply it to the surface of your nails.
- Until the varnish has dried, bring your hands to a pan of boiling water and hold them over the steam for a few minutes. You need to remove your nails as soon as the polish dries a little.
Make sure that the matte finish appears evenly on all nails. To do this, move your fingers over the steam so that the steam completely covers each nail.
Preparatory activities
In order for the coloring composition to evenly cover the nail plate, and the manicure itself to last the maximum amount of time, it is necessary to carry out high-quality cleansing. This means that you need to remove the previous coating from your nails, and also degrease them using nail polish remover. An important point is that you should not use hand moisturizer, as this may negatively affect the uniformity of the varnish coating.
Any manicure and decor will lose its incredible effect on untidy hands. This is especially true for matte composition, since it always attracts increased attention. Therefore, it is very important to put your nails in order - carefully file and give the same shape, treat each nail.
To create a spectacular matte manicure at home, it will take approximately half an hour.
An important point - it is worth considering that in this situation it will not be possible to use a quick-drying fixative, since it will eliminate the entire velvet effect. In this regard, you need to be prepared for the varnish coating to dry completely on its own.
Matting varnish using starch
In every housewife's kitchen there is a bag of potato or corn starch, which can be used to give the varnish a matte effect.
To perform a manicure you will need:
- nail polish
- base coat
- starch
Matting with starch is performed in several stages:
- polish the nail plates, shape them, remove cuticles and degrease with nail polish remover
- apply base polish to your nails
- pour a small amount of starch onto a piece of food foil and add a few drops of varnish
- stir the mixture using a toothpick. Achieve a uniform texture, gradually getting rid of the smallest lumps. The varnish should not be a thick mass, it should be a loose coating that is easy to apply to the nails.
- Apply the resulting polish to your nails as usual. Once it dries, you will be able to appreciate the matte finish you have achieved.
Advice! Mix the varnish with starch as quickly as possible, otherwise the coating will dry out and it will be difficult to apply it evenly on the nails.
Photo instructions
To make a manicure matte, you don’t have to use a polish with this finish - just apply a matte top coat over a regular glossy finish (this is what Essie has, for example). What is the sequence of actions?
1
Prepare everything you need. You will need colored polish (we used the new Essie Gel Couture, so we didn't use a base) and a matte topcoat.
2
Degrease the nail plate with oil-free nail polish remover. Antiseptic hand gel is suitable for the same purpose.
3
Apply two coats of color (we used Surrounded By Studs). The finish of the varnish can be anything - but a regular one paired with a matte top will look better than metallic, pearlescent or glitter.
© Makeup.ru
4
Make sure you are happy with the coverage. The fact is that a matte top will highlight all imperfections, especially if the varnish is dark.
© Makeup.ru
5
Apply topcoat to your nails in one coat (keep in mind that some topcoats may slightly change the color of the polish, such as making it lighter). Let it dry thoroughly - it's good if you have an hour left. Ready!
© Makeup.ru
Matte manicure using baking soda
Baking soda, along with starch, has such a fine texture that it can matte even the simplest and cheapest nail coatings. It will remove the glossy shine from the varnish in a matter of seconds. The matting process happens so quickly that you should stock up on the necessary material and tools in advance.
To get a matte varnish you will need:
- baking soda
- strainer
- manicure brush
- container with water
- nail polish
Matting occurs in several stages:
- soda tends to cake, so it must be sifted through a strainer. This will rid the substance of lumps and large particles that can ruin the manicure.
- Apply glossy polish to the nails on only one hand. If you cover all your fingers at once, you risk not having time to treat your nails with baking soda. The varnish will have time to set while you work with one hand.
- As soon as you have applied the varnish, immediately take a dry brush and dip it in soda. Gently move the brush over the surface of the nails.
- hold the baking soda on your nails for a few seconds. During this time, the grains will penetrate into the structure of the varnish, thereby removing unnecessary shine.
- Brush off excess soda with a brush and dip your fingers in water to completely remove it.
The matte effect will only be visible after the varnish has completely dried.
Step by step guide
- It is necessary to turn on the electric kettle and wait for it to boil, since strong steam generation is required to create the desired effect.
- On pre-prepared nails, apply the standard varnish coating that has been selected.
An important requirement is to achieve a rich and even coverage, so you should apply it in several layers, avoiding streaks and stains. - An important condition is that the nails should not have time to dry. 10 seconds after application, you need to put them under steam. You will need to hold your hand at a height of approximately 10 to 15 centimeters. It is worth remembering to take precautions, because there is a possibility of getting burned by the steam.
- The exposure time for nails over steam is from one to one and a half minutes.
- It is important that you do not wipe your nail plates with anything; they should dry naturally. An interesting point is that as the water dries, a matte velvety effect will appear.
- After the matte coating has completely dried, you can begin to decorate your nails.
Little tricks
- Light shades will look inexpressive, so it is best to choose rich and deep cool colors.
- If the coloring composition contains sparkles or mother-of-pearl, then as a result the manicure will look dirty. The solution is to choose varnishes of solid colors.
- The ideal shape of the nail plate is oval. On square-shaped nails, such a manicure can look rough.
- To obtain a uniform and identical result, do not apply the product to all nails at once. First, it is best to cover 2 or 3 nails, give them a matte effect, and only after that proceed to the next ones.
- If you want to diversify a plain matte varnish, then you can complement it with glossy accents. To do this, you will need to take a transparent or colored varnish and apply it to the free edge of the nail plate. To create a French jacket, you need to put a dot or draw any pattern. It will stand out especially gracefully against the background of the velvet covering. The most effective option is a similar tone or standard clear varnish.
- You should not use a greasy hand cream, as it will neutralize the velvet effect.
How to make matte varnish: step-by-step instructions
The methods presented above are effective and simple, but they require enough free time to complete. To make the task easier, we suggest you make a matte varnish yourself.
The method presented below makes any glossy varnish matte without changing its color. All you need to do is add a little starch to the coated bottle. In the same way, you can matte a transparent top, which will add velvety to your manicure.
To obtain a matte varnish, follow these steps:
- take a bottle of varnish that is 1/3 empty. This is a mandatory condition, otherwise additional ingredients simply will not fit into it.
- make a funnel out of paper and lower its sharp tip into the neck of the bottle of varnish
- sift the starch using a fine mesh sieve
- pour the starch into a bottle of varnish, dosing the portions evenly
- Shake off the contents of the bottle and ensure uniformity of the varnish.
Check the matte level on a piece of paper or your fingernail. If the quality does not suit you, then add more starch. If the varnish, on the contrary, turns out to be too thick, dilute it with a thinning liquid. Let the finished matte varnish sit for 24 hours.
Advice! To obtain a uniform consistency, add a metal bearing ball to the bottle of varnish. It will help stir the starch and quickly achieve a matte effect.
Using the simplest materials and techniques, you can make your favorite shade of nail polish matte. Professionals advise matting dark shades, as they look most impressive and luxurious in a velvety finish.
Characteristics of matte varnish
Matte varnish is a nail coating without the glossy shine characteristic of varnish . The varnish was created back in 1992, but became famous only in 2009. Nowadays, matte varnish has long ceased to be a novelty and has firmly taken its place among the most popular nail coatings. And it is already difficult to find a manufacturer who would not include matte varnishes in their line.
Matt grain varnish
Most matte polishes have a pleasant silky surface , but there are polishes with a velvety , sandy and grainy effect on the nails. Matte finishes with such an unusual texture are often complemented with large or small glitter. Such textured varnishes are tricky for girls with short and wide nails - they significantly make the manicure heavier and further emphasize wide nails, making them look like shoulder blades.
For short and wide nails, choose polishes with a silky surface and predominantly dark colors; sandy and grainy polishes are more suitable for those with narrow nails.
disadvantages of matte coatings common to all manufacturers is the unpredictability of matte varnishes and their tendency to streak if applied carelessly . If a glossy finish can visually smooth out an uneven finish, then a matte varnish, on the contrary, emphasizes all the flaws in the manicure.
Men's manicure with matte varnish
As for men's manicure, matte varnish has found one of the best uses here. The main reason is that it helps to emphasize the well-groomed nails and corrects their color.
To solve these problems, colored matte varnishes in beige or light tones are often used, thus giving the nails a healthier look.
Features of matte coating
A velvet coating with a deep, rich tint looks beautiful on nails and complements any look. This type of nail art has a number of features:
- Matte nail polish requires ideal nail shape and a smooth plate surface. Any defects in the coating will be noticeable.
- When working with matte gel polish, you should not use a glossy topcoat.
- Velvet coating takes longer to dry than gloss.
- Using a matte top coat lightens the color of the selected polish.
