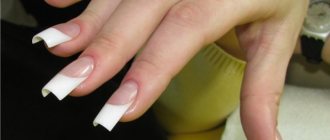
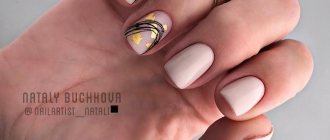
In the modern nail industry, nail modeling is available to all women. An experienced master is able to give nail plates any shape and length. A particularly relevant procedure is short nail extensions, which avoids long waits for natural nail growth.
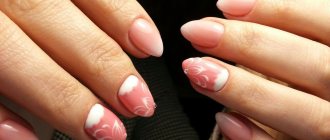
Modeling a small free edge has its own nuances, but the end result is worth the effort. Extended ends with a short length look very natural and modern.
Peculiarities
Having long nails is gradually going out of everyday fashion, so short artificial plates are an excellent option for creating a neat manicure.
Modeling small nails has its advantages:
- the strength of the plates increases;
- simple correction in case of damage to one of the tips;
- suitable for problematic and brittle nails prone to splitting;
- easily extended even to the shortest free edge of the nail;
- suitable for those girls who are not used to wearing a long manicure;
- a more convenient option for everyday use;
- the ability to create a beautiful manicure even if there is a strict dress code at work or school;
- a good option for those who have a wide plate;
- the costs of materials and work of the craftsman are usually less;
- It’s easier to decorate and choose a design.
Thanks to these advantages, modeling short nails has earned great popularity among clients. It helps you get used to the artificial plates more gently in order to grow longer nails in the future.
If the client bites his nails
Extending short nails is a rather painstaking process. If a person often bites and bites his nails, then artificial plates can wean him from this bad habit. Since it will be quite difficult to bite through frozen gel or acrylic. In addition to the fact that the client will be able to get rid of a bad habit, he will always have well-groomed, long, strong nails that he cannot grow on his own. What a master has to deal with:
- Short nail bed.
- There is no free edge of the plate.
- Areas of the nail bed are often bare.
- An ingrown nail begins in the same place as the free edge of the nail bed.
In this case, extensions should begin with reconstruction of the nail bed and sides of the plate. In order to create a mock-up of the future plate, there is only the point where the nail begins to grow in. In this case, it is possible to grow an artificial plate only on a tip, since the shape cannot be fixed. If the case is quite simple and the natural plate is not badly damaged, then extension with tips is the best way out.
But this option may also be impossible if the master is dealing with an advanced case of onychophagia. In this case, the natural plate is very shortened, and there is nothing to glue the tips to. Therefore, first of all, the master has the task of restoring the nail bed. To do this, you can use a frame. In this case, it is necessary to calculate the critical permissible length. Before the stock is reconstructed, it is undesirable to make the length protruding beyond the finger more than 1 mm.
What to choose: acrylic or gel?
The selection of materials and artificial coating is an important point when planning a manicure with a short length. Traditionally, gel or acrylic extensions are used. Some characteristics of these materials are the same, but each of them also has important distinctive features.
Advantages of acrylic extensions:
- high strength of the created artificial tips;
- when removing overgrown edges, there is no need to cut down, just use a special solution;
- The acrylic coating becomes perfectly smooth when hardened;
- easy to correct for single injuries;
- no UV lamp required;
- the extended ends are practically indistinguishable from natural plates.
Disadvantages of modeling with acrylic:
- a sharp, strongly noticeable odor that is present not only during the procedure, but also after the extension;
- hardens longer than gel polish;
- may cause allergies.
@sabina0409
Many nail artists prefer gel coatings due to the following advantages:
- the procedure is quick in time due to the instant hardening of the gel tips under the lamp;
- the material is non-toxic and odorless;
- short nails extended with gel look more natural than acrylic ones;
- long-lasting results if the correction terms are followed.
Cons of gel nails:
- artificial plates are more susceptible to damage;
- Removing gel-extended ends takes a long time by filing;
- Regular correction or updating of manicure is necessary.
@malvina__nails
Any of the materials can be used to model short plates. I usually advise professionals to try both coatings to understand which one is more convenient to use and subsequently wear.
Extension procedure
To form short extended nails, a similar technique is used as for other lengths. In this case, there are the most important steps that must be followed in order to get a beautiful result:
- Degrease your nails and disinfect your finger skin.
- Perform a classic or hardware manicure procedure (treat the cuticles, file the nails, polish the surface of the plates).
- Cover your nails with primer.
- Attach special shapes or glue tips.
- Apply gel or acrylic. Dry your nails under a lamp between each layer of gel. Acrylic hardens on its own.
- Remove templates. Adjust the shape and length of the nail plate. Perform a decorative manicure.
The procedure for extending short nails is not particularly difficult. To make this manicure easy even for beginners, you need to follow the following recommendations:
- Make sure there are no wounds or cracks on the skin near the nails. If necessary, treat inflamed areas prior to your scheduled procedure.
- It is best to treat the cuticle by sliding it with a wooden stick without using a trim manicure.
- Before fixing forms or tips, additionally sand the nail plates with a soft file or cutter. This will allow the attachment tool to lock in place better.
- For better disinfection of the skin and plates, after the primer has dried, hold your hands under the lamp.
- Make sure that your fingers and hands do not move when applying acrylic or gel. This helps avoid damage to the uncured coating.
Any manicure technique requires sufficient experience. A short simulation is an ideal option for mastering the extension procedure.
Gel nail extensions
Very often, before starting a manicure, the nail breaks completely. In this case, we advise you to shorten your nails to one length or make an artificial nail. It’s not difficult, and in today’s article we will describe in detail the entire process of gel nail extensions.
at home!
You need to start the process by pushing back the cuticle with an orange stick.
A manicure must be done so that the gel does not get on the skin, otherwise the artificial nails will simply peel off.
Next, we should remove the natural gloss from the nails; we will do this using a buff or file with an abrasiveness of at least 180 grit.
If you bought a file and don’t know which side is for artificial nails and which for natural ones, try running the file along your wrist. The side that scratches the skin more strongly has an abrasiveness of 100 grit or less, and the side that does not scratch, in our case, will be 180 grit.
So, if you decide to remove the gloss with a file, start preparing from the cuticle side; it is better to move the file towards the free edge, in no case across it, and you should not file the nail plate. In order for the gel to stay on the nails well, one or two movements in the same place are enough. Our task is to make the nail uniformly matte and slightly rough. The gel will lie in these same roughnesses, and upon polymerization, when it hardens, it will give strong adhesion to the nail plate.
Then follows a very important step that we recommend not to skip - disinfection of the nail plate. To disinfect your nails, you can use Severina disinfectant liquid, which will degrease and dry the nail plate.
After treatment, you should never touch your nails with your hands, especially if you touched foreign objects.
Next, for a better fit, we will use Kodi Ultrabond acid-free primer.
It's time to take the gel. We will be extending our nails with Cosmo transparent gel:
1) Take the gel
2) Small synthetic brush
We take a small drop of gel on the brush and from this drop we cover the nail with a thin layer, this will be the base layer, which should dry thoroughly. We carefully cover the nail and be very careful that the gel does not get on the skin. Any leakage of the gel onto the cuticle or side ridges will subsequently cause detachments, causing the nail to completely peel off and fall off. We will not seal the free edge of the nail; we will simply cover the nail plate with an even layer of gel and leave literally a millimeter from the cuticle and side ridges. Dry in a lamp for 1 minute.
Aftercare
At the end of all manipulations, the safety of the manicure largely depends on the careful wearing and adherence to the nail care rules. If your nails are of short length, you should pay attention to these tips:
- Carry out the correction twice a month.
- Do not overload your nails with an abundance of decorative elements, so as not to expose them to destruction.
- Do not use acetone-based nail polish removers, which can damage the gel material.
- In between extensions, strengthen your natural nails with special oils, creams and baths.
- If you have brittle nails, removing the gel should be done very carefully using medium and soft abrasives.
- Avoid sudden temperature changes on your hands.
- When washing dishes and using various household chemicals, use protective gloves.
You need to take care of the extended artificial material carefully, just like natural plates. Then the manicure will last as long as possible and will remain with a perfectly smooth surface.
Nail extensions for short nails: what you need to know?
The procedure for extensions on short nails is no different from conventional extensions using modeling materials. All stages are strictly followed. With any extension, there should be no damage or injury to the nail plate. The whole procedure is performed in several stages:
- Preparatory stage. Nails are degreased, cuticles are processed, hands are disinfected, and a primer is applied to the nail plates.
- Main stage. Forms are fixed on the fingers or tips are glued and the procedure for modeling the nail plate using gel is carried out. In this case, each layer of gel is dried under an ultraviolet lamp. If you are doing acrylic extensions on short nails, then you do not need to dry your nails under a lamp.
- The final stage. At this stage, the length and shape of the nail plate is adjusted. A manicure is being performed.
Also, the extension procedure can be performed using a special gel on a natural basis. Biogel extensions on short nails are not so harmful to the nail plate, since the material is made on the basis of natural components and provides air access to the nail.
It is important to consider that the beauty and practicality of extended manicure largely depends on the professionalism and experience of the master. The Manicurof salon employs only highly qualified specialists who are fluent in various extension techniques. This guarantees you a flawless result.
In order for nail extensions on short nails to give the desired result, you need to adhere to the following recommendations:
- If you have never had a long manicure before, then you should not immediately extend very long nails. Firstly, such nails will bother you. Secondly, to get a long lasting manicure, you need to have enough regrowth of your nail.
- To make extensions on a short nail plate look natural and harmonious, the length of the extended nail should not exceed 2/3 of the length of your nail plate.
- When decorating an artificial nail, try to ensure that the center of gravity falls on the central part of the smile line.
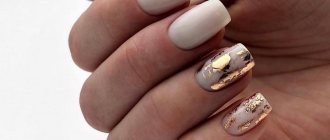
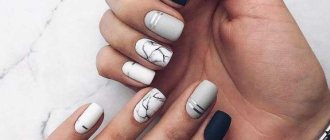
- To make an extended short manicure look beautiful, it is important to choose the right nail design. Rich monochromatic varnishes, laconic patterns, French manicure and small decorations made from foil strips are ideal.
