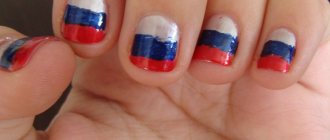
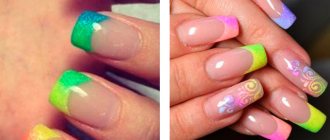
One of the favorite pastimes of fashionistas is painting their nails. A stylish and fashionable manicure will help complete your look and give it a special charm. There are many different nail design options for all occasions, but nail designs depicting flags of different countries have been especially popular lately.
Why do they do this type of nail design?
The motivation for creating a similar design on your nails can be different. A manicure with flags can be a manifestation of patriotism or a symbol of love for a certain country where a person dreams of going on vacation. This nail design is often chosen by those girls who go to any competitions as a participant or fan, as well as those who simply want to emphasize their individuality and draw the attention of others to their extraordinary nature.
In most cases, a manicure with flags is not intended for everyday wear, since the colors and their combinations used to create it are most often very bright and contrasting. If you really want to decorate your hands with a manicure with a flag and wear it in everyday life, then you can paint such a patriotic image on only 1-2 nails, and cover the rest with a calmer, neutral varnish.
In addition to depicting the flags of their country on their nails, modern youth often decorate their pens and wardrobes with stylized drawings of the symbols of other countries. The most popular among young people today is nail designs with the flags of Great Britain and the USA, which, thanks to the bright contrasting colors in their composition, look very stylish. You can also often see the European Union flag on the nails and accessories of fashionistas. Football fans often draw flags of national football teams, as well as the flags of Brazil and Argentina.
We create a design taking into account the shape of the nail
The science of vexillology studies the prerequisites for the appearance and meaning of various symbols and colors on the flags of different countries, thanks to which we know what constituent elements these images consist of. Most often, the design on the flag consists of stripes, squares, circles, stars, images of birds, animals and other special symbols.
When creating a manicure with a flag, it is not enough to simply draw stripes or dots in certain places on the nail plate; you need to take into account the fact that different geometric shapes transform nails of different shapes in different ways. So, when drawing symbols and signs on your nails, you need to remember that:
- horizontal stripes visually stretch the nail and make it more elegant and attractive, vertical stripes, on the contrary, flatten it, and oblique stripes perfectly hide nail imperfections (asymmetrical shape, unevenness, etc.);
- stripes can be clear and blurry, thin and thick, and the density of the pattern depends on this. The thinner and more precise the lines, the more elegant and “slender” the nail will be. Blurred and wide lines will make it look “voluminous”;
- You shouldn’t overload a manicure with a flag with details, especially if your nails are short. It is better to make it stylized and schematic, made in the right colors.
It is important to remember that only on well-groomed hands with neat nails, a manicure with flags, like any other design, will look beautiful, so do not neglect a hygienic manicure. Nails should be the same length and shape, there should be no hangnails, overgrown skin or cuticles.
Step-by-step instruction
To make sure everything works out for you, we have prepared a step-by-step guide on how to do a manicure, with photos that will help you recreate a stylish British design on your nails.
Step 1
Prepare your nails for a manicure: push back the cuticles, remove hangnails, and adjust the shape of your nails. You can choose the method of hand care that is preferable to you. It doesn’t matter whether it’s a classic, European or Brazilian manicure. The main thing is neat and well-groomed nails as the final result.
Step 2
Apply a base coat: it will not only protect the nail plate from yellowing, but will also smooth out the surface of the nail. Due to this, the future drawing will lie smoother and the color of the varnish will be richer.
Step 3
Take a blue shade of polish and apply it in two layers. Start painting your nails from the center, smoothly moving to the sides - this way you will not stain the cuticle. Once the nail polish is dry, move on to the next step.
Step 4
The most interesting thing is ahead - you have to draw the British flag. To do this, you will need special nail design brushes or polishes with a thin brush. Using white, draw vertical and horizontal lines - you will get four blue squares.
Now draw a diagonal line in each of them, forming a pattern resembling a snowflake. Try to get all the white lines the same thickness. A manicure will look impressive and stylish only if it is done carefully.
Add thin red lines on top of the white stripes. The key to success in creating such a design is confident and clear movements of your hand during the drawing process. Each time the British flag on your nails will look better and better. Therefore, you should not be upset if the picture does not come out perfect the first time - you will need a certain skill.
Step 5
Wait until the varnish is completely dry and apply the sealer. A top coat will allow the design to last longer and also give your nails a beautiful glossy shine.
How to draw?
There are several ways to apply designs on nails, which differ from each other in their complexity. For those fashionistas who have some experience in applying designs to their nails, you can use a thin brush to create a manicure with a flag. For beginners, stencils, stickers and tape for nail art will help in this matter. By gluing strips in a certain order, you can create a wide variety of multi-layered images.
Experts recommend using matte, saturated colors to paint the background, and to create bright accents, it is best to use glitter. The most popular colors are red, blue, white, and green, since they are the ones most often found on the flags of different countries. In addition, when creating such a manicure, you can use rhinestones, beads and other decorative elements. When creating such designs, it is important to make sure that the previous layer of varnish is completely dry before applying each layer. To make the design look brighter on the nail and the colors to be more saturated, you can apply beige or white varnish to your nails as a base. You need to complete the manicure with a layer of sealer.
The use of gel polishes, which require drying in a lamp, will significantly simplify the drying process and increase the wear time of the manicure. With their help, you can create complex multi-layered designs without fear that the varnish will not smudge or merge into one spot. The easiest way to create a design on your nails is to use special stickers, with which you can create an image of the flag of many countries on your nails to suit your taste.
The origin and significance of the Georgian flag
The history of the Georgian flag, which depicts 5 crosses, goes far into the past. A similar model first appeared in the middle of the 13th century, during the reign of George V, and before that time there was only a large cross on the flag of the Georgian kingdom.
The red cross on the flag of the Georgian state is widely known throughout the world. Some call it Georgievsky and consider it a real symbol of the Georgian kingdom. Smaller copies of the cross, located in four rectangles, are called Bolnisi.
The cross has long been considered an unchanging Christian symbol and was revered, so it is not surprising that previously it could be seen on the symbols of many states. On the Georgian flag, a large cross represents Jesus Christ, revered by all, and 4 small crosses represent his closest holy evangelists.
White color is considered to represent great wisdom and immaculate, unsullied purity. It also identifies sincere innocence. Bright red is unconquered courage, pure and sincere love, wise justice and incredible courage.
