Features of manicure with transitional shades
Gradient design has features compared to other techniques:
- to complete the job you need from 2 to 5 shades of varnish;
- the direction of application of the material can be any;
- the technique assumes a smooth border between colors so that the transition is not visible;
- gradient is a universal manicure option, suitable for both everyday and festive looks;
- the transition can be between related or contrasting colors;
- the finished manicure assumes a glossy or matte look;
- Both regular and gel polish are suitable for making a gradient print.
Nails with a color transition (step-by-step photos will be presented below) can be created in different ways. In master classes there are options for horizontal, vertical or diagonal transition. Another way is when each nail is painted the same color, the gradient is made from the thumb to the little finger.
The ombre technique has a number of advantages:
- modernity;
- speed and ease of manicure;
- versatility, diversity of ideas.
Gradient manicure: types, techniques and master classes
Smooth transitions on nails are impressive, beautiful and not too difficult. This is probably why gradients are so popular in manicure. In addition, this technique is represented by many variations, thanks to which the design always remains unique. In this article we will look at what the gradient technique is in manicure.
Classic gradient or ombre
Gradient manicure is always a smooth transition from one color to another. But how many of these colors there will be and whether they will differ much from each other depends on the author of the design.
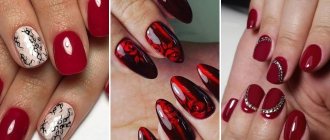
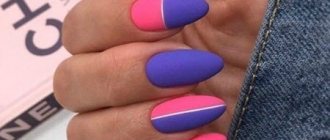
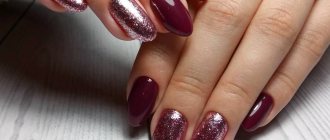
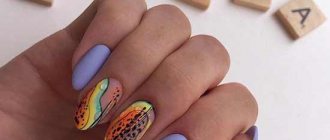
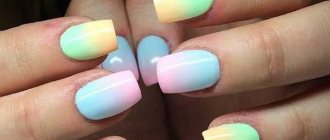
The popular ombre technique is a type of gradient manicure in which the transition occurs from a darker shade of one color to a lighter one. As for the classic gradient, the transition can occur between any colors, even contrasting ones.
(the first picture is ombre, the other two are gradient)
Gradient direction
In addition to color, gradients may differ from each other in their location on the nail. Based on this feature, vertical and horizontal gradients are most often distinguished. The application technique is the same for both. But there are options for sophisticated connoisseurs: a gradient from the center of the nail or from a corner, for example.
Our tutorials feature two vertical gradient designs. The first one is made using the ombre technique and represents a transition within one color. And the second shows a combination of two independent, dissimilar shades.
Master class No. 1
Master class No. 2
A separate version of the vertical gradient can be called a technique in which 5 different shades of the same color are applied to different fingers (from dark to light or vice versa). However, here you can “play” with variations. For example, cover the index finger with light blue, make a gradient from blue to blue on the middle finger, and cover the ring finger with blue varnish. The number of versions is limited only by your imagination.
geometric gradient
By combining two current trends of recent years, you can get a stylish solution. True, the application technique will be completely different, more complex - you will have to draw. Geometric gradients suggest that white is gradually mixed into one colored gel polish, making the tone increasingly lighter.
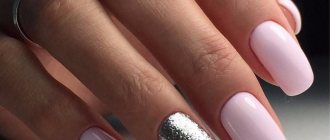
Ombre with glitter
“Based on” the shade, you can make the transition from pure color to sparkles. The whole secret of this manicure is to gradually increase the density of sparkling particles. Stretching can be done using dry glitter or ready-made gel polishes with shimmer. This manicure is perfect for both long and short nails.
4 ways to do a gradient manicure
There are quite a few techniques for performing manicures with color transitions. Some of them are suitable only for salon use, others can be successfully used at home.
Using a sponge
On the prepared nail with the base, apply stripes of the selected colors of gel polish. Then, using a gentle tapping motion with a sponge, mix the layers, being careful not to pull or smudge. Repeat 2 or 3 layers and only then dry in a lamp.
You can do it differently: place drops of the selected colors one by one on the foil, mix them with a stick and carefully dip the sponge into it. Transfer the design from the sponge to the prepared nail with the base using the same slapping movements.
Using a flat or comb brush
An example of such a technique can be seen in master classes. A horizontal gradient with a lot of colors requires some skill, but it looks more impressive. The selected shades of the gradient are applied to the prepared nail with the base and the top color is pulled off with a brush slightly moistened with clinser. Repeat on 2-3 layers, each of which is dried in a lamp.
Master class No. 3
Master class No. 4
UNO, Ombre Gradient Brush
Set of brushes for design
Design brush #8
Using an airbrush
An economical and fast option that requires special equipment. This technique allows you to create very smooth, imperceptible and gentle transitions and is especially good for pastel shades.
Using pigments
The ombre effect can also be created using dry colored pigments, which are applied in a thin layer to the sticky layer. You should move from the zone of maximum intensity to the transition, gradually thinning the pigment layer.
Pink neon pigment
Pigment green neon
Neon yellow pigment
Manicure techniques: ombre and gradient
The color transition can be performed using ombre or gradient techniques. One word is of Latin origin, the other is Greek. Many do not share these concepts, identifying them. Both options are used to characterize the type of manicure, suggesting a transition between colors, but they differ from each other. Ombre is a horizontal color transition, also called a washout.
Photo of nails with a gradient color transition
The gradient is considered a more daring solution; it is the vertical or diagonal direction of the transition of colors. There is no difference in the way the work is performed. If we are demanding in terms of concepts, then ombre is characterized as a manicure in which the boundaries between colors are not visible, the transition is very soft. The gradient even allows for a clearly defined, sharp edge without being feathered.
Matte and pastel colors
Matte varnish or a special matte coating will make your ombre manicure even more elegant and festive. This option will allow you to mute bright and flashy colors, making them deeper and more restrained. And pastel colors will add more tenderness and lightness. Therefore, it is allowed to use matte shades when performing a manicure. But it’s worth seeing in advance whether certain colors will be combined.
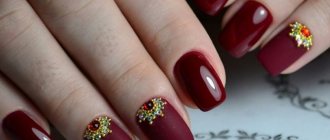
A manicure design with a color transition can be complemented with various decorative elements: sparkles, rhinestones, beads, patterns, stucco, foil and other decorations. An experienced nail design master will help you choose the appropriate option depending on the desired look and occasion.
Don’t forget that the gradient manicure technique is interesting in itself and therefore you shouldn’t distract attention from the main emphasis – the transition of colors. Experts, as before, advise decorating only 1-2 nails on the hand. It is also allowed to apply small elements to each nail, the main thing is that they look laconic.
Table of compatible colors in manicure
In the photo of nails with a transition of related colors, a smooth play is visible. It is not difficult to reproduce such a print in practice. When coming up with a work process, it may not be clear how they fit together. To help the master there is a special table describing the characteristics of each shade.
It is easier to understand which colors combine with each other using a circular pattern, where the colors border each other in segments. In accordance with it, colors located next to each other, strictly opposite, or like the vertices of an isosceles triangle are in harmony.
Palette of shades for different looks
Summer is a time for bright colors. At this time, a manicure with a color transition can be contrasting, where opposite shades are combined. A bright image is suitable for relaxation, weekends, work (if it is not related to business activities).
These colors include aquamarine, mint, purple, lilac. In autumn, the shades shift to brown and gray to match the quality and appearance of coats, woolen sweaters and scarves.
If you need to paint your nails for a celebration, then a good combination would be to use a pastel tone with glitter. The shiny part will attract attention, but will not look provocative or inappropriate.
A business woman needs to choose a discreet nail color option with a transition from milky to peach, lilac or brick shade. Cool colors and warm, muted tones are suitable for this look.
The color of the varnish should be selected taking into account the color of the skin and hair. If you do not take this information into account, you can accidentally give your face a yellow, sickly tint, highlight pallor and circles under the eyes.
Beige and pink colors can give this effect to those with dark skin. For them, it is better to choose a cream or orange-copper option. Cool pink colors and pearl pink tones will look harmonious with pale skin.
Abrupt transitions
A sharper transition of colors is dictated by a new trend - a geometric gradient. This technique is a little more complicated, but the results are worth it. Shades from light to dark are applied to the nail plate with a special brush, following a geometric pattern - rhombuses, squares, triangles and stripes.
Bold manicures often use rich, deep colors such as cherry or burgundy that fade into black. At the same time, white flowing into black will add a touch of severity and style to the image. Therefore, if you work in an office that is very strict about appearance, you need to use a light-colored manicure. It will not be conspicuous if you dress in a business style. Flashy shades are best used on vacation.
It should be remembered that combinations with red will look catchy. In order to muffle its activity, you can use more delicate pastel colors from the same range. Shades of yellow, blue, light green or lilac will also help to smooth out the red color. Using bright yellow, orange, deep green, blue or purple will help maintain the energy of the red shades of the polish.
Tools for painting nails with color transition
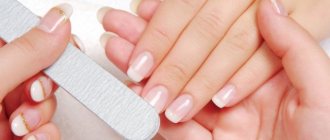
Since manicure attracts attention, it is necessary that the nail plate is well-groomed.
To perform ombre you will need several tools:
- orange stick, cuticle nippers;
- foam rubber with fine porosity;
- foil;
- brush;
- desired colors of varnish or gel polish;
- polishing buff;
- toothpick or needle;
- surface degreasing liquid;
- clinser to remove the sticky layer.
The main tool for work is a sponge and a brush. It is thanks to these things that such a flawless gradient can be achieved. The foam rubber needs to be cut into small cubes with an area slightly larger than a nail.
Household items that are suitable for this purpose include a dish sponge and a makeup sponge. Some masters say that the desired smooth transition may not be possible with the first material due to too large pores.
How to use a sponge to achieve a gradient effect?
To achieve the effect of the drawing, you need to practice a little.
The working technique is as follows:
- The desired colors are applied to the plastic surface in layers.
- Blur the boundary between tones using a brush or needle.
- The master takes a piece of foam rubber and places it on the plastic with the palette.
- The material is pressed onto the nail, pressing for a few seconds.
When the job turns out perfectly, you can save time and start depicting the sequence of colors directly on the sponge. Another way is when part of the sponge comes off so that there are uneven edges.
The master applies the main color to the nail, after which the edge of the foam is dipped in a contrasting shade. When the base coat has dried, the sponge is pressed to the place where the other color should be. At the border of different parts, you need to apply the material to the surface several times with sharp movements.
Using rhinestones
Rhinestones are more suitable for special occasions. In this case, you can completely cover a couple of nails with them or stick a thin rim at the base. Experienced craftsmen can create the effect of transition from one color to another using multi-colored stones or beads. This technique requires very delicate and painstaking work, and is applied only to accent nails.
In the case of a wedding manicure for the bride, all prohibitions are often lifted, and nail design specialists can allow themselves to realize even the most daring ideas, combining and applying an abundance of decorative elements. But for such an event, it is better to turn to a truly experienced master so that the manicure turns out perfect and not tasteless.
The gradient on the nails goes well with the moon manicure. These two techniques complement each other perfectly, making your fingers even more attractive. It should be understood that this option is suitable for owners of long or medium nails.
How to make a color transition with a brush?
The second way to work with a gradient is to use a brush. There is a special tool for working with gradients, but a regular one for design is also suitable.
To perform ombre, use foil on which colors are mixed. Apply the varnish to the panel with a brush, and use a toothpick to mix the contacting areas.
Complicating the task, the master begins to create directly on his finger. To do this, you will need a round brush, which will need to stretch each color in the chosen direction. When the next shade is applied next to the previous shade, the border is shaded using a thin, clean tool, each time removing excess varnish. This method allows you to avoid staining the skin around the nail with varnish.
Instructions with photos for creating a gradient on nails with regular polish
It is better to start doing nails with a color transition (a photo of one of the options is presented below), working with regular varnish. There is a high chance that you will not get the desired effect the first time. Using regular varnish, you can redo the work as much as you like. With gel this will not be possible, and the manicure will be ruined.
Here is one option for working with a contrasting color using foam rubber. During preparation, it is necessary to remove or push back the cuticle. The second step is to apply a greasy cream, a special Vaseline-based product or PVA glue around the plate, which then allows you to quickly remove excess material.
- A base coat and white varnish are applied to the nail and dried.
- Both colors are applied to a piece of foam rubber in layers.
- The porous material is applied to the nail with short movements, achieving the desired effect.
- Remove excess varnish.
- Cover with a finishing coating, a protective agent.
How to make ombre nails with gel polish
We are sure that we were able to not only interest you in such an original way of transforming a manicure, but also convince you of the need to immediately try to translate the chosen design into reality. If this is the case, then hurry up and read the instructions below and prepare everything you need for such an exciting process.
Tools:
- nail file Used to correct the length and shape of natural or extended nails. Remember that the lower the degree of abrasiveness of the tool, the harder the working edge it has;
- metal pusher. With the flat side of the pusher you free the nail bed from overgrown skin, and with the sharp edge you carefully move the side ridges away;
- scissors or tweezers. They have super-sharp, sharpened edges, which need to be used to evenly cut off the cuticles with the trimmed method of manicure, and with the untrimmed method, simply push back the epidermis with an orange stick;
- polishing buffs. Due to their rapid wear, it is recommended to buy several pieces at once. Using elastic, soft, textured fabric, the buff removes roughness and smoothes out unevenness of the nail plates;
- dots. A metal or plastic stick with round ends that is used for basic nail art techniques. Especially for painting polka dots on your nails;
- a synthetic, moderately porous sponge or a set of standard brushes, which includes a flat brush, a hair brush, a petal brush and a fan brush.
Materials:
- remover. To eliminate previous manicure delights on your nails;
- nourishing, natural oil or special softening gel for cuticles;
- varnish base with a self-leveling effect;
- acid-free primer if your nail plates need to be degreased first;
- several gel polishes in the shades you like;
- acrylic paint for nail art or colored stains;
- glossy or matte topcoat to consolidate the result of your efforts.
As you can see, you don’t need much to do a stylish manicure at home. The main thing is to stock up on endurance and patience, “set your hand” on the training cards and carefully read our step-by-step instructions.
Ombre nails with a sponge
Step 1. It is necessary to cover the nail plate with a base and dry it. Step 2. The next step is to apply the background gel polish. It can be white, pink or any other suitable color. Step 3. Now that the background is done, you need to apply strips of varnish very close to each other on the foil plate. The shades can be any, depending on what style you choose. Then you need to shade the borders. Dip a damp sponge into the resulting palette. It may be noted that the use of foil is not necessary. With the right approach and the necessary experience, varnishes can be applied directly to the sponge. Step 4. After this, you need to apply the polish to your nails with a patting motion. Carefully wipe off any remaining residue with a napkin. Dry in a lamp and repeat this step as necessary. Step 5. The culmination of the manicure will be covering with a transparent top.
This method is the most common. At the same time, the transitions are quite smooth and neat.
Ombre nails with a brush
Next, we’ll look at how to make ombre nails without a sponge. To do this we need a special flat brush, as in this photo:
The preparatory steps will be the same as in the previous paragraph, only the gel polish needs to be applied directly to the nail, and then with a slight movement of the brush from side to side, shade the gel polish. Repeat this action as long as necessary, each time drying a new layer in the lamp, and at the end fix the gel polish with top coat.
Ombre nails with airbrush
An ombre airbrush is one of the new inventions that makes the work of nail artists easier. The principle of its effect is similar to airbrushes for cars - shellac is poured into the device’s reservoir, after which it is sprayed onto the nails in the form of a spray. This manicure is very simple to perform, especially in comparison with the two previous methods. With this tool you can realize even the most vivid fantasies and incredible color schemes. It is very easy to use, you just need to practice on paper and learn how to regulate the pressure. After this, you can start manicure. Drying and coating occur in a standard manner.
How to make a gradient with regular varnish
An ombre manicure at home can be easily done with regular polish. To do this you need to use the above methods, the technique remains the same. The only caveat is that everything needs to be done quickly, before the polish dries, otherwise you risk getting a very sloppy manicure.
Nuances to consider
Any path to the desired result is thorny and full of obstacles. Didn't manage to create the cutest gradient on your nails the first time? Don't despair and rush to try your hand at the second attempt. And tips and life hacks collected from practicing masters will help you avoid mistakes in the future and reach the pinnacle of nail art:
- It is not advisable to use chameleon varnishes, since it is impossible to predict their behavior when they come into contact with the nail. And the result may differ significantly from what was planned;
- for matte shades, only application with a sponge and mixing on the palette is used, otherwise the coating will look unaesthetic;
- for glossy varnishes it is recommended to use 2-3 layers of fixative - in this case they will not fade over time;
- if you have short nails, then replace the standard horizontal gradient with a vertical stretch, visually adding length to the free edge;
- remember that the transition from dark to light in the direction from the nail bed to the free edge is more suitable for long or extended nails;
- if you create a really bright transition by combining contrasting shades in a color block style, then do not forget to carefully blur the boundaries, otherwise you risk getting a “dirty” effect;
- If you don’t have a brush or sponge at hand to create a trendy ombre, then use a regular eyeshadow applicator as a decorating tool.
Many of these methods, as well as simple but effective tips, help you adjust your work and achieve a truly stunning result of your efforts. Find more life hacks in the video below:
Gel polish manicure with color transition
The peculiarities of working with gel polish are that each layer is dried separately under a lamp. With this material it is easier to polish the surface to a perfect condition.
Nails with a color transition (photos of the stages of working with gel polish do not differ from the previous version) are easy to do. To prepare the plate, you need to push back or trim the cuticle and sand the nail. This is necessary for better adhesion of the gel polish to the surface.
The work takes place in several stages:
- The plate is covered with a layer of base varnish and dried under a lamp.
- Various paints are applied to the foil in strips, and the edges are blurred using a needle or toothpick.
- Press the palette onto a piece of sponge moistened with water.
- The foam rubber is applied to the nail several times with sharp movements.
- If the color intensity is achieved, the applied material is dried under a UV lamp.
- To make the coating more dense, apply several layers of gel, each time directing the nail under the lamp.
For each plate you need to take a new sponge, since the area is different and the colors are laid unevenly. If the pattern on the nail is uneven, then first you need to apply the foam rubber with varnish to the foil, and then try it on your finger.
Top colors
Drawings that correspond to the time of year are always relevant, especially if the manicure itself is done in the top colors for the current season. Interesting combinations of glossy and matte with metallic varnish coatings. But this option should suit the occasion and outfit, and also be in harmony with the decorations.
But coatings with glitter will look advantageous in any case and will attract even more attention to the ombre manicure. Experiment, don't be shy about it. It is important to do all the work efficiently and beautifully.
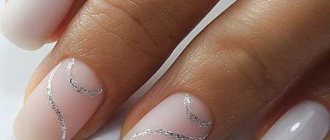
French manicure in ombre style
The French manicure technique involves applying white or other varnish along the smile line in a thin strip.
French ombre came into fashion this season, 2018-2019.
There are several options for implementation:
- over the completed manicure, a strip of contrasting color is applied in a thin line along the edge of the nail;
- the plate is painted in 2 colors, from the base to the edge it turns white, the border is blurred.
Thanks to this technique, it is possible to create a delicate ombre version. As a rule, soft pastel colors of varnish are used in the work.
Ombre with rhinestones
The gradient looks interesting, so it does not need additional decorative elements. The combination of stretch marks with rhinestones may look inappropriate because it attracts undue attention. If a woman wants to add some sparkle to her look, she can use medium sized rhinestones on 1 nail.
Since one of the design directions is to apply a different pattern to each finger, the color transition boundary can be indicated using decorative stones. Rhinestones are used to create a pattern, a geometric image. Full laying of one nail is allowed.
Ideas for two-color, three-color, multi-colored manicure
In the 2018-2019 season, the vertical gradient faded into the background, giving way to a horizontal design. The smoother the transition can be conveyed to the master, the more fashionable the manicure will be. But if a woman wants to replicate the idea of a diagonal color transition, then she should experiment and try different gradient directions.
Here are some ideas for using different colors:
- The idea is to use 2 varnishes: colored and white. The thumb is painted with a clean, bright color, the next - by mixing it on the palette with a few drops of a light shade. The remaining nails are painted with flowers, constantly diluting the previous mixture with white. For example, the thumb will have an orange polish, and the little finger will have a light peach polish.
- A similar principle of diluting the main color can be used when working with a gradient on each plate.
- Another option for a vertical transition is to apply several colors to each nail, not forgetting about a smooth transition. In this way you can apply 10 colors on 5 nails. It may look, for example, like this: apply burgundy and red onto a large one using a sponge so that one of them occupies 2/3 of the area. Next, place scarlet and pink, orange and lemon, delicate light green, mint, blue and lilac colors in an arbitrary ratio.
- The trends of the season allow for bold decisions when a horizontal gradient is used on each nail using shades from different ranges: sea wave and mint, and next to brick and pink or lilac-orange.
- A transition of 3 colors can be used on one nail, combining the main shades on the rest: the index finger is painted yellow, the middle finger is painted pink, the little finger is colored lilac. Then on the ring nail there is a gradient from the combination of this palette.
- The use of a related range of 4 tones on a medium-length plate looks beautiful. For example, the use of yellow, orange, scarlet and muted red. If you shade the colors, ensuring a smooth transition, then the nails have a beautiful play of color.
- The diagonal color transition does not have to be the same on all plates. The gradient can be combined with rhinestones on the border of shades, plain nails, and change the direction of the varnishes.
Manicure can say a lot about a woman, which is why so much attention is paid to this topic. Drawing nails with a color transition is not difficult, especially since there are many photos on the Internet with step-by-step actions. For an impeccable result, you need a little practice, but having mastered the basics, a woman opens up space for an unlimited number of image options for every day.
Author: Valentina Dyleyko
Article design: Mila Friedan
Two-color manicure: rules for combining shades
Before doing a manicure, we suggest you understand the rules for combining shades. This is a very important point, since this knowledge will help create a truly stylish, fashionable design.
The most popular is the monochromatic combination, which involves painting the nails with two shades from the same color scheme. Due to this, the manicure looks very harmonious. If you wish, you can complicate the process a little and create an ombre effect on several nails using a simple sponge.
In turn, the achromatic combination suggests that contrasting shades will be used in the design. The most commonly used colors are white, gray or black. They combine well, so you definitely won’t have any problems choosing an additional shade. Most often, red or blue are combined with white. Black is used a little less often, as as a result the design may look too strict.
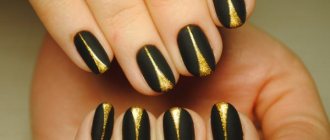
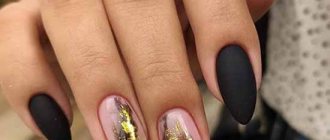
To create a festive manicure, many girls choose black as the main color and gold. It doesn’t have to be used on all nails; small accents will be enough. A bold, but at the same time stylish design can be achieved if you combine black with red. If you wish, you can try other combinations that suit you.
Gray tone is not chosen so often, but it looks great as a base. It is worth combining it with pink, yellow, white or blue. Regardless of which shades you choose, the overall nature of the manicure will depend on their saturation. For example, by choosing a pastel color scheme, you will get a cute, delicate design.
If such combinations seem too simple to you, then we suggest experimenting with so-called complex colors. To do this you will need two shades that are different from each other. That is, they must be self-sufficient. An excellent example would be the following combinations:
- orange and blue shades look good not only in the summer season. Choose this option for autumn everyday life to cheer yourself up a little;
- red with a green tint are great for creating a stylish New Year's manicure;
- yellow and blue are one of the best options for the summer season.
If desired, you can combine other shades, but it is very important that they look good in one design. To do this, choose colors with the same saturation.