How to remove shellac in a salon
In the salon, shellac is removed using a special solvent, or cut off with a nail file or cutter.
Dissolution
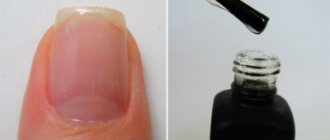
The company that produces Shellac offers a safe and fast system for removing it. Special Shellac Remover Wrap sponges are soaked in Product Remover solvent, then applied to the nail, and removed after 10 minutes. The varnish comes away from the plate in one piece, and the master removes the remainder with an orange stick.
Sawing
Some manicurists recognize this method as safer than dissolving. For girls with thin and brittle nails, it is better to remove shellac without liquid. Using a machine with a cutter, the coating is cut down to the base, then the bottom layer is removed. It is difficult to damage the plate in this case, unless the master has sufficient skills.
How to remove shellac: step-by-step instructions
Helpful advice: If non-professional solutions are used during the procedure, the duration of their effect on the coating should be increased to 30 minutes. Special products are kept on the nails according to the instructions. In addition, to speed up the process, the surface of the varnish can be filed down just a little: in this case, the liquid will penetrate the hardened shellac faster, helping it separate from the nails.
First step
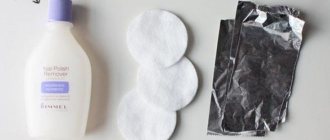
Divide the foil (bag, cling film) into small pieces and take out special sponges from the packaging. If instead of sponges there are cotton pads, then they must be cut into two equal parts.
Second step
We wash our hands thoroughly and dry them. Then wet the sponges or halves of cotton pads well in shellac remover, place them on the nail and wrap tightly with foil (cling film, bag). The cotton wool/sponge should fit very tightly to the nail, since this way the coating dissolves faster and better.
Third step
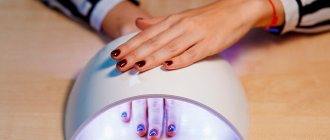
Let the liquid soak for the required amount of time (5-30 minutes). It’s better to keep it a little longer than necessary (unless it’s acetone, of course).
Fourth step
Unwind your fingers and carefully remove the cotton pads/sponges. Ideally, the gel polish should come off completely along with them. Carefully and gently, so as not to damage the nail plate, “scrape off” the remaining pieces with an orange stick.
Fifth step
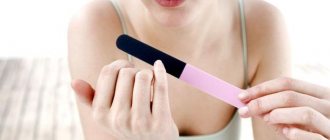
If the surface of the nails is uneven, then it makes sense to lightly walk over it with a sanding file.
How to remove shellac at home
There are five different ways to remove shellac at home.
Professional solvent
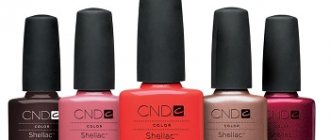
Like Shellac varnishes themselves, all products for removing them are available in professional stores. If you follow the instructions, the result will be the same as in the salon.
Acetone
Products containing acetone can be used as a professional remover. Liquids for removing regular nail polish or pure acetone are suitable: a piece of sponge is moistened in the liquid, applied to the nail and wrapped in foil. You can use professional overlays and do without foil. You just need to watch the time so as not to dry out the nail plate with acetone. After all, such products are not intended for long-term compresses.
Specifics of the procedure
In order for your nails to remain healthy and beautiful after the home procedure, you must remember the following rules:
- mandatory hand washing. Before removing shellac, the nail plates and skin of the hands must be degreased and pathogenic microorganisms removed. Therefore, it is better to use antiseptic soap, but, in extreme cases, regular soap will do;
- prohibition on mechanical removal of coating. Do not cut, chip or completely file off the coating - this can lead to serious nail injuries;
- refusal of metal accessories for manicure. Marigolds can easily be damaged by iron tools, especially during the process of removing shellac, so in this case it is better to do without them;
- antibacterial treatment of nail plates and fingers after the procedure. Guarantees healthy nails and removes remaining gel polish remover. You can use regular chlorhexidine or a professional manicure suspension.
Instructions for removing shellac
After preparing the necessary products, begin removing the shellac:
- Cut the cotton swab so that it fits comfortably on the plate, after which a rich cream is applied to the skin near the nail to protect it from exposure to aggressive substances;
- Moisten the swab in the solvent and place it on the nail, wrap the finger with foil on top, securing it with adhesive tape for a tight fit;
- Take a break for 15-20 minutes. when using acetone, or the time specified in the instructions for the special liquid. During this time, the shellac will acquire a soft state and begin to lag behind the plate;
- Remove the foil from your fingers in the reverse order of application. After removing the tampon, the shellac is quickly scraped off with a cuticle stick. Having completed the procedure on one finger, move on to the next;
- Treating the nail with a file and covering it with a balm or varnish that restores the nail plate and softens the cuticle.
Manicurists advise removing shellac in a salon, since when performing the procedure at home there is a certain risk of ruining the nail. As a remover, it is recommended to use special formulations that do not contain acetone .
Milling cutter against soaking: pros and cons of different gel polish removal techniques
21.02.2017
The more popular the technique of covering nails with gel polish or shellac becomes, the more often the question arises of how to remove it.
There is no need to talk about the obvious dangers of picking and peeling off the coating: even clients interested in the nail industry know how unfortunate the consequences of such a removal technique are for nails.
But even some technologists cannot answer the question of what is better - removing gel polish with a cutter or dissolving the polymer coating with gel polish remover.
Professional gel polish removal techniques
Gel polish, which is often called shellac, is an elastic polymer compound that is acetone-soluble. This characteristic determined the most common method of removal - soaking.
This technique, which can be performed at home, is also recommended by professionals whose clients, despite all the warnings, remove the coating on their own. But the craftsmen themselves are increasingly using a milling cutter for this procedure: a device that resembles a dentist’s drill.
Which technique is better for the master himself and is safer for the nail plate is worth considering in more detail.
Dissolving gel polish with acetone-containing liquid: pros and cons
To dissolve gel polish, technologists advise purchasing a special liquid. Those who understand that the beautiful packaging contains the same acetone-containing composition, take the usual nail polish remover. Also required for the procedure:
- grinder for removing a dense glossy layer from the surface of gel polish;
- cotton pads, which are applied to the nails in the form of liquid-soaked quarter corners;
- foil to wrap the tips of your fingers and increase the effectiveness of the composition;
- an orange stick or a sharper pusher;
- polisher and cuticle oil.
Instead of foil, you can use special plastic caps to remove gel polish. They are more aesthetic and hug the nail more tightly: the relevance of the latter aspect is clear to those who have ever encountered a restless client who is unable to calmly endure 15 minutes of soaking the coating. Unlike a foil cap, a plastic clip is less likely to slip off accidentally.
Gel polish dissolution procedure
To understand the advantages and disadvantages of this method, you need to understand what happens during the procedure. In 15 minutes, a liquid containing acetone corrodes the coating and makes it soft.
The master, who removes the caps one at a time, quickly lifts the soft mass with a stick or pusher and removes it.
According to the technology, it is unacceptable to press hard on the tool or pick out poorly dissolved gel polish: if necessary, the wrap with a wet sponge is repeated.
This technique seems to be as safe as possible for the nail plate: after removing the layer, it is sanded, polished and soaked in oil. But is everything so rosy? During the entire 15-minute procedure, the fingertips received a powerful chemical burn.
Essentially, the skin was immersed in acetone, which cannot but affect its condition. A client who is not prone to allergic reactions only experiences dry skin, while an allergic client experiences cracking of the pads, skin rejection and excess keratoses.
Those who had damage on the cuticle line before the procedure will hardly be able to withstand such torture: acetone will burn the injured rollers.
Grinding the coating with a milling cutter: advantages and disadvantages
Removing gel polish with a milling cutter seems more difficult: those who see the device in the hands of a specialist for the first time have unpleasant associations with a dentist.
In practice, the process doesn’t look any better: a ceramic or metal nozzle with pronounced notches, which craftsmen call “corn,” slides over the surface and grinds off the gel polish layer by layer. Flying dust, unpleasant sounds and vibration sensations can cause a negative reaction.
Those who have seen the consequences of poor-quality processing can present as an objection the danger of cuts and burning in the process. Technologists present their arguments:
- a good attachment combined with the high power of the device itself removes the layer delicately, without reacting with the scales of the nail plate itself;
- dust is eliminated by using a good vacuum cleaner built into the countertop;
- oscillatory movements are minimized by the correct placement of the master’s fingers;
- The client will not feel a burning sensation when working quickly and confidently without stopping in one place.
Cuts and injuries are also only a consequence of inexperience: with constant practice, the risk of injury to the nail or cuticle is minimal.
Removing gel polish with a router
The speed of the procedure will increase significantly: to treat 10 nails, the master will need 5-15 minutes. For a client who is removing gel polish by soaking, at this moment the last nail would just be wrapped.
But it’s also worth mentioning the disadvantages: the cost of a good device and the inadmissibility of using a low-power one, the price of the attachments themselves and the need for serious practice before working with your hands. Contraindications to the procedure itself are:
- individual intolerance;
- thinning and increased sensitivity of the nail plate;
- allergic reactions to dust.
Cutters for removing gel polish
Each technique has its own advantages and disadvantages. Therefore, practicing masters rarely stop at “pure” techniques. The combination in the case of removing gel polish looks like this:
- the top and middle layers of the coating are cut off with ceramic, diamond or carbide milling bits;
- the residual base layer is either removed with a less abrasive nozzle, or even dissolved.
Due to the small thickness of the remaining coating, this process will take only a few minutes, and the risk of damage to the nail will be minimal.
Technologists warn: there is no completely safe way to remove gel polish, so you shouldn’t get carried away with frequent reinstallation of the coating. Following this recommendation allows your nails to remain healthy.
by HyperComments
Source: https://www.aristek.ru/blog/freza-vs-razmachivanie/