Gel polish is an ideal choice for fans of a beautiful manicure that maintains a well-groomed appearance for a long time. But chips and detachments can make it untidy just a few days after visiting the master. Innocent and unnoticeable at first glance, they increase in size over time and become a real problem. You want to hide such hands from everyone and redo the coating as soon as possible. This is also one of the most common causes of plate delamination and the appearance of nail diseases.
What to do if gel polish chips or peels off
If you notice that a client's gel polish is peeling off or cracking, think about the root cause. Is this the first time this has happened or has it happened before? Has anything changed in the usual process of creating a manicure or wearing it? It should be understood that the problem is not always the work of the master. The reason for this may be the condition of the client’s nails, their characteristics and diseases, materials of unsatisfactory quality or with an expired shelf life.
Minor defects along the edges and corners can be eliminated using restoration. With significant damage, as a rule, nothing can be done except to completely redo the manicure. But you can avoid problems in the future by choosing the right materials and techniques for the new coating. You should analyze your own mistakes and the client’s mistakes, if any.
Pay attention to:
- time after which the coating deteriorates;
- fingers and places where damage occurs;
- power and performance of UV-LED lamps;
- influence of external factors on nails.
If the client visited you for the first time, ask in advance if he had any complaints about the durability of the gel polish. Perhaps, due to the nature of his work, he has to come into contact with aggressive chemicals, water or dust. A visual examination of hands and nails, assessment of their condition and health is also required.
Causes of chips and detachments
There are several reasons that can affect the durability and appearance of a manicure. They fall into three main categories:
- Failure to comply with technology.
- Use of low-quality materials.
- Violation of wearing rules.
If the first two fall under the responsibility of the master, then the latter depends solely on the client. It must be remembered that gel polish is a reliable, but not reinforced concrete coating. In addition, it can behave differently on different nails. Some have wet hands, others have dry hands. The plate itself also differs in physiological characteristics. For example, if one girl’s manicure lasts a month, this does not mean that your client will be able to wear it for as long.
Fortunately, the latest gel polish production technologies are improving at an astonishing rate. For example, Lunail gel polishes behave equally well on different types of nail plates. By following manicure technology and wearing rules, you can reduce the risk of defects to almost zero.
Errors in manicure technology
Let's look at the ten most common shortcomings of manicurists that nullify any efforts. You can spend an hour on a great design but miss the basic details. As a result, your art will not last very long.
- Lack of comprehensive training. One of the “golden” rules of professional manicure and neat coating is preparing the plate, which is performed in several steps:
- grinding;
- degreasing;
- dehydration;
- application of primer.
Using a buff, natural gloss and unevenness are removed. The dust that remains after such treatment is removed with a degreaser. The dehydrator restores a healthy pH balance and has a drying effect. The final step is applying a primer, for example, Perfect Bond Primer Lunail. It has the effect of double-sided tape, providing reliable adhesion to the base.
Ignoring at least one of the stages risks getting debris (dust, moisture, particles from nails) under the coating and subsequent detachments.
- Incorrect application of base coat. Often this is what later leads to detachments. The purpose of the base is to level the plate and prepare for the application of colored gel polish. It is recommended to apply it in two layers. The first one should be very thin. Make sure it is even, has good adhesion to the nail and covers it completely. Otherwise, air bubbles will remain under the base, and detachments will not be avoided.
- Incorrectly selected base. Despite the fact that modern bases are almost universal in use, they require close attention from the master. When choosing them, you should take into account the individual characteristics of the client’s nails - structure, length and shape. Square nails break more often than oval or almond-shaped ones, and long nails break more often than short ones. Therefore, in the first case, give preference to a more rigid coating with strengthening of the side ends.
- Poor quality hygienic manicure. To prevent the gel polish from peeling off, it is necessary to completely remove the pterygium. This is the dry epidermis at the bottom of the cuticle that extends onto the nail plate. It also needs to be removed near the side ridges and in the folds of the skin at the base of the nail. Even a millimeter of excess skin that is under the artificial turf will ruin it after just a few days. Do not cut your nails when they are covered with old gel polish - this will make them brittle. They should be filed with delicate movements and in one direction.
- Incorrect handling of manicure files or cutters. Removing gel polish and correcting the length and shape of nails involves a rather aggressive effect on the plate. It is important not to saw through it, otherwise the coating in such places will not have the necessary adhesion. When removing, it is better to reach the base and not touch the “native” nail at all.
- Remains of a special product for softening the cuticle. If you remove cuticles with a cuticle remover, be sure to carefully remove it before proceeding to the next steps. It contains fat, alkali and other components that should not be covered. Use a degreaser, a dehydrator, and orange sticks.
- Streaks. As a rule, they are encountered by inexperienced craftsmen who have not yet gotten used to carefully applying gel polish directly under the cuticle. The more liquid the material, the greater the risk of streak formation. They may be invisible to the naked eye, but immediately after the session they start the process of formation of detachments. Washing your hands in hot water can speed it up.
- Poorly sealed ends . This must be done carefully, preventing the coating from flowing under the free edge of the nail. Use the minimum amount of material on the brush. Over or under finishing of the ends is a common cause of chipping.
- Leaving detachments under a fresh manicure. If there are any, they must be removed with a device, and only then a new coating must be applied. The nail can be strengthened with gel or other special products.
- The layer of materials is too thick. When applying base, gel polish and topcoat, it is important not to overdo it. You cannot save, but excessive generosity can also turn against you. Each individual layer must be dried well in a lamp - the polymerization process must be 100% complete, otherwise you will be guaranteed to have detachments.
Mistakes when applying gel polish. What you should consider to make your manicure enjoyable for as long as possible
Manicure with gel polish has won the hearts of the fair half of humanity mainly due to the durability and durability of the coating, which stays on the nails for at least two weeks. This manicure is not afraid of water treatments, mechanical stress and contact with various household chemicals. Of course, in order for a manicure to please its owner for such a long time, it is necessary to take into account many nuances and do everything in the correct sequence and using technology. Unfortunately, many beginners, when doing a manicure at home, make mistakes due to which cracks and chips appear on the nails within a few days. To prevent this from happening, when applying gel polish you should consider:
- It is very important to properly prepare the nail plate. Before applying gel polish, you need to remove the natural shine with a buff so that the surface of the nail becomes slightly rough. Otherwise, the adhesion between the natural nail and the gel polish coating will be impaired, which will lead to its peeling.
- Another common mistake is treating the nail not with a buff, but with a polisher. In this case, the completely opposite effect is achieved and the natural shine that needs to be removed will only intensify.
- Do not moisturize the cuticle and side ridges with oil before applying gel polish. In this case, an oil film will form between the nail and the base and the gel polish will not last long. After completing the manicure procedure, it is advisable to treat the nail with a dehydrator or fresher and only then begin applying gel polish. Oil is applied to the cuticle only at the very end of the procedure.
- When applying gel polish to natural nails, you must use only an acid-free primer. It is advisable to apply the primer only to the tip of the nail, otherwise removing the gel polish will be problematic. Acid primers are designed for gel nail extensions.
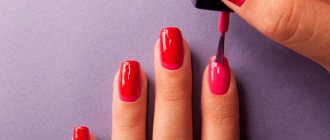
- All gel coatings must be applied in as thin a layer as possible. If after one layer of colored gel polish the shade is not as saturated as you would like, then the first layer must be dried and only then applied the second.
- To lift the settled pigment of colored gel polish, do not shake or shake the bottle, otherwise bubbles will form during application. To do this, it is enough to rotate the bottle in different directions before use.
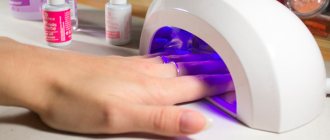
- It is necessary to carefully monitor the time and quality of drying of gel polish in a UV or LED lamp. To ensure that the gel polish hardens evenly during polymerization and does not run off, your hand should be placed in the center of the lamp and strictly parallel to the base. For the same reasons, it is better to paint and dry your thumbs separately.
- When applying the base, color and top coat, do not forget to seal the end, since the free edge of the nail is the most vulnerable place of the manicure.
- The sticky layer is removed from the last topcoat; this should not be done between layers, as it holds all the layers together.
Follow these simple rules and you will only have to remove your fashionable gel polish manicure when you get tired of it.
Selection of low-quality materials
Using products from different brands or of questionable quality can also lead to chipping or peeling of your manicure. When buying materials from different manufacturers, you cannot be sure that they will be “friendly” with each other. The most common reason is a chemical reaction between the components of the products. It can appear in the form of bubbles, bald spots or discolorations. That's why you should give preference to one brand and use the base, gel polish and top coat in a harmonious tandem. Only then can you guarantee the client full compliance between the idea and the final result. In the Lunail catalog you can find brand materials for each stage of work.
Materials must be stored in accordance with the manufacturer's recommendations indicated on the packaging. They are sensitive to UV radiation, so it is best to keep them away from sunlight. Be sure to keep an eye on expiration dates.
Hit parade (top 10) of the worst examples of manicure among celebrities and stars
Celebrities don't always make their looks perfect. And often the main mistake lies precisely in unsuccessful nail design. Horrible manicures of stars can often be seen online, on the pages of magazines and even on their personal blogs. Maybe this is a PR stunt, because strange designs and color combinations attract much more attention than ordinary types of manicure.
Selena Gomez
The singer could not choose one color and chose several at once. Not without rhinestones. The end result will amaze more than one fashionista.
Jessica Alba
Stars also forget about accuracy. The actress's manicure with dark tips resembles dirt , which significantly spoils the overall design. The French coat can be white or another bright color, but not a dark shade.
Kelly Osbourne
The celebrity decided to forget about a simple jacket and made a very ordinary nail design. The only problem is the color . The gray tint makes your nails look sloppy and scary.
Tyra Banks
The famous model posted a photo of her nails on her Instagram with the caption “Help!” Looking at such a manicure, I really want to send the star a bottle of polish by mail. And a nail file.
Lady Gaga
The queen of shocking surprises the audience with her outfits. There were also nails. The singer's manicure seems heavy and does not in any way make me want to repeat it on my own hands.
Georgia May Jagger
Most likely, the model was very hungry. This is the only explanation for the fact that she covered her nails with sushi designs. A picture of food on your nails will never attract approving comments .
Venessa Hudgens
There can never be too many stones! But the socialite decided to prove the opposite by placing an incredible amount of rhinestones .
Lily Allen
If you listen to the same type of music for a very long time, you can then embody its image on your nails . This idea is suggested by Lily’s manicure with images of rap artists and leaves of a forbidden plant.
Heidi Klum
Hollywood has gained fame as a “golden” place, and its residents contribute to this in every possible way. Heidi Klum decided to do her nails in a beige tone, covering them with stones of the same color. This is a big mistake; any decorations should differ in shade from the base layer of varnish.
Rihanna
The designs on the nails look very interesting. The singer decorated her manicure with drawings of dollar bills. Many tabloids discussed this design, but their opinions agreed that it looked rather strange.
To avoid finding yourself in a similar situation, you need to carefully monitor the color theme of your manicure. The unbridled imagination of the master can also play a bad joke; if you don’t like something, you need to immediately pay attention to it. The main mistake girls make is that they often cannot stop and make a whole picture of drawings and stones on their nails. What do you think about this?
Violation of the rules for wearing manicure
Exposure to an aggressive environment, prolonged soaking in warm water, contact with soil or dust is not a complete list of factors that affect the condition of gel polish. Proper care will help extend its service life. In order for the coating to look aesthetically pleasing and last a long time without chipping or peeling, the following recommendations should be followed:
- hydration. Any manicure, whether standard or using gel polishes, dries out the nail plate. To keep your nails looking neat longer, recommend that the client regularly moisturize the side ridges and cuticles between visits to the nail technician. An overdried plate also needs nutrition and restoration. There are many professional products for this, for example, Lunail “Orange” cuticle oil. You need to apply oily textures to your nails a few days before your manicure. Immediately before coating, thorough degreasing is necessary.
- strengthening the nail plate. Instead of a standard manicure base, choose a vitamin base. It saturates nails with useful substances, thanks to which they become stronger and more resistant to damage. In emergency cases, when the plate cannot be improved with auxiliary means, strengthening with gel is recommended.
- use of gloves. The client should not wear them every time he washes dishes. Modern gel polishes can easily withstand up to 2 weeks without chipping or peeling, even if you do wet cleaning every day without gloves. However, they still protect the coating from mechanical damage, which can significantly reduce its durability.
- refrain from removing it yourself. Many clients cannot resist removing gel polish with their own hands. For this purpose, use acetone-containing liquids, hard buffs and other available tools. Such actions are dangerous for nails, leading to injuries and future detachments of the new manicure. Professional craftsmen cut it off with a milling cutter, leaving an ultra-thin layer of base - this is a proven, safest and most gentle method. Inform the client that other methods of removing the coating may cause severe damage to the nails and permanently weaken them. After several such treatments, they become paper thin and will take months to recover.
How to avoid it
Compliance with technologies and rules for wearing manicure, as well as the use of high-quality and certified materials, allows you to avoid unpleasant moments associated with the durability of gel polish. But even if detachments do not appear in the second, third or even fourth week, this does not mean at all that you need to go with it “until the last.” To prevent worn-out gel polish from causing problems, it is recommended to renew your manicure at least once every three weeks.
Important! On nails in poor condition, you should not use gel polish without first strengthening it. For this purpose, you can use Lunail nail modeling gels. An uneven, thin or cracked nail plate is the main contraindication for such a coating. In such cases, good adhesion to the base cannot be achieved. This also applies to clients who struggle with nail diseases. If the plate becomes discolored or if there are symptoms of mycosis, you should immediately visit a doctor. Such nails require appropriate treatment - you cannot simply cover them with gel polish. You can enjoy beautiful nails with an even coating only after complete healing. To disinfect your hands before the procedure, use an antiseptic, such as Lunail Antiseptic.
Lifehacks
- To prevent the gel polish from spreading, immediately after applying it, turn your finger over so that the nail is at the bottom, the coating will even out and will not spread.
- It is best to paint and dry one nail at a time, then the coating will not have time to spread and lose its shape.
- When you have dried the top, do not rush to turn off the lamp; dry it a little longer than it should, then it will retain its shine longer.
- Do not remove your nails from the lamp, always turn off the lamp first and then remove your hand, this also promotes shine.
