No acetone: nail extensions, soluble
Gel polish is an ideal option for those who do not want to paint their nails in the morning and wash them in the evening. Shellac sits on the nails for weeks and, in good conditions, behaves decently - it does not peel off, peel or crack.
That is why owners of extended nails were interested in the pressing question of whether it is possible to combine technologies and materials. “You can,” said the nail industry, and crowds with durable and strong acrylic or gel nails flocked to salons for long-lasting beauty.
Long-lasting beauty turned out to be fatal. It turned out to be impossible to get rid of it the old fashioned way, with a “compress” (foil, cotton wool, ZhDSL).
Acetone, in principle, is the enemy of man, but you shouldn’t let it get close to extended nails - it won’t dissolve and it will ruin it. And using a liquid without acetone to remove a long-term coating is a waste of time. So how to remove gel polish from artificial nails ?
Removing gel polish from the palette - soaking in hot water
This method is considered the simplest and fastest, so manicurists use it most often.
It requires:
- hot water - but not boiling water;
- pusher - a convenient metal scraper;
- 100 grit nail file or nail polish remover.
How to easily remove gel polish from tips or chamomile? The first step is to get rid of the top coat, and here it is important to know what exactly was applied with the top coat.
Option two:
- Regular clear nail polish - removed with nail polish remover and a cotton pad.
- Top coat – removed superficially with a hard file until the shine disappears.
After only the nail design remains on the tips and there is no protective film on top, you can proceed directly to the removal procedure:
- The tips are immersed in hot water for a few seconds.
- Use a pusher to pry up and remove shellac from the plastic.
When performing work, you need to remember a number of points:
- All gel polishes differ in consistency, composition, density, density, so the duration of heating in water will have to be determined empirically. Typically the processing period ranges from 10 to 60 seconds.
- The pusher may not remove the “color” in a single layer, then you should simply scrape off the coating from the tips - carefully and without haste.
- If you press hard on the plastic with a scraper, you can break the tip, and then you definitely won’t be able to reuse it.
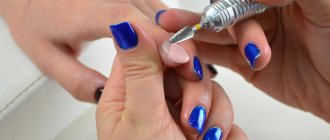
With the machine: remove gel polish with a manicure machine from extended nails
To cut quickly means to cut with a milling cutter. It works lightning fast, but is dangerous. You need a skill, which you can acquire from tips.
Which cutter should I use to remove gel polish? If “expensive and rich”, then ceramic, which cuts gel polish like butter, does not heat up and does not clog. But you can safely work with extended nails “without showing off” - with a carbide cutter.
Excessive gentleness when working with artificial materials is not necessary. By the way, you have to try hard to get to the “meat” even when working with natural nails.
We choose a hard cutter (with a green or blue notch). The shape is convenient (cylinder, cone or “corn”).
We set the revolutions in accordance with the virtuosity of using the tool, but not less than 10,000. Having moved the cuticle away from the front of the work, we turn on the desktop vacuum cleaner, the device and get started.
- We file off the gel polish in the direction from the cuticle to the free edge and in the direction of movement of the cutter.
- We rest our elbows on the table, and rest our working hand on the little finger, ring finger or the end of the palm.
- The cutter should slide along the nail, and not “bite” into it. The pressure is the same as when working with a ballpoint pen.
- We carry out the sawdust using short stroking movements, without staying for long (more than 2-3 seconds) at one point. If there is a feeling of burning and burning, we increase (namely, increase) the speed of the router and reduce the pressure.
- We work with a router until the material is completely cut down, after which we begin to correct the extended nails.
The extensions are not yours, and “drinking too much” through negligence is not a tragedy. A thick layer of gel or acrylic will protect your own from injury, and any hypothetical errors will be corrected by correction, which is usually combined with filing off gel polish for one simple reason - the frequency of both procedures is approximately the same. Why pay twice when you can cut both here and there?
Professional products for removing gel polish from nails
Professional means for removing any gel polish are:
- Beautix is an excellent product that quickly and efficiently removes gel polish.
Apply the product to the sponge, place the sponge on the nail and wait 10 minutes. According to the instructions, this time is enough to soften the gel polish. We remove all residues using a pusher or a stick.
- TNL is also a budget option compared to others.
The liquid will allow you to remove gel polish in just 10-15 minutes. The method of application is similar to that described earlier.
- Nano Professional is a very high-quality professional product that will allow you to remove gel polish not only quickly, but also relatively safely for your nails. The method of application is similar to that described earlier.
- Masura is a very popular remedy.
However, the effect period of the product is slightly longer - 15-20 minutes. The method of application is similar to that described earlier.
- Severina is perhaps the most affordable gel polish remover. Despite its availability, the product is quite effective and is in demand.
Nail polish removers
Of course, these are not all gel polish removers, there are a lot of them. They all differ in quality and cost. When choosing a product, we recommend that you pay attention first of all to its safety and effectiveness, and only then to all other factors.
How to apply gel polish correctly
Gel polish is not inferior in popularity to traditional varnish coating. And there is every reason for this: firstly, the gel polish lasts on the nails without losing color for about 3 weeks, secondly, all this time it retains its shine, and thirdly, it practically does not chip. Moreover, the entire procedure of applying gel polish takes no more than half an hour. Due to the fact that the coating has a special consistency, you can choose a wide variety of shades, and a single layer application allows you to make the color translucent. For lovers of more saturated colors, gel polish is applied in two layers.
How to apply gel polish correctly
Preparing nails for applying gel polish
Before starting the procedure, nails must be carefully prepared. By analogy with preparing for regular extensions, the surface of each nail is first covered with a thin layer of bonder gel. The nail will acquire a barely noticeable matte structure.
Nail Preparation Tip
It is not recommended to apply a thick layer of bonder gel, otherwise your nails will look wet and the gel polish will most likely begin to peel off after a few days. Excess bonder gel is removed with a foam sponge.
Polymerization
The next stage of preparation is the polymerization of the bonder gel in UV rays for 50-60 seconds, after which a sticky dispersion layer is formed on the nails, which should not be removed.
Depending on the type of nails, we proceed as follows:
- We cover natural nails with a thin layer of strengthening, transparent gel. We cure for ½ minute in UV rays.
- Artificial nails on tips are covered with one layer of constructive transparent gel to strengthen the stress area. Polymerize for 3 minutes. in UV rays.
- Finished acrylic nails are coated with a strengthening transparent gel. Polymerize for 30 seconds.
Application of gel for created nails with gel polish coating
To create an artificial nail plate, can you use forms and tips under gel polish? Now everything will be based on individual preferences or the decision of the manicurist. To remove artificial layers, special tools or time are required.
Forms are used if you have your own short nails and do not want to part with them. They are considered more acceptable while preserving the structure of the nail than tips. Removing layers is quite simple without the use of specialized tools.
Nail gel
So, it was determined that the correctness of the technological process of using artificial gel coating depends on existing factors. Now you can move on to consider different methods of nail extensions using forms or tips with a step-by-step explanation.
A lesson in modeling an artificial nail at home using one or two different coatings on tips and gel polish:
- Hands are treated with disinfectant;
- The cuticle softens and excess skin moves away;
- A 180 or 240 grit file removes the glossy surface of a natural nail;
- Tips undergo identical file processing to give the surface a rough and matte finish;
- Then make a trim to determine the length and shape of the nail;
- Now start using a degreaser, and then a primer;
- When using a single-phase technique, the entire process is divided into three stages and after each layer the gel is completely dried using a UV lamp;
- If the emphasis is on the two-phase technique, then the sequence is maintained. First, the base layer is used one-time and dried. Then another gel is used twice for modeling and dried in the same way.
- Then comes the time to use the destick remover.
- It is imperative to file down any uneven surfaces using a 150 grit file.
- The final stage is the third layer of gel in any of the selected technologies;
- Get rid of stickiness again;
- Use emollient oil for the skin around the nail.
Gel polish
Lesson on modeling an artificial nail plate using forms using the three-phase technique with photos:
- The first three steps are skipped because they are fundamental to any technique;
- The nail is cleaned of glossy shine, and then of dust;
- The form is placed on the cleaned surface and secured;
- This is done by degreasing the native nail with a product and then with a primer until completely dry;
- The base layer is applied and dried;
- Then it is covered with modeling gel, the substrate is formed and dried;
- The form is removed and covered with gel to create the shape of the nail plate, dried;
- The final layer is also dried under UV;
- Emollient components are applied to the cuticle.
The next and final stage of creating a complete manicure is applying stylistic images using gel polish. And now the main question is, can gel polish be applied to tips? This is now a fairly common practice.
Creating a complete manicure
Step-by-step process of adding gel polish to tips with photos and videos on an artificial nail plate:
- The use of gel polish occurs on the main dried gel layer;
- To fix the gel polish on the nail, it must be dried under UV;
- On top of it, gel polish is applied to the tips;
- You can extend the life of your manicure and apply a sealing layer of gel polish, which will last up to three weeks.
- To remove gel polish from tips, you need to use a special solution with lint-free swabs.
Removing gel polish with alcohol: myth or reality
Can alcohol remove gel polish? Yes, it is quite possible, but the procedure time will increase. Please know that when choosing this method you need to be extremely careful.
- Wash your hands thoroughly.
- We will need isopropyl alcohol. By the way, this liquid is widely used in cosmetics, perfumes, household chemicals and medicine.
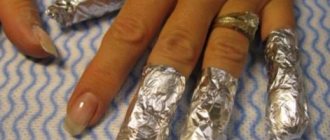
- So, take a cotton pad (cotton pad, sponge) and moisten it with alcohol, then apply the cotton wool to your nails and carefully wrap them in foil. This process is already well known to you.
- We wait about 15 minutes.
Removing nail polish at home
- For a better result, you can massage the nail a little in the foil, then remove the cotton wool and foil from the nail.
- We remove all residues with the already known pusher or stick.
- Removing gel polish with alcohol is completed. Be aware that this method may be much less effective than you expected.

