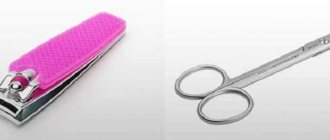
What attachments are there?
Before purchasing pedicure cutters, you should carefully study all types and their purposes. For full-fledged work, the master must have the following types of attachments in his arsenal.
"Flame"
With blue notch. Used to lift and remove cuticles and skin in the sinuses.
Important! When working with the nozzle, be sure to maintain an inclination angle of 45°.
"Needle" made of carbide metal
Blue color. Purpose – opening the cuticle, removing pterygium, correcting the length of the natural nail.
Attention! When working, be sure to maintain parallelism between the nozzle and the nail plate.
Ceramic or steel in the form of “corn”
Blue or green notch. Used to remove artificial coatings and correct the length and shape of the nail.
Reference. When working, it is recommended to keep it parallel to the nail.
Diamond or corundum cone
Blue markings.
Important! Used to lift and open the cuticle.
Globular or spherical with different diameters
Red and blue color.
Attention! Purpose – removal of pterygium, hangnails, cuticle, seals on the nails and skin of the fingers.
Diamond in the form of a bullet (lentil)
Used to eliminate pterygium.
Carbide in the shape of a cylinder (drum)
Used to remove rough skin, dry calluses, and corns. A very dangerous nozzle, so you should be as careful as possible when working with it.
Reference. It is better for novice craftsmen to purchase cylindrical attachments with rounded edges.
"Roller"
Purpose – elimination of lateral growths and cuticle.
All of the above attachments are quite enough to perform a complete manicure.
Important! Many professionals have in their arsenal softer (silicone, etc.) cutters for polishing the surface of the nail plate and for delicate treatment of very sensitive skin.
What types of attachments are there for hardware pedicure based on material of manufacture?
In addition to their functional differences, cutters are divided by material of manufacture. This primarily depends on the focus of her work, as well as achieving the desired result.
Ceramic
Such attachments are considered the safest, so it is best to start practicing your skills in working with the device with them. They are a mixture of adhesive and abrasive, which is baked at high temperature in an oven. True, they wear out quickly and you need to ensure they are replaced periodically. Due to the different levels of abrasiveness, they can be used for absolutely any purpose: polishing, removing cuticles, cutting off skin on the heels. The main thing is to choose the right nozzle.
Diamond
Such hardware cutters for pedicure are more wear-resistant and also have great functionality. Their production involves diamond chips, which are also baked with an adhesive solution or a metal tip. They, just like ceramic ones, come in different diameters, and you can choose the one you need for your specific purposes. Their convenience lies in the fact that they are all painted in a different color, which determines their rigidity. Black and red are the harshest, while yellow is the most gentle.
Natural
Such fragile cutters for hardware manicure are used for the final stage - polishing. They are made of cotton, felt, suede and are shaped like a brush or disk.
Silicone
Excellent assistants when grinding or polishing. The tip of the nozzle is made of silicone and also has a color differentiation of the degree of hardness from dark to light. The nozzle is used until it is completely worn out.
To polish the nail plate after finishing the cuticle trimming procedure, you can use only one type of attachment - it is better to give preference to silicone ones, as they allow you to remove uneven nails.
Metal
It is clear that these cutters are made exclusively of metal. The tip can take any shape - oblique or straight. Such attachments are more suitable for artificial surfaces or for removing a thick layer of dead skin. The main advantage of using metal nozzles is the absence of dust during operation, as well as less wear resistance and the occurrence of overheating.
What is the minimum set a beginner needs to work?
In the kit, a novice master should have a complete set of attachments to perform all pedicure tasks. The set includes:
- grinding attachments of different hardness and size;
- needle-shaped diamond cutter;
- silicon carbide caps on a rubber base;
- carbide nozzle “drum”;
- diamond in the shape of a cone;
- ball-shaped diamond cutter with blue cut;
- diamond cone, flame and bullet with red markings.
To gain initial experience, it is advisable to purchase cutters that have blue markings and smoothed corners.
Attention! For additional polishing and buffing of the natural nail, you can purchase silicone cutters and sand caps.
Pedicure attachments - review
We have a lot of cutters for pedicure, contact us for a free consultation by phone
The main task of such attachments is to remove the layer of dead skin and not injure living skin. Moreover, before the procedure, the layer to be removed must be softened. Whether it’s a water bath or a special product for hardware pedicure, but it must be prepared. Sometimes a pedicure that takes place using special softening agents rather than water baths is called dry, i.e. without water. And many beginners (and not only) masters take this term literally - dry in the literal sense of the word, without any preparation of the foot. This is fundamentally wrong! In those cases when they ask me: “Are these the attachments that can be used to do a dry pedicure?” I usually answer: “Have you tried to give yourself such a pedicure?”...
First, let me remind you of the structure of any nozzle (Fig. 1):
Rice. 1
So, the main types of nozzles for removing corns are: corundum, diamond and sand caps.
Corundum, they are also called mineral . The future working part is formed from a special mass and baked in an oven. Then glue is poured into the hole in the working part made in advance during molding, the shank is immersed in it and left for some time until the glue completely hardens (Fig. 2).
Rice. 2
These nozzles are similar to pumice and they work on the principle of pumice: their entire surface consists of continuous depressions of different sizes. With the edges of these holes, the nozzle catches loose dead skin and gradually scrapes it off. When it comes to living tissue, the attachment begins to “slip” along the surface due to the high elasticity of the skin, without damaging it.
Such attachments withstand any chemical sterilization and sterilization in autoclaves - they can be used repeatedly. During the work process, the working part is “ground down”, gradually becoming smaller. However, since its structure is the same throughout its entire depth, it remains operational until it is ground down almost to the diameter of the shank.
They are inexpensive: 40-45 hryvnia. Therefore, you can have a fairly large assortment of different shapes and abrasiveness, allowing you to perform any procedure efficiently and comfortably.
Despite all the advantages, corundum nozzles also have significant disadvantages: due to the low sharpness of the edges of the recesses, the work does not proceed very quickly and with quite a lot of heating of the treatment area. During operation, part of the removed skin clogs the porous surface and the nozzle stops working. If the client has large and rough calluses, then one set of attachments may not do all the work. You will have to have a replacement in stock. After work, cleaning such a nozzle is not so easy - you cannot do without an ultrasonic cleaner. Fortunately, now they are inexpensive (Fig. 3).
Rice. 3
Or use special brass brushes, although they are less effective (Fig. 4).
Rice. 4
Diamond. Made from natural diamond chips (Fig. 5).
Rice. 5
A shank is soldered to the steel base of the working part. Then grains of natural diamond are fixed to the base using another metal - nickel. Nickel forms a hard, smooth surface from which grains of diamond protrude and are embedded in the metal (Fig. 6).
Rice. 6
Thanks to this fastening, the diamonds do not become loose and fall out. The maximum that can happen to them is the top of the crystal chipping during an impact when the nozzle falls. And this is not very scary, because the new edges formed in this case are just as sharp as the old ones.
Attachments with large crystals are used for preliminary treatment of coarse calluses, with medium ones for basic work, and with small ones for finishing grinding and polishing. Heating of the treated surface is minimal. All work is done quickly even with low-power milling cutters due to the fact that the very sharp edges of the crystals easily cut off (they cut it off, not scrape it off like ceramic ones), the most stubborn skin, and the smooth surface of the base of the working part prevents cut particles from sticking to it and clogging the nozzle. Upon reaching living tissue, the master needs to be extremely careful, because if pressed hard enough, the nozzle can cut delicate skin.
They can be sterilized in an autoclave and any disinfectant solutions. And washing them is a pleasure - simply under running water using a regular plastic brush. Sometimes the master complains: “The diamond attachment worked for a year or a year and a half, and it became “dull”, it doesn’t work, but only heats the heel.” This is a consequence of a barely noticeable deposit accumulated on the crystals from the drugs used, sterilizing solutions and skin residues due to not very careful care. In this case, it is enough to wash it in an ultrasonic cleaner and the nozzle will sparkle again, like new and again, as before, it will delight you with its work.
There is only one drawback of natural diamond attachments – high price. But if you calculate how long it can work and how much effort the technician can save, then the cost of 30 - 60 Euros turns out to be quite acceptable.
This is a very effective, reliable and durable tool, because diamond is the strongest material on Earth. There is simply nothing to dull it. And if you handle it carefully, without dropping it or using it at high speeds, then it can serve you for years.
An alternative to natural diamond is “artificial” (Fig. 5). I put the word artificial in quotation marks for a reason. Because it is not a diamond at all. And crystals of a chromium-nickel alloy grown on the surface of a steel base by electrolysis. This is a very hard alloy and in a beauty salon it will work no worse than natural diamond. True, over the years, the edges of the crystals will still become dull, however, given the price of the nozzle, which is much lower than that of a real diamond, the “indestructibility” of the crystals when dropped, all the same ease of operation and care, we can confidently say that this is an alternative.
These attachments come in the same shapes and sizes as their bigger brothers. And it is very difficult to distinguish one from the other. Natural diamond has virtually no color and the attachment looks like iridescent silver. And the younger brother has a small, barely noticeable yellowness and if you have nothing to compare with, then you may not see the difference. We can only hope for the integrity of the seller...
Sand or emery caps (Fig. 7).
Rice. 7
Unlike the previous ones, these attachments are designed as a disposable tool. They consist of a rubber base, onto which a replaceable cap is placed, made according to the principle of waterproof sandpaper - abrasive chips are glued to a fabric base of the desired shape and size. The base lasts a long time, allows itself to be washed and sterilized many times, and the cap, the instrument that is in direct contact with the skin, is designed for one client. This is good from a biosafety point of view. And in this sense, there is no alternative to it.
The efficiency of the cap is very high and comparable to diamond. True, it is much more difficult for a milling cutter to rotate it than a diamond, since the crumb is not so sharp and the number of its grains is much greater, which means there are more cutting edges working simultaneously and resisting rotation. And the heating of the surface is much greater. Since the sandpaper “crumbles” during work, the life of the cap is short - a high-quality cap must withstand a full cycle of work with one client and work equally effectively both at the beginning and at the end of the procedure. Many masters use this and do not throw away the cap, but sterilize it and use it several more times. On the one hand, they can be understood: in the procedure, at least 4 caps must be used for each client - 2 diameters (large and small) and 2 hardnesses (coarse and fine). If the work is complex, then their number increases. Considering the usual price of a cap of 10 - 15 hryvnia, it is easy to calculate how much a pedicure procedure will cost and not every salon can afford it. On the other hand: the fabric base and the porous structure of crumbs and glue are an ideal environment for the development of microorganisms and all the advantages of biological safety with such use are reduced to nothing. Some masters do this: they provide each of their clients with a separate set of caps, after each procedure they sterilize them and store them in separate signed bags. And still, this is not a solution...
Fortunately, high-quality caps have now appeared for about 4 – 6 hryvnia (Fig. 8), which allows the master not to think about the cost of the procedure and make it effective and safe.
Rice. 8
There are three more types of attachments used to remove corns: ceramic caps, carbide cutters and an “open knife” attachment. They, for various reasons, are much less common than those described above.
The mentality of our craftsmen with their irresistible desire to save on everything, including instruments, led the manufacturer of ceramic caps to create truly reusable caps. And he succeeded. The caps fit on standard rubber bases, although they are made of ceramic. The advantages and disadvantages are the same as those of ceramic attachments: they are not afraid of any liquid sterilization, they work well for small corns, they clog quickly, and are difficult to clean. The main advantage of the cap – disposability – has been lost; what has been gained is a lower price than ceramic caps and a longer service life compared to a conventional cap.
Carbide cutters. For this procedure, the largest diameter and the largest teeth are used (Fig. 8.1). They work like small blades, cutting off the topmost, hardest layer of corns, and do it quickly and efficiently. They process the inner, softer layer ineffectively because the teeth are still small
Rice. 8.1
for such material they cut it poorly. This is a kind of fuse in the work - it is not easy to reach living skin and injure it. They can significantly increase the speed of the wizard’s work, because... Processing the top and stubborn layer takes only a few minutes.
The “open knife” attachment gets its name from the two knife blades that are visible through the working hole (Fig. 8.2).
Fig.8.2
This tool finds its rightful place in high-end beauty salons. It is designed for fast, high-quality and painless work on the client’s heel. The tool is designed like a small electric planer, only it is configured to work not with wood, but with leather. Two replaceable blades are attached to the axis, which cut it off when the tool rotates. The size and shape of the working hole in the nozzle body are selected in such a way that the blades can only cut off the dead layer. A few skillful movements and all that remains is to sand the heel - the job is done! No dust: the skin is quickly cut off in large layers and does not scatter throughout the office. This attachment is easy to clean, can be sterilized perfectly, and is simply a record holder for speed of operation. And for the price... Now a nozzle with an “open knife” costs about 500 Euros and it requires a separate electric motor, costing about 100 - 150 Euros, which can be connected to budget milling cutters and pedicure stations with the spray “PEDICURE STATION “LEADER SPRAY-M”” . This is a very good offer for salons that are trying to improve the quality of service and surprise clients with new work techniques.
A few words about the speed at which large pedicure attachments are used and why they “suddenly” bend during operation.
General rule: the larger the nozzle, the lower its rotation speed , even if you have a 50,000 milling cutter! (Fig. 9).
Rice. 9
All of the above attachments work well at speeds from 10,000 to 15,000 rpm. The conditions for performing the procedures in this case are almost ideal. At a lower speed, the efficiency decreases; at a higher speed, we get strong heating of the skin, and at an even higher speed, we get a bent or broken nozzle (Fig. 10).
Rice. 10
The fact is that all these tools “naturally” have a certain vibration caused by the mismatch of the center of mass with the axis of rotation of the nozzle: diamonds and crystals are located unevenly over the surface of the nozzle, the shank is not soldered to the working part perfectly accurately, the fabric base and the adhesive layer are not the same thickness on different sides of the cap, the ceramic mass itself is heterogeneous... During rotation, unbalanced centrifugal forces try to swing the nozzle (Fig. 11).
Rice. eleven
As a result, we feel vibration. At a sufficiently high speed, the magnitude of these forces becomes so great that they can crumble the ceramic working part or bend the shank. And then legends appear about “powerful and bad” milling cutters that can break the attachment...
In conclusion, I will say that there are no bad or good attachments. It all depends on the working conditions - if there is a lot of it, then it is unreasonable to refuse a natural or artificial diamond or even an attachment with an “open knife”; if there are few and there is an opportunity to process ceramic attachments with high quality, then why not use them. And if clients come to you with problematic and sore feet, then you simply cannot do without disposable caps.
I wish you success in your work, regular and grateful clients.
Vitaly Vorobyov, founder and director of Vitalina® Company
top of page
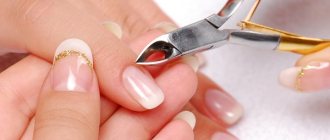
How to use the device correctly when working with cuticles?
The cuticle requires a very careful approach both during manicure and pedicure, since careless handling can significantly damage the skin around the nail. The algorithm for performing this procedure will be as follows:
- Gently lift and push the cuticle towards the base of the nail.
- Using the nozzle, remove dead skin particles.
- Carefully remove the pterygium. The nozzle should be held parallel to the nail plate. Eliminate any, even slight, pressure.
- Sand the sinuses and side bolsters.
- Remove rough skin and dry calluses (if any) from the subungual area and fingertips.
In addition, there are a number of rules that must be followed when removing cuticles. These include:
- the nozzle must be directed in the opposite direction from its movement;
- for each zone, use only a cutter specially designed for it;
- do not put pressure on the nail and skin;
- to avoid burns, do not linger in one place for more than 4 seconds;
- maintain optimal power of 15,000–20,000 rpm.
Help It is recommended to use different sets of attachments for manicure and pedicure. This will help prevent the spread of infections that often affect the skin and nails of the feet.
Next you can watch a video about hardware pedicure of fingers:
Hardware pedicure: technology
To carry out the presented cosmetic procedure yourself, you should study all the instructions, which are presented below step by step:
- At the initial stage, you should soften the skin of the feet, which is preceded by the use of various lotions or creams. After soaking for some time, the feet should be rinsed with running water and wiped dry.
- Now start treating your nails and skin of your feet. To begin with, you should use harder and coarser attachments (cutters with strong abrasiveness), and only then you can move on to soft specimens (cutters with fine abrasiveness for polishing leather). Use the device according to the instructions provided with it - press it gently, at an angle of 35 degrees, without pressing. If there are particularly rough areas, do not try to remove them at once - this can significantly injure the skin. It is better to repeat the procedure in a few days.
- Now they begin to remove the cuticle using a diamond nozzle.
- After cleansing your feet and shaping your nails, you can start polishing the nail plate. Here you should use silicone attachments, which have a soft and even pleasant effect on the nail.
- Wipe your feet with a damp cloth or clean them of dust and debris in any way convenient for you.
- Apply any nourishing or moisturizing cream to your feet and nails. Wait a while until the composition is completely absorbed into the skin.
While the cream is absorbed, you can start cleaning the device - remove dust from it with a special brush. Used attachments should be cleaned in the same way.
This is where the entire hardware pedicure procedure ends. As follows from the above, there is nothing complicated in the procedure itself. The main thing is to study the instructions and get your hands on the processing. If you are new to this issue, then you should treat your feet especially carefully. Start with the roughest areas of the feet first, and only then carefully begin to treat the nails. For clarity, watch the video.
How to sterilize and treat after use?
A novice master must remember that after each pedicure session, all instruments, including cutters, must undergo mandatory sterilization. This must be done, as particles of skin, nails and fat remain on the attachments.
The complete tool processing process includes:
- dry cleaning from biological residues;
- disinfection;
- preparation for sterilization;
- sterilization.
Important! Only after going through all the stages should the nozzles be put into an airtight container.
Types of disinfection
Before disinfection, the cutters are thoroughly cleaned using a brush under running water to remove particles of nails and skin. There are 2 types of processing:
- Chemical. The nozzles are immersed in special solutions that have antiviral, antibacterial and antifungal effects. You can use drugs such as Gigasept, Alaminol, Estilodez, Optimax.
- Physical. To process this method, the cutters are immersed in boiling water for 15 minutes, after which they are thoroughly dried on a sterile cloth.
Attention! After disinfection, pre-sterilization preparation follows, consisting of washing the nozzles under running water using detergent.
Sterilization
The final stage of processing instruments after a pedicure is sterilization. Various devices are used for it:
- Glasperlen devices. Compact devices designed specifically for sterilizing cutters. Depending on the selected mode, treatment lasts from 30 seconds to 3 minutes.
- Autoclave. In this device, processing is carried out using hot steam. The device is refilled only with distilled water. The higher the selected temperature, the less time sterilization takes. Minimum – 15 minutes, maximum – 40 minutes.
- Heat cabinet. Treatment with hot dry air. The maximum holding time for nozzles is 2 hours, the minimum is 30 minutes.
Reference. To sterilize cutters at home, you can use a conventional oven. Instruments are placed in it after preliminary dry cleaning and disinfection. The holding time is 20 minutes at a temperature of 200°.
A novice manicurist should know that pedicure cutters, depending on the material and purpose, have a certain service life. To prolong it, it is important to insert them into the device and use them correctly. In this case, the pedicure will turn out better and better each time, and the attachments will last quite a long time.
Foot treatment
The condition of the foot before the procedure affects the choice of cutters. Hyperhidrosis and hyperkeratosis, diabetic foot, calluses, corns, warts - features that affect the pedicure technique and set of tools.
The video shows a complex medical pedicure using a steel attachment.
An experienced professional should have an arsenal of attachments for all common foot problems; we advise beginners to take a basic set and supplement it with special cutters.
The Myslitsky-Nail catalog contains sets of attachments for:
- classic pedicure;
- diabetic foot pedicure;
- pedicure for hyperkeratosis of the skin of the feet.
Let's consider the types of cutters for pedicure depending on the type of treatment of the skin of the feet.
| Processing type | Cutter material | Form | Diameter (mm) | Abrasiveness | |
| Surface cracks | Diamond | Ball | 4,2 | Average | |
| Resurfacing of cracks (including diabetic foot) | Sintered Diamond | Tornado | 5 | Super rough | |
| Treatment of interdigital space | Diamond | Reverse cone | 3,3 | Average | |
| Hyperkeratosis of the skin of the feet | Carbide | Rounded cylinder | 3 | Single cut | |
| Removing small but deep calluses | Carbide | Ball | 2,1 | — | |
| Removal of corns, shallow cracks, small calluses | Steel | Torpedo | 7 | — | |
| Removal of keratinized edges of cracks on heels, treatment of side ridges | Ceramic | Ball | 2,8 | Double cross cut | |
| Delicate removal of calluses on fingers | Sand | Straight cylinder | 6 | Thin | |
| Treatment of side bolsters and finger pads | Sand | Rounded cylinder | 16 | Super rough | |
| Removal of subungual calluses | Diamond | Ball | 1,2 | Average | |
| Final foot treatment | Silicone | Cone | 12 | Rough | |
| Grinding of calluses, keratinization, corns | Silicone | Cone | 4 | Average | |
| Rubbing in oil and wax | Silicone | truncated cone | 8 | Thin | |