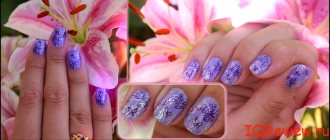
Flower meaning
The image of an orchid is one of the most popular in flower themes. This plant will emphasize such character traits as tenderness, femininity, and romance of their owner. Therefore, if you want to add more romance to your life, a manicure with orchids will be a great solution.
In China, this flower is a symbol of beauty, the coming of spring and love. This design is perfect for spring. It is better to do it on long nails, because there is more surface for applying the design. You can make a design across the entire plate or only on the protruding edge. Regardless of the chosen technique, the orchid will look elegant and delicate.
Useful tips
Before you start drawing an orchid on your nails, it’s best to practice on a piece of paper. This drawing is not one of the simple ones; drawing the details requires patience and scrupulous attention. Therefore, if you have artistic skills, this will make your job easier.
To make the drawing bright and rich, use acrylic paints for your work. They are easy to paint your nails with: they don’t smudge and you can easily draw thin contours with them. For painting, take the thinnest brushes.
What you will need
You can entrust your hands to a professional, but if you really want to learn how to make a beautiful painting yourself, you can paint orchids on your nails at home. To do this you need to prepare the following tools:
- varnish for background coating;
- acrylic paints in light pink, lilac and white shades;
- top coating;
- dots;
- thin brushes.
Having prepared your workplace, you can begin to perform a manicure with a floral pattern.
Manicure with orchids sculpting 2021 photos new options
All women, without exception, love a beautiful manicure. Many of them are trying to independently master the art of creating incredible designs with drawings. At first glance, it seems very difficult, but in fact, drawing a beautiful image on your nails is not so difficult. The drawing can be anything. Delicate and beautiful orchids deserve special attention.
The history of the birth of the first of the orchids is full of myths and mysteries. The ancient Greeks believed that a beautiful flower grew from a shoe lost by Aphrodite. Other sources claim that the entire countless family of orchids was born from fragments of the rainbow. Be that as it may, the sophisticated flower of unearthly beauty is a favorite decorative element for clothing and jewelry. He also inspires nail art masters to create a beautiful manicure with orchids. An orchid on nails will perfectly complement any style of clothing - from a practical everyday look to a chic evening dress.
Master class with step-by-step instructions
The beauty of a manicure depends on the technique used and how carefully you depicted the orchid.
- Before you start painting, complete all preparatory manipulations, including polishing, creating the desired shape and processing the cuticle, and applying a base coat.
- Then coat your nails with background polish.
- After it dries, start painting. Add white and lilac paints to the palette and mix to create a gentle gradient transition. Take the resulting shade with a brush and place it on the nail plate.
- Draw the remaining petals in a similar way.
- Use white to highlight the middle of the flower.
- Use green color and a thin brush to paint the pistil and stem.
- Carefully paint the core of the orchid with white paint.
- After the flower has dried, seal the result with a top coat.
Drawing this beautiful and delicate flower requires a fair amount of time and patience, but such painting is worth the effort. Your image will become more feminine and romantic.
Step-by-step instructions for nail art with orchids
If you know how to draw, then you should definitely try to depict this unusual and beautiful design. To depict it you need the following accessories:
- varnishes of soft pink, burgundy, lilac colors;
- colorless fixative;
- green and gold acrylic paints;
- dots for nails;
- thin brush for nail design.
When you have prepared the necessary tools, you can safely start drawing. We would like to offer you detailed instructions, after which you will be offered a video lesson to watch.
- To begin with, do not forget to carry out the usual hygiene measures and apply a manicure base. Then you need to apply a pale pink varnish in two layers.
- Wait until the varnish is completely dry, and then you can start painting the design. It is necessary, stepping back 2 mm from the base of the nail, to draw three bases for the flowers. To do this, using burgundy varnish and dots, you need to make three-pointed stars and put two dots in the continuation of the line.
- After that, take a lilac varnish and draw two petals across each star.
- Then use gold-colored paint to make a core in the center of the flower.
- The orchids are almost ready. All that is missing is a stem and leaves. To depict them, dip a thin brush in green paint and carefully draw a line from the first flower to the edge of the nail. Then along the bottom edge you need to draw two neat leaves. Remember that each leaf should taper towards the center and widen at the edges. The flowers must be connected to each other with a thin, even line - this will be the stem. It is possible to place several flowers on one nail, or draw one large orchid.
- The finished image must be covered with a layer of nail fixative.
Incredible flowers completed! As you can see, they are not at all difficult to depict. Also, do not forget that the combination of delicate and bright varnishes always looks very advantageous. You can also draw an orchid on each nail or decorate just a few nails with flowers, and paint buds on the remaining nails, or not make any design on them at all. Nail designs with such unusual flowers always look great.
To clearly demonstrate to you how such an unusual and very feminine design is made, we would like to invite you to watch the video.
Simple technique
The option proposed above may seem too complicated to you, especially if you are just starting to master nail design. There is an easier way to draw an orchid on your nails. For this you will need white, blue and gold shades.
- Prepare your nails for painting.
- After you have coated them with background varnish, mix two colors on the palette - white and blue - to create a subtle gradient.
- At a short distance from the base of the nail plate, draw two three-pointed bases with this shade - these are orchid petals.
- Using dots, blend the petals.
- Mark the middle with gold varnish.
- Using a thin brush, paint the stem and leaves.
- When the painting is dry, apply a top coat.
You can paint one large or several small orchids on one nail. Despite the simplicity of execution, the pattern turns out to be spring and airy.
Step-by-step instructions for beginners
After looking at a few photos with a similar design, you can start making this incredible flower. You can create step-by-step orchids on nails in the following way:
- First, you need to give the nail plates the desired shape and cover them with base varnish. Possible shade options are listed above. It is better to paint the base twice. Nude or translucent base tones will look great on such a delicate manicure.
- After the base coat has dried, you can begin drawing. You can choose the place to apply the flower yourself: near the base of the nail, closer to the tip or on the entire nail. To begin with, three main petals are drawn from the selected center using the selected color.
- Then, using a lighter varnish, paint two larger petals on top of these bases. Using white varnish, draw thin contours of each detail.
- Use yellow or golden paint (varnish) to make a core in the form of two dots.
- Using one of the dark varnishes, apply small tint dots along the petals closer to the center.
- Use green, black or brown varnish (paint) to make thin, irregularly shaped stems. If you wish, you can get creative and add small buds.
- At the end, the painting must be covered with a fixative.
Spring French manicure
A French jacket with orchids on nails looks elegant and stylish. It doesn't look too bright, doesn't seem too romantic. Discreet classics combined with a flower that personifies spring and femininity are an excellent option for both fashionistas and lovers of traditional manicure.
- In order for the French manicure to look beautiful and well-groomed, the nails should have a square or semi-square shape. After the preparatory work has been completed, begin creating the jacket.
- It should be done in the classic version: a flesh-pink base and a white “smile”.
- It is better to paint an orchid in white and pink - such a palette will be in perfect harmony with a traditional French jacket.
- After the painting is dry, apply a top coat.
You can decorate only one nail with painting, placing the design over its entire surface. Or highlight the protruding edge. If you want to add more colors, you can make the “smile” green instead of white. This color suits floral and spring themes.
Tempting options with orchids
If you show your imagination, you can create wonderful bouquets of orchids on your nails. The color scheme of orchids and the main coating can be multivariate. It depends on preferences and desires. Special fantasy designs can be achieved using acrylic paints. They make it possible to mix shades, achieve richness or, conversely, tenderness.
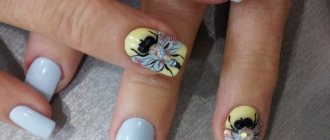
So, for example, for evening makeup, a pattern on black varnish or a burgundy finish is more suitable. A little golden streaks or dots on the flower can add a festive touch to such a painting. Orchids look especially bright on white varnish. It is possible to paint the white base of one nail on the ring finger or on all of them, as can be seen in the pictures above. You can diversify this painting with the help of small rhinestones. The summer version with orchids is possible on a yellow, mint, lilac, blue base coat. Orchids on nails are ideal for a French manicure.
How to draw a white orchid
If you don't like a lot of pink and lilac shades, an alternative would be to picture an orchid in white. A manicure with such a pattern does not look flashy, it is discreet and elegant.
- Make the background cover in a soft pink shade.
- Highlight the protruding edge of the nail with white.
- On the border of these two shades, draw petals in black. Highlight the middle with white.
- Draw thin black branches between the petals.
- Using a rhinestone, mark the middle of the orchid. Secure the result with a top coat.
The manicure turned out to be discreet and feminine, thanks to the unusual combination of shades.
Useful tips
Orchids can be painted in a variety of ways and in a variety of colors. Particularly daring and creative people can use acrylic modeling to create a voluminous manicure. You can add rhinestones or sparkles to your manicure. But moderation must be observed so that the design does not turn out to be too colorful.
For a “floral” manicure, the optimal length and shape of nails is medium with rounded corners. This will add femininity to your look. It is better to paint no more than two nails, and on the rest, make a plain background with varnish of a suitable shade.
A manicure with orchids will add femininity and a little romance to any of your looks. And this beautiful and delicate flower will give you a little spring mood at any time of the year. Floral painting always remains relevant and is suitable for both everyday and festive manicure.

