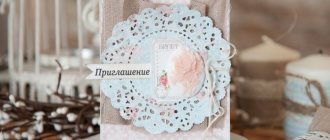
Do-it-yourself volumetric letters “LOVE”
Recently, three-dimensional letters have been used to decorate the wedding hall and photo shoot space.
From three-dimensional letters it is easy to form words, for example, “love”, “family”, “happiness” and their equivalents in foreign languages. Finding a use for such charming accessories will not be difficult! These letters are made from different materials. In today's master class, the Svadebka.ws portal wants to introduce you to one interesting idea for decorating three-dimensional letters. These products will look just great!
How to make three-dimensional letters for a wedding
Three-dimensional letters with the most appropriate word for this event – LOVE – can become a real creative decoration for a wedding. Making such letters is not as difficult as it might seem at first glance. Our step-by-step master class will show you how to make three-dimensional letters for a wedding with your own hands - you can use these letters for a photo shoot, or simply leave them as decoration.
First, let's stock up on everything we need. For letters:
To decorate the heart letter “O”:
The first step of this master class is to print out the template letters. All letters are made on A4 format, which is very convenient and practical. We cut out the printed letters and trace them on the isodome. Instead of the letter “o” there is a beautiful heart, which is very popular at a wedding.
Detailed instructions:
Take one bucket and fill it with hot water. Pour half a bottle of pink liquid paint into this bucket. Stir. Unwind one package of cotton rope and soak it in room temperature water.
There is no need to dye the rope completely; therefore, to do partial dyeing, distribute the rope in folds around the circumference of the bucket. Those. part of the rope should be lowered into the colored water, and part of the rope should hang over the edges. We do the same with the second rope, only we paint it in a bucket of blue paint. After an hour or two, rinse the ropes thoroughly with clean water. Let dry.
Next you need to make the letters themselves. Take a ruler with a centimeter scale and trace the word “LOVE” on a piece of foam. The approximate width of each letter is 19 cm and the height is 30 cm. You can choose the size for the letters yourself.
Cut out the traced letters using a utility knife, using a die-cutting die.
Apply a bead of hot glue to the back of the "L". Attach rope. Apply glue to each side of the letter and wrap it with rope in a circle. You need to wrap the entire letter completely. Try to keep the end of the rope glued to the back of the letter. Do the same with the remaining letters, alternating colored ropes.
At the end of the work you will have two letters with white and pink stripes and two letters with white and blue stripes. This method of partial dyeing creates an amazing striped effect.
What you need to make and design decorative letters
To make letters for a wedding photo shoot with your own hands, you only need a little patience, imagination and auxiliary materials.
Stencil templates
It is not profitable to buy stencils, since it will not be cheap (especially if you order the whole alphabet). One letter can cost 100 rubles or more. Therefore, it is much easier to download ready-made templates from the Internet using the following links:
You can also download it here in PDF format. After receiving the sample, all that remains is to print it, glue it on cardboard and carefully cut it out.
Dye
Anyone can paint cardboard letters, whether personalized or any other, with gouache, watercolor, oil, or acrylic. Foam props can be colored using spray paint. Metal letters will require special metal paint. It is best to work with it in the air.
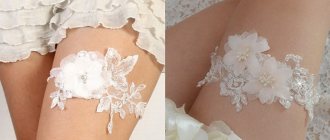
Flower letters for a wedding photo shoot
Frame
An original solution would be to place the initials of the newlyweds or the wedding date in a frame. It is difficult to make one with your own hands, so frames are usually ordered from workshops. They can be made of plastic or wood. The contents of the frames are combined with a frame of decorative ligature.
Finishing
To design letters you can use:
- rhinestones (placed on glue);
- ribbons (adhesive or tied);
- decorative flowers, hearts, bows;
- lace (suitable for soft fabric letters);
- garlands needed to create glowing letters.
Application options
The word “LOVE” is universal, which means that within the wedding theme it will be appropriate everywhere. For example, you can place this accessory in the area where sweets are located. Or you can decorate the table on which the banquet cards are located with three-dimensional letters. You can also place letters decorated with rope as a background behind the bridal table.
Decorative letters will be in demand during a photo shoot, you can be sure. Or maybe you want to decorate your home with these letters. In general, where and how to apply such attributes is up to you!
Source
Options for a wedding photo shoot with letters
The question may arise as to how letters can be used beyond decoration in various places. Here comes the application in a wedding photo shoot. There are various options for their location and use:
- put or place on the ground. Where the newlyweds stand behind the letters in various poses. Which will lead to defocus;
- you can hold them in your hands. It all depends on the idea, for example: the newlyweds keep the word or phrase together; either the groom is one thing, and the bride is another word; or someone standing in front or behind each other;
- binding to helium balloons. Which allows you to support them above your head, for newlyweds or friends;
- the use of words or combinations of phrases in the presence of native ones. For example, the designation of mom and dad, sister, and so on;
- in humorous photography scenes. For example, the groom holds in his hands the phrase “gotcha”, and the bride “mine forever” and so on;
- in scenes depicting love. For example, guests hold the word “Love”, and the newlyweds hug each other tightly or kiss.
Using letters when taking photographs can help newlyweds not get confused during the process. Somewhere to relax or give free rein to your imagination. Taking the initiative can leave a lasting and memorable impression of the event.
Video gallery:
The other day we told you about decorative letters at a wedding, as an original way of design, and mentioned that such letters can be made of very different sizes and shapes from any material you like: cardboard, fabric, metal wire, flowers, etc. Today we want to continue the conversation on this topic and show you three-dimensional letters made of foam plastic.
Volumetric letters made of paper
Three-dimensional letters are made from paper simply and easily. Such figures will be an excellent decorative element for wedding celebrations, photo shoots, etc.
Tools and materials
To work you will need:
Step-by-step instruction
The process of making a three-dimensional letter from paper consists of the following steps:
The inner part of the blanks should be cut out with a stationery knife and then continued with scissors.
While working, you need to make sure that excess glue does not stain the letter. Otherwise, shiny marks will remain on it.
Fabric pillow letters
You will need: red and white cotton fabric, sewing machine, scissors, thread, pins, centimeter, ruler, sheets of paper, pencil, filler - synthetic fluff or holofiber.
- Draw letters on sheets of paper.
- Transfer the letters onto red fabric in 2 copies.
- Make patterns, taking into account an allowance of 1 cm.
- Cut strips for the sides 7 cm wide from white fabric (5 cm width of the side, 1 cm allowance on each side).
- Start with a simple letter L: fold the blank right sides together, leaving 5 cm of the sides free, then stitch the bottom of the letter, 1 cm from the edge.
- When the stitching approaches the corner, make notches to make the corner even.
- Sew the side to the part without finishing 4 cm - this will be the opening for turning it inside out.
- Attach the second part of the letter L and make marks with a pencil on the sides opposite the existing corners so that the letter is even.
- Attach the piece, secure with sewing pins and make cuts in the corners so that the fabric does not wrinkle.
- Sew the second piece, leaving 4 cm for turning.
- Fill the letter with filler and sew the hole closed with a blind stitch.
- Start creating the letter O: fold the two parts of the letter and make symmetrical marks with a pencil every 2cm on two blanks on the outer and inner sides of the fabric. Also make marks on the sides of the outer and inner rings.
- Make notches (cuts) along the marked marks.
- Sew the outer ring on one side, matching the marks, leaving 4 cm for turning.
- Sew the inner ring on one side.
- Stitch the edges of the inner ring strip to form a “tube”.
- Sew the free part of the outer ring.
- Turn the workpiece inside out, secure the inner ring with pins and sew it by hand with a blind seam.
- Fill the letter with filler and sew the hole closed with a blind stitch.
- Sew the remaining letters using the same pattern.
- make sure that the material you choose is enough to make all the letters;
- take a piece with a yakrim and a motley pattern or print: the pattern will help you create a stylish and memorable accessory for a wedding photo shoot.
Letters for decorating a wedding hall or for a wedding photo shoot can be written not only in the names of the newlyweds. Any deviation from the template is welcome: confessions and words of love, bright and succinct statements.
Designing an intricate inscription requires a non-standard approach: the bride and groom can decorate the products with floral and decorative arrangements, dry leaves, tree bark or yarn. Letters made in eco-style, covered with moss and berries, have become especially popular. You can create an unforgettable accessory by decorating the blanks with fringe or garland, pearls, wool or satin.
Take care of colorful wedding decorations. An unusual inscription made of decorative letters will help you create a unique photo session and enliven the decor of the festive hall, leaving only pleasant memories of the happy event.
Volumetric letters with backlight
Three-dimensional luminous letters will become an original decoration for any holiday.
For illumination, you can use a New Year's garland or make individual light bulbs yourself and connect them using a wire.
Tools and materials
To work you need:
Step-by-step instruction
The manufacturing process consists of the following stages:
Stages of creating volumetric letters with backlight
Before installing the garland, you must make sure that it is in full working order.
For greater convenience, it is possible to create letter templates on a computer and then print the image on a printer.
Having mastered the basics of creating three-dimensional figures, you can make any inscription to decorate the interior or any holiday.
Source
Glowing inscription Love. Master Class
An original decor idea for Valentine's Day - a glowing inscription Love. By placing a poster in a frame and connecting lights to a nearby outlet, you can create a custom wall decor that will give the room a romantic atmosphere.
You will need:
- white canvas
- set of lights
- awl
- LOVE template
- scotch
- pencil
- red acrylic paint
- brush
- scissors
- thermal gun
Step 1: Make sure the word fits on the canvas. Note: You can of course create your own word at the size you want and print it out. Also, the distance between the holes on the template may be greater than the distance between the lights on your garland. In this case, you will need to remake the template yourself, placing the holes at the required equal distance from each other.
Step 2: Cut out each letter.
Step 3: Place the letters on the canvas so that they all fit completely. Secure the templates to the canvas with tape.
Step 4: Use a pencil to outline all the letters. Try to leave only a barely noticeable mark with a pencil, so it will not be visible after filling in the letters.
Step 5: Once you have finished tracing all the outlines, remove the tape and remove the paper templates from the canvas.
Step 6: Using acrylic paint and a brush, paint over the letters. It is better to first outline the letters and then paint them inside.
Step 7: Apply 2-3 layers of paint, allowing each layer to dry.
Step 8: Once the paint is dry, take the cut out templates and reattach them on top of the painted letters, securing the templates together with tape.
Step 9: Using an awl, punch a hole in the canvas at the location indicated by the black dot. And try to insert a light through this hole. This way you will understand what size hole is right for you.
Step 10: Punch holes in all the blackheads.
Step 11: Remove the tape and remove the paper letter templates from the canvas.
Step 12: Turn the canvas over and use nail scissors or tongs to remove any lint that has formed around the holes when piercing.
Step 13: Now you can move on to the very last step - adding the lights! It is worth starting from the far right corner of the letter E. Each light must be placed in its own hole.
Steps 14, 15, 16: Once all the lights are threaded through E, move to V, then O, and finally L.
Step 17: Flip the canvas over and stick some lights to the canvas with a heat gun or tape for extra security.
We hang the canvas on the wall, connect the lights to the socket - and the glowing inscription is ready!