Materials and tools
To work with tapes, you will need a set of simple tools that can be found in every home. If this is your first experience in decorating bottles, then it is better to start with simple design solutions to get the hang of it. To work you will need:
- Sharp scissors.
- Glue that adheres well to glass. It's better to use "Moment".
- Braid, lace, scraps of fabric.
- Accessories: beads, beads, buttons, cabochons.
- Tweezers for creating miniature elements.
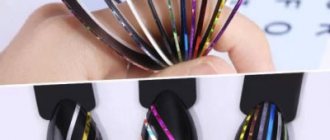
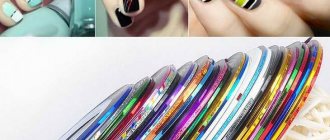
- Ribbons.
The basic material also has a number of variations:
- Satin. Most commonly used due to its pliability and elegant aesthetic appearance.
- Silk. Thinner and more slippery material.
- Satin. They have a denser structure, and the fiber pattern is visible to the naked eye.
- Jacquard. Decorated with original drawings.
- Organza ribbons. The material is translucent and airy.
- Cotton. They hold their shape well, so they are suitable for creating three-dimensional compositions.
Each of the above types is used by needlewomen to decorate bottles, but the most popular material is satin. It combines the optimal ratio of quality and price.
Complex compositions made from combined materials look original. For example, cotton flowers surrounded by satin petals or the same background.
Candy - how to use
Using shibori technique
For a wedding or anniversary, the following champagne bottle decor will also suit you.
– satin ribbon (3.5 m)
– gold brocade ribbon (1.5 m)
– glue (preferably moment)
- scissors
– a bottle of champagne with gold foil
1. Prepare a bottle and tape and measure its approximate length for the first layer. To do this, attach the tape to the neck of the bottle.
2. When you have measured the length, cut the desired piece of tape and mark several points on it with glue.
3. Next, wrap this piece of tape around the bottle so as to cover the champagne wrapper. It is advisable to tighten the tape well, thereby preventing unevenness.
4. Measure the second piece of tape. It will be longer.
5. Proceed with the second piece as with the first piece of tape, i.e. Mark the dots with glue and glue. It is advisable that the ends of the ribbons be positioned equally, this will ensure a beautiful and neat pattern.
6. Continue gluing the next two layers (3rd and 4th) in a similar manner.
7. Now prepare the gold ribbon. It also needs to be measured and glued. Make 2 rows (see picture).
8. Another piece of gold tape needs to be glued to the bottom of the bottle.
9. Prepare the blue ribbon again. Measure and glue to the bottom of the bottle so that the seam is at the back.
10. Now we cut 7-8 blue ribbons of the same length and glue them in the same way - so that the seam is at the back.
11. This is the rear view. A not very neat seam has formed that can be easily closed. To do this, prepare a stationery knife and use it to make a slot for the end of the tape, which needs to be inserted there.
12. Apply a little glue to the tip of the blue tape and push it into the gap.
13. Next, you need to apply glue to the entire tape and press it tightly to the bottle.
14. Pay attention to the middle of the bottle, there is an open space there. This is where we attach another piece of golden ribbon. The corners that stick out from the front need to be cut off.
15. Now you can decorate the front of the bottle - add bows, lace, beads, etc.
Bottle preparation
Both empty and full containers must be properly prepared for the procedure. First, remove the label and any remaining glue along with it. There are two methods for performing this procedure:
- Soak the label paper in hot water and then quickly tear it off. The method is not considered the most effective, since often the glue remains on the glass and has to be scraped off.
- Heat the label with dry, hot air and slowly tear off one centimeter at a time. A hair dryer turned on at full power can act as a source of flow.
After cleaning the glass, it is thoroughly washed and dried. Then the surface of the bottle is wiped with a cotton pad soaked in alcohol. This way the glass will be degreased, which will ensure good “adhesion” to the glue. Tapes are usually pre-cut after measurements are taken.
Decoration with ribbons
Decorating a bottle of champagne or wine with your own hands is not such a difficult task. Several master classes with a step-by-step description of the work will tell you about popular techniques and the features of their implementation, and the novice designer can only choose. The simplest option is to create a fabric covering on the glass in “layers”. Work starts from the neck. A “loop” is made from a piece of tape, which is placed on the thinnest section of the glass container.
Its ends are trimmed if necessary and glued to the surface of the bottle. Then they take the next strip, create the same “loop”, partially lay it on the previous layer (so that the base does not show through) and attach it in the same way. In this way, a continuous fabric covering is created with beautiful joints (overlapping). Colors and materials are combined. Then the resulting background is complemented with other decorative elements.
Creating relief
Another technique is creating a relief texture. The effect is achieved by gluing tapes or pieces of textile to the surface and then squeezing them with your fingers. As a result, folds are formed that most accurately imitate the thin fabric of clothing. It is necessary to glue the entire piece completely, and not its individual parts. As a base, paper or other fabric of a neutral shade is attached to the glass.
Kazashi technique
To create flower arrangements, they use the Kazashi (Kazashi) technique, which originated in Japan, where girls crowned their heads with similar decorations. Many have seen complex floral arrangements with hanging “buds” on long threads, adorned on the high hairstyles of Eastern women. The essence of the method is to specially fold shreds and pieces of ribbon in such a way that sharp and rounded ends of leaves and petals are obtained.
They are carefully collected with tweezers, and the free ends are fixed to the surface with glue. Elements with multi-layered flower buds look the most beautiful. In the Kazakh technique, they collect petals and place blanks of the same type on top of each other, but of different sizes and colors. This way a volumetric effect is achieved. Kazashi flowers are combined with openwork, beads, and braid.
Shibori technique
Another gift from Japan is shibori ribbons. Most often they are used to create body jewelry (necklaces, earrings, bracelets), but they are also suitable for bottles. The ribbon is a “crumpled” piece of fabric that is dyed in different colors with an ombre effect. When creating the material, it is crumpled and tied into knots so that the result is a rainbow color, opening the way for the artist’s imagination. Shibori tape is usually glued to a fabric base, but in the case of a bottle it is attached directly to the glass. It is worth noting that material without additional decor looks impressive, but boring. Ribbons are always surrounded by various kinds of accessories, among which beads, cabochons and glass beads to match the main color prevail. The composition gains volume due to the folds of the material and looks festive and solemn.
How to decorate champagne with sweets
– black paper (2 orange sheets, 1 green sheet)
*Tissue paper is thin paper, also known as “tissue paper”. You can find it at gift wrapping racks, as well as in specialized art stores.
– candies (in this example there are 48 pieces)
– raffia
*Raffia are long fibers that can be found on the leaves of the raffia palm tree. They are popular among florists and are used in arts and crafts.
– hot melt adhesive
– hot glue gun
1. Prepare some orange tissue paper and cut it into 7 x 7 cm squares.
2. Apply glue to the flat side of each candy. Now you need to glue the candy into the middle of the paper square.
3. Next, you need to fold the edges of the paper towards the top of the candy. Start gluing the candies to the bottle using glue.
* It is better to decorate the bottle with candies from the bottom up in a circle.
* Try to glue the candies tightly to each other.
4. Making leaves. To do this, prepare green tissue paper and cut out long narrow leaves from it.
5. The leaves need to be glued together in several layers. Next, you need to decorate the neck of the bottle with them.
6. Your bottle will look even more like a pineapple if you wrap some raffia around the neck.
So, let's decorate the champagne with ribbons! This is one of the simplest methods, which is accessible even to those who have never encountered handmade.
What you need for decoration:
- ribbons (the combination of red and gold looks great, but you can experiment);
- glue gun (can be replaced with superglue);
- scissors;
- beads, lace and other decorations.
Cut the required length of tape and coat it with glue. We wrap it around the bottle in the neck area. This is the first layer. It's better to give it time to dry. For the second layer the tape should be a little longer. We fasten it in the same way, moving towards the bottom of the bottle. Glue another 2 layers of tape in the same way.
Next, take a brocade or other more elegant ribbon and make 2 layers of it. We decorated the top of the bottle. Next we proceed to the bottom. We attach the brocade ribbon at the bottom, and mask all the joints with either small ribbons or beads.
You can experiment with shades and shapes or make a composition from one type of goodies. This work does not take much time and even beginners can do it. Now you know how to decorate champagne for a wedding with your own hands and you can choose the design that you like the most!
Ribbon costumes
On the most “masculine” day, a non-trivial gift for a representative of the stronger sex will be a bottle of cognac, which is “dressed” according to its uniform. Such a gift will be of particular importance for a military man, rescuer or police officer. Satin ribbons are used to make a jacket, which is decorated with miniature chevrons, shoulder straps, buttons and ties with clips.
The costume is created using the technique of overlaying ribbons on top of each other. The first white layers are formed near the neck, which imitate a collar. Then the uniform is decorated with green, black or blue stripes (depending on the type of troops). Some craftswomen sew it separately from fabric and then simply put it on the bottle. Special attention is paid to the neck and plug. They are decorated with tiny berets, peakless caps, budenovkas, caps or caps. The elements are sewn separately and the finished miniature of the headdress is simply attached to the neck.
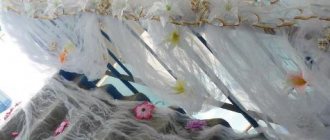
How to decorate champagne. Hat for a lady.
In this example, you will be able to make a hat for the lady that you prepared earlier. The only difference is the color chosen to cover the bottle. In this example it's blue, but you can leave it pink, or choose a color that you like best.
* Prepare the bottle by decorating it as in the previous example.
Cooking the hat
1. Cut a circle from a plastic bottle. The size of the hat will depend on the diameter of the circle.
2. Inside the cut out circle, cut out another circle - you will get the part of the hat that is attached on top of the champagne. This means that you need to measure the diameter of the neck of the bottle, and make the inner circle a little larger so that the hat is a little larger.
3. Next, cut out this shape from cardboard (the diameter of the paper circle is equal to the diameter of the hole in the plastic circle).
*Remove strips one at a time.
*Use a stapler to attach the cardboard to the plastic. Next, use your imagination to decorate the hat. In this example, satin ribbon and lace were used.
The photo on the left is a top view, the photo on the right is a bottom view.
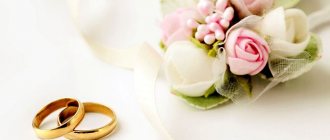
Bottles for a wedding
The bride and groom are always given two bottles of champagne for their wedding. This is an established tradition, the roots of which can no longer be found. At a wedding, they act as decoration on the festive table. After the celebration, they are hidden and the first one is opened exactly a year later, and the second one is opened upon the birth of the couple’s first child. As a rule, the container is decorated either in the form of a symbolic bride and groom, or to match the general theme of the wedding. The necks are decorated with doves (symbols of fidelity), rings and satin bows. They try to make the costumes of the “bottle” bride and groom look like the originals.
Men's clothing - a black jacket or tuxedo, with a ribbon, a bow tie, button beads and miniature cufflinks. To imitate a bride's dress, they use lace, openwork, airy fabrics, tulle, and sometimes even wire crinoline. Bottles decorated in a wedding theme are wrapped in layers of ribbons of beautiful colors, which are combined with artificial pearls, openwork stripes, beads, bows and voluminous flowers. The neck of the “female” container is decorated with a miniature tiara with a veil, and the “male” container is decorated with hats or top hats.
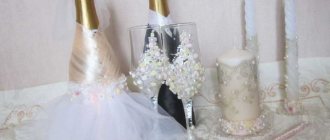
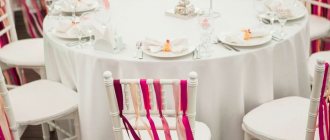
Compositions with candlesticks and glasses, which are decorated in the same style, look interesting. Some weddings also use boutonnieres, baskets woven from ribbons, or paraphernalia around the wedding chairs in the same color scheme and with similar motifs.
Decorative conservation
This is a more interesting way to decorate bottles, which you have probably seen many times in restaurants and cafes. Ordinary home food preservation is rarely truly decorative. But it can be done on purpose without long and painful hours spent at the stove.
You will need fruits, vegetables or berries and any available preservative - strong saline solution, alcohol, pharmaceutical formaldehyde, vinegar or acetic acid. For decoration - star anise, chili peppers, sprigs of herbs, cloves of garlic - whatever.
To ensure that the contents retain their original appearance longer, we recommend spending 5 minutes sterilizing the bottle. After that, put all the filling there, as you please, and fill it to the top with preservative. If the bottle cannot be rolled up like a jar, first fill the neck with wax, and only then screw it on or close it with a stopper.