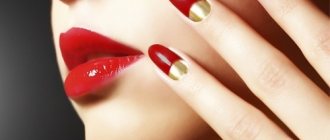
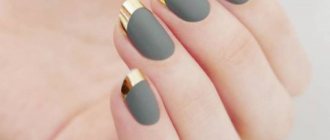
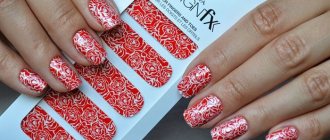
According to statistics, 70% of women who had a manicure with gel polish for the first time then return to it again, remaining its faithful fans. Nothing surprising. The durability and long service life of gel manicure explain its popularity, and the unusual design performed by many masters arouses genuine interest. This procedure has only one significant drawback - it is costly, both monetary and time-consuming.
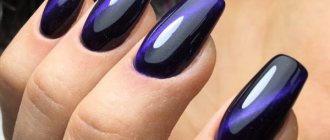
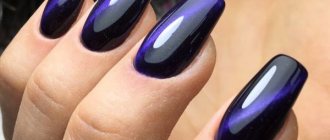
Gel polish, shade “Noble plum”
Few people know, but you can apply gel polish to your nails at home, especially now that equipment and materials have become available. The procedure itself is quite simple, you just need a little practice and everything will work out. So, in our next review we will present a step-by-step procedure for applying gel polish at home.
How to use gel polish at home: conditions, materials, equipment
It’s worth making a reservation right away, if you plan to do a gel manicure yourself, get ready for significant expenses. Because there is no difference between a salon manicure and a manicure done at home. What exactly you need for a manicure, what you can save on, and what you can’t - you will learn about all this below.
Starter kit for creating gel polish manicure at home: UF lamp, dehydrator, primer, varnishes, manicure tools
For a gel polish manicure at home you will need:
Memo for a beginner manicurist
And now about all these means in more detail.
Lamp for baking nails
Without it, gel manicure is impossible. It is under the influence of UF rays that the varnish polymerizes. Without it, gel polish simply does not harden. There are two types of lamps - LED and UF lamps. For the first option, get ready to shell out 5,000 rubles. The cost of the second option starts from 1,500 rubles, and you can find even cheaper on Chinese sites. Let’s make a reservation right away: the price of the pampa does not affect the quality of the manicure. The main thing is that its power is not lower than 36 Watts (if you choose a UF lamp).
UF lamp
The main advantage of the LED lamp is that it is durable and does not require replacement elements.
LED lamp
In the case of UF lamps, you will have to change the lamps every 0.5-1 year. But, again, you can buy replacement lamps very inexpensively on Chinese websites. In addition, when choosing an LED lamp, be prepared for the fact that not all types of varnishes will suit you, and with such a lamp you will not be able to do gel extensions. The UF lamp is suitable for all procedures.
Therefore, our advice is that it is better to stick with a UF lamp. By the way, quite recently a hybrid of UF and LED lamps appeared, but their prices are unreasonably high.
Verdict - even the cheapest lamp, including those purchased on Chinese sites, is suitable for home use, the main condition is that the radiation power is not lower than 36 Watts.
Pushers, orange sticks, nail files, buffs, polishers, lint-free wipes
All this is available in abundance on the same Chinese sites, and in terms of quality they are in no way inferior to professional ones. The only disadvantage you may encounter is the short service life. But this is also the main plus - for hygienic purposes it is better to change the material more often. The cost of a full set of nail files will cost you around 100 – 200 rubles. We buy lint-free napkins there, and the more, the cheaper - 50 napkins will cost about 70 rubles, 200 - 150. But you can also use ordinary disposable handkerchiefs.
Set of nail files and sanders
Verdict - save money.
Manicure scissors and tweezers
This is where you can't save money. It is better to purchase these devices in professional stores. High-quality devices carefully cut the skin without injuring it and do not require sharpening for a long time. Chinese analogues can cause injury. The cost of tweezers is around 700 rubles, scissors are a little cheaper.
Manicure tools
Verdict - we choose only high-quality tools.
Auxiliary products – dehydrator and primer
A dehydrator, also known as a degreaser, is needed to thoroughly degrease natural keratin, without which the gel polish simply will not stick to your nails. It is also needed to remove the sticky layer. The price is around 500 rubles. for 250 ml. bottle. Many people advise replacing the dehydrator with regular alcohol or acetone. It’s possible, but still, a dehydrator dries the nail plate much better. Alcohol and acetone can change the color of the varnish and do not remove the sticky layer well enough, as a result of which it is not always possible to achieve the desired shiny effect.
Dehydrator (degreaser)
Primer. Provides additional adhesion of natural nail keratin to artificial material. Many people believe that it is enough to thoroughly degrease the nail surface. But still, the primer will ensure a longer service life of the nails, and if you have a weak plate, then you simply cannot do without a primer, because it additionally strengthens the nail. The price for a 20 ml bottle is about 200 rubles.
Verdict - you can replace it with cheap alternative products or do without a primer. You can... but it's not worth it. We buy only in specialized stores, we don’t even think about Chinese options.
Gel polishes
I would immediately like to debunk the main myth of the nail industry - gel polish and shellac are not different variations of coatings, and not even a type of varnish. Shellac is simply one of the most popular brands, a pioneer, so to speak, in the gel polish market, as a result of which the brand name has become a household name.
Interesting
If you don’t want to “wear” the same design for a long time, you can easily change it. It is enough to apply a slider or other decor over the boring manicure and re-fix it with a top coat. Or you can carefully remove the top layer by sanding and apply a new color. But you should often change the finished manicure, since any changes can affect its appearance and quality.
First of all, you will need a base gel coating and a finishing coat (top). We don’t skimp on them - only the highest quality and proven brands, the same “shellac” is an ideal option. Why? The base not only protects the nails from pigment penetration, but also additionally creates a reliable frame for the nails, which is especially important for those young ladies who complain about thin and fragile nails. But most importantly, the reliability of the gel polish’s attachment to the nail surface depends on the quality of the base coat. The quality of the top determines the manicure’s resistance to damage and chips. The issue price is from 1500 rubles. for both means.
The most important elements in creating a manicure with gel polish are the gel base and gel top.
Colored varnishes. Their qualities are not as important as the color itself. Since they play only a decorative role. Of course, you shouldn’t buy frankly low-quality varnishes, but the option from Chinese sites is also suitable. The only thing that can disappoint with cheap varnishes is that after six months they can delaminate into composite components. In principle, the same thing will happen even with famous brands, but in 2-3 years. You decide. The price of a cheap analogue starts from 70 rubles. per bottle, original version - from 500 rubles. You decide. But remember that varnishes of the same brand are best attached.
Color gel polishes have a rich color palette
Verdict - base and top only from proven brands, you can save on color.
Care products
Products such as cuticle oil will cost about 100 rubles. Enough for more than one year. There is no need to chase brands here, the main thing is quality. We don’t consider Chinese ones, their quality is zero. By the way, oil can also replace regular hand moisturizer.
Cuticle oil
Verdict – inexpensive, high-quality product.
Decorative elements
These are sliders, rhinestones, sparkles, etc. All of them are presented in abundance on Chinese websites, the prices are the most affordable, and the quality is acceptable.
Set of rhinestones and nail decorations
Verdict - you can get it cheaper.
Manicure according to GOST: basic requirements
GOST R 51142-98 “Household services. Hairdressing services. General technical conditions" applies to nail services and more. All salon procedures are classified by type, according to which they have certain quality standards. In general, the main idea of the new law can be formulated as follows: a manicurist (or other specialist) must provide services to the client according to the client’s wishes and observing all safety measures.
General technical requirements.
They relate to almost all components of the salon service: premises, materials used, tools and equipment, the master’s workplace, education and classification of the master, as well as documents confirming compliance with the requirements. For example, all materials and technological equipment included in the List of Goods Subject to Mandatory Certification must have an appropriate certificate and be used in accordance with the rules. And in order to minimize the risk of infection and development of diseases of the nail plate, it is necessary to comply with sanitary standards, and manicurists must have at least 250 hours of training behind them.
-66%
Patrisa Nail, Disinfector, 100 ml
Disinfectant for hands and tools. Alcohol content: not less than 60%.
(28)
350 RUR 120 RUR
350 RUR 120 RUR Buy
IRISK, Glasperlene sterilizer ABC “IRISK”
Ball sterilizer for processing instruments.
(70)
RUB 1,310
RUB 1,310 Buy
TNL, Dry oven
Dry heat cabinet for sterilizing instruments.
(460)
RUR 4,099
RUB 4,099 Buy
Safety requirements.
These requirements are, of course, aimed at ensuring that during the procedure nothing threatens the life and health of the client. In the first place comes the expiration date of all accessories, mandatory disinfection, sterilization and sanitary treatment, time and material consumption standards, as well as the need to take into account contraindications and individual characteristics of the client.
SMart, Replaceable file, boat L, 180 grit, 50 pcs.
Disposable abrasive file for base file. Length: 18 cm.
(2)
450 rub.
450 RUR Buy
Requirements according to category.
Each beauty salon or hairdresser has its own category, indicating the level of quality of the manicure, pedicure, haircut, massage and other procedures provided. The new GOST provides mandatory and optional requirements for all categories. Of course, the highest bar is set for luxury establishments, and the fewer mandatory requirements, the lower the category of the salon or hairdresser.
Technology for applying gel polish at home
If you have already had a manicure done by a professional, then visually the technology is already familiar to you, all that remains is to hone the practice.
So, the stages of applying gel polish at home:
- We do a hygienic manicure. You can't go anywhere without him. The stability of the gel coating depends on how well the nail plate is prepared. So we cut off the cuticle and lateral ridges as much as possible, and remove the pterygium. Shape the free edge.
The procedure for performing a hygienic manicure
- We prepare the nail plate. If necessary, remove the gloss from the nail using a soft buff. Some gel polishes do not require filing of the nail, for example, shellac brand gel polishes. We carefully degrease the nails and apply primer, especially paying attention to the end parts of the free edge of the nail. It is important that the time between applying the primer and coating does not exceed 15 minutes; if you do not meet the deadline, apply the layer again.
Preparing the nail plate: shaping the free edge of the nail
Preparation of the nail plate: degreasing
Preparing the nail plate: applying primer
- Applying the base layer. Apply a very thin layer of base to the entire surface of the nail, not forgetting the end parts. The main thing is to ensure that the top does not leak onto the cuticle and side rollers. If necessary, correct leaked varnish.
Applying the base
Important
We follow the rules for applying gel polish: first apply the coating to four fingers of one hand, except the thumb. After which the varnish is dried in a lamp. The same is done with the other hand. Thumbs are painted and dried separately! If you apply varnish to your entire palm at once, there is a risk that the varnish will run off your thumb.
- Applying color. It is applied in two layers and each one is baked in turn in a lamp. The first one is very thin. Don't be afraid that it will turn out uneven, the second layer will fix everything. We also apply it very thinly. It happens that the second layer also colors the plate unevenly. Then apply the third one. It is better to dry the varnish three times in a lamp than to get a deformed or bubbling coating, as happens with a thick layer. We also make sure that the varnish does not leak onto the border of the skin. It is not necessary to paint the ends at this stage, but it is not forbidden.
Applying color
It is important to follow the technique of applying varnish. Pay attention to the diagram:
Scheme for applying gel polish to the nail surface
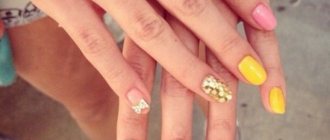
- Applying decor. There is complete freedom of imagination here. You can use glitter, stickers, sliders, rhinestones.
Important
We reduce the sticky layer only in the final phase. Because it is precisely this that ensures the adhesion of each subsequent layer.
- Consolidation. Top coat is applied. The layer is applied quite densely. After all, consolidation of the entire result depends on it. Don't forget to seal the ends. If you miss this moment, the manicure will come off your nails.
Applying top coat
- Removing the sticky layer. Everything here is elementary. Apply degreaser to a napkin and thoroughly wipe each nail.
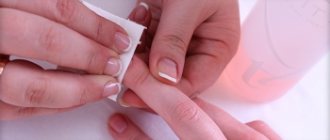
Removing the sticky layer
- Apply moisturizer to the cuticle.
Moisturizing the cuticle
This is the sequence of applying gel polish at home.
You can learn more about the procedure for applying gel polish at home in the video.
