Stamping has recently become increasingly popular among the fair sex. However, for many, this method of applying patterns to nails remains a mystery. And many people don’t even know what the method of transferring patterns on nails using a stamp is called. So, stamping patterns on nails is called stamping.
When using the stamp for the first time, the design may not turn out very well. But with practice comes perfection. Therefore, it will take practice and stamping to achieve amazing patterns.
How to use a nail stamp step by step
First you need to prepare the tools, namely: a primer, paint for stamps, a couple of contrasting varnishes, a special scraper or an unnecessary discount card, cotton swabs, nail polish remover, a set of stamps.
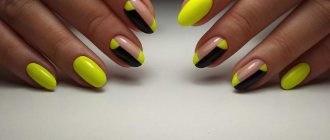
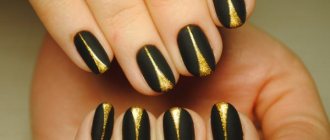
Stage 1. Stamping varnish must be darker or lighter than the base one. It doesn’t matter in what shades the base will be made, the main thing is that the pattern is contrasting.
Stage 2. So, first you need to cover your nails with base varnish. Then let it dry completely before applying the next layer. Wait until it dries completely again.
Stage 3. Take a stamping (most often it comes in the form of a metal disk or rectangular plate). Then apply varnish to the engraved pattern - you need to use a lot of varnish, since the pattern must be completely covered with varnish.
Stage 4. After using a discount card, you need to remove excess varnish.
Step 5. Then you can apply the stamp to the nail. In this case, you should lean the stamp against the edge of the nail and roll it along the nail plate, trying to leave an imprint on the surface.
Stage 6. Then duplicate all stages of the process on other nails. If the polish is imprinted on the surface of your finger, then you can remove it using a cotton swab dipped in nail polish remover.
Stage 7. After decorating the nails with a stamp, you need to cover them with a fixative.
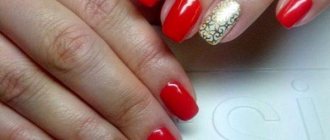
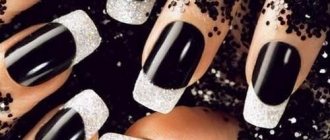
In this way you can decorate any manicure option, be it a French manicure or lunar nail art.
In the video below you can learn the secret of simply applying a pattern with a stamp.
How to do stamping correctly
To do stamping, first of all you need to prepare your workplace - make sure that there are all the tools on the table that you will need in the process of creating a manicure. It is important to correctly select colors that will successfully combine with each other, and only after that you can proceed directly to the procedure.
Regular gel polish
An important point is preparing nails for coating. First of all, it is necessary to treat the cuticle, shape the nails and degrease the surface. For this, in addition to regular hand washing with soap, special liquids are also used.
The procedure then includes the following steps:
- Application of primer. The primer is a transparent base that provides a better application of the base color layer. After using the primer, you must let it dry completely.
- Applying a colored base in one or two layers (this depends on the consistency and pigmentation of the composition).
- Processing the base layer with a special brush (sealing).
- Drying nails in a special UV lamp.
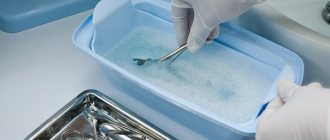
- Treating the metal surface and the stamp itself with acetone (this is necessary to remove dirt, dust and varnish residues from the working surface).
- Applying varnish to a metal disc: take a small amount of coating, which is evenly distributed in a thin layer over the surface, filling all the details of the engraved design.
- Transferring the image to the soft surface of the stamp. To do this, it is pressed tightly against a metal disk so that all the details of the image are imprinted on it.
- Drawing on nails. The stamp is firmly applied to the desired area, after which it is rolled over the surface of the nail, transferring the image.
- Drying. First, you need to let the design dry for a few minutes, and then you can dry your nails using a UV lamp.
- Applying the final layer. The top coat should be transparent and may also contain fine glitter.
- Final drying.
Reversible gel polish
The reverse stamping method allows you to create a more complex and original design. However, this procedure is considered more complex and requires certain skills and experience to perform it.
Main stages:
- Basic manicure (cuticle removal, shaping, degreasing).
- Apply primer and colored base coat.
- Drying.
- Applying varnish to a metal disc, spreading the coating using a scraper.
- Transferring an image to a stamp.
- Additional drawing of details directly on the stamp surface. To do this, use special thin manicure brushes.
- Drying the stamp in a UV lamp (no more than 20 seconds).
- Removing the resulting pattern from the surface (use tweezers).
- Transferring the image to the nail, securing the result with a top coat.
- Final drying.
Stamping with acrylic paints
Despite the fact that gel polish is a very affordable means of creating a manicure, the question of what can replace it remains relevant. The most popular alternative medium is acrylic paints. They compare favorably with their cost, but do not always have the desired thickness and consistency. Therefore, unfortunately, it is impossible to guarantee a positive result.
The steps of stamping using acrylic coating are standard; the sequence of actions does not differ from the procedure using gel polish. However, there is one important point: before using the product, it is recommended to hold the jar of the composition open for 10 minutes - this will make the paint thicker and more suitable for use.
Transparent nail stamp
The positive features of a transparent stamp for stamping are a wide variety of patterns, a minimal set of tools and products used for manicure, as well as the ease of removing and replacing the design on the nails.
The described type of stamp has a hollow handle, which makes it possible to control the process of applying the design and correct it in time, which is quite convenient. At the beginning of the process of working with the stamp, you should slightly correct it using a manicure file.
It is also important to note the fact that the pad of this stamp has a harder surface than the silicone one. The advantage of such a tool is that, thanks to its transparency, you can control the entire process of applying the pattern. This is quite convenient, especially when applying patterns at the location of the jacket.
Scotch
We also include adhesive tape in the list of accessories for home nail art. Using adhesive tape we draw straight lines and shapes. We cut out the desired shape, glue it onto the nail, painted with varnish, and apply a contrasting shade on top. All that remains is to carefully remove the tape, our version of a professional manicure tool.
Silicone stamp
It is necessary to consider in detail the key forms of silicone stamps used for stamping, their characteristic features and advantages. In general terms, we can say that nozzles made of this material are quite soft and flexible, but their various modifications are endowed with varying degrees of elasticity.
A large number of specialists in the field of manicure consider a rectangular stamping stamp to be the most convenient in the process of performing work. This working surface facilitates the application of a pattern on the entire surface of the nail plate, with the exception of the thumb. The base can be separated from the handle, but it is presented in a single copy in the set.
There are also non-original rectangular stamps of more impressive sizes. They are endowed with a more rounded surface, and their length can be up to 70 mm. In this case, they are most suitable for applying a more integral pattern to the surface of the nail plate. They can also be used for reverse stamping in conjunction with stencils with a three-dimensional pattern.
A large silicone stamp will help in the process of applying a solid pattern to any nail plate. Due to the suitable material, it is quite soft and elastic to work with.
The ball-shaped working head can be easily removed, and the silicone pads are ideal for thin and brittle nails and for very convex and long nails.
What can replace the tool for stamping patterns on nails?
In the case when it is not possible to purchase tools for stamping, but there is a desire to create your own exquisite design, then you can make a stamp with your own hands, and it is quite simple.
To do this, you will need several appropriate plastic materials for the pad. For example, dense foamed polymer or silicone. The most important thing is that the chosen base does not change its shape much when pressed, but at the same time has good plasticity.
You also need to take into account that the pad should not absorb much varnish, so a material such as foam rubber is not suitable for creating a base. The handle should be such that it is comfortable to place in your hands. And the pad should be of such a size that it is enough to cover the entire surface of the nail.
Stamp
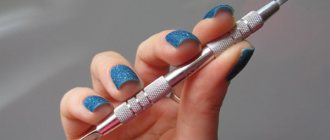
There are stamps to speed up the work. This tool has three parts: plates with patterns, the stamp itself, and a device that levels the varnish on the plate with the pattern. Apply a drop of varnish to the selected design, align it, press with a stamp and place the imprint on the nail. The drawing turns out smooth and clear, but without accuracy the effect is completely different!
Reviews about stamping
Marina, 27 years old:
“I really like giving myself an elegant manicure using stamps. I also experimented with a large number of thick varnishes and concluded that the best option for me is El Corazon varnishes.”
Juliana, 24 years old:
“Finally I could afford to fulfill my old dream and bought a transparent stamp for stamping. The shape is very comfortable, the pad is, however, a little harsh (silicone gel), but it does not need to be treated with a buffer, it can be easily cleaned with tape. At first, of course, I couldn’t find a “common language” with him. But then I got better at it and now everything is wonderful. So, overall, I’m happy with the stamp!”
Katya, 33 years old:
“For some reason I’m not particularly good at working with stamps. I can’t find any varnishes with the required thickness. It’s probably better to buy a special varnish and try again, I hope everything works out.”
Basic tools for nail design and how to replace them
Kira Berdyugina |
November 6, 2014 | 12808 Kira Berdyugina 11/6/2014 12808
If you decide to try your hand at nail art, you can't do without these 9 tools and devices. Use our tips to replace them with improvised means.
Professionals use a huge number of special tools for nail art, but a beginner only needs to replenish his manicure cosmetics bag with only nine things.
Dotters
The name "dotter" comes from the English word "dot". This tool fully corresponds to its name: with its help, dot patterns are applied to the nail: polka dots, flowers, and so on. Dotters come in a variety of sizes to allow you to make dots of varying diameters. When choosing, pay attention to the convenience of the handle. The dotter should fit well in your hand and not slip.
Dotter can be replaced with all sorts of available means. For example, a pin with a hat.
Nail art brushes
Just like dotters, nail art brushes come in all shapes and sizes.
Thin brush
Thin brushes are used for fine work: drawing contours or fine lines.
Wide brush
A wide fan brush is ideal for creating a spray or gradient effect. Use it to apply multiple shades of polish to your nails at the same time.
Angled brush
Angled brushes tend to be stiffer and allow for more confident strokes and precise application of polish.
If you are a beginner nail artist, you don’t have to immediately buy a professional set of brushes. Try replacing them with regular paint brushes.
Nail art pens
Special pens for nail art operate on the principle of a corrector pen. They are extremely comfortable and make life easier for a beginner. To avoid ruining your manicure, try drawing the desired pattern on a flat surface, and only then apply it to your nails.
To achieve a fine, even pattern, use a poster pen. The effect will be the same as from a nail art pen.
Nail stickers
Stickers for nail design are a simple and quick version of “lazy” nail art. Why painstakingly draw patterns on your nails when you can use a ready-made sticker?
Gently apply the sticker to the nail, press and cover with top coat. Ready!
You can use pictures cut out of thin paper as stickers.
Nail art tape
Thin tapes for nail design will allow you to create unusual geometric patterns. They come in all kinds of colors, including metallic shades, and will liven up the most boring monochromatic manicure. And most importantly, the stripes will turn out perfectly even!
Nail art tape can be used both as a stencil and as nail stickers.
Rhinestones
Sparkling rhinestones, when used wisely, will add not only sparkle, but also elegance to your manicure. The important point here is not to overdo it with the number of rhinestones on your nails. Apply the rhinestones carefully, smearing the base with clear varnish so that they adhere tightly to the nail.
Small beads and beads are also good for nail design.
Sponges for nail art
Special sponges for nail design allow you to create a beautiful ombre effect. To do this, apply varnishes of two colors on a sponge in the form of a gradient and apply it to the nail.
Instead of a special sponge for manicure, you can use makeup sponges or a regular sponge for washing dishes.
Stamps for nail art
Ready-made stamps are another way to quickly and easily draw beautiful patterns on your nails. In addition, the stamp makes life easier for those who do not know how to draw smoothly.
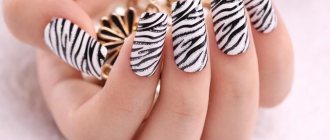
You can make stamps with your own hands using pencils and erasers. Using a blade, cut out the desired pattern on the eraser - and the stamp is ready! The easiest way to deal with an animal print (for example, leopard spots).
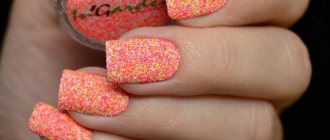
Glitter
Nail glitter is a good alternative to rhinestones and patterns. But you need to use them carefully: a large amount of glitter is difficult to wash off from the nail.
Instead of glitter for nail art, you can use ordinary glitter for needlework. With their help, you can also turn any polish in your makeup bag into a glitter polish.
Based on materials from stylecraze.com
BeautyManicure and pedicureManicure