Preparing nails for coloring: where to start?
Before you learn how to paint your nails beautifully, you need to understand how to prepare them for painting. Preparing the nail plates is a fairly important procedure that contributes not only to the perfect application of varnish, but also to the overall impression of the manicure. The preparation process includes:
- processing of side rollers;
- cuticle trimming;
- alignment of nails to the same length;
- removing burrs around the plates;
- nail polishing;
- giving the nails the desired shape.
Processing side rollers
Cuticle trimming
Nail polishing
Nail shape
To paint nails at home, you may need a toothpick, a cotton swab, cotton pads, and nail polish remover (alcohol, acetone) as improvised preparations. They will come in handy if the manicure is done poorly, with marks. Even experienced and skilled nail technicians use this “first aid” kit, because no one is immune from mistakes and blunders. Also, if you get quick-drying polish on your skin, you need to remove it as soon as possible - otherwise, wiping it off later will be a big task.
How to beautifully paint short nails
The appearance of a modern woman includes many important components. One of these important things is well-groomed hands and, in particular, nails. There is a stereotype that only long nails can look bright and sexy. Women always decide for themselves what men like, although, in the opinion of men themselves, they like a beautiful manicure on short nails.
Under the influence of such an erroneous opinion, many women grow them artificially, causing harm to their own, or after growing their own nails, they are faced with the inconvenience that they bring to them. But to achieve attractive nails, you don’t have to endure inconvenience. In this matter, “beauty does not require sacrifice.” There is a simple way - you need to turn your small shortcomings into big advantages.
Doing a manicure at home
You can do a simple and beautiful manicure at home; you don’t have to go to a manicure salon. You just need patience and skill. You will also need the appropriate tools that it is advisable to have at home - a cuticle shovel, manicure scissors and a nail file. Before you do this at home, you need to place your hands in a bowl of soapy, warm water and hold them there. After this, you can do hygiene procedures at home, which it is advisable for everyone to do.
How to increase them
Based on the fact that it is not possible to grow long nails, you can increase their length using the cuticle, which covers part of the nail bed. By moving it aside and carefully cutting it, we get more space, a flawless and neat look. If you wish, you don’t have to cut the cuticle; you can simply move it further away.
What types of nails are there?
There are four types: round, pointed, oval and square. What shape to make them depends on the shape of the nail bed and hole itself. There are certain rules, following which you can give them the most suitable look. If the hole is round, then you need to file it in the form of a circle; if the hole is square, then you need to file it in a square manner. If the nail is wide and short, you need to file it in the form of a rectangle and slightly round the edges; if it is wide and long, it is better to file it in the form of a rectangle, but with oval edges.
Manicure color
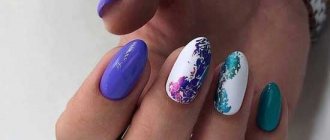
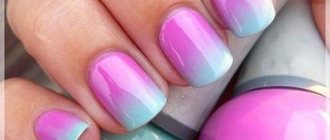
Having completed all the necessary manipulations, you can begin choosing a varnish. There are several tips on this matter. Some representatives of the fair sex believe that short nails should be painted with light or pearlescent varnish. But if you have short nails, it is better not to paint them in light or pearlescent colors, as they make the nails wider and all the flaws on the surface become visible. It is necessary to select varnishes that are not too dark or bright colors. It is also not recommended to use more than 3 tones to get the most aesthetically pleasing manicure.
Technique for applying colored nail polish
So, your nails are the same length and desired shape, can you apply the first coat of polish?
Stop, before you start painting, you need to make sure that your nails are clean and there are no traces of hand cream or other greasy cosmetics left on them. Such products can interfere with the even application of the varnish and contribute to its rapid peeling. To clean your nails, you can use nail polish remover, regular acetone, alcohol, or simply wash your hands thoroughly in warm water and soap, and then dry them well. The varnish will last a long time and will lie more evenly on a completely dry surface.
Applying base coat for varnish
The next step in learning how to paint your nails neatly and beautifully involves applying a basic base to them. The base coat allows the polish to go on smoother and more beautiful, as it fills in all the unevenness and roughness of the nail surface, and also protects the nails from the negative effects of the aggressive components of the base coat.
Usually the base has a transparent color and is applied before the first layer of colored varnish. It contains various useful substances: talc, silk, etc. As a base, you can use a varnish with a strengthening effect - the main thing is that it is transparent and does not affect the color of the main coating. In addition, the base prevents the colored composition from penetrating deep into the nail and giving it an unsightly yellowish tint over time. Therefore, a light or transparent varnish on such fingers will look more impressive.
Applying color coating to nails
[yandex2] [google2]
Finally, comes the most interesting and creative process - painting your nails with colored varnish. How can you paint your nails in the most beautiful, original, correct and bubble-free way?
First of all, you should pay attention to the quality of the coloring agent. Only a high-quality product with a valid shelf life and not diluted with acetone and other means can turn the painting process into an exciting experience. A good polish will stay on your nails for a long time and will not start to come off within a couple of days after painting.
After choosing the color of the paint composition and the intended design, you can begin painting. To do this you need to do the following:
- Warm the polish by holding it in your fist or placing it in a warm place. This way the product will acquire a homogeneous consistency and lie smoother, without bubbles.
- Adjust the direction of the incident light. For right-handers, it should fall to the left, from above, for left-handers, on the contrary - to the right, from above. The wrong direction of the light will not allow you to determine how the nails are painted - correctly or not, whether there are flaws in the manicure, etc.
- It is recommended to start coloring with the little finger, gradually approaching the thumb.
- You should not try to paint the entire plate with one stroke - smearing a small amount of paint will cause gaps to appear and will apply unevenly.
- You should start applying varnish to the nail from its middle, gradually moving to the base and then to the sides.
- How to properly paint short nails with polish? To do this, you need to take a small portion of the coloring agent with a brush and distribute it evenly on the nail plate. If you want to lengthen short nails, then you do not need to completely paint over them from the sides. A video or a detailed photo report can tell you more about how to beautifully paint short nails.
- The consistency of the coloring composition should not be too thick, but it should not spread over the plate like water: the thickness should be medium.
- In order to paint your nails simply, quickly and beautifully, as experienced masters do, you must always apply two layers of colored coating. It is in this case that the color of the varnish will be more saturated, intense and bright. Each layer should be given time to dry.
- If during the painting process the coloring composition gets on the skin, and it is not possible to wipe it off completely without touching the nail, you can remove only the largest strokes. Small ones will disappear on their own during the day if you wash your hands several times with soap and water.
- During the painting process, you should make sure that the varnish does not get on the cuticle, otherwise the whole impression of cool nail art will be ruined.
- After applying two layers of the base coat, it is important to apply a fixative - it will prevent the beauty from quickly disappearing from the nail plates.
- After applying the fixing agent, it is important not to get down to work for at least half an hour - the paint should dry well.
Secrets of creating the perfect manna
It is no secret that fingernails do not have an ideal structure, and that is why it is necessary to adhere to all the rules when creating a manicure. Correctly it should be like this:
- Before applying the main varnish to the nail plate, you should remember about the health of the nails, and therefore for this you need to create reliable protection. Every fashionista should definitely remember that any varnish, especially colorful ones, should not be applied to unprotected nails, since with this technique you can not only ruin the manicure, but also provoke pigment spots that can form as a result of the damaged structure of the nail;
- To create a neat manicure, you need to know how to use a brush correctly during the nail painting process. Visually, you need to set a distance from the cuticle and start painting your nails. To make the manna look beautiful, you need to apply the varnish slowly along the periphery of the nail, and then along the side edges, alternately removing excess varnish into the bottle;
- The process of applying varnish occurs in two rows for a more beautiful look.
Editor's choice: Fashionable nail polishes 2021: photo selection
The problem for many girls is that they do not feel the amount of polish they use to paint their nails. This is where problems with manicure begin, because then there are defects around the nails.
Painting nails at home
How to beautifully, easily and correctly paint your nails at home?
Everything is very simple here: all you need is a good supply of time, a little patience and endurance, as well as the necessary tools and means for manicure. The process of painting nails will become more pleasant and of high quality if you sit comfortably in a chair or chair, place a small pillow or roll of rolled fabric under the hand being painted, adjust the lighting, turn on your favorite music and get down to business with all the confidence and desire. The emotional mood in this event is no less important than the quality of the varnish and the set of necessary accessories.
A big challenge for girls who do their own manicure is the procedure of applying varnish to their right hand. How to paint the nails on your right hand correctly, with two colors, one, and even learn how to make pictures and drawings? Here are some small details:
- In order for a right-handed person to paint his nails unusually and beautifully on his right hand, like a skilled master, you need to carefully examine the nail plates of your hand;
- then you should choose one of the nails and focus on it;
- Having dipped the brush in the varnish, you need to begin to carefully and carefully apply it to the plate, starting from the right side and gradually moving to the center, and then to the left side;
- After allowing the first layer to dry, you should paint the nails with the same care with the second layer of paint.
How to paint your nails
How to paint the nails on your right hand
Paint your nails with red polish
Carefully paint the nail
Expert advice
Hands are a woman’s calling card, so you should be especially careful about the appearance of your marigolds, since the “card” will have to be presented to men. To avoid having to blush for an unsuccessful home manicure, you must follow the recommendations of specialists:
- Before you start covering your nails with different colored polishes, it makes sense to practice. You can paint your nails with a colorless medicated varnish, which is easy to find at the pharmacy. Training will help both to fill your hand and strengthen the plates before the main staining;
- You can achieve a matte finish by carefully bringing your fingers with painted nails to a pan of hot water from which steam is coming out;
- To make the varnish look brighter, it is applied in several layers;
- If you lubricate the skin around the nail with PVA glue before applying the composition, it will be easier to remove excess varnish. They are simply removed with the adhesive film that forms when drying;
- Translucent varnish in faded shades should be applied over white. This will make it look brighter;
- If you only have clear varnish, you can turn it into colored varnish. To do this, you need to pour a little powder into the bottle and add a couple of beads of suitable size that will help mix the components;
- To make stripes or holes on your nails, you can cut out stencils from tape and stick them on your nails before painting. You can get patterns by painting with contrasting varnish on painted nails. Use a needle or toothpick as a brush.
Manicure stencils help you create a unique design
The main condition for a quality manicure is having free time. Slowly, following the recommendations step by step, you can create a wonderful design, no worse than a salon one. Although it will not last as long as we would like, it will still have time to show off on the nails of the hostess, who will receive many compliments. Since painting your nails beautifully on your own is not difficult, you can change the chosen design very often.
