Before you start creating an artistic design for your fingertips using dust, you need to do a hygienic manicure: we file the plates to give them a neat and beautiful shape, then we remove the cuticle, polish the plate and cover it with a base for varnish. After this, you can move on to creating a real masterpiece using nail dust.
What is this shiny, interesting decor? (video)
Dust is the best option for plate design, giving the manicure a mesmerizing, attractive shine and an expensive, impressive look. It creates a simply amazing 3D effect, which is simply a win-win option for celebrations; therefore, this decoration is quite often used when creating wedding nail art. Most often, decor that shimmers in the light is used to complement a ready-made pattern or design from other types of jewelry, but in some cases, craftsmen also use a more laconic solo option.
Another advantage of such an unusual and expensive decoration is that it is very easy to apply to your nails. A little practice and patience and the design shimmers in the light is ready!
https://youtu.be/https://www.youtube.com/watch?v=EJeGfS5_cpk
What is a nail rub?
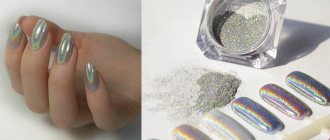
The rub (pigment) is a shiny powder with a soft structure. This is a fine polyester dust that forms a mirror-like smooth coating on the nails. The product is made from various materials, which determines the color and intensity of the shine of the manicure. The decorative coating is resistant to ultraviolet radiation, moisture and other external factors. Making a mirror, pearl or holographic manicure for yourself will not be difficult, which is the main advantage of the new product. The technology for using powder involves the presence of a coating layer on the nail plate to fix it. The following are used as a base: gel polish; acrylic; top coating.
A convenient compact box with pigment will not take up much space in your cosmetic bag. From the offered assortment, you can select many different options and use them separately or in combination with each other, creating an exclusive nail design. It is worth considering that the tone of the varnish layer determines the shade of the manicure.
Rainbow dust – “DEFILE BRILLANT” (photo, video)
Now there are a huge number of manufacturers producing various nail care and decoration products; they could not ignore the dust for nails, which is simply a pleasure to use.
Result:
- dries in a second after application;
- magical fingertip design.
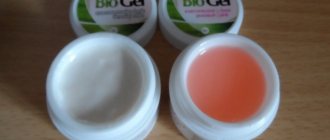
Characteristics:
- bioceramides included in the decor strengthen the plates;
- ceramides, moisturize the surface of the nails;
- Diamond crushed dust pigment gives the design a stunning shimmer:
- This decor has passed all the necessary dermatological tests.
Advantages:
- quick manicure;
- The coating shines with every hand movement.
Manicure with rubbing: advantages and disadvantages
It looks very original. Its owner is unlikely to be able to remain unnoticed. In addition to aesthetic qualities, the pigment has the following advantages: a high degree of light reflection, exceeding metallic effect coatings or nail art foil; ease of use: even a teenager can handle it; a large selection of colors that can be combined with each other; increased durability of manicure, subject to application technology;
Suitable for and long. Among the shortcomings
There is a large consumption of material to create a manicure. The overconsumption is especially noticeable during the first applications, when the hand is not yet trained to distribute the powder evenly. You also need to pay attention to the thickness of the layer of gel polish and rubbing; if there is an excess of them, the opposite effect occurs.
We use silver, gold dust and glitter to create a brilliant nail design (video)
https://youtu.be/https://www.youtube.com/watch?v=WMPk9GPxzNQ
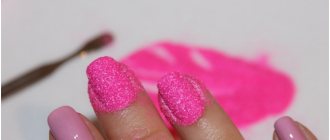
Unlike varnishes with various glosses that cover the plate, this decor must be used pointwise.
Take the brush and dip it in the sand, and then touch the plate covered with the main shade in the place you want. In this case, the enamel should not yet dry out. If you draw a twig by applying silver sand on it, you will depict real frost. The result will be a beautiful winter nail design.
Rubbed nails: types of material
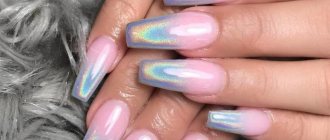
Inspired by women's increased attention to mirror rubbing, manufacturers have released many types of powder. It differs in size, color, degree of shine.
Specialists in salons often use the following types of pigment: multi-colored powder (melange) to highlight several nails on the hand to make an accent; mirror powder applied using a sponge; dry glitter.
Among the main types of rubbing, the most popular are: mirror; pearl; holographic; silver; golden
For a detailed overview of all types of rubbing, as well as the most current designs, see the next publication!
Multi-colored French
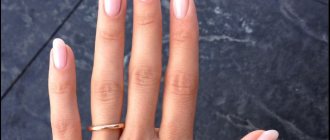
This pattern is based on a French classic manicure. To create it you will need stencils, several varnishes of different shades (for example, beige and white) and glitter dust. First we apply the base varnish and let it dry. Then we glue the templates onto the tip of the plate. The area where these stencils are glued is called “smile line”. It goes from the tip of the plates to its bed. We paint this area with another enamel, for example, white, and decorate it with shiny sand using a brush.
For a French manicure, you can also use a white special pencil, which can be used to cover the tip of the plate on the back side, and then apply glitter or dust on top, if desired.
Rubbing on gel polish
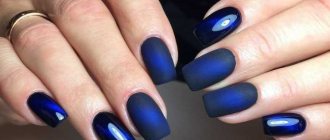
Rubbing is most often used on the now fashionable gel polish coating. It is an ideal basis, allows you to get a mirror and iridescent manicure, and realize any of your fantasies in the world of Nail-art. The pigment is applied immediately when the gel polish layers dry, otherwise nothing will work.
Application rules
Key points to pay attention to when using the rub:
- The gel polish base should have a good sticky layer. You can apply pigment to the top coat. It is better not to use finishes that are easy to use and currently popular without it; the glitter will not stick well.
- The result is influenced by the color of the substrate, that is, the gel polish itself. By changing it, you can get different shades with the same pigment.
- Rubbing, especially the mirror type, looks beautiful on a flat surface. This coating can highlight imperfections, so it is important to pay attention to nail preparation.
- You should not heavily cover the color by making a thick base for the nail polish, as this may affect the durability. One or two thin layers of gel polish is enough.
Important! When using mirror and holographic finishes, it is important to use a good finish that does not absorb shine. Matte tops are not suitable.
What is needed for application
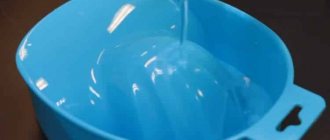
In addition to the standard set of gel polishes, base, top, bonder and lamp, you will need a brush or applicator; it is even better to take a special sponge, if available. They are needed to scoop the pigment from the jar and apply it to the nail. You can use a small spatula for this. It is convenient to use rubber or silicone pushers and sponges. They are soft, comfortable, and can be used to apply dust and then rub in. Additionally, you will need a cotton pad or swab with which you will need to remove any remaining rub from the area around the nail and from the roller.
Step-by-step application technique
Before applying the rub, you need to prepare everything you need for a manicure, decide on shades and designs. A completely mirror coating on all nails is not always done; more often they focus on 1-2 fingers of each hand.
How to use nail rub correctly:
- Treat the nail using the standard manicure method, straighten, degrease and apply bonder. Immediately after this, cover the plate with base. Dry in a lamp.
- Apply a base of colored gel polish. Dry. If one layer is not enough, it does not overlap, then repeat.
- Secure the colored layer with a topcoat with a sticky layer. Dry the nail in a lamp. You can apply the powder directly to the sticky layer of gel polish, this is also done.
- Using a brush or applicator, cover the nail plate with a layer of rub. There is no need to save, no bald spots should remain.
- Use your finger or applicator to rub the pigment into the plate. Do this until it acquires a mirror shine. Pay special attention to hard-to-reach places. Check the quality of the work and inspect it carefully.
- Dry the nail for another 30 seconds to allow the glitter to adhere.
- Apply topcoat to nails and dry for 2 minutes.
After a manicure, colored particles of decorative rub remain on the cuticle and in the rollers. It is convenient to remove them with a napkin moistened with a cleaner. To clean hard-to-reach places and recesses, you can take a toothpick with a cotton wool wound on the tip.
Video: Subtleties of using mirror rubs
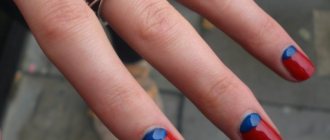
Nail design with imagination
For this type of nail art you will need a toothpick or a needle, two or more enamels, and it should be thick and quick-drying, as well as shiny sand. We apply varnishes in various horizontal and vertical stripes or in just one layer, but interspersed with a different tone. Afterwards we mix the varnishes with a toothpick or a needle. The result will be all sorts of chaotic swirls that are all the rage right now. To add solemnity to your manicure, you can add iridescent sand in some places.
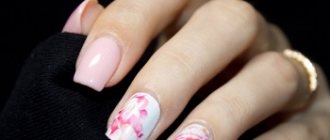
Nail designs
Agree, all kinds of patterns applied to nails are relevant, stylish, and most importantly, quite unusual. You can choose whatever you like: hieroglyphs, inscriptions, a drizzle pattern on the window, butterflies, flowers. The main condition is that you need to be able to draw, and most importantly, do not forget that we draw with different hands, that is, it is very difficult to draw with your left hand what was drawn with your right hand. And not every person has creative training.
In order for the drawings and patterns to be neat and equally drawn on the fingertips of both hands, it is necessary to use special sponges, seals, stamps and stencils. It is not necessary to visit the store and spend money on expensive tools and manicure sets. Artistic nail design can be done using various improvised means, for example, makeup brushes or toothpicks. And if you have stickers on the plates, then creating a masterpiece will not be difficult at all.
This season's trend is nail art with lace (photo)
You will need pieces of lace, glue and varnish. Cover the plates with varnish, then glue lace or any other fabric onto it. Be sure to cover the tip of your finger along with the lace with a layer of colorless varnish so that the pieces of material fit tightly to the plate and do not get dirty.
You can imitate a French manicure by gluing lace onto the “smile line.” Some fashionistas decorate their nails with glitter dust and rhinestones. Don't limit yourself to just cream and white nail polish colors, use red and black, blue and blue, white and brown. Imagine black mesh on red enamel or white lace on a brown background. Isn't it very beautiful? In general, it all depends on your desires and imagination!
How to do a French manicure with clear, white acrylic powder
French manicure is universal. It is suitable for women of all ages, for any event, as it is discreet, but at the same time effective and stylish. It's not difficult to make with acrylic powder.
Step by step how to apply powder on gel polish in French style
How to apply powder to gel polish is described in detail in step-by-step instructions:
- Powder for a French coat is non-glossy, mostly white.
- Nails look neat. The cuticle is removed and shaped.
- Apply gel polish. The last layer should be very thin.
- Open a jar of acrylic powder and dip the tip of each finger into it.
- Use a brush to remove excess.
- Cover with gel polish again.
With this jacket, the coating on the tips will not wear off, crack or chip. And it will last 2-3 weeks.
How to use
The offered powder has a variety of colors and shades. The experiment does not require varnish of different colors. Having several material options, you can get different colors with the same substrate.
The technology and types of rubbing depend on the base on which the powder will be applied and its type.
The nail rubbing technique includes several stages:
- Preparing nails for manicure: shaping, trimming cuticles, treating the nail plate, degreasing.
- Apply the base in 1-2 thin layers. Drying in a UV or LED lamp.
- Applying gel polish. Drying.
- Top without stickiness, drying up to 2 minutes. (UV) or 30 sec. (Led).
- Even distribution of pigment over the nail using an applicator
- Rub the powder into the varnish until a homogeneous layer is obtained.
- Double fixation with layers of topcoat. Drying.
But which nail polish is the most effective for nail fungus, what reviews exist and what prices exist are detailed here.
The video shows the rule for using nail rub:
This technique uses gel polish. The sticky layer holds the powder in place well. On the same substrate, different pigments look different and vice versa: on different substrates, the same pigments take on different tones. Gold pigment on pink polish will give a beige tint, and on red polish it will give a coral tint.
The rub can also be used on regular varnish.
It may also be useful for you to learn more about whether covering your nails with gel polish is harmful.
The preliminary stage corresponds to applying powder to the gel: preparing the nail plates for the varnish coating. This is followed by applying the base and drying. Varnishing the surface in two thin layers. To obtain a high-quality coating, the main thing is not to overdry the varnish: it should dry well, but retain a slight stickiness. The powder is applied quickly to the nail plate, the resulting effect is secured with transparent varnish. But what to do when the nail polish bubbles on your nails and what can be done about such a problem, the information at the link will help you understand.