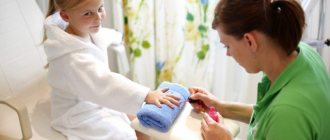
Nail preparation
The first step is to prepare the nail plate and cuticle for further processing. To get started you will need:
- Tweezers, trimmer;
- Scissors;
- File;
- Scrub, oils, cream;
- Degreaser (you can use alcohol or face lotion).
To learn how to do a cool European manicure, you need to remember that the most important part is preparation. In this step, the old coating is removed, the cuticle is trimmed, the nails are filed and their surface is leveled. To carry out the procedure, you can use a special apparatus or several files and hand tools (they must be sharpened before use).
Manicure at home
Step-by-step instructions on how to prepare your nails for a manicure at home:
- The old varnish is erased. Immediately after this, the marigolds are soaked in the bath. We recommend adding a little sea salt and iodine to the water - then the plate will become thicker and stronger;
- After 5 minutes of “soaking” the nails, you need to take out one finger at a time and check the cuticle. If it is easily deformed, then it can be cut. Using a file or a special stick, the peel is carefully brought to the hole itself, after which it is cut off. Depending on your experience, you can use a trimmer (for professionals) or tweezers (for beginners). The action is repeated with each nail;
- After trimming, you need to lubricate the cuticle with oil. Most often, spas use cocoa or shea for this purpose, which have excellent antimicrobial and regenerating properties;
- Next, the plate is leveled and the desired shape is given to the nails. For rough processing - shaping, hard tools are selected. For example, with diamond or mineral coating. For soft - cleansing the nail from growths and irregularities, more gentle - silicone or wooden;
- When the treatment is completely finished, all that remains is to degrease the surface and hole, remove any remaining oil from the cuticle;
- If everything is done, then the instruments must be sterilized. If a manicure is performed using a machine, that is, the main work is carried out with machines, then they are disassembled and washed in a special solution. Hand instruments are rinsed in Chlorhexidine.
Photo - Preparing for a manicure
In exactly the same way, trimmed pedicures are performed at home. After this you can start designing.
Unedged or European manicure is carried out without tools - it is easiest to do it yourself. The plate is cleaned of varnish and fat, then a special gel is applied to the cuticle. It is noteworthy that when using the unedged technique, you do not need to soak your nails.
After applying the softener, a few minutes should pass, then you simply move the skin closer to the hole. The cuticle is very pliable and soft. You do not need to use any trimmers or scissors to remove it. It can even be removed with an orange stick. All that remains is to wipe the plate with remover and cover it with a base for further coloring.
Read the material on the topic: pedicure at home: step by step for beginners + photos of results.
DIY European manicure at home
Do-it-yourself home manicure is performed using traditional tools: a file, a polisher, and nippers.
To begin with, the nails are cleaned of the old coating. After this, a suitable nail shape is created. Files are used for these purposes. Next, remove the cuticle. It can be removed quickly and without problems if it is initially treated with a special softening liquid. Use pliers to carefully cut off the dead skin and wipe each finger with a cotton pad.
Nails are treated with a polishing file. After which the base is applied. As soon as the base has dried, the nails are covered with colored varnish.
Any girl can do this manicure at home. After all, the technique is very simple.
Step-by-step photo of performing a home European manicure
Homemade European manicure is suitable for girls with fairly soft cuticles.
At the first stage, the nails are given a shape.
To carefully and quickly remove cuticles and pterygium, a special cosmetic composition is used - remover.
The product is applied to the cuticle and side ridges. Exposure time from 30 seconds to 2 minutes (see recommendations on the label of your remover).
To work with the cuticle, use a pusher or an orange stick.
First, the cuticle is gently pushed back with a pusher.
Then the pterygium is cleaned with a hatchet.
Remains of the product are removed with a napkin.
Additionally, you can prepare a bath with essential oils and salt.
Keep your nails in it for 10-20 minutes.
Walk the stick along the cuticle again.
At the end of the manicure, rub in wax or nail oil. Do-it-yourself unedged manicure is ready. Instructions for materials from the Beautiful illusion channel.
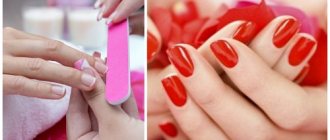
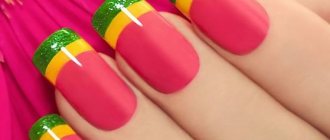
Simple edged manicure with regular varnish
The easiest way to do a manicure on short nails at home is with your own hands. In addition, it will look most advantageous on small plates. All points are carried out in the same way as written in the section above. After giving the desired shape and degreasing, the plate is covered with a base - it will fill the cracks and become a strong and even base for the paint.
You can make different types of manicure with regular polish:
- On the water;
- Gradient;
- Art design and many others.
Edged
Let's focus on the most common coating - it is very easy to make yourself and does not require much time. After the base has dried, a layer of colored varnish is applied on top of it. It must also be completely dry. If the shade is not bright enough, the surface is repainted.
To make the manicure last longer, a professional fixer is used. It performs several functions: it gives neatness, strengthens the plate, helps remove delamination and prolongs the life of the varnish. The fixative is often enriched with various vitamin and mineral supplements.
Video: doing a trim manicure yourself
Learn how to do French manicure
Doing a French manicure correctly is very simple; it does not require any special skills or tools, so it is often done at home. The only thing is that it is recommended to buy white varnish with a thin brush. Of course, you can work at home using stencils, but any professional craftsman will tell you that only by painting with a brush can you give your nails the desired and beautiful shape.
Instructions on how to do a simple French manicure at home step by step:
- The nail is prepared: degreased, covered with base. When the base is completely dry, the main color is applied on top of it. French is a very soft and elegant type of manicure, where pastel colors are often used. The base polish can be pink, beige, coffee, etc.;
- After the base dries, smiles are drawn. To create them, you can use stencils, but this technique has several disadvantages: there is no originality, varnish leaks through them, and they are inconvenient to peel off. Therefore, it is better to draw patterns by hand;
- This is why you need a varnish with a thin brush. The “smile” is drawn with thin short strokes along the natural white stripe at the end of the nail. Depending on the shape, it can be round, more square, or even straight. Depending on your skills, you can also decorate all your nails or just one with a simple pattern. For example, draw a few stripes or write something;
Photo - French manicure in stages - All that remains is to coat the varnish with a fixative and wait for it to dry. Some girls use glitter varnish (with sparkles) instead of a fixative. It also holds up well, but can be inconvenient when removing manicure.
Video: an easy way to create a French manicure
Lunar manicure with gel polish or shellac
The original moon manicure, which can be easily performed with both shellac and regular varnish, is becoming increasingly popular. Of course, if we talk about convenience, then it is best to do it with gel - it lasts longer and it is easier to draw holes with it. In appearance, lunar is the complete antipode of French. If in a French manicure only the tips of the nails are shaded with white (or another color), then in a lunar manicure the holes are shaded.
To make a professional lunar design, you need to prepare a manicure kit: these are accessories for trimming, tools for working with gel (removers, primers, etc.), and an ultraviolet lamp.
Fashionable manicure with gel polish with rhinestones at home step by step:
- Nails are cleaned and wiped with a degreaser. It should be noted that, unlike working with simple varnish, the usual tonic or alcohol will not work. Many masters use formulas enriched with various minerals and silicones, which fill the gaps in the nails, promoting stronger adhesion of the gel and the plate;
- Afterwards the nails are painted over and the holes are outlined. Please note that it is best to use a thin brush to create semicircles near the cuticle - then the work will turn out very neat and interesting. It is recommended to draw the moons first, and then paint over the plate;
- When everything is done, the nails are placed under an ultraviolet lamp for 2 minutes. Afterwards a second layer of gel polish is applied. It is needed for intense color. It is also dried for 2 minutes;
- When the main plane of the platinum is painted over, the holes are processed. They need to be painted with a thin brush so as not to smudge the contour. For this, masters work with acrylic brushes - they are thinner and stiffer than ordinary ones. Rhinestones or velvet sand for nails are inserted into the centers of the holes and pressed with a stick for better fixation;
- The painted holes are dried for 2 minutes;
- After finishing working with the biogel, you need to wipe the plate with a degreaser, which will remove the “stickiness” from the nails. This is how you do a moon manicure
In order for this unusual manicure to look interesting and stylish, you need to select varnishes very carefully. Experts advise using paints in contrasting colors, for example, black and white, green and yellow. But, if you work in pastel colors (pink and white, brown and beige), you will get a more delicate design.
Video: 4 ways to draw a hole for a moon manicure
DIY manicure with gel polish at home
It’s a little more difficult to do a manicure at home with gel polish. This requires at least minimal practice and, of course, the presence of a UV lamp, which will allow you to quickly and reliably dry the material. If you wish, you can learn any design, especially since all detailed lessons can be watched in online videos. To do this, just enter the query “do-it-yourself manicure for beginners” into a search engine.
The first stage always includes preparing the nail plate. Treat the cuticle and, if desired, remove it using special nippers. Also, for a beautiful gel manicure you will need to purchase the following consumables:
- Top for gel polish;
- Gel polish of the required shade;
- Finish coating;
- Cuticle softener;
- Liquid for removing the sticky layer.
How the procedure itself is performed is shown step by step in the photo (based on materials from the ArtNail Cafe channel).
How to properly apply gel polish on your nails with your own hands
To prepare the nail plate you will need a file and a buffer.
It is also recommended to coat your nails with an acid-free primer before applying gel polishes.
The three-phase system consists of a base, gel polish and top coat. For thin and brittle nails, it is better to use a rubber base coat.
Each master selects gel polish individually for himself. The main thing is not to take coatings that are too cheap, so that during the training stage you do not become disappointed in the procedure or your abilities. A high-quality manicure depends not only on skills, but also on the materials used.
You can also choose a rubber top, it is thicker and easier to work with.
Additionally, you will need cuticle oil.
As well as a liquid for degreasing and removing stickiness.
First of all, you need to lightly walk over the nail plate with a buff to give the necessary roughness. You don't have to work too hard to avoid damaging your nails.
Next comes the degreasing stage. It will require lint-free wipes and a special product, as in the photo above.
Before applying the base, it is recommended to cover all nails with a thin layer of primer. Remember that this product dries in the air.
To apply the base coat, you can use a brush from the bottle, or you can purchase a wider and more convenient one in the shape of a spatula. The base should be applied in a very thin layer, while rubbing a little into the nail. Most gel polishes dry in a UV lamp for 2 minutes; in an LED lamp, the time is reduced to 30 seconds. Each layer of gel coating must be thoroughly dried.
The first layer of color is applied in a very thin layer.
The end must be sealed. To do this, use the edge of the brush to carefully walk along the edge of the nail.
The second layer of color may be slightly thicker than the first.
Three-phase coating involves applying a finish. The top, as a rule, has a more liquid consistency, so you need to work with it carefully but quickly. If necessary, you can do interlayer drying.
If you used a topcoat with a sticky layer, you need to remove the stickiness from it with a degreaser.
At the end of the manicure, you can apply care oil to the cuticle.
As you can see, doing a manicure with gel polish yourself is not so difficult.
Matte and mirror for short nails
Recently, many girls have begun to create designs on their nails that are not shiny at all. Some even use varnishes that harden after application and become powder.
Matte or velvet manicure can be done at home in three ways:
- Use regular polish, and while drying, hold your nails over the steam for a few seconds;
- Use a special matte varnish;
- Use special sand coatings. After application, they dry out and turn into textured varnishes.
You don't need any special training to make an interesting matte design. You just need to buy a polish without glitter - they are sold in any cosmetic store.
Step-by-step technology:
- Nails are cleaned and filed. In principle, the beginning of the procedure is no different from working with simple varnish;
- After the matte surface has dried, you can “play” a little with the textures. For example, paint the entire nail matte black, and after drying, add glossy dots or stripes. This is a good option for a holiday or photography, where many will pay attention to the accents in the image;
- You can do a matte leopard manicure in the same way. Just dot your nails with a glossy color and outline them with a matte color. Then the base should be light, the dots themselves should be black, and the outline around them should be brown.
Leopard
But the easiest and fastest manicure you can do at home is with foil. In order for the nails to be shiny and glossy, they are covered with special stickers. To do this, they use colored foil, on which patterns can be applied, or simple stickers that replicate the mirror coating.
How to do an artistic mirror manicure with foil at home:
- Nails can be painted with any varnish. It is best to take white or colorless;
- While the varnish is not dry, foil is glued onto it. It is very fragile, making it easy to break off along the contour of the nail. Although the options for its use can be very different: torn patterns, striped patterns, etc.;
- Afterwards you need to cover the plate with a fixative, because the foil gets scratched very quickly. Manicure with foil - step by step photo instructions
Glowing manicure is performed at home in the same way - here either fluorescent varnish or foil is also used.
Video: manicure with foil
Water manicure step by step
Despite its apparent simplicity, manicure on water or water design is quite difficult to perform. They can make the most unusual designs and patterns, but to do this you need to gain experience and purchase high-quality varnishes. To work, you will need a container with warm water (preferably disposable, because after nail art it will be spoiled), glue, a needle, and varnishes of the desired color.
Instructions on how to make a beautiful water manicure at home step by step:
- The nail is prepared and painted white - then all other colors will look bright on it. In order not to worry about erasing the varnish around the nail, the skin must be covered with either PVA glue or a special “fuse”;
- Varnishes drip into the water. You need to act quickly, because they harden, and it is difficult to work with a dry coating. When the desired range is obtained, it is necessary to draw patterns on them with a needle; Water drawing
- There are different schemes. The simplest one is to move the needle from the center to the outskirts of the circle. This painting will allow you to get an elegant web design;
- When everything is ready, the nail is blotted into the center of the pattern (or to the outskirts, depending on the chosen pattern). You don't need to hold it for long. During the process, excess varnish in the water is removed with a needle or stick;
Water manicure - All that remains is to remove your fingers from the water and wipe them with nail polish remover.
Drawings obtained using water manicure are very original and interesting, but require a lot of time. Therefore, it is often much faster and easier to make them with acrylic paints.
Video: making drawings on water for water manicure
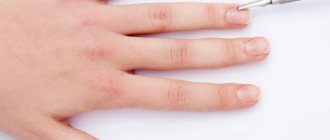
Working with the cuticle
A DIY manicure at home starts with the cuticle. Where to start processing it? In order for dry skin to become more pliable and be removed painlessly, it should be softened, and a bath with warm water will help with this.
SIMPLE HOME MANICURE
To do this, pour water into a small bowl and add sea salt if desired. In this case, you can get a comprehensive procedure that will help soften the cuticle as much as possible and at the same time strengthen the nail plate, soften the skin on your hands, and eliminate irritation. The time for taking such a bath is 10 minutes.
Use a terry cloth to blot your hands and use an orange stick to push back the cuticles.
Remove it using special pliers.
Then rub in cuticle oil or regular rich hand cream.
Today, a lot of different products are sold to make cuticle removal easier. For example, salons actively use a special product to soften the cuticle. It allows you to get rid of the skin without the use of cutting tools, but when working with it you need to be very careful, since if you leave the composition on your nails too long, you can get a burn or cause excessive dryness of the nail plate.
CUTICLE SOFTENERS
| Brand RUNAIL. The remover contains aloe extract. The cuticle softens within 3-5 minutes and is removed with a stick or a special manicure tool. Not suitable for very rough skin. | |
| Brand ORLY. Medium consistency, specific aroma, removes cuticle well. The exposure time is only 20-30 seconds. | |
| Brand INGARDEN. The remover has a liquid consistency, is convenient for home use, and perfectly softens the cuticle. Application time also ranges from 3 to 5 minutes. | |
| Brand Be natural. Acts quickly, maximum time 45 seconds. Very quickly softens the cuticle. It is better to apply in stages, several fingers at a time. Suitable for rough cuticles. | |
| Brand OPI. The product is in the form of a light cream with a pleasant aroma. Exposure time 3-5 minutes. Not suitable for very rough cuticles; it will soften them only slightly. | |
| Brand CND. A good remover that removes cuticles very carefully. But not very suitable for home use due to its large volume. | |
| Brand MASURA. Remover with algae extracts. Well softens and nourishes the cuticle. | |
| Oriflame brand. The remover has a pleasant smell and softens the cuticle well, but the bottle is not very convenient to use. | |
| Eveline brand. Not a very comfortable tube. The product is difficult to distribute accurately. It greatly softens not only the cuticle, but also the nail plate. |
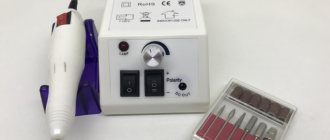
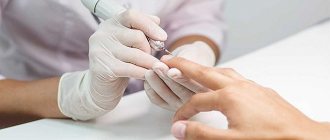
Hardware manicure for beginners
Probably everyone has already heard about hardware manicure. More and more fans of this technology are appearing. Its trick is that it allows you to free it from dead cells without damaging the cuticle. Of course, here you will have to master a special apparatus, which is equipped with various cutters. It will help you forget about wire cutters and other devices. Hardware manicure is performed quickly and painlessly.
HOW TO DO A HARDWARE MANICURE CORRECTLY STEP BY STAGE
It is performed on dry skin. At home, it is better for beginners to work at low speed to prevent accidental damage.
Stages of work:
- If there is old coating, it must be removed. How to do this correctly, see the section: How to remove gel polish.
- Treat the skin with an antiseptic liquid.
- Use a stick to push back the cuticle. Using a cone-shaped nozzle, remove the skin. Hardware manicure for beginners should be performed at medium speeds. Movements should be neat and smooth. The cutter should not be pressed too hard against the skin. To remove the cuticle you need to move from left to right.
- Give your nails the desired shape. The disk attachment is designed for this purpose.
Video tutorial on hardware manicure
European manicure at home
A trim manicure is not the only way to get your hands in order. European manicure, which has a lot of advantageous characteristics, is considered its worthy competitor. Its essence is that the cuticle is treated with a special softening compound, and then pushed back with a stick. After applying the decorative coating, a special oil is applied to the cuticle, which slows down its growth. The beginning of a manicure for beginners is giving the nails the correct and suitable shape. To do this, use a file of medium hardness. After that, the nails are covered with regular varnish and the coating is secured with a special product.
The advantages of European manicure are obvious:
- The risk of infection is reduced.
- Does not cause pain.
- It will be an excellent choice for people with thin, sensitive skin.
EUROPEAN HOME MANICURE
- The first step is to remove the old coating from your nails. Detailed instructions in the section: How to remove gel polish.
- In the second stage, you need to shape your nails using a natural nail file and lightly sand them.
- Apply remover (a special cosmetic product for softening and subsequent removal of the cuticle). The exposure time is different for everyone, from 30 seconds to 10 minutes (on average 3-5 minutes). Read the instructions carefully, because... the recommended time cannot be exceeded. Then you need to remove the remover with a cotton pad or wash it off.
- We push back the cuticle and clean the edges if necessary.
- At the final stage, we roughen the nails using a buff and degrease them using a special de-sticking agent.
It is better to degrease your nails with special lint-free cotton pads for manicure to avoid getting small fluff on the nail, which can subsequently ruin the appearance of the coating.
Nails are prepared for applying gel polish. You will learn about the sequence of stages of a gel polish manicure below in the step-by-step photos.
Video tutorial on how to perform a home European manicure
How to do edged manicure at home?
Despite the popularity of European manicure, many girls still prefer the edged version, thanks to which a manicure with gel polish or other coating looks very impressive.
Performing a trim manicure for beginners in stages is as follows:
If there is an old varnish coating, it must be removed.
- File your nails and give them the desired shape.
- Prepare a bath to soften the cuticle (you can additionally apply remover).
- Then push back the softened cuticle with a stick or metal pusher. You can also clean out the pterygia with a spatula.
- Using nail scissors or nippers, carefully trim the cuticle along the edge and clean the area of the side ridges. After this procedure, the cuticle can be wetted again and pushed back again.
- Apply nourishing oil or cream with massage movements until completely absorbed.
Video tutorial on trimming your own manicure
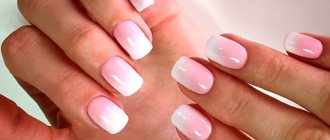
Newspaper and ombre
Color gradient designs are popular due to their simplicity. If it is done in salons with a special airbrush, then at home it can be done even with a simple sponge. This is ideal for New Year, birthday or any other holiday.
How to make a stylish ombre manicure at home:
- The nail is prepared and filed. A base and white varnish are applied to the plate;
- Afterwards, a small piece of sponge is cut out. Varnish is applied to it in strips. Thus, in the future you will get a gradient;
- To create an interesting winter design, you can combine red with white and gold, or blue with green and scarlet. Another secret to getting the perfect transition lies in choosing a sponge. It should be dense, without large pores;
- The nail is blotted with a sponge. Try not to press too hard, otherwise the transition will be too clear;
Ombre step by step - All that remains is to apply glitter and fixative. This will help hide sponge marks and give your manicure a salon look. Ombre sponge
Video: gradient or ombre on nails
A newspaper manicure is no more difficult to do at home. Newspapers often use ink that can be washed off with alcohol. But, if you turn the newspaper over and rub it with alcohol, the print will simply transfer to the surface underneath it.
How to do a newspaper manicure step by step:
- The nail is painted in any color contrasting with black. This is done because the letters are most often black;
- A small piece is cut from the newspaper. It is applied with the desired side to the nail;
- You need to run a sponge soaked in alcohol over the paper several times. If the newspaper is thick, then you even need to apply the swab to the plate for a few seconds;
- When the letters have passed, you need to cover the nail with a fixative. Newspaper manicure
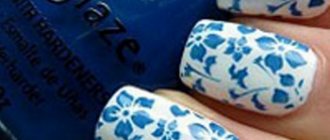
Home manicure ideas with visual instructions
Photos and ideas for manicure at home will allow you to choose the right design. If you know the basics of nail art, you can create almost any design.
Home manicure idea 1 Idea 2
Manicure idea - 9 steps
Photo - Idea 4
How to make a beautiful manicure: interesting ideas and tricks
We got acquainted with the manicure technique above, now we will talk about how to simplify the process of performing it and how to easily and simply create an unusual and interesting decorative manicure at home.
Tricks and tips for unusual and easy manicure
- To make bright polish easier to remove without staining the skin around the nail, cover it with a rich cream before removing the polish. The polish will come off even easier if you place a piece of cotton wool soaked in nail polish remover on each painted nail and leave your fingers there for about 5 minutes. After that, the polish will come off in one motion.
- To whiten yellowed nails, treat them with toothpaste using an old toothbrush. In the future, do not forget to apply a base coat on your nails.
- Use your imagination when modeling your nails. To create beautiful monograms on your nails, use an ordinary toothpick.
- For nail design, use special stickers: with their help you can create such masterpieces as a romantic and feminine lace manicure and manicure with animal print.
- Matte manicure, which is very fashionable today, can be easily achieved by adding a little loose powder to your regular polish.
- Using an ordinary magnet and a special varnish with metal particles, you can create a fashionable cat-eye manicure.
- To give your nails an original look, use an ordinary toothbrush, and how to do this is shown in the video.
- Another interesting technique that you can try for a decorative home manicure is ombre or gradient. It involves smooth transitions between several colors of varnish combined on one nail. You can perform this manicure using 2-3 colors of varnish and an ordinary fine-pored sponge.