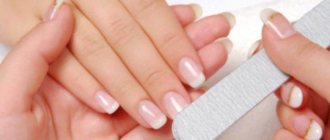
Why should you do ombre with a brush?
The site's experts claim that there are at least 9 ways to create ombre nails. In today's publication we will focus on stretching varnish with a brush, because we consider this method to be optimal for beginners. What are the other main advantages of graduated tassel designs?
— There is no need for additional tools.
— When stretching with a brush, the cuticle does not get dirty. This is an important advantage. There is no risk of ruining your manicure with careless movements when finishing your nails and removing any remaining polish from the skin.
— The time savings are very significant, since cleaning the periungual space is not necessary.
And if you do get your cuticles and side rollers dirty, find out how to quickly and easily clean them in the article “20 life hacks for a home manicure.”
Masters recommend using a flat brush or a brush for Chinese painting. But practice suggests that a good design can be obtained from a bottle of varnish using an ordinary brush.
The time of a modern woman is worth the weight of gold. Therefore, every minute counts for her. But no matter how long the to-do list is, a real woman must look flawless to the tips of her nails.
Therefore, most representatives of the fair half of humanity prefer to use gel polish in order to enjoy the result for two weeks. And be protected from the fact that the varnish peels off right in the middle of a business dinner.
Let us remind you that ombre is included in the list of the most fashionable nail designs of 2021.
Stretching nails with gel polish: design advantages
- Undoubtedly, the super durability of the manicure! Ten to twelve days of flawless coating is a compelling circumstance!
— Gel polish is applied to the nails in a smooth, even layer. If you use a sponge, roughness may appear, and a brush helps to avoid such troubles.
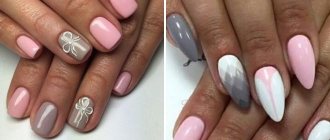
— Large selection of colors, the ability to use the amazing “Cat Eye” gel polish with a 3-D effect!
Stretching nails with gel polish step by step
- Traditionally, we perform a hygienic manicure: we file the free edge, push back or remove the cuticle.
- Use a buff to remove the top layer of glossy coating from the natural nail. This is done to improve the adhesion of the products to the surface of the nail plate.
- We disinfect the surface with a special product and remove small particles of dust.
- Cover the nail plate with primer and let it dry.
- Apply a thin layer of base coat and dry in a lamp.
- We cover half of the nail with one color, and apply another color closely to the second part. It is most convenient to perform a vertical ombre with a brush, moving from the root of the nail to the free edge.
- Using a clean brush, we pass at the junction of the colors several times so that the shades blend.
- Dry the layer in the lamp for 2 minutes.
- We repeat points 6-8 from two to four times. The number of layers depends on the color saturation of the gel polish. If you like the result after two layers, then stop with this with a light heart.
- We cover the nails with top coat to smooth out all the small irregularities.
- Dry the finish coat in a lamp and remove the sticky layer with a special product.
Watch the video to see how professionals do horizontal ombre with a comb brush.
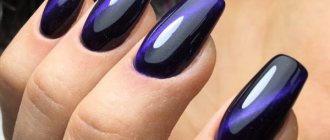
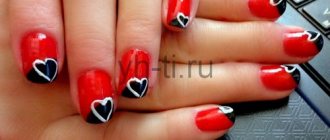
Paired with black
Stretching using black color looks luxurious, sexy and at the same time elegant. This manicure is suitable for ladies who are confident and love to attract attention.
Other options for stretching with gel polish
- Apply a base coat to the base - a lighter shade of the two selected or white varnish. Next, stretching is performed according to the above mentioned scheme: two colors applied end-to-end are rubbed in the center with a brush.
— Some masters recommend mixing colors on the nail plate with a brush dipped in alcohol. They claim that the result will be more spectacular.
— In practice, another method is used. All two shades are also applied at the joint. Next, two drops of the selected varnishes are mixed on the palette, and a line is applied with the resulting shade in the middle of the plate.
- Another option. We also paint two parts of the nail with different colors. Then apply a drop of one shade to one part of a clean flat brush, and another varnish to the other part. Then you need to move the bone in the middle of the nail plate (at the junction of two varnishes), mixing the shades.
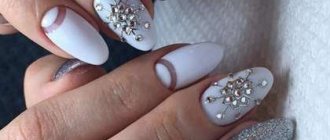
Holiday manicure ideas with glitter
Glitter will help give your nails brightness and a unique shine. Large kamifubuki imitate festive confetti, and a small scattering of sparkles allows you to create the effect of fireworks. Sequins of various sizes allow you to create a festive and bright look, ideal for a noisy party.
Depending on the holiday, you can create a wide variety of manicure designs:
Manicure for the New Year with sparkles
Manicure for Valentine's Day
Manicure on March 8
Fashionable manicure with loose transparent glitter
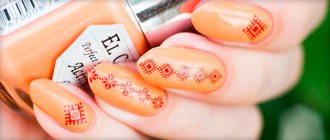
Today, shimmering nail designs and a combination of several manicure techniques are in fashion. A novelty in nail design is a coating made in the popular ombre (amber) technique and decorated with “dry” transparent glitter in the shape of a hexagon. Performing such a “brilliant” manicure is quite labor-intensive and can take more than one hour. However, the result is worth it! Typically, this glitter manicure involves covering all the nails, but if time is limited, use glitter partially.
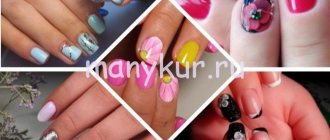
A gradient on your nails can be done in two ways: apply transparent glitter to a colored coating or use colored glitter. For manicure options with glitter, see the photo .
Manicure with glitter: technique (photo step by step)
The process of performing a manicure with glitter takes a long time, but is quite simple in technique. What will you need?
- transparent base;
- white nail polish;
- colored varnishes;
- colorless finish varnish;
- wooden stick for manicure;
- transparent glue;
- sparkles/glitter on a transparent basis;
- sponge/sponge;
- scotch;
- nail polish remover.
So, a photo with step-by-step instructions for performing a manicure with glitter .
- Apply the first layer of colorless coating.
- We take white varnish as a base and carefully cover all the nails with it.
- Carefully cover the skin around the nails with tape so as not to get dirty when applying the gradient coating.
- Apply colored varnishes in the form of stripes to the sponge, then print the coating on one or two nails. For subsequent application, the varnish must be renewed. The coating must dry.
- Apply glitter/spangles one at a time. To do this, apply transparent varnish to the part of the nail (where we will attach the first particles of glitter). Then we dip the edge of a wooden stick in transparent glue, pry up the glitter and attach it to the transparent varnish until it dries. Next, repeat the procedure until the entire nail is covered with glitter.
- We fix the glitter with a transparent finishing varnish.
- We remove the tape and carefully remove the remaining coating from the skin with a brush dipped in nail polish remover.
[pro_ad_display_adzone id=”9403"]
Stylish manicure with glitter is ready!
Stretching nails with regular polish
Ordinary varnish is not very durable, but sometimes it is more convenient to use it.
— Beginners are recommended to practice with varnish, because an unsuccessful attempt can be easily erased.
— To create a one-day design specifically for an outfit or for a special occasion.
— When performing stretch-ray arcs and using a multi-colored design, you can choose varnishes of the desired colors. It is not advisable to buy expensive gel polishes specifically for this purpose.
Mirror Gradient
The mirror gradient is made using rubbing – a very fashionable manicure design for more than one season. On its own, a single-color rub looks great, but in combination with a gradient, it will simply be an “explosion.”
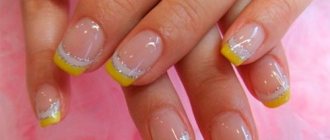
Stretching with sparkles: on weekdays and on holidays
We present to you a completely different stretching technique - glitter coating. Graduation in this case is performed by gradually reducing the thickness of the glitter from the root to the free edge (or in the opposite direction). This spectacular design is often used, for example, as a New Year's manicure.
The brief step-by-step instructions consist of 4 stages.
- Traditionally, treat the cuticle and free edge.
- Apply base and background shade of varnish.
- Cover the tip of the nail with glitter. Using a brush, gradually “stretch” the glitter towards the root.
- You can apply a top coat over the glitter, but the shimmer will fade a little. If you leave the design unfinished, some glitter may flake off.
The glitter stretch is reminiscent of a French manicure, in which the smile line has a fuzzy border. Find the best options for a French jacket with gold glitter in our latest review.
There are secrets on how to stretch with dry glitter, varnish with shimmering particles, large and small sparkles. The glitter stretch on gel polish and regular polish is slightly different. The authors of the site are preparing a separate publication on this topic.
You can use glitter to cover both a calm nude design and a rich red manicure.
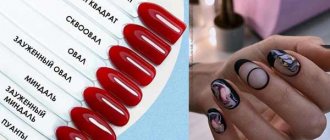
How to stretch your nails: popular methods of doing it
Based on the direction of transitions, stretching can be divided into three types.
Vertical stretch. Colors are applied with a brush and the joints of two shades are mixed in a vertical direction. This is the most convenient way to perform ombre with a brush. It is worth recalling that vertical (longitudinal) lines are recommended to be made not only on long, but also on short nails. This allows you to visually lengthen the plates.
Vertical stretch. Craftsmen prefer to make a vertical transition of colors using a sponge. But stretching can also be done using a thin brush. To do this, cover the nail plate with a light shade of gel polish and dry it in a lamp. Afterwards, apply another shade to half of the nail and use a thin brush to stretch the product towards the root, blurring the border. Apply two or three thin layers of gel polish.
Stretching all nails. A gradual color transition is performed from nail to nail. As a result, each nail plate is covered with a different shade of varnish, the thumb is darker, the little finger is the lightest, as in the photo. To achieve this effect, you need to mix shades on the foil, gradually adding more and more white varnish to the blue.
Stretching also differs in the number of shades used. Ombre can be made based on two or three colors, and a rainbow gradient can accommodate seven different varnishes.
At the end of the article, watch video lessons on performing horizontal and vertical stretching.
What is stretching in gel manicure?
A manicure with color stretching is a technique of applying a color coating that smoothly transitions from a dark to a lighter shade. To work, use a special brush made of natural material, the surface of which evenly distributes the coloring composition over the surface of the nail plate.
Professional artists call this technique gradient or ombre. A manicure done using this technique looks impressive. It is suitable for everyday and evening wear. To prevent the coating from looking vulgar, it is recommended to choose bed or light shades of gel polish.
You can dilute the color horizontally, vertically and diagonally. To do this, the brush is held at a certain angle. The drying process plays a huge role in the design process. To work, in addition to a brush, you may need additional tools and materials:
- Foam sponge;
- Spray gun for gel polish;
- Set of brushes.