Main differences
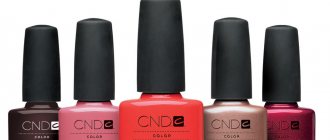
What does single-phase application system mean? Simply put, this is a three-component product, which includes a base, color and finishing layer. With its help you can do a quick manicure, and such a bottle will take up little space in your cosmetic bag.
A manicure using this gel will last about two weeks. But not all nails accept it, and accordingly, the durability of the coating may be less. A trial application will determine if the product is suitable for your case.
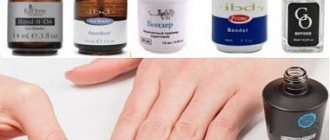
What is three-phase gel polish? This product consists of three different bottles:
- base;
- color;
- fixative
The base coating has the same principle of operation as double-sided tape. At the same time, it strengthens the nail and holds the color well. The fixative performs the function of fixing the color and protecting it. The fixing layer can be matte, glossy or have a scent that remains on the nails after drying.
Three-phase gel is a suitable option for those who like to decorate their nails with stickers.
What does three-phase gel polish mean? Single-phase gel polish
Covering nails with gel polish is very popular. But many representatives of the fair sex refuse this type of manicure due to some difficulty in performing it, and also because such a procedure takes a lot of time. But now that there is a special single-phase gel polish on sale, you can safely forget about these shortcomings.
What it is
As a rule, a manicure using gel polish occurs in three stages, but using a single-phase coating, you can perform a manicure much easier and faster. This means that single-phase gel polish combines the functions of a base, a fixer and the color coating itself. Now you just need to apply one or maximum two layers of this product on your nails and the manicure is considered complete. In addition, this nail coating is safer.
Single-phase gel polish has a unique composition and formula. It combines several components that are included in a regular base for gel polish, its fixer, and also a color pigment. That is why its use allows you to replace three usual means for creating a manicure using gel polish or shellac.
By performing a manicure using this particular coating, you can not only get a chic nail design, but also significantly reduce the time it takes to complete it, as well as save on the procedure itself.
But besides ease of use, this tool has other obvious advantages.
Advantages
If we talk about the advantages of this new product for performing gel manicure, there are quite a lot of them. The most basic ones are the following:
- Speeding up manicure and simplifying it. Now, instead of three jars with the necessary products, you should use only one.
- This coating will lie on the surface of the nails in a thin layer, which means that the nails will be able to breathe. In addition, a manicure made using such a single-phase varnish will look more natural.
- You can save a lot. The cost of single-phase gel polish is several times less than the total cost of the three conventional products that it replaces.
- This nail coating, despite the thinner layer, can stay on the nails longer than the usual gel polish. On average, the durability of such a manicure can last up to 4 weeks. But it will be correct to remove single-phase gel polish from the surface of the nail bed after 15 days, since the nails will grow during this time, and their grown edge will not make the best impression.
- This product can be dried not only in an ultraviolet lamp, but also in an LED lamp. But this method of polymerization is not suitable for all conventional gel polishes.
- You can cover not only your natural nails with this product, but also your extended ones.
- And another undeniable advantage of this product is the saving of work space during manicure. There is no need to place several vials on the table; one will replace them all. This is especially true for manicurists, whose work surface is always heavily cluttered.
- All varieties of such single-phase products sold today can be used in combination with each other. For example, you can paint your nail with one color and create various patterns on its surface with any other color.
Application process
To prevent the coating from deteriorating in the near future, you need to know how to apply single-phase gel polish:
- You should start by removing the old coating and giving your nails the desired shape.
- Treat the nail plate with a fine-grained buff. This will make it smoother, which will improve the quality of the coating.
- Wipe your nails with a cotton pad soaked in degreaser.
- Push back the cuticle.
- Apply the first layer without touching the periungual ridges and cuticle. The tips of the nail should be carefully painted.
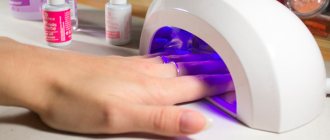
- You can dry your nails in an LED (1 minute) or UV lamp (2 minutes).
- Before applying the second layer, the cuticle is pushed back again. This will make your manicure perfect.
- Apply the next layer with the same care as the first. Dry under the lamp.
After the procedure, you can treat the cuticle with a special oil. This will soften the skin and soothe it.
The differences when covering nails with three-phase gels lie in the step-by-step separate application of each product:
- After preparing the nail plate, it needs to be degreased and disinfected. This will eliminate the risk of fungus appearing under the coating.
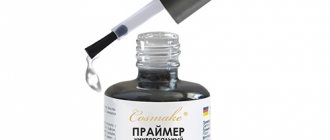
- To improve the adhesion of the gel polish to the nail, a special primer is applied. It is better to choose an acid-free one, which does not spoil the structure of the plate. Drying is not necessary at this step; the product will dry on its own within 20 seconds.
- The base is applied in a thin layer over the entire surface and then dried. 2 minutes if using a UV lamp and about 30 seconds under an LED lamp.
- The color layer is also applied thinly. Drying time is the same as in the case of the base. A primer that improves adhesion to the next layer should also be present.
- The fixative coating is thicker than the others. Therefore, after application it is better to dry your nails additionally. This will extend its service life and eliminate the risk of damage.
The service life of such a manicure is from two weeks.
Important! Whichever of these products you use, you need to pay attention to the quality before purchasing. The easiest way is to choose a gel by smell. A high-quality coating does not have a sharp unpleasant aroma, which indicates the absence of harmful impurities.
Performing a manicure with three-phase gel polish
Let's take a closer look at three-phase gel polish and how to apply it to the surface of the nails.
Preparation
Preparation plays an important role in applying a manicure and takes place in several stages:
- The first thing you need to do is get your nails in order, remove the cuticle, make the desired nail shape and file off the top glossy layer.
- The next step is to thoroughly degrease the nails using a special product.
It should be noted that if you have oily hand skin, then repeat this step twice to maximize the adhesion of the layers. The degreasing procedure is carried out so that fungus does not grow under the coating, invisible to the naked eye.
- Next, we apply a more gentle acid-free primer.
You need to refrain from acidic products, as they have a specific, not very pleasant odor and penetrate into the deeper layers of the nail. This layer is designed to ensure strong adhesion of the nail plate to the selected varnish. The primer dries within 20 seconds, without using a UV lamp.
Performing a manicure
The next stage, manicure, takes place in several steps:
- Applying a gel base layer.
Apply the base thinly and evenly over the entire nail plate, including the free edge of the nail. A thin layer of base, like all subsequent layers, will be most appropriate. Dry in a UV lamp for 2 minutes or in an LED lamp for 30 seconds.
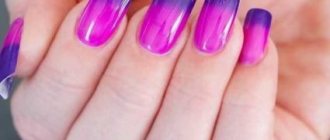
- Now let's move on to the most interesting part - the color coating of our nails.
At this stage, the first color layer should be as thin as possible. A thick coating of colored gel polish can lead to the formation of bubbles or waves when interacting with a UV lamp, which we absolutely do not need. If your layer is not dense enough, apply a second layer of colored gel polish (don’t forget to seal the end of the nail). If you ignore this procedure, soon expect chips and cracks at the ends of your nails. Dry in a UV lamp for 2 minutes or in an LED lamp for 30 seconds.
- Further, at your request, you can apply decor, be it artistic painting, sparkling rhinestones or iridescent sparkles.
After decoration, the manicure goes into the next form.
Pros and cons of single-phase gels
- A good result without unnecessary time expenditure.
- The application method excludes coating with a base and fixer. Therefore, you should not count on a long service life of such a manicure.
- During application, such varnish may drip, which causes difficulties when modeling nails.
- This product is not suitable for complex designs and decorations. The absence of a sticky layer does not allow you to show originality in the design of your manicure.
- Those with an elastic nail plate often experience cracking of the coating, so sometimes you have to additionally buy a fixer specifically for single-phase gels.
- Single-phase varnish does not dry out the nail plate and can be used even for weakened nails. However, this is not always good, because without the appropriate skills, nail modeling will not work.
- The finishing stage eliminates the formation of a sticky layer.
Under what circumstances should you choose three-phase gel polish?
But using a 3 in 1 product is not suitable for all clients. If the nail plate is thin, there are damages or unevenness on it, then the nail design using a single-phase product cannot be called neat. In this sense, what three-phase gel polish means for a master can be described as follows:
- The ability to create the correct architecture of the client’s nail plate due to the thick structure of the base coat.
- The prospect of choosing between an aggressive base and a gentle base. In the first case, the manicure will last a long time and will be able to withstand various external influences. It is recommended to do it before going on vacation. In the second case, the design will be less “tenacious”, but will not disrupt the structure of the nail plate.
- The thick structure of three-phase varnish allows you to create complex designs using stickers, rhinestones, etc.
Performing a manicure
In other words, a 3-in-1 product is only suitable for smooth and healthy nails, as well as manicure without additional elements, and three-phase gel polish is universal, which is why most masters choose it.
Pros and cons of three-phase coatings
- High strength is accompanied by a glossy shine thanks to the fixative. This varnish does not deform and looks as if it had just been applied.
- The complexity of the process does not always allow you to do a manicure at home, so you have to resort to the services of a professional master. The result is additional costs of time and money.
- Decorative elements on nails in the form of stickers require the use of only a three-phase application system. It is this method that allows you to firmly secure the decorations between the layers.
Attention! Regardless of whether single-phase or three-phase gel polish is used, the surface of the nails must be degreased before application. During the application process, be sure to remove any remaining product that gets on the skin near the nail.
Which product should I choose?
When the question arises, which is better, you should decide what is your priority. Beginners prefer single-phase gels. They are attracted by ease of use and pricing. In addition, for those who like to frequently change their nail color, this option will come in very handy. This is an affordable way to have a manicure for any life situation: be it a wedding celebration, or an ordinary friendly party. With this product you can look your best without being a professional.
More experienced people believe that it is better to spend time and money, which will later pay off in the form of a durable and original manicure. This option is good for those who cannot afford to do their nails often for a number of reasons. It’s easier for them to go to the salon once a month and get the desired result. Or, after spending time, do the same at home, if your skills allow. In this case, a thorough choice of a three-phase agent would be more rational.
Important! Always follow the storage conditions for bottles of gel polishes. Loose closures and dirty bottle necks will render the products unusable. They will lose their qualities, which will immediately affect the beauty of the manicure. Varnishes should be kept away from the sun and heating devices, and open bottles should not be placed near lamps for drying.
What you need for self-application
- There is no need to do hand baths before the manicure procedure. The point is the porous structure of the nail, which will absorb moisture. The time for evaporation will be about 3 hours, and applying the coating to a non-dried surface will promote peeling of the varnish.
- Take your time. Otherwise, miss an important point, which will cause the coating to be short-lived. Shooting and redoing it again is an additional challenge.
- Be careful. If you can handle simple varnish, then applying a gel coating will not be difficult.
- Buy a palette (these are artificial nails that you can apply polish on). After practicing on it, you will identify your weak points and be able to approach decorating your own nails more competently.
- Apply the gel, making the layer as thin as possible. Thick layers may shrink during the drying process, which will ruin the entire appearance of the coating.