Benefits of shellac
Shellac combines the best characteristics of traditional varnish, extension gel and biogel:
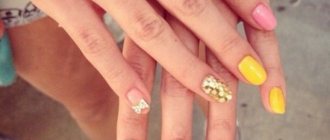
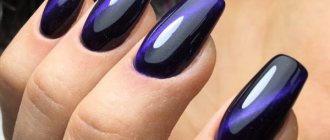
- Gel polish looks like a rich, smooth and glossy finish on your nails, it is durable and long lasting.
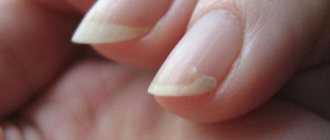
- It does not deteriorate the quality of nails and does not allow them to break.
- With high-quality removal, the nails will remain in the same condition as before the coating.
- Gel polish is very easy to apply and remove from the surface of the nail. The texture of gel polish allows you to apply it in an even layer and correct errors, since it hardens only in a special lamp.
Characteristics of the procedure
Gel polish is an acrylic gel colored with colored pigments. In appearance it does not differ from traditional varnish. Its characteristic feature is super durability. He varnished this product for easy application, a large number of shades, shine and shine. But the gel provides protection and durability. How long does gel polish last on nails? The wearing period of the coating is 3 weeks. During this time there is no need to tint or update them.
You can carry out the procedure for applying gel polish not only in the salon, but also at home. You can make an interesting design yourself with gel polish for beginners. Gel polish coating is a completely harmless procedure, because this product does not contain toluene and formaldehyde. Compared to extensions, this procedure does not involve filing the nail plate, since in the first case a single-phase gel is used for nail extensions, and in the second, gel polish. But you shouldn’t use this manicure very often. Once every six months you need to give your nails a rest.
Here's a video of what you need to cover your nails with gel polish:
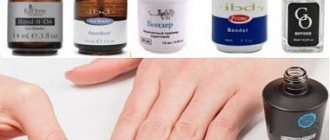
List of required tools
First we need tools and a set of coatings. You can purchase all the necessary attributes from one manufacturer, or from different ones.
A set of necessary tools and coatings:
UV lamp for shellac. Any lamp is suitable for creating a high-quality coating, but the speed of hardening of the layers depends on its power. Ideal power: 36 W.
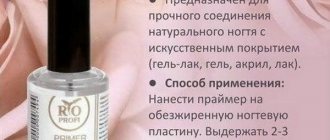
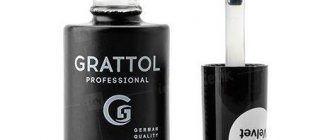
Base, color coating, top. It is recommended to choose coatings from one manufacturer to create a higher quality coating.
- Lint-free wipes for degreasing and removing sticky layers;
- Files for polishing the nail plate;
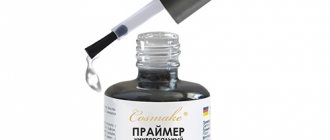
- Degreaser and stick remover;
- Shellac remover;
- Oil. Olive, almond, peach, coconut or special for cuticles are suitable.
Types of gel manicure kits
All sets - and there are a lot of them on the professional market - can be divided according to the level of complexity of the manicure performed. This is the gel set:
- "Newbie"
- "Base"
- "Professional"
They differ from each other in the number of special and auxiliary elements, tools and equipment. So the simplest set - for beginners - is focused only on “trying it out”. Its cost is very low and affordable for every lady, but there are practically no options for gel manicure.
Shellac at home
- Shape your nails with a hard file, polish the surface with soft files to make them smooth.
- For perfect coverage you need to have a perfect manicure. Soften the cuticle with cuticle remover and water with lemon and oil, push it back and trim it carefully.
- For a more uniform coating, degrease the surface of the nail with a special product or nail polish remover. It will help remove dirt, dust and dead particles.
- Cover your nails with a shellac base. Apply it thinly if your nails are smooth, and thickly if your nails are uneven. Be sure to seal the ends of your nails to prevent chipping. Cure the base layer for 1 minute at 36 watts.
- Apply color coat. The number of layers depends on the desired effect: the richer you want the color, the more layers you should paint. 2 coats are considered the standard amount needed for a dense shade. Dry each layer in a lamp for about 1.5 minutes. If shellac stains the skin or excess part, remove the varnish using a wooden stick dipped in nail polish remover.
- Apply a thick layer of top coat, also sealing the ends. Dry the layer in the lamp for 2-3 minutes.
- Remove the sticky layer using a lint-free cloth soaked in adhesive remover. Do not use cotton wool - it leaves lint on the surface. Instead of a special liquid, you can use alcohol or nail polish remover.
- Apply oil to the base of the nail to prevent dry skin.
Why do you need a gel manicure kit?
Shellac manicure is difficult to perform at home because it requires a variety of components and even equipment. Of course, the stages of nail preparation are in many ways similar to classic manicure, but there are some nuances that are difficult for beginners to remember. Moreover, gel coatings are amazingly good for creativity and variety of nail designs, which also creates difficulties when creating a gel manicure kit on your own.
Knowing this, and also taking into account women’s craving for beauty, leading manufacturers of the nail industry took care of the layout of special sets. Now, if you want to create a high-quality and durable coating on your nails, you only need to formulate your own wishes and choose a gel manicure kit to suit them.
Removing shellac
Shellac will need to be removed 2-3 weeks after application. It's very easy to do this:
- Using a hard file, go over the surface of the shellac, removing the top layer, this will help the liquid to better saturate the layers.
- Cut the cotton pads into strips and soak them in a special shellac remover or acetone. Apply them to your nail without touching the skin.
- Wrap your finger in foil and leave for 10-15 minutes. The structure can be heated in a UV lamp, or simply massage the foil with your fingers.
- Remove the foil and cotton pads. If you choose a high-quality gel polish, the coating will come off as a solid film. If this does not happen, remove the residue with a plastic or orange stick. File the remaining sections with a saw. However, if something remains even after removing it with a stick, it means that the layers of shellac were too dense.
- Lubricate the nail and cuticle with oil.
How to remove gel polish
The main advantage of shellac is the durability of the manicure. But this is also its disadvantage, because removing shellac at home is not an easy task, as it is time-consuming.
You will have to wait a while because to remove shellac you need to soak the cotton pads from your kit and leave them on your nails for the shellac to dissolve.
There is no need to use acetone when removing manicure, as it is not only harmful to the skin, but also does not particularly help in removing shellac. And if you included it in your list when creating a set, then it is better to purchase a special nail polish remover.
In addition, do not rush to reuse your shellac tools at home: many experts are of the opinion that the nail plate needs rest after shellac.
You don't need to get a manicure for at least a week. It’s better to put aside your shellac manicure materials and tools for now and lubricate your hands with cream.
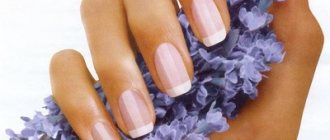
French gel polish
To create a French, you need the shellac tools from the list. What tools and materials will be needed? The first thing you need are brushes. If you use a stencil to create this type of manicure, then it will leave marks that cannot be removed without damaging the entire work, especially if you do everything at home. So you will have to give up this tool and practice until you get the perfect line. The rest of the work will go easier, and gradually you will learn how to create the perfect manicure without leaving home.
Tips for applying shellac
- Do not apply shellac to all your fingers at once. First apply the base to the left big one, dry it in a lamp, then paint the right big one. And so on with the base, color coating and top until it reaches the little finger. This method allows you to dry your nails more efficiently.
- Do not dry your thumb sideways, lay it flat like the rest, otherwise wrinkles may form on the surface of the shellac.
- After several procedures, take a week's break: apply oil to the cuticle and nails, take baths with salt and iodine to strengthen the nails.
- Author: Author: Alena
Rate this article:
- 5
- 4
- 3
- 2
- 1
(4 votes, average: 4 out of 5)
Share with your friends!
Subtleties of technology using SHELLAC
The first thing you need to do before applying the product is to properly prepare your nails. For this purpose, professional nail service technicians do everything the same as before standard nail extensions. First, you should do a dry manicure. Then you should treat the surface of the handles with a special antibacterial agent. It is not recommended to use alcohol for this purpose, as it dries out the skin very much. The next stage involves using an orange stick or spatula. Using these tools, the cuticle is pushed back. Then those parts of it that turned out to be keratinized and have served their purpose must be removed. The easiest way to do this is with a hatchet or simple nail scissors.
What do you need to cover your nails with shellac? You definitely won’t need any miraculous remedies or tools. After a dry manicure, nail experts recommend giving the nail plates the required length and adjusting the shape.
The next step involves eliminating nail shine. How to achieve this? Use a sander. In this case, it is necessary to process the entire surface of the plates. Why is this required? Masters claim that with this technique you can achieve ideal strong adhesion of the nail plate and innovative gel polish.
Then, using a simple manicure brush, brush away all the resulting dust, which always remains from sanding and filing the nails.
After this, you will need to treat your hands with an antibacterial drug again. Only then comes the turn of applying Bondex. With its help, you can easily and effectively degrease the surface of the nail plates. This will ensure optimal adhesion between the shellac and marigold. This drug is applied in a very thin layer. If after using it the nail looks glossy and wet, it is recommended to soak in excess liquid. Otherwise, the product will peel off.
The next step is to treat the plates with base shellac gel. After which the fingers are placed in a UV lamp for 40-60 seconds. Now you can use the color product. To do this, use a brush, which usually comes with the SHELLAC itself.