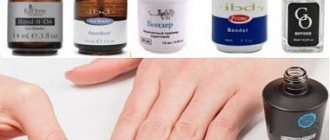
The best brands
- CND Shellac
Description: The products of this brand were the first to be able to combine the properties of both varnish and gel.
It fits easily and simply onto the plate, making it bright and shiny. It does not have a sharp unpleasant odor and, if desired, can be easily washed using a special product. Price: 950 rub.
- In'Garden So naturally
Description: A very popular brand among both professionals and ordinary fans of this type of coating. The product is famous for its unique formula, which includes a large number of medicinal components. With their help, you can not only decorate your nails, but also significantly improve their quality. Even with non-professional home use, a manicure will not take more than thirty minutes.
Price: From 370 rub.
- Entity Beauty
Description: Quite a well-known American manufacturer of varnishes. The products of this company have a very dense coating, but there are no problems with its application. The varnish dries both with an LED lamp and with UV, but despite the drying method, it retains its durability for two weeks. The collection of shades itself is very rich and has more than 130 coating options.
Price: 750 rub.
- Jessica
Description: Jessica gel polishes are applied easily and simply without preliminary preparation of the nail plate before the coating itself. The wide palette of shades includes scarlet and burgundy tones and the entire palette of pink shades, ranging from delicate pastels to bright fuchsia, as well as dark tones. For lovers of bright, extravagant nails, there is a collection of neon shades. But the company does not stop there and continues to release new colors.
Price: 1150 rub.
- GelColor OPI
Description: The brand offers a palette of more than a hundred shades from the most delicate and neutral to the brightest. The products themselves are elastic gel polishes that are easy to apply, dry quickly even with low-power lamps and last up to three weeks without chipping, scuffing or peeling.
Price: From 1400 rub.
- Harmony Gelish
Description: Premium brand of gel polishes developed in Japan. They appeared on the Russian market in 2010 and won the love of gel polish fans throughout Russia and the CIS countries. Gelish is by far the widest palette, which has about 300 different shades.
Price: 870 rub.
- Just Gel IBD
Description: A company that produces the safest nail products. Thanks to its soft formula, it does not cause allergic reactions and plate delamination. The varnish contains ingredients that help maintain a long-lasting shine of the manicure, as well as prevent chipping and cracking of the coating.
Price: 815 rub.
Single-phase coating for nail extensions: how to apply
To learn how to use single-phase gel for nail extensions, just follow the recommendations, which outline step by step how to use the product:
- Preparation of the working surface.
- Shaping the nail. This can be done using nail scissors and a nail file.
- Application of single-phase gel. Before using the coating, you need to decide on the technique for nail extensions. You can extend your nails with both forms and tips.
How to carry out preparatory work is described in the table:
| What preparations need to be made before using the coating? | How to prepare |
| Hand hygiene. | Hands must be washed with soap. After washing, you need to wait until it dries completely. |
| Cuticle removal. | The cuticle should be trimmed or pushed back. This procedure must be performed a couple of days before applying a single-phase coating for extensions. This is required so that all possible wounds have time to heal. Cuticles should be removed using non-metallic tools. |
| Polishing the nail plate. | Use a special file to level the surface of the nail. This will allow the coating to apply more evenly. |
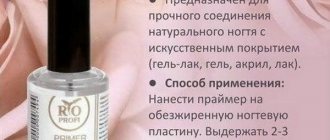
| Degreasing the nail. | Single-phase gel for nail extensions (how to use is described below) requires the use of a primer. The product is applied to the nail plate, preventing contact with the skin. |
Important! If you use a single-phase coating immediately after removing the cuticle, there is a risk of infection.
The completion of the procedure depends on the chosen extension method. After completion, it is allowed to cover the nail with a colored varnish coating, if a colored gel was not applied.
Note! Before using single-phase gel for nail extensions, you should evaluate the integrity of the nails and the skin around them. If there are fresh, deep injuries, the procedure should be postponed until the adjacent skin has healed.
How does the nail extension procedure work?
There are several nail extension techniques. This applies to both the materials used and the methods of their application. For example, some masters still use nail extensions using tips - when a plastic overlay is glued to a natural nail, on top of which a builder gel is applied. in most cases, masters have already moved away from this method, since it can seriously injure the nail plate. But nevertheless, you have to resort to extensions using tips in cases where your own nail does not have a free edge, that is, it is too short, or has an irregular shape (deformed, broken).
Typically, growth occurs in several stages:
- Manicure and nail preparation. At this stage, the master removes the cuticle, hangnails, pterygium, trims the shape of the natural nail, and shortens its length, if necessary. Then the master removes the glossy film of the natural nail with a soft file to ensure maximum adhesion of the gel coating to the natural nail.
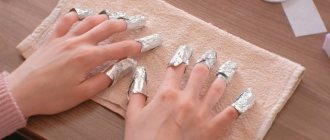
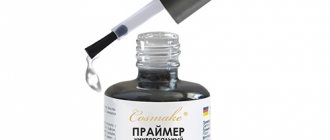
- Degreasing. At this stage, the surface of each nail is treated with a special degreasing agent (sometimes nail polish remover or alcohol is used). Then the nail is treated with a primer (primer) to hold the gel on the nail plate.
- Direct extension.
Application technique
The technique for applying single-phase gel polishes is quite simple. You will need a minimum amount of materials and time. That is why this product is quite often used for nail art at home. And by following all the steps of this step-by-step instructions, even a beginner can handle applying single-phase gel polish. For a manicure using single-phase gel polish you will need:
- pusher or orange stick;
- file with abrasiveness of 220-240 grit;
- manicure machine and vacuum cleaner (if possible);
- lamp for drying gel polish;
- cuticle oil.
The application technique itself consists of the following steps.
- Manicure. First, you should get your hands in order. This can be done manually or using a machine with cutters. In order for the coating to adhere well, in order to avoid detachments, it is necessary to carefully remove the pterygium, push back the cuticle and carefully cut it off. Give your nails the same length and shape. If you do a manicure by hand, then after you have completed this procedure, at least two hours must pass before you can proceed to the next stage. This is due to the fact that all moisture from the surface of the nail plate must evaporate, otherwise the durability of the coating may decrease.
- Preparing the nail plate. Using a file with an abrasiveness of 220-240 grit, a buff or a special router attachment, we remove the glossy layer from the surface of the nail. This needs to be done quite carefully so as not to remove excess and spoil your nails. Next, you should degrease the surface. For this, a special composition is used, which can be found in stores with manicure products. If you don’t have such a solution on hand, you can use regular alcohol or vinegar. To apply the composition to your nails, it is better to use lint-free wipes, since cotton pads can leave hairs, which are then quite difficult to remove. After degreasing, it is necessary to coat the nail plate with a primer. This composition will act as a primer, which will make the surface rougher for better adhesion of the nail and the color coating.
- Gel polish coating. At this stage the color coating is applied. To do this, you can use a brush from the bottle, although many artists prefer to apply the composition with a separate brush. To carefully lay the material, you should place a small drop of gel polish in the lower third of the nail plate, stretch it first to the cuticle, and then lift it to the free edge of the nail, carefully paint the edges without touching the side ridges. It is necessary to seal the end of the nail well. This will further strengthen the coating. If your product has flowed under the cuticle or from the sides, then you should use an orange stick and remove excess material before the gel polish cures. After this, you need to turn your painted fingers over with your nails down and leave them in this position for a few seconds so that the product evens out as much as possible.
- Drying. Now you should send your hand into the lamp. Single-phase gel polish from different manufacturers takes different times to dry. Therefore, you should read the instructions for the product. Thus, in an LED lamp, the polymerization time of single-phase gel polish is 30-40 seconds. If you do not find information on the drying time on the packaging, then you should wait for an increased period of time. It is recommended to dry all gel polishes in a UV device for at least two minutes. If necessary, the color coating can be repeated several more times. Don't forget to dry each layer. Single-phase gel polishes do not have a sticky layer, so there is no need to treat the surface with a degreaser.
After you have completely applied the color coating, you should coat the cuticle with a special oil. This is done because the skin around the nail is quite delicate, but it was exposed to aggressive influences in the lamp and requires plenty of moisture. Now a manicure that will delight you for many weeks is ready.
Who is suitable for single-phase gel?
Single-phase gels are inferior to three-phase professional systems, but are suitable for home extensions for those who want to have a well-groomed manicure without overpaying for the product. Single-phase products are less troublesome and, when applied correctly, are no less durable than three-component polymers.
Single-phase gel polish is one of the best means for manicure, as it significantly reduces application time and practically does not harm the health of the nails.
How to use it correctly at home? What are the pros and cons of using a coating such as single-phase gel polish?
Benefits and Features
The main feature of three-phase gel polish is that for proper application of this product, a base, color composition and a fixative are required. Without this, the manicure will not last for the three weeks stated by the manufacturer.
Many companies operating in the nail industry market offer a wide selection of color palettes. Choosing a suitable base and top coat is also usually not difficult. Companies offer various options, including rubber bases that can smooth out unevenness of the nail plate.
The consistency of three-phase products is optimal. It allows you to quickly and evenly distribute the composition over the nail without forming bald spots.
When choosing a suitable composition to create an attractive and long-lasting manicure, you need to pay attention to:
- smell;
- brush size;
- bottle shape;
- the possibility of combining the base and top of one manufacturer with the color coating of another.
As a rule, three-phase gel polishes are purchased to be used in a salon setting. This is due to the fact that applying such compositions to nails is somewhat longer and more difficult. However, this does not mean that using such gel polishes at home is impossible.
Single-phase gel: distinctive features
The difference between a single-phase gel and a two-phase and three-phase one is that all 3 polymer components are in a common container. The contents of the jar contain all the necessary coating functions: adhesive, modeling, protective. This means that with the help of one substance the adhesion of the polymer to the surface, strength, glossy shine and resistance to chipping are created.
Advantages of single-phase gels
- Due to its liquid consistency, the polymer is easier to distribute over the nail plate. Thicker two- and three-phase gels require more painstaking application and careful leveling.
- 3-in-1 products are cheaper than multi-component gel nail extension systems.
- Better tolerated by people with sensitive skin.
- The total thickness of the single-phase acrylic system is smaller, which reduces the load on the natural nail.
Minuses
- The wearing period of a single-phase manicure is shorter than that of two- and three-phase manicures due to the absence of a separate glossy layer.
- A low-viscosity polymer creates difficulties for novice artists: it flows onto the cuticle, under the side ridges, and spreads when forming the apex.
- It is impossible to create designs that use camouflage, colored gel, three-dimensional figures, or stickers.
Can a three-phase gel be used as a single-phase one?
The sculpting gel included in the three-phase nail extension system cannot be used as a single-phase product. It performs only a modeling function and requires an adhesive substrate and finishing coating.
But a single-phase product can be included in a three-phase application system as a 2nd layer, especially if the single-phase gel is from the same company as the base and glossy ones.
How to choose a system
There are only three types of varnish coating: one-, two- and three-phase. And you should choose the best option for yourself, focusing on the characteristics of each type. What is the difference between single-phase gel polish and three-phase gel polish?
The first criterion for choosing a system is the amount of free time. To apply a three-phase coating, we take three products: a base, colored gel polish and a top coat. It’s easier to apply single-phase gel polish: several products in one bottle. Creating a manicure will take much less time.
The financial component also matters. What is the difference between single-phase gel polish and three-phase gel polish? We spend more money on purchasing two or three funds than on purchasing one. In this regard, a single-phase varnish is superior to a two- or three-phase product. But this is not all the pros and cons. Preparing your nails for coating them with gel polish is of considerable importance. Proper results can only be achieved through proper implementation.
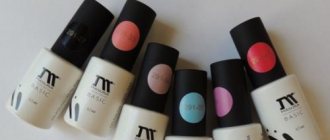
Aren't brands important? Not all manufacturers produce high-quality varnishes. Other varnishes are not just of low quality, they are harmful. That’s why it’s better to buy gel polishes from trusted manufacturers. And the optimal option is the one that suits both professionals and is popular among amateurs. An example is Masura varnishes.
What it is
Classic gel nail coating implies that the procedure involves three materials: base, color and top. Single-phase gel polish has a slightly different formula; we can say that the product combines all three bases at once, has a base + color and top.
The product is applied in two layers, with the first leveling the plate and giving a rich shade to the nail, the second creating a durable coating with a shiny effect like a top coat or finishing coat. Single-phase varnish is dried using ultraviolet rays or in an ice lamp.
The dispersion layer is removed using a special liquid to remove sticky residue. You can use a nail disinfectant; it will also do the job well. For manicurists, varnish has become a godsend, since the three-in-one product makes the job easier, saves money and creates a coating similar to a three-phase system.
Pros and cons of a cosmetic product
The use of single-phase gel varnishes has its advantages and disadvantages. Among the advantages:
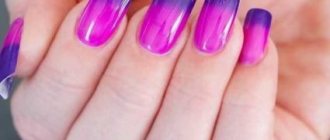
- you can choose any shade to suit your taste;
- It’s easy to create prints on your nails by combining colors;
- the product does not contain harmful chemicals that can damage the surface of the nail;
- nails breathe freely due to the fact that the gel allows oxygen to pass through to the surface;
- the product retains its shine for 2-3 weeks;
- the nail plate becomes stronger than when painted with classic varnish. This is possible thanks to the dense application of a single-phase cosmetic product.
Like any other product, such gel polishes also have disadvantages. Nail specialists in beauty salons say that it is now very easy to run into a fake. It may have exactly the same cost as the original, but its quality cannot be compared with it.
In addition, single-phase gel polishes cannot be used by everyone. The fact is that they will not fit well on bending, weak nail plates. It is also worth saying that such a product has a higher price than, for example, a three-phase gel.
What is single-phase gel polish
On store shelves there is a wide range of products we are considering, which differ not only in color, but also in the number of phases. This is where the question arises, what does single-phase gel polish mean?
By entrusting your manicure to a master in a salon, you can observe how layers of base, gel and top are applied successively to consolidate the result. This nail care technique is called three-phase because three different products are used during its implementation. Single-phase gel polish allows you to abandon the base and top, because its unique formula replaces these components.
Single-phase gel polish gray
Reviews about single-phase gel nail polish say that it has many advantages compared to three-phase. Satisfied customers note such advantages as a thin coating, which makes the manicure natural.
The base in the three-phase nail design technique has a dense structure, so the gel polish thickens the nail plate, which is especially noticeable if the nails are short. With a single-phase product this problem does not arise.
Drying the coating in a lamp
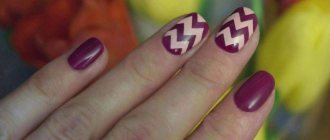
The difference between a manicure made with single-phase and three-phase varnish can be seen in the photo.
- Financial savings - a single-phase varnish costs a little more than that used in a three-phase technique, but its price is significantly lower than the total cost of salon manicure products.
- Space saving - instead of three bottles, only one is needed.
- Drying in an ultraviolet or LED lamp, unlike some conventional gels, which are suitable only for an LED lamp.
- Long lasting coverage up to 4 weeks.
But if there are so many advantages to using a 3-in-1 product, why haven’t all nail salons switched to this technique yet? It turns out that there are several negative aspects that distinguish single-phase gel polish from three-phase gel polish.
Durable coating
Using different products gives the artist a choice not only of color, but also of the composition of the product. Aggressive substances can be replaced with gentle ones at any time. In addition, a single-phase product will not be able to eliminate the unevenness of problem nails, which a thick base can do very well, building the correct architecture of the nail plate, and creating a complex design with stickers becomes impossible.
You need to decide which varnish to use to create a manicure at home, based on your own experience and the condition of your nails, but in any case, you should familiarize yourself with the correct technique for applying the chosen product.
Manicure technique with three-phase gel polish
As mentioned above, using three-phase shellac takes a fairly long period of time. However, the result will definitely not leave you indifferent, and there will be no limit to the enthusiastic glances of your friends.
Let's take a step-by-step look at the technology of applying this product to your nails from the very beginning.
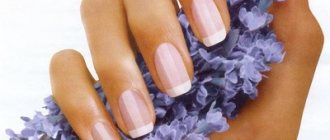
- The first and one of the main stages is the transformation of nails. It is necessary to tidy up the nails, that is, remove the cuticle in order to achieve a more accurate result. Next, give each nail the desired shape. Nowadays, natural shapes are especially in demand - rounded or almond-shaped. You also need to file down the outer glossy layer of the nails so that it is completely ready for applying products.
- Then you need to use a special product to degrease the nail plate. This is required for the best adhesion of the nail to the base coat and the gel polish itself. This procedure also protects against any dangerous microbes invisible to the human eye and protects against fungus.
- This is followed by the application of a gentle acid-free primer. It is worth choosing exactly this one in order to protect your nails from excessive penetration of acids, and yourself from a specific odor. This layer is necessary for the strongest adhesion of the nail plate to the subsequent layer of gel polish. The applied product dries within 20 seconds, and the use of a UV lamp is not required at all.
- Next, let's move on to the most interesting part. Apply the base coat in a thin layer over the entire length of the nail, completely covering it from the cuticle to the end of the free edge of the nail. It will take about 2 minutes to dry in a UV lamp, and only 30 seconds in an LED lamp.
- Events are getting more and more intense. We apply a color coating. If your choice fell on colored shellac, then it must be painted in two layers in order to avoid so-called bald spots.
But here you should be especially careful. There is no need to apply too thick coatings: bubbles may appear and you will have to start all over again.
With delicate and pastel shades the situation is simpler, so experts note that just one layer is enough. As for drying, the instructions are the same: 2 minutes in a UV lamp or 30 seconds in an LED lamp.
- Under no circumstances should you ignore the stage of sealing the end of the nail. This is important if you want to avoid possible chips and cracks.
- At the final stage of the manicure we use a finishing coat, also called “top coat”. Here it is very important to apply the product in a thin layer, with the obligatory sealing of the end of the nail plate.
If you have paid a lot of attention to the decor of your nails and they are covered with all sorts of convex details, masters recommend applying the top coat in two layers. This will certainly protect your manicure from all threats from the environment.
Next, take the time to thoroughly dry each nail so that your manicure will delight you with its beauty for a long time.
- At the end of the procedure, you need to remove the sticky layer from the surface of the top coat. For these purposes, it is better to use a special product and a cotton pad.
However, it happens that this liquid is not at hand. Then the experts advise using regular alcohol. The result will be no worse.
If applied correctly and following the manufacturers' instructions, three-phase gel polish will be able to delight others with its shine for a long time.
Main types of gel polishes
There are two main types of such varnish - single-phase and three-phase gel polish. The three-phase type of varnish is most often used in beauty salons and is used for nail extensions. To create such a manicure, masters purchase three different gels for each phase separately. This manicure takes a very long time to complete and the materials are much more expensive. Besides, it’s better not to do it yourself.
We will dwell in more detail on single-phase varnish. After all, to create a flawless manicure with such a varnish, we only need one varnish, which immediately combines all three phases. You can apply this varnish yourself without much difficulty, since it is as easy to apply as regular varnish. In addition, its cost is not as high as that of three-phase.
The only thing you will have to spend a lot on is a special UV lamp to dry the gel.
But believe me - after trying just once to do a manicure with this varnish, you will never want to go back to the usual one.
How does nail extension work?
Thanks to single-phase gel polish, you can also extend your nails if you have very short ones. This procedure can be carried out at home with your own hands, having previously studied several videos, read several articles and purchased the necessary materials, primarily tips.
Let's look at the whole technology:
- We do a regular manicure, after which we treat the nails and cuticles with antiseptics. Then we cut off our nails almost completely and sharpen them with a nail file.
- For each nail separately, select the appropriate tips. Tips come in two main types: classic and French tips.
- Then we put the tips aside and use primer to degrease the base of the nail so that the tips stick to the nail better.
- Next, glue all the tips to the nail. The place where the tip was glued should be treated so that the joint is not very noticeable. Try not to touch the base of your own nail too much.
- Carefully polish the entire surface and make it equal to the natural nail.
- The next step is to apply the gel to the resulting base. The gel is dried using a lamp. Then carefully polish the resulting surface.
- At the end of the previous stage, we should already have a long, smooth nail. All that remains is to re-coat it with single-phase varnish and dry it again.
As you can see, extending your nails yourself using gel polish will not be difficult. However, if you have already made up your mind and bought everything you need for this, and something also doesn’t work out for you, try giving this manicure to someone you know.