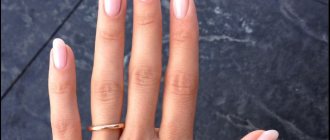
The optimal solution to many nail problems
Using the gel, you can strengthen the nail, hide all sorts of defects, create the desired length and shape, decorate it with a variety of designs, and much more. After polymerization, the gel has a fairly plastic structure, which allows you to create artificial nails that are as similar as possible to natural ones. However, as the nail continually grows, the material also shifts. To restore your nails to their original beautiful appearance, it is necessary to carry out regular corrections.
A procedure such as correction of gel nails in a beauty salon is one of the most popular services. Usually, after 3-4 weeks, the nails grow by several millimeters, the architecture of the artificial nail is disrupted, and the highest point, the apex, shifts. All this contributes to fragility. It is also possible for the material to peel off.
Materials and equipment
For gel correction, the following consumables and equipment are required:
1. Gel. The wizard selects a 3- or 1-phase system. You will need a base gel, a transparent gel to create a base, a camouflage gel, and a white gel for a jacket.
2. Degreaser.
3. Primer. Acid or acid-free. Designed to create good adhesion of the gel to the natural nail plate.
4. Gel topcoat. Designed to create a protective layer and add shine to finished nails.
5. Liquid for removing dispersed (sticky) layer on the surface of the gel coating.
6. Paper forms.
7. Brush for gel nail extensions.
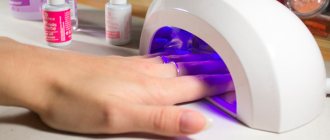
8. UV lamp with a power of at least 36 W.
9. A router or a set of files of different abrasiveness (from 100 to 240 grit).
Each correction differs in the complexity of execution, the amount of consumables spent and time. Simple nail correction with gel is the most common. Technically it is basic.
A simple correction is always planned in advance and carried out after 3-4 weeks. In its process, the material is laid out only in the area of the regrown nail and the side ridges. The instructions below will tell you how to correct your nails with gel in 1 hour. The procedure is simple, but requires patience.
How is gel application different from regular extensions?
Using gel extensions of the nail plate, its length is extended. Despite the fact that the nails seem well-groomed, they look unnatural, and in rare cases, vulgar. Gel extensions lead to brittleness and separation of the nail plate. Even if a girl decides to get such a manicure for the first time, her nails become weak - this is the other side of the external beauty of her hands.
Unlike extensions, gel nail coating is based on applying a small amount of product to the surface of the plate, without lengthening it. For this manicure use:
- biogel - as a strengthening and treatment of the nail plate from delamination;
- gel as a base for base and sculpting;
- colored biogel is a decorative coating for giving nails an individual design.
With gel coating, nails look natural and well-groomed; there is no pronounced bulge of the plate, as after extensions. Often, girls get a manicure with gel coating in order to grow their own nail length in the future.
Step-by-step gel nail correction
Step 1: the hands of the master and client are treated with a disinfectant solution.
Step 2: If necessary, a European manicure procedure is performed.
Step 3: at the client’s request, the length of the nail is shortened and the free edge is given the desired shape.
Step 4: those places are processed using a router or file where the material has peeled off. The entire surface of the nail is also smoothed. The highest point is cut down because the symmetry is broken. The gloss is removed from an overgrown nail using a softer file with an abrasiveness of 240 grit. You need to work with files very carefully so as not to saw through or injure the natural nail. After washing down, use a brush to remove all dust well.
Step 5: The nail plate is degreased. The regrown part of the nail is treated with a primer. It is applied in a very thin layer. Too much of it can be one of the reasons for the material to peel off.
Step 6: if the master uses a 3-phase gel system in his work, then he applies a base layer of gel to the entire surface of the nail. This layer is polymerized in a UV lamp for 2 minutes. Sometimes during the polymerization of the gel, the client may experience discomfort and burning on the surface of the nail plate. In this case, it is recommended to remove your hand from the lamp for a few seconds and place it again as soon as the reaction stops.
Step 7: Without removing the dispersed layer, apply a small amount of gel to the regrown part of the nail and distribute evenly. Do not allow the gel to come into contact with the cuticle or flow onto the skin of the client’s hands. The distance from the gel to the cuticle should be approximately ½ millimeter. This layer is also polymerized in a UV lamp for 2 minutes.
Step 8: The second layer of gel restores the nail architecture and creates the highest point - the apex. This layer is polymerized in a UV lamp for 2 minutes.
Step 9: Once the new nail is created, it is filed to even out the surface of the gel and give the nail its final shape. The cuticle area is cut very carefully.
Step 10: the entire surface of the nail is covered with finishing gel and polymerized in a UV lamp for 1-3 minutes. If a gel with a dispersed layer is used, then after polymerization it is removed with a special liquid.
After the new nails are ready, you can offer the client to cover them with decorative varnish or decorate them with a design. Finally, nourishing oil is rubbed into the cuticle.
How to correct extended nails
If you do not want to contact a specialist, and you are confident in your abilities, then you can restore your manicure yourself at home. You will definitely need to order or buy in the online store all the necessary materials and tools. Nail correction at home is justified from a financial point of view if you do it regularly. The main advantages of this solution are that you can make corrections whenever you want and help your friends.
Those who are interested in how to correct nails should first watch the lesson or read the step-by-step instructions with photos so as not to spoil the manicure. In addition to modeling material, you will need to purchase a UV lamp. To simplify the process, you can buy a manicure machine, the only drawback is that you need to learn how to use it and understand the sets of attachments. You don’t have to buy the most powerful router; you definitely don’t need a professional one. Its cost is relatively low, and you will use it for a long time.
- Urethritis in women - how and how to treat: drugs and folk remedies
- Good liquid for removing shellac from nails
- Hormones produced by the pituitary gland
Correction of extended nails with gel
This is one of the material options that is used for extensions and modeling. Correction of gel nails involves the use of specific materials that you will have to purchase yourself. For the procedure you need to have:
- degreaser;
- gel;
- modeling gel;
- liquid for removing the sticky layer;
- acid-free primer;
- antiseptic;
- cuticle oil.
This is the most minimal set for correcting extended nails with gel. If you used a single-phase gel for the first time, you can use it for correction. In the case of a three-phase procedure, any system is suitable. Next, you need to have a minimum set of tools that will help you do everything easily and quickly:
- lint-free wipes;
- buff for polishing nails;
- Ultraviolet lamp
- pusher or orange sticks;
- brushes for modeling nails with gel;
- gel files, suitable for 150/180 and 100/100 grit.
- nail clippers for cutting cuticles or blades;
- artificial nail clippers.
Below is a step-by-step description of how to correct gel-based nails. It is very similar to the procedure when working with acrylic. The instructions consist of the following steps:
- Degrease, disinfect hands, tools, remove varnish and paint from the plate (it is better to use products without acetone).
- Use an orange stick to lift the cuticle.
- Using a nail file, correct the shape, first file off those parts of the gel that have begun to lag behind. Then, in the place where the old coating begins at the cuticle, remove all the gel, you should get an imperceptible transition to the natural nail.
- Treat the surface with primer so that the infection does not get under the nail, remove excess with a towel.
- The smooth part of the regrown plate is cut off using a buff. Next, the hole is immediately filled with gel and dried with a UV lamp.
- When the material dries, you need to remove the sticky layer and form the correct shape. Use a file to immediately correct any unevenness, if any. The base layer of gel is applied evenly over all parts of the plate. A little more material is needed for the stress zone (just above the middle of the nail), but do not overdo it. Then dry the material again in a UV lamp.
- Then you need to correct the shape, smooth out defects and unevenness using a nail file. Be careful not to accidentally wear off the base layer to the old coating.
- Remove dust regularly with a brush.
- Before applying the finish, you need to make the desired design (drawing, French).
- Next, apply the finishing coat in one layer and dry under a lamp. To make it smoother, then apply a buff.
- You need to treat the side rollers and cuticles with nourishing oil (rub in like a cream).
Correction of acrylic nails
This type of artificial material is very popular among girls. Correction of nails with acrylic is carried out according to a similar algorithm, as with the option described above. To ensure everything works out correctly, you can use the instructions described below:
- Treat your hands and work surface with a disinfectant.
- Remove the varnish layer with a non-acetone product.
- Treat cuticles with a softening agent. After 2 minutes, use a wooden stick/spatula to remove the pterygium from the natural plate.
- Remove any remaining product using a lint-free cloth. File down the free edge with a nail file and set the desired shape. It is necessary to cut down 2/3 of the thickness of the material.
- Remove shine from the natural nail for better adhesion of the plate to the acrylic.
- Treat the peeling areas with a fine-grain nail file.
- Next, you need to treat the part where there is no acrylic using a degreaser.
- Treat the nail plate with a primer, which connects the keratin of the natural part with the artificial material.
- Run the simulation. Make sure that the acrylic is applied evenly over the entire area and does not penetrate the skin or into the lateral sinuses. Extension brushes should only be made of natural bristles; do not press too hard when applying.
- Then place your hands under a UV lamp for 2.5 minutes.
- Apply special oil to the cuticle.
Nail correction with shellac
This is a new type of coating that is easier to apply and lasts as long as gel/acrylic ones. Nail correction with shellac is carried out in two ways: with or without complete removal. To carry out the procedure, a standard set of instruments is used. Correction of gel polish is carried out according to the following instructions:
- It is recommended to treat nails that are too dry using a special activator. it consists of essential oils and water, apply it to the sides and keep for 5 minutes.
- Use a pusher to pick up the shellac polish. Carefully remove the coating; this is easier to do using the same activator.
- Using a nail file, give the regrown edge the required shape.
- Next, get a manicure or use a special gel to soften the cuticle and push it back.
- Clean the plate with a nail polisher until a shine appears. This step cannot be skipped; then it will be easier to remove the layer if necessary.
- Degrease the surface.
- Coat the substance that replaces the base and finish, dry it under a lamp.
- Select a shade of shellac, apply one layer to the surface, and dry.
- Then another layer, and again you need to dry it.
- Apply finishing coat last and let dry.
- Apply cuticle repair serum.
Nail correction using tips
This procedure is similar in its algorithm to working with gel extensions. Restoring sealing, updating the coating, replenishing modeling materials, giving an aesthetic appearance - all this is the correction of nails using tips. Below is an algorithm for acrylic technology:
- Saw off the overgrown tips with a reversible nozzle and process to a thin substrate.
- File the surface of the nail with a 180 grit file, smooth out the transition from the tip to its own plate.
- Use a spatula to push back the cuticle.
- Use a diamond attachment to perform a hardware manicure.
- Degrease, disinfect the nail, wipe with a napkin (dry).
- Apply a small amount of acid-free primer at the base of the tip.
- Lengthen the nail bed with camouflage acrylic and shape using a brush.
- Model the cuticle growth area and apex with matte, one-time powder.
- Next, you should compress the stress area.
- Use a clothespin to secure the clamp.
- Model the free edge of the nail with white acrylic. You can put it on two tips at once.
- Form the free edges with the base of a thick brush.
- Use the drum attachment (reversible) to file the tip of the nail.
- Treat the inner, longitudinal arch in the same way.
- File the cuticle and apex area with the “corn” attachment.
- Use a 100 grit file to file down the nail plates.
- Sand the inner arch of the nail using the reverse corn attachment.
- Use a carbide tip to treat the hyponychium area (where the inside of the nail comes into contact with the skin).
- Treat the outer and side parts with a 100 grit file and remove dust.
- Coat the inside of the loose tips with finishing gel without sticky salt.
- Cover the outside with gel too.
- Keep your hands under the UV lamp for 2 minutes.
Complex correction
Complex nail correction with gel is carried out in cases where the time from extension to correction is more than 4 weeks. As a rule, at this time there are definitely breakages, and the material has already moved to the middle of the natural nail. This correction almost corresponds to full nail extensions. In the process of complex correction, the master cuts all the material down to the substrate. Then the gel completely creates a new nail, taking into account all proportions.
During complex corrections, an aquarium design or French manicure is often performed or restored. It is important to correct the reverse side of the nail as well. Be sure to cut out any irregularities or detachments using a router, and create a new arch.
Frequency of correction of extended nails
Many people wonder how often they need to correct extended nails.
There can be no clear answer to this. It all depends on individual characteristics, such as the rate of nail growth, fragility, and susceptibility to mechanical stress. It is also important what field you work in and whether your work activity involves the use of household chemicals. On average, the correction procedure after nail extensions should be carried out once every three weeks.
If your nail growth rate is low, you take good care of your hands and wear protective gloves when necessary, you will be able to make corrections less often. If by nature your nails are weak and brittle, and you have to do a lot of manual work, which negatively affects the condition of your manicure, then correction after extensions will have to be done more often. Over time, you will determine the frequency that is optimal for you. This will help you make an appointment at the manicure salon on time.
Nail extensions are a current and popular beauty service. It is worth remembering that it requires correction after a certain time, which is advisable to do in the salon. However, correction of gel and acrylic nails can be done at home if you are careful and patient about this procedure.
French manicure correction with gel
It should be noted that the correction of the French manicure itself is somewhat different from the usual correction. You can restore the jacket using complex correction and cutting, or you can use the method of removing the free edge. In this case, the free edge is completely cut off with a router or file. It is given a correct and symmetrical smile shape. The filing of the nail surface and general preparation follow the same steps as for a simple correction. Then a special paper form is placed under the natural nail. This will serve as a working surface for creating a new free edge. White gel is laid end to end with the processed edge. After its polymerization, the nail is filed in accordance with the rules, and the free edge is given the desired shape and length. At the end, the French manicure is covered with a topcoat.
Typically, the time for a complex correction or jacket is 1.5-2 hours, depending on the chosen design.
Types of correction of extended nails
Depending on the complexity, there are three types of nail extension correction procedures:
- Simple. The fastest in terms of execution time. It only involves the restoration of small cracks and painting over the nail pattern. They resort to it only if the coating has been slightly damaged.
- Average. Involves re-application of extension materials onto the client's nail. Thanks to this, the overgrown hole is processed, and the manicure is given a beautiful and well-groomed look.
- Complex. If the nail was broken or subjected to significant mechanical stress, the extension procedure will have to be performed again. Usually it is only required for one or a few nails. But in any case, this is the longest and most complex type of correction, thanks to which the nail is restored to its original appearance.
Correction is a necessary procedure that should be repeated periodically if you are extending your nails. However, in order not to bring your manicure to a critical state, you should treat your nails with care, avoid mechanical damage and exposure to aggressive chemicals.
Correction with gel polish
If the client is already tired of extended nails, but does not want to completely file them down, then we can offer nail correction with gel polish. This is a great way to gradually remove artificial material. In this case, the nail is processed in accordance with the instructions for a simple correction. During filing, the border of the artificial material is compared with the surface of the natural nail, without forming an apex. The nail is given the desired shape and length.
After washing and pre-treatment with primer, the entire surface of the nail is covered with a thin layer of base gel polish. Next, 2 layers of gel polish and the topcoat are applied according to the technology. Gel polish coating cannot be corrected. After 3 weeks, all material will simply be deleted. If the client wishes to extend her nails again, the master will perform full nail extensions with gel. In the future, correction will also take place every 3-4 weeks.
