Features of manicure
Any nail shape is suitable for a Mickey Mouse manicure. It’s just that on short ones you can make a small-sized image, and on long ones the picture will look quite original, occupying the entire surface of the nail plate.
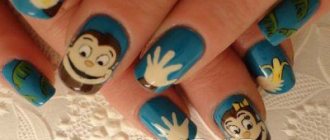
Variations of execution can be completely different. The composition may include a drawing of Mickey; his girlfriend, Minnie; and adding interesting cartoon elements: bows, hearts, etc.
Or it could be a minimalistic option: when only Mickey's head is drawn with ears on an accent finger, and the others are covered with a neutral background (or a polka dot background).
Combination of shades
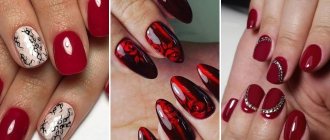
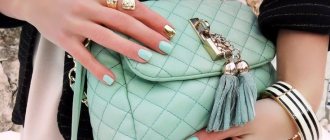
When choosing color solutions for a Disney-style manicure, you can limit yourself to two colors: black (for the Mickey Mouse picture) and white (for the background). This is a stylish and classic option.
Ideally, to fully convey the mood of the hero, you should add a red tint - it will perfectly complement the design.
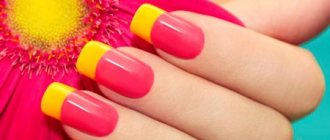
In the summer, when everything around is full of colors, you can add bright blue, green, yellow, crimson and orange.
How to make a Mickey Mouse style manicure with your own hands?
Masters paint the smiling face of Mickey the mouse using a thin brush. For images, black, white and red gel paint are used. To copy a design from a picture onto your nails, you must have at least an average level of artistic skills. This is especially difficult if you apply the image to a girl’s small nails. To begin with, you can draw figures on paper to feel more confident during the manicure procedure. There are lighter interpretations of the Mickey Mouse design. Read about them in the continuation of the article.
Required Tools
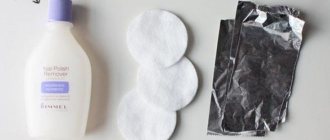
To draw Mickey Mouse on your nails, you need to prepare the necessary materials and tools:
- file for natural nails (180-220 grit);
- buff for polishing (150-220 grit);
- degreaser;
- acid-free primer;
- rubber base coat for gel polish;
- flower beds;
- top coat for gel polish (glossy or matte);
- liquid for removing the sticky layer (it is better to buy 3 in 1: a product for degreasing, removing stickiness and dehydration);
- auxiliary materials: lint-free wipes, orange stick, tweezers.
Important: the instrument for performing manicure must be subjected to mandatory disinfection and sterilization.
When is it appropriate and how to draw Mickey Mouse on your nails?
Before you design your nails, they need to be properly prepared. To do this, the plates are given the desired shape. At the next stage of preparation, the cuticle is pushed back or trimmed. It is not recommended to start painting until the entire surface of the nail is degreased, after which the base coat is applied. A Mickey Mouse manicure will be truly individual, fabulous, if you strictly follow some rules and pay attention to the subtleties. To do this, you should watch a thematic video that will show how, what, and why you need to do it.
The image of Mickey Mouse on nails should be appropriate. For example, it can be combined with a bright shirt, T-shirt, or jeans. We can definitely say that such a nail design will not be appropriate if you are wearing an evening dress or classic shoes. What will fit here are original sandals, characterized by an unusual shape and design. Take the time to look at a photo of Mickey Mouse on your nails to understand how attractive and appropriate it will be. Sometimes adult women choose this design. By choosing the right clothes, you can create the image of an unusual, and most importantly, not boring lady.
Hygienic manicure
We perform manicures using any technique convenient for you: hardware, edged, combined or European.
We pay special attention to cleaning the pterygium, because its remnants will cause peeling of the coating in the future.
- We shape the free edge and remove the gloss from the nail plate using a buff or file of the appropriate abrasive. Be careful, you only need to remove the top glossy layer and create roughness for better adhesion of the artificial material to the natural nail. Do not rub your nail until it turns red, as this will only cause harm.
- Apply the degreaser and immediately the acid-free primer with a wrung-out brush, using gentle rubbing movements, and let air dry for 1-2 minutes.
- Apply the base coat. If the nail plate is uneven (this can be easily checked by looking at the highlight), we perform alignment in compliance with the correct architecture. In this case, it is better to work one nail at a time.
- We apply the color coating in several layers. We dry each of them in a lamp.
- We carry out the design (instructions are described below).
- We fix the coating with topcoat.
How to draw correctly
You will need:
- gel polishes black, white, red and yellow;
- a thin brush (a kolinsky brush is perfect);
- dots (if you don’t have them, use a toothpick).
The figure can be depicted on one or more fingers.
Delicate manicure for romantic natures
Despite the fact that Mickey is a cartoon and comic book hero, he is loved not only by children. Many girls and women are very fond of the cheerful and resourceful character. And the variety of manicure designs with Mickey Mouse is proof of this. If you want to decorate your nails, then pay attention to the option in the classic soft pink color.
Repeating this manicure is not at all difficult:
- Apply primer and base gel polish to all nails. And dry in LED lamp for 30 seconds.
- Paint four nails with pink polish and one with glitter. And dry again under the lamp. To make the color more dense, apply two coats of polish on each nail.
- Take a thin brush and, dipping it in black gel polish, draw the silhouette of Mickey Mouse's head on the tip.
- Finally, apply a thin layer of topcoat and let dry. Don't forget about the important point - sealing the ends of the nails. This technique will help you increase the life of your manicure.
Mickey Mouse
Before drawing Mickey Mouse on your nails, it is better to first practice on paper. The technique is not the simplest, so carefully study all the details of the drawing.
Let's start creating the design:
- On a white background we draw the outline of Mickey Mouse: arms, legs, muzzle, tail and body.
- Use black gel polish to paint over part of the mouse’s forehead and ears, as well as the main body (leave space for shorts and boots);
- We paint the shorts with red gel polish, the boots with yellow, and the buttons and gloves with white (highlight with a black outline).
- Using dots we draw eyes (first white ovals, and inside them, below, black circles), a nose and a mouth (with a red tongue inside). Dry it in a lamp.
- Some places should be highlighted with a thin black outline to give the picture volume.
- Cover everything with topcoat, dry it in a lamp, remove the sticky layer. The design is ready.
Do not forget that each layer of application must be dried in a lamp.
Minnie Mouse
Mickey had a good friend - Minnie. She is drawn exactly the same as Mickey, only in a skirt and with a bow on her head.
An interesting manicure idea: choose the main color black on your left or right hand and draw Mickey on one finger.
On the second hand, take red as the main color and draw Minnie on one finger on a white background. This pair of famous heroes will perfectly decorate your nails.
You can also draw kissing characters on this finger, or on two neighboring ones - this will create a whole composition.
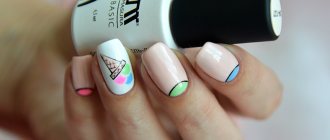
Geometry
Geometric designs on nails with Mickey Mouse imply a minimalistic and clear figure.
A completely black circle is drawn on a neutral background, ears are added to it - only the silhouette of the character is obtained.
The remaining nails can be covered with a polka dot print.
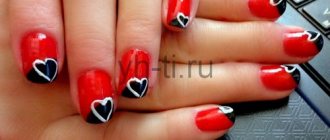
Mickey Mouse ears
Drawing not the cartoon character itself, but only his ears is a great idea for a Mickey manicure.
- First, you draw a black headband of the desired size, and then the ears on the sides.
- To represent Minnie, add a bow to the top of the headband.
Lunar manicure
Moon manicure is especially popular today.
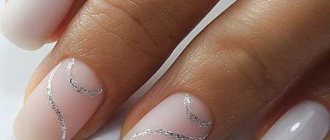
With this design, the white hole near the cuticle is not painted over at all, or it is covered with a different tone, contrasting with the main one.
The following options would be stylistically appropriate:
- white lunula, red base tone and red ears extending from the lunula;
- the nails have red lunulae, a white base tone, and an image of Mickey on the accent nail.
It is not necessary to follow the suggested color schemes. The main thing is that the selected shades are combined with each other.
Stamping with Mickey Mouse
A quick, simple and worthy alternative to drawing is stamping. If you don't already have a hero plate, you can buy one.
Step-by-step design with Mickey Mouse:
- We do the basic manicure before applying the top coat.
- Remove the stickiness from the color layer.
- We apply a special varnish to the stamping plate and use a scraper or plastic card to evenly distribute the paint over the design.
- We transfer the design to a silicone stamp and imprint it on the nail.
- Cover everything with topcoat. Dry it in a lamp and remove any residual stickiness.
If you stain your skin with stamping polish, it can be easily removed with nail polish remover.
Stickers
There are many nail stickers featuring Disney characters, including Mickey Mouse. This is the easiest option for manicure.
Another advantage is that there are even plot pictures. The main thing is to choose from the whole variety the ones that are right for you.
When choosing between water-based or adhesive-based stickers, it is better to give preference to the latter. They are brighter and do not require additional equipment for application: just remove the sticky color, stick on the image, press and cover with topcoat.
How to draw Mickey Mouse on your nails
If you are interested in how to draw a cartoon character step by step, then use not only photos, but also videos as a visual example. It all starts, as usual, by applying a base layer, and then the main color. Next, take a thin brush and paint two circles (places for the eyes) with white varnish, then they smoothly connect with each other downwards, forming the mouse’s face.
Once the image is ready, you can start painting it with black varnish. Again, using a thin brush, a smile, nose, and eyes are created. Around the resulting face, a border is also made with black varnish. Finally, two large ears are drawn in the form of black circles. This is the simplest description of the process of applying a step-by-step image of Mickey Mouse on nails.
There are still many options to gain experience, you can try each of them. At the end, the drawings are always covered with a finishing composition, which allows you to consolidate the result.
Other interesting manicure options
Don't limit yourself to the ideas above.
Add creativity to your design:
- A red jacket with white polka dots and a black bow on all nails, and two mice on the thumb will be beautiful;
- Black and white heroes can be lined with rhinestones of different sizes;
- black silhouettes or stickers on a silver background will look elegant and festive;
- if length allows, add fun captions.
Whatever you choose, it is important to perform each stage correctly, then your manicure will be stylish and long-lasting.
Creative ideas
A manicure with Mickey and Minnie Mouse will definitely put any fashionista in a positive mood. It's impossible to be sad when your nails are decorated with such cuteness.
Stylists and fashion experts confidently claim that your favorite design will remain at the peak of popularity for quite some time. All thanks to his uniqueness and charisma.
Plain
The easiest way for beginners in the nail service is to give them monochromatic options with simple silhouette pictures. Admire the proposed photos, how easily and naturally a simple manicure with Mickey Mouse decorates women’s hands.
The advantage of a monochromatic design is its phenomenal versatility:
- suitable for women of any age;
- fits into the style of different outfits;
- looks elegant in a variety of settings.
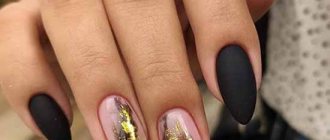
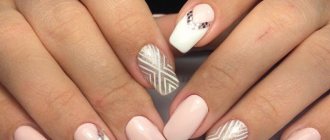
A discreet beige background with a delicate black pattern on the surface of the nail plate of the middle or ring finger looks organic. This design is perfect for every day and for work. Moreover, the same manicure can be used in an evening setting, you just need to improve your nail art a little. In this case, rubbing in matching colors, sparkles or rhinestones will help.
In addition to classic nude shades in a monochromatic version, rich, rich tones are successfully used. The brightness of the background perfectly compensates for the ascetic design of the picture.
Geometry
Geometric shapes on nails , including round Mickey and polka dots on bows, have been a constant trend in recent years. Almost all the details of the classic design with Disney little mice contain one geometric figure or another: bows, prints on clothes, ears and other parts of the animals. Abstract and simplified forms occupy a special place in the style.
The use of different color palettes and decorative elements allows you to diversify a themed manicure.
Bright ears
Expressive, determined people will most like a manicure with Mickey Mouse, which has a color accent on the ears. The fundamental technique in this case is to draw a silhouette with large ears. Moreover, the color chosen is necessarily an alternative to black, which was initially accepted as a classic of the genre. For young fashionistas, for example, a manicure with yellow, orange, light green, pink or mint colors is suitable.
Lunar
An interesting idea for a lunar manicure will certainly be the unusual shape of a hole in the shape of a mouse head with round ears. The holes in the nails will be an excellent basis for a future smile, a Minnie bow or part of it, or a paw in a white glove.
The trend is a combination of the original thematic zone of the nail hole with an atypical bright smile zone.