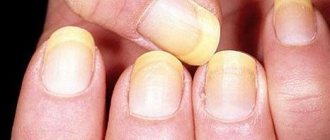
Causes of “poor health” of nails
The reasons why the nail plate can become fragile, thinned and brittle are quite varied.
Aggressive mechanical impact on nails worsens their condition
- Mechanical impact , including the use of files with too coarse abrasive or from the wrong material (for natural nails it is recommended to use glass or ceramic files).
- Frequent unprotected contact with aggressive household chemicals. Do not use cleaning products without gloves. Or say goodbye to dreams of strong, healthy nails.
- Problems with the health of the whole body. Possible diseases of the stomach or intestines, poor metabolism, decreased immunity, overwork, stress, and taking antibiotics.
- Lack of vitamins or minerals. Deficiency of calcium, zinc, magnesium, sulfur, phosphorus and silicon instantly and extremely negatively affects the condition of the keratin layers that make up the nail plate.
Treatment of brittle and peeling nails
Treatment should begin with getting rid of the causes of the disease as quickly as possible. It is enough to follow some simple and even pleasant rules:
- Use special coatings with the addition of minerals, moisturizers, silk fibers, and vitamins.
- Choose a safe file - glass or with the smallest abrasive.
- Check the ingredients of the products you use. They should not contain toluene, formaldehyde and their analogs, which are harmful to the structure of the nail plate.
- Do wellness treatments: baths with sea salt and iodine, masks with lemon. Use oils.
- Wear gloves when working with detergents and cleaning products.
- Rule out diseases of the gastrointestinal tract and thyroid gland.
- Take a course of vitamins or introduce foods high in microelements and vitamins into your diet: dates, seaweed, shrimp, cheese, cottage cheese, eggs, fish, nuts, beans, celery, blueberries, ginger.
- Don't bite your nails.
- Do not tap your nails on the table, computer keyboard, or piano keys. This creates microcracks in the nail plate and aggravates brittleness problems.
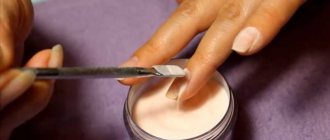
- Another effective way to strengthen your nails is to seal them with wax.
Use a fine abrasive file
Don't bite your nails
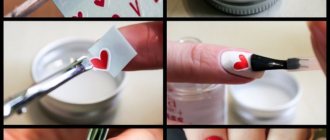
How to seal a nail at home
At home, you can repeat several salon techniques:
- Massage beeswax into each nail, paying special attention to the tip, which means sealing the end of the nail. Under thermal influence, the plates heat up, the wax melts, evenly enveloping them with a protective film.
- Having completed the preliminary procedures, dip your fingertips in paraffin heated in a water bath for a few seconds, put on cellophane gloves or wrap them in cling film and put on warm gloves. After 15 minutes, remove the paraffin and apply nourishing cream to your hands.
- Buy a cream with proteins, vitamins or a special crystal mineral in the store. It is rubbed into the nails and remains on their surface for about a week.
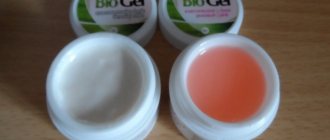
- Apply a complex of two biogels made from teak wood resin and fix with a UV lamp.
Many of the procedures presented above require certain financial investments; it will be cheaper to carry them out in a salon. However, the best home method for sealing nails from this point of view is paraffin therapy. Girls often have a question about whether it is necessary to seal the free edge of the nail with shellac. To prevent its delamination and not resort to the sealing procedure, it is necessary to seal its tip with gel polish during manicure.
The healing power of wax
The healing properties of natural beeswax and its benefits for nails have been known for a long time. Wax moisturizes and softens the cuticle, has an anti-inflammatory effect and kills bacteria.
It contains a huge amount of useful resins and minerals, as well as propolis, vitamin A and beta-carotene.
Nail wax
Sealing the nail consists of filling its entire surface, down to the smallest microcracks, with a layer of wax. This layer does not wear off for 1-1.5 weeks and throughout the entire time it nourishes and moisturizes the keratin layers , and also creates a protective barrier. It is also possible to use bio-wax, natural beeswax without additives or cosmetic wax.
Wax-based cosmetics are not only recommended for treating brittleness and splitting, but are also incredibly effective for treating “dead” nails after unsuccessful extensions.
For complete recovery, you need to carry out the procedure about twice a month . It is important that the nails are as short as possible. not recommended to use a decorative coating during treatment .
Don't be alarmed if you experience pain during the wax sealing process. This is normal if the condition of the nails is very advanced.
How to seal nails?
The method for performing the described procedure depends on the material with which it is performed. Among all the ways to properly seal nails, you should focus on 1-2 suitable options. It is advisable to make the choice with a manicurist. The specialist will tell you which technique will be optimal, taking into account the individual characteristics of the plates, their condition and elasticity.
Sealing nails with wax
The most gentle and useful recovery method, which is easy to do yourself. Natural beeswax contains valuable components - keratonides, minerals, propolis, beta-carotene and other substances. They nourish and protect the nail plates, strengthen them and give them a natural shine.
Sealing nails with wax at home:
- Get an unedged (European) manicure.
- Apply nourishing oil or liquid vitamin E to the periungual ridges and plates.
- Polish the surface with a special suede file or buff.
- Rub wax thoroughly into nails to seal.
- Repeat polishing.
- Immerse your fingers in cold water for 1-1.5 minutes.
- Dry your hands with a dry cloth.
Sealing nails with gel polish
The method under consideration refers to cosmetic procedures that extend the service life of the coating. There are several ways to properly seal your nails with gel polish; you need to choose the most convenient and simple one.
Available method:
- During the painting process, move the brush down towards the end of the plate.
- After manicure, apply gel polish along the outer side of the nail.
- Gently brush the brush from below the free edge, lightly grabbing the end.
Sealing nails with gel
This material is used primarily for extensions, but it can be used to significantly strengthen the plate. With this coating, nails acquire increased strength for 3-4 weeks. They do not break or delaminate, they are easier to grow, and for correction you do not need to completely remove the material.
How to do gel nail sealing:
- Get a European manicure.
- Disinfect and degrease nails.
- Apply base coat.
- Take a little gel onto the brush and first treat the free edge of the plate and its end.
- Continue sealing the nails, evenly stretching the material into a thin layer.
- Hold your hands in an ultraviolet lamp for 2 minutes, in a diode lamp for 15-30 seconds.
- Apply top coat.
- Remove the sticky layer with a degreaser.
Sealing nails with biogel
This coating is made on a natural rubber base, so the plates do not lose their elasticity and are less susceptible to chipping. Therapeutic biogel is enriched with useful components and vitamins that restore damaged horn cells and strengthen them. Sealing nails at home is performed similarly to the previous technology. There are several colors of biogels, and after fixing the transparent coating, you can do a decorative manicure.
Mineral nail sealing
The described product penetrates deep into the plates. It enriches tissues with minerals, making them harder and stronger. Nail sealing paste fills voids and microcracks, restoring the integrity of the horny surface. Additionally, it gives a natural shine and slightly whitens the plates. When performing the procedure, you will need a high-quality mineral paste to polish and seal your nails. It is sold in specialized manicure stores and is used very sparingly.
Sealing technology:
- Make an unedged manicure and file the surface of the nails (remove the natural gloss).
- Degrease the plates.
- Using an orange stick, apply a small amount (about the size of a pea) of paste to the nail.
- Rub the product in with a polishing block, moving from the middle of the plate to the edges.
- Separately treat the ends of the nails.
- Use a soft buff to polish the plates to a shine.
- Apply nourishing oil.
Keratin nail sealing
The active component for this procedure is a solid protein that is part of the structure of healthy natural plates. Sealing nails with keratin helps not only strengthen them, but also restore them. This is especially necessary after extensions, when the plates are thinned and weakened. To carry out sealing, you will need to make a special mixture from the available ingredients (in equal proportions):
- keratin;
- mineral paste;
- wax.
How to do nail sealing:
- Perform a European manicure.
- Degrease your nails.
- Remove the top glossy layer (polish).
- Apply a small amount of the resulting mixture to the plate.
- Thoroughly rub the composition into the nail using a soft buff.
- Go through the ends separately.
- Lubricate your nails with nourishing oil or cream.
Wax sealing procedure
Tools and materials for sealing nails
Biowax for restoring nail plates
- File for shaping.
- Buff for waxing (1200 grit) or a suede sanding file.
- Steam bath - water with a small amount of soap added. You can add sea salt.
- Natural beeswax. It can be replaced with biowax or cosmetic wax.
- Cosmetic oil for nails and cuticles.
- Orange stick, cuticle remover.
It's easy to make your own nail and cuticle oil. Mix any vegetable oil, preferably olive, with vitamins E and A (capsules), lemon juice or castor oil.
Sealing nails with wax: instructions:
- File off the free edge and give your nails the desired shape. We remove everything that flakes and looks bad.
- Immerse your fingers in the bath for 7–10 minutes.
- Get an unedged manicure. It is important not to cut the cuticle, otherwise painful sensations during sealing cannot be avoided.
- Use a file to polish the surface of the nail plate.
- Rinse your nails and wait until they dry.
- Apply wax to dry and warm nail plates and rub each nail with a buff for about two minutes until you feel warm and visually shiny. Pay special attention to the edge of the nail and the sides.
- To set the wax, immerse your fingertips in cold water.
- Treat cuticles and nail plates with oil.
Procedure for applying nail wax
The procedure may be contraindicated if you have an allergic reaction to any of the beeswax components.
The procedure for sealing nails with wax is very simple and at the same time effective, and how it is performed - watch the video:
Sealing the nails. Stages of the procedure
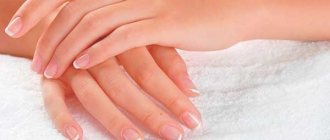
Nail sealing is a manicure procedure aimed at restoring the structure of the nails. After the procedure, the nail plate becomes smoother and acquires a glossy shine. Thanks to the protective film that forms on the surface of the nails, their elasticity returns. Nail growth improves.
Which nails need this procedure?
> overdried;
> yellowed;
> weakened;
> brittle;
The nail sealing procedure is also great for nails that are tired of colored coatings and extensions.
What products can be used for the procedure
There are many options for this procedure, including biogels and gel polishes that allow you to seal your nails and make them stronger and shinier. But if you are a supporter of the eco-friendly approach or just want to give your nails a break from using other coating options, then we recommend paying attention to polishing your nails with wax, a heated mixture of oils or a specialized cream.
Nail Sealing Procedure: Step by Step
1. Remove overgrown cuticle. To do this, apply a softening agent, for example, cuticle remover with lanolin from Uno. After the time indicated on the package has passed (from 60 seconds to 5 minutes), the cuticle is carefully pushed back with an orange stick and, if necessary, cut off with nippers.
2. Shape the free edge of the nail. For natural nails, we recommend using a glass file. It carefully processes the free edge and helps prevent delamination as much as possible. If you still have this problem, you should file the nail, moving in one direction (from left to right or vice versa).
3. If the surface of the nail is uneven, you can correct the situation by going over it with a sanding block. Dust from nails is removed with a brush.
4. Start buffing with a suede nail file and a small amount of nail sealant, such as Buffing Cream from Super Nail. It contains lanolin, which gives nails the necessary nutrition and hydration. The cream penetrates the nail scales, filling the unevenness; it is at this stage that the nails will acquire a glossy shine and a protective layer. The remaining cream is washed off with water. By the way, the instructions for the cream indicate that it can also soften the cuticle.
5. At the end of the procedure, you can make a relaxing hand bath with oils and herbs. To make the cuticle look well-groomed and not bother you for a long time, apply specialized oil. And the skin of your hands should be pampered with moisturizer.
Suede nail file
Super Nail, nail sealing cream “Buffing Cream”
The sealing procedure stops the delamination, after which the nails grow back healthier and stronger. At the same time, you achieve an aesthetic appearance of your nails: they acquire a beautiful shine and a smooth surface. A nice addition is that you don’t have to give up color after this procedure if you use Super Nail’s Buffing Cream to seal your nails.