Types of manicure
Manicure colors for 2021 suggest beautiful Chinese painting, that is, details continuously drawn with one stroke. Chinese execution technique is divided into the following types:
- satin painting;
- feather;
- wavy;
- voluminous transparent coating with openwork.
The simplest flowers are depicted using only one of the listed techniques. More complex drawings involve a combination of several techniques.
Of course, romantic, sophisticated girls choose a more delicate, sophisticated manicure made in a classic white jacket. One of the nails (usually the ring finger) is painted with a pink flower with a white border and green leaves. This option is usually preferred by brides, harmonizing it with the overall style of the celebration.
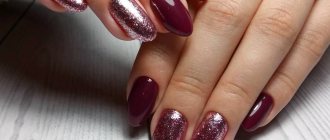
The photo of a manicure with flowers shows a neat nail art with a pink base. Abstract fictitious flowers are made on the ring and middle nails in a gray tone. The main technique is volumetric, combined with others. As an addition, craftsmen create roses in 3 D format, which are attractive to the eye. This option goes with absolutely any look.
Oval and almond-shaped nails with a white jacket are an original, classic solution. Two nails decorated with delicate pink flowers give the manicure a special charm.
Flowers are made using Chinese painting, which is best done by an experienced professional craftsman. By the way, this trend is appropriate at any time of the year.
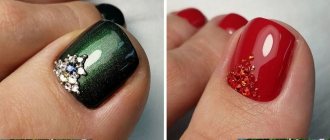
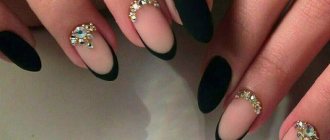
More daring people opt for green pearlescent gel polish, and the ring nail is covered with glossy black varnish. Then a large purple flower with green foliage and a white outline is applied to it. Gold bouillons are placed in the middle, and a number of mother-of-pearl rhinestones of different sizes are laid out on the middle nail.
Dot design
The simplest pattern in manicure is polka dots . To create it, dots , which draws dots with a clear outline. With its help, you can create points of different diameters, thereby making the design more interesting.
Dots resemble a knitting tool in appearance, but instead of a hook there are small balls at its ends. To make the dots easy to work with, it is equipped with a plastic or wooden handle.
What do you need
- varnish coating in white and black colors;
- dots;
- fixer and base.
Draw step by step
- Apply base and white polish.
- Place a black dot in the center of the cuticle. On the right and left sides you need to draw black dots, decreasing in size.
- Fill the middle with large and small dots.
- Apply topcoat.
This design can be done in two or more shades. To make the drawing expressive, use contrasting colors. The dotted design can be created on one finger or on all of them. It all depends on how bright you want your manicure to be.
Simple and beautiful nail design with gel polish for beginners
Nail design for beginners should be easy to do. You can learn to create simple drawings, which are the basis for creating more complex patterns. Below are descriptions of the most popular nail design options.
Dot patterns
The dots can cover the entire surface of the nail or form a specific pattern.
Patterns are applied using dots onto a dried base or onto a colored layer:
- Select a suitable shade of varnish for the dots to match the main color of the nail.
- The instrument is placed into the open bottle after pre-treating it with a degreaser.
- To get a big point. You need to submerge the entire tip in the gel. To create a fine dot, just touch the varnish with a ball on the end.
- The dots are pressed against the nail for 1-2 seconds, the varnish flows off, forming a perfectly round spot.
- The pattern is dried in a lamp for 1-2 minutes.
To set even points. You need to practice on plastic tips or training cards.
Hearts using a toothpick
You can draw mini hearts on your nails without using brushes:
- Using a dot, place 2 drops of gel on the dried base, placing them at the same level, close to each other.
- Use a toothpick to carefully connect the drops in the middle, leaving two round tops.
- Towards the bottom of the drop you need to stretch it a little to get the end of the heart.
The drawing needs to be dried in a lamp and secured with a topcoat.
Drawings using stencils
Using stamping is considered one of the simplest design options:
- Select a pattern from a plate with drawings and fill it with gel polish.
- Using a plastic spatula, remove excess from the plate.
- The silicone stamp is pressed tightly against the design, and then the design is transferred to the nail.
- Dry the layer in a lamp.
It is important to work with the stamp carefully, preventing it from slipping either from the plate or from the nail. Otherwise the drawing will be smudged.
Abstraction
The most popular type of abstraction on nails is brush strokes:
- On the dried base you need to apply small strokes in different directions using a flat brush.
- If you are planning a pattern of several colors. Then the strokes of each color are dried separately.
Abstraction can be done using foil, stamping and self-adhesive strips.
Stickers
To transfer a design to a nail, you need:
- Apply base and main color.
- Peel off the film protecting the sticky layer from the sticker.
- Place the slider in the desired part of the nail and press gently.
- Place some water on the sticker and press it down gently.
- Remove the slider after 1 minute.
- Secure the design with a finishing coat and dry it.
There are non-transferable sliders. They are simply placed on the plate and secured with topcoat.
Nail art geometry using tape
Geometric patterns are easy to create using tape:
- The adhesive tape is cut into strips or other shapes.
- Glue pieces of tape onto the dried 1st layer and cover the nail with varnish.
- Remove the tape with tweezers and dry the coating in a lamp.
If the varnish applied over the tape is liquid, then it is recommended to dry the nail for 15 seconds and remove the tape.
Broken glass
This effect is achieved using foil:
- The material is cut into small pieces.
- “Glass” is laid out on the dried base.
- Cover the plate with a finishing coating.
They sell pre-cut pieces to create this effect.
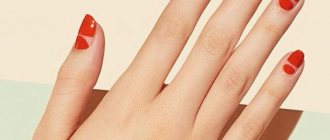
Painting Watermelon with a brush
This summer manicure is very easy to do:
- Red is chosen as the main color. The layer is dried.
- The French is painted in green and dried again.
- The border between red and green is emphasized with a thin white line.
- Black gel is used to add dots that imitate seeds.
- Dry the layer and secure the design with a top coat.
You can use only green color in 2 shades and draw stripes, like on the rind of a watermelon.
Gradient
The gradient can be made using a foam sponge:
- A light gel polish is applied and dried as a base.
- Apply 2 colors of gel to the sponge.
- Using wetting movements, the colors are transferred to the nails.
- The colored layer is dried and then the base is applied.
It is important to choose matching colors.
Lunar manicure
This effect is very simple. On the main color, using a brush, draw an even hole near the cuticle. You can use different colors, the main thing is that they match.
Monograms
This is what we call ornate patterns. They are applied using thin brushes. Before creating such a design, you need to practice using stencils.
French
French is called French manicure. It will be difficult for beginners to draw it smoothly, so it is worth purchasing special templates. French can be not only white, but also colored, shiny or black.
Flowers
To draw a simple flower, you will need dots and gel polish in 2 colors:
- Dots apply a central drop onto a dry base. This will be the middle of the flower.
- After cleaning the instrument, dip it in a different color and place several drops around the first at the same distance.
The flower petals can be left round or stretched to the sides with a needle.
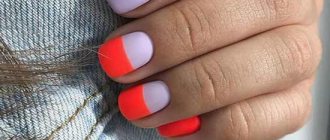
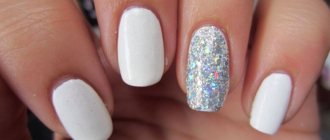
#2 Fashionable white jacket 2021
White color harmonizes perfectly with almost all colors. This property of white color can be used to create chic French nail art. The classic version is a combination of white and pink. Initially, the French was done in exactly this color palette.
Today, white French can be done with black, gray, red, purple and other tones. At the same time, use not only the oval “smile” line, but also try to perform a twist-french, a French with a triangular shape. White color in French design is most often used to highlight the edge of the nail plate, but a French design, where white fills the main part of the nail, looks no less attractive.
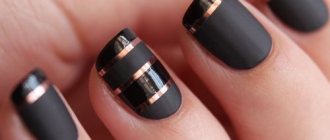
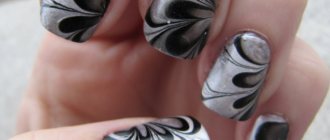
Design with adhesive tape
Materials and tools
- base and fixer;
- varnishes of three colors: graphite, white, neon yellow;
- adhesive tape of any color;
- scissors;
- tweezers;
- thin brush;
- acetone and cotton pads.
Execution technique
- Cover your nails with base coat and dry the coating.
- Apply white polish to your pinky and ring finger nails. On the rest we apply a graphite color coating.
- After the white color dries, glue the tape. It will not be used on black nails. We glue a strip in the middle of the nail, and also make divisions in the form of a herringbone: three strips on each side. Glue the tape so that it extends beyond the border of the nail. This will make it easier to remove.
- Soak a cotton pad with acetone. Wipe off the brush.
- Drop a little varnish in yellow and graphite shades onto the palette. Fill them in a checkerboard pattern into the cells created with adhesive tape. Work with graphite color first. Then wipe the brush and fill the cells with yellow. Wait until the varnish dries a little.
- Use tweezers to remove the adhesive tape.
- Apply topcoat.
Tools for creating simple nail designs
To create elementary patterns you will need the following tools and tools:
- varnishes of different shades;
- fixer (top) and base (base);
- a thin brush, it’s easiest to create clear patterns;
- dots;
- needle or toothpick;
- stencils;
- adhesive tape for manicure or tape;
- rhinestones.
The most popular drawing techniques, which never go out of fashion, are using dots, using a stencil, using a needle, laying out a picture with rhinestones. Adhesive tape, newspapers, and sliders are also often used to create patterns.
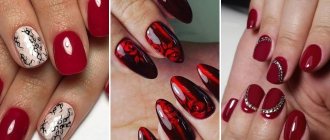
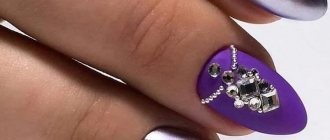
Drawing with rhinestones
Materials needed
- rhinestones;
- base and fixative with drying;
- pink polish;
- needle or dots.
How to paint on nails with rhinestones
- Cover your nails with base and pink polish.
- After the polish has dried, cover the ring finger nail with a drying sealer.
- Lay out the heart from rhinestones.
- Apply sealer around each pebble using a dotting agent. Try not to get the rhinestone on the surface, otherwise it will fade.
- Cover nails without rhinestones with a sealer.
Drawing with a stencil
If you don’t know how to draw, but really want to create a beautiful pattern, there are special stencils . They are easy to use thanks to the adhesive backing, which allows you to create a clear design. All you need to do is choose a stencil with the desired thematic design.
Using stencils, you can create a quick, symmetrical design with your own hands.
What you will need
- varnish of light green and black colors;
- fixative and base;
- stencil “chess”;
- sponge;
- dark silver glitter.
Drawing with a stencil
- Apply base and light green varnish. Dry the coating.
- Cut out the stencil and stick it onto the entire nail plate.
- Using a sponge, paint your nails black. Make precise blotting movements. Without waiting for the coating to dry, sprinkle the nail plate with glitter.
- Wait a few minutes for the black polish to thicken. Remove the stencil.
- Use a fixative.