Nail artists are constantly updating materials for nail decoration. One of the latest trends in nail fashion is crushed crystal. Small sparkling Pixie crystals allow you to create a fabulously beautiful design. With his appearance, he attracted not only nail technicians, but also girls who do their own manicures.
Swarovski crystal chips
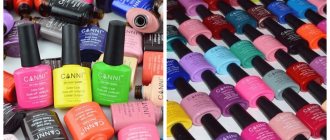
It is not surprising that Swarovski was the first to offer this interesting material as a decoration for nails. Thanks to the brand, crystal pixels were rapidly gaining popularity. Later, other manufacturers expanded the range of this nail accessory, making it more affordable in terms of price.
Pixie to match the color of the manicure.
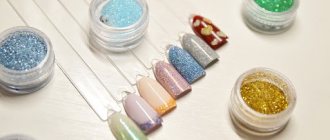
Today designers have at their disposal:
- colored and transparent tiny shiny crystals;
- tiny crystals with the so-called 3D effect;
- crumbs of rich color, forming a thick-colored spot on the nail plate;
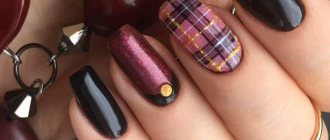
About chevron
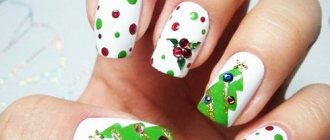
Perhaps, besides the classic French manicure, the most popular type of French manicure is the chevron. Its essence lies in the brightness and diversity of colors than in the standard nail version. The nail plate is decorated with broken lines or diamond-shaped stripes of different, preferably contrasting, colors.
Chevron manicure will be an unusual solution
A chevron is made quite simply: a base color is applied to the nail, then stencils with stripes are glued on and painted over with a different color. Since the geometric print does not lose its trends, the chevron is still relevant.
Crystal chips in nail decoration
Crystal chip sets include crystals that match each other in color. To make the design truly unique, you can choose sets with crystals of different sizes. In addition, they can be mixed independently with each other and with glass broths.
The crystals adhere perfectly to the smooth surface of the nail, thanks to their miniature size and compacted lower part, thereby turning the nail into one beautiful shining gem.
Crystal crystals - accent
Differences between crystal chips and classic rhinestones
Since girls with short nails wanted to decorate their fingers with the stunning shine of artificial diamonds, such criteria as the size and weight of rhinestones became especially important.
They became smaller and smaller until an innovation was born - Pixie crystals. These design kits combine round and faceted rhinestones, expanding the boundaries of nail creativity. Professional salon manicurists and amateur craftsmen with sufficient nail art skills immediately appreciated the new decor.
How the design is created
To apply crushed crystal, you DO NOT need a whole arsenal of specific tools and devices. A specialist only needs a sense of taste, concentration and imagination. Thanks to their easy handling and extraordinary brightness, crystals have become a favorite accessory of both professional nail designers and home manicurists.
You can make a nail design with crystal elements even without having special skills in working with gel or acrylic, and without special training in manicure craft.
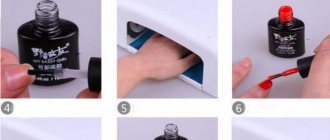
You can paint your nails using regular nail polish. To do this, you need to clean the nail, onto which immediately after this you need to apply the 1st layer of varnish, and then dry it thoroughly. The second layer of varnish serves as the basis for attaching crystal fragments, so there is no need to dry it.
The most beautiful nail decoration.
You should quickly distribute the crystal chips over the surface of the nail according to the design idea. The crystals must be carefully pressed and wait for the varnish to dry completely. You can also cover your nails with colorless varnish, which will allow the crystals to last longer and delight you with their shine.
However, if the durability of your manicure is important to you, then you should pay attention to various gel polishes, since regular polish is clearly inferior in durability. Then the technique for applying crushed crystal (when using gel polish) will be slightly different from that presented above.
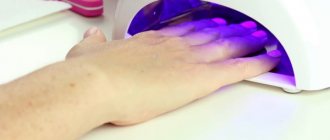
First, you need to wait until the first two layers of varnish are completely dry (using an ultraviolet lamp), and then shiny particles are attached to the final uncured layer. After this, the crystal elements are additionally fixed with transparent gel polish. Then they are finally fixed using a lamp, where the varnish polymerizes (hardens).
Step-by-step instructions for crystal manicure
Any nail extension is a rather complex technological process that should be trusted to professional artists . So that you can familiarize yourself with the technique of creating a crystal manicure, we offer you detailed step-by-step instructions.
- First of all, you need to carefully treat your nails. It is very important to do this with a soft file so that damage from sawing off the top layer is minimal. Then, in order to degrease and remove excess moisture from the nail plate, a dehydrator should be applied, followed by a primer for better adhesion of the surface to the gel.
- The next important point is the special preparation of template forms. Stencils are glued onto them in random order, thanks to which you get a crystal effect and multiple edges. After this, the forms are put on and secured to the fingers, and then purely technical steps follow - applying gels.
- First, camouflage gel is applied to the base of the nail plate. Usually a soft pink shade is used, as close as possible to the natural color. The camouflage must be dried in a UV lamp for 3 minutes.
- Next, using a transparent gel, you will have to extend the free edge of the nail. At the same stage, the shape and length of the future layout is determined. When the tips of your nails are ready, place the pen in a UV lamp for 3 minutes.
- The main part of the extension is completed, and now, using a special liquid and a lint-free cloth, you need to remove the dispersive sticky layer from the surface of the nails. Next, you should remove the template form and remove the stencils from the inside of the extended ends, thanks to which beautiful patterns were obtained on the crystal nails. To do this, use regular tweezers.
- The next standard stage is filing and polishing the nails. Correct your manicure, eliminating all shortcomings and errors.
- The final touch remains. Apply a dehydrator to your nails, then cover them with finishing gel, which also polymerizes in a UV lamp for 3 minutes. Your manicure is ready, enjoy the gorgeous crystal design!
To make the step-by-step instructions more understandable for you, we suggest you visually consolidate the information you have read. Watch this helpful tutorial that will show you how to create a wonderful crystal design on your nails.
The steps described are just the basis for creating a manicure that looks like crystal. Nail art can be decorated with numerous elements to make it even more elegant and original. To inspire you to experiment creatively, we have prepared for you a small collection of photos with interesting and stylish design ideas.
Crystal nails are a great option for any occasion, be it New Year, Birthday or wedding celebration . A gentle, feminine and fantasy manicure will make the bright light sparkle, playing temptingly and attracting everyone's attention to you. In conclusion, we invite you to watch another interesting video lesson, where a master masterfully creates crystal flowers on his nails. Don't be afraid to try something new and unusual, experiments will certainly delight you!
Crystal chips and French
French - goes well with crystal sugar. An orange stick or thin brush is perfect for working with small crystals. Simple tools will help you carefully remove excess fragments and carefully fix the crystals on the nail.
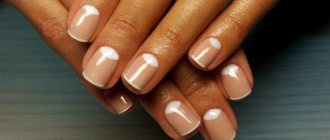
About neo-French
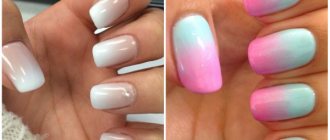
Neo-French is interesting with its combination of pastel shades of different colors. Nude, coffee, and pale pink colors will be in fashion.
Neo-French is the embodiment of tenderness and femininity on nails
All cream shades are applied alternately to one nail and sprinkled with sand or powder on top, at the client’s request. It looks very feminine and neat.
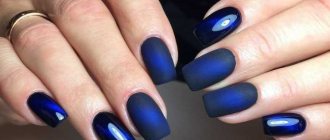
Swarovski pixels and matte finish
Both matte and glossy finishes combine beautifully with Swarovski pixels. Nail design is best done on a flat, well-lit surface. This way you can be sure that not a single sparkling crumb will be wasted, and the design will be neat.
Matte finish and Swarovski pixels
A sprinkle of glitter on your fingertips: manicure with crystal chips
Crystal chips on the nails make even those who can’t stand rhinestones, beads and broths squeal with delight. Swarovski sounds noble.
Jewelry brand crystals have long become a symbol of luxury, and celebrities and fashion houses do not neglect their friendship with them. Style icons such as Coco Chanel, Marlene Dietrich and Marilyn Monroe were fans of Swarovski crystals.
Today, jewelry with artificial diamonds from the brand adorns the shows of Dior, Armani and Chanel, and Angelina Jolie, Milla Jovovich and Madonna confess their love for crystal clear, high-tech cut crystal.
Crystal chips for nail art Crystal Pixie, as befits Swarovski’s “brainchild,” received a standing ovation. The dream of a VIP manicure “for a special occasion” has finally come true.
The design with crystal chips on gel polish has become the hero of nail art channels on YouTube. How else? After all, the muted sparkle and multifaceted tints remind of the main thing - “you deserve the best!” And how nice it is that this is the best - affordable.
Crystal pixels and rhinestones
This is another original option for using the smallest lenses in nail design. Experiment!
- Recommended on the topic: thanks to these designs, you can do manicures 2 times less often.
- Use these nail polish colors to make your hands look younger.
Crystal nail extensions
Let's take a closer look at the technique of crystal nail extensions:
- We disinfect the hands of the master and the client with an antiseptic. We prepare the nails for the procedure. We degrease, remove the cuticle, level the plates and give them a rounded shape. To avoid damaging the skin of the periungual ridges and cuticles, you must use a soft nail file. Leave the length of the free edge about two millimeters.
- We select a shape for the nails and prepare it. Using gel and camouflage acrylic, you can create a three-dimensional pattern according to yours and the client’s wishes. (This is if the form is not engraved).
- Having secured the shape, it is necessary to extend the nail plate so that it turns out to be longer than the natural nail. For camouflage, it is better to take acrylic in a natural pink color.
- Cover the tip of the nail with transparent acrylic or gel. The gel has a good ability to level. We extend the plate using the materials that were used during modeling. We fix the materials in an ultraviolet lamp for two minutes.
- Apply another layer of transparent gel to the entire nail and polymerize for two minutes. Before giving the desired shape, remove the sticky layer.
- Then we apply the finishing gel without the sticky layer, and once again place it in an ultraviolet lamp for two minutes to dry.
Ready. As a result, you have beautiful nails with a fashionable design.