What are liquid tips for nail extensions?
Before you figure out what liquid tips for nail extensions are, it is worth noting that a little earlier the same company developed a similar technology - top forms, which you have probably heard about. The technology is similar in the pads used for modeling - they are also made of durable plastic and look like tips. The master forms the future base by placing the gel in a plastic blank, and then fixes it on the nail. The material hardens during polymerization in a UV lamp and the overlay is removed. Next, the process of creating an artificial plate follows the classical scheme. Why did the new product get such a name? Everything is simple, because the master uses gel in his work, and it is a liquid material. Nail extension with liquid tips has a lot of advantages, more on them below.
Advantages and disadvantages of liquid tips
Undoubtedly, new technology cannot replace the classics. And if you are a master who is accustomed to working on lower forms, you are unlikely to be able to appreciate this new product. But for beginners and for artists who prefer to work with substrates, nail extensions using liquid tips will be a worthy alternative. It has the following advantages:
- It is easier to place a plastic overlay on a natural nail than a regular base.
- If you buy liquid tips for nail extensions, you can save on purchasing disposable backings and glue for them, since these blanks are reusable. Their minimum service life is 2 years.
- The technology allows you to achieve a neat and natural result, especially when creating an arched jacket thanks to marks for the smile line.
- Nail extension with liquid tips allows you to reduce the artist’s work time: there is no need to glue the backing, file it, or adjust the size.
- When creating an artificial plate, no glue is used; the backing is made of gel and attached to the nail using the same material.
- The method is suitable for working with problem nails (trapezoidal and springboard-shaped). In addition, it allows you to work with plates without a free edge, when it is impossible to substitute the lower form.
- The method allows nail artists to create complex 3D designs and lay out an aquarium design so that not a single decorative element goes into the sawdust.
But the method is not without its drawbacks:
- Choosing an overlay for wide nail plates can be problematic. Difficulties most often arise when modeling nails on the thumbs. Professionals advise using this technique on 8 thin fingers and resorting to the classic method when laying out material on the thumbs. Even this combination of techniques will allow you to get the job done faster.
- It is difficult to build the correct architecture of nails with overlays - they turn out to be “pecking”.
- Without a turning lamp, not all masters are able to set the mold well; as a result, the gel flows onto the side rollers and detachments occur.
- Shapes such as pipe, edge or stiletto will be impossible to make using technology.
Differences between liquid tips and top forms
We have already talked about the similarities of technologies, let’s note their differences, and they are significant:
- Liquid tips for nail extensions involve the use of gel, while the top forms involve working with acrylic, although it is possible to use both materials in both technologies, but not all nail technicians can do this.
- Using the new method, the blank is applied to 2/3 of the nail, while the upper form completely covers the entire plate.
- When the top mold is removed, a ready-made glossy surface of the artificial plate is obtained, which does not require additional processing, while the formed substrate still needs to be coated with gel.
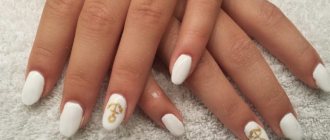
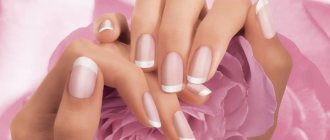
French manicure with liquid tips
Even a beginner can make a French tip using liquid tips technology at home. It is very difficult to lay out an even smile line when applying extensions to ordinary plates or forms. The new technology has solved this problem; thanks to special markings, the arch of a classic French manicure will be even and symmetrical on each nail. For a French manicure on the top forms, you will need the same equipment as above, except for gels. Their colors should be white, transparent and camouflage pink.
After preparing the natural nail plates, you can apply extensions using tips. Here the technology is also somewhat different from what was described earlier. First, distribute the white gel from the smile line and in the area of the future free edge. The Frenchie's smile must be smoothed out well with a brush and the shape polymerized.
For rigidity, coat the area of the jacket and the stock with a thin layer of constructive transparent gel, and dry the mold in a lamp for ten seconds. Use camouflage gel to extend the liquid tips again, apply to the natural nail plate and polymerize for three minutes. Now you can remove the molds and line the nail bed with camouflage. Bake in the lamp for a full four minutes. Now all that remains is to shape it and cover it with top gel.
In conclusion, we can say that liquid tips have greatly simplified the life of manicurists. Of course, not everyone will like them, it’s a matter of taste and habits, but every professional is obliged to try a new technology at least once. After all, how can you find the perfect method if you are not interested in new products?
How to use liquid tips?
The instructions for using plastic pads are very simple and reviews confirm that even beginners can really master this technique. So, the step-by-step scheme for modeling marigolds with their help looks like this:
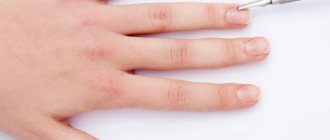
- Traditional preparation of nails: their surface is cleaned, sanded, the cuticle is processed, a degreaser and primer are applied to the plates.
- Then you need to choose pads that fit each finger.
- The gel is placed into the workpiece and the future substrate is formed.
- After this, the plastic blank is placed on the nail and the hand is placed under the lamp for 10 seconds.
- After time, the material hardens and the lining is removed. A base made of gel remains on the nail.
- Then the professional needs to form a stress zone and dry the result in a lamp for 3 minutes. The sticky layer is removed with a special liquid.
- Using a file, the shape of the free edge is modeled.
- The final step is to apply the top gel without a sticky layer, which dries under a UV lamp for 2 minutes.
It will be easier for the master to work with forms if he has a double-sided UV lamp, then he will be able to support the overlay and the result will be more accurate.
Step-by-step instructions: extensions using tips
After preparing the nail plate for extensions, in the case of performing the procedure using tips, the following steps are:
This:
- Selection of tips . The width of the product should match the width of the nail plate in the center. Ideally, the tip lies completely on the nail from corner to corner.
- Pasting . Glue is applied to the concave part with a brush over the entire area of the hole. Maintaining an angle of 45 degrees, gluing begins from the edge of the nail plate. 10 sec. The tip is kept pressed. If excess glue comes out, wipe it off with a lint-free cloth.
- Trimming length. The length is adjusted using a tip cutter. It is necessary to take into account that the subsequent steps of manicure include filing the nail, which also reduces the length of the nail. When working with a tip cutter, it is better to cut with a margin.
- Formation . A file not exceeding 100 grit abrasiveness is used to give the shape. At the same time, the joint is cut down and the transition is leveled. The biological nail is not affected at this stage. To the touch, the surface of the workpiece should be smooth and stepless.
- The remaining dust on the nail is removed with a brush . Apply a thin layer of degreaser to the nail plate.
Tips are glued. Further actions depend on the material chosen for extensions: gel or acrylic.
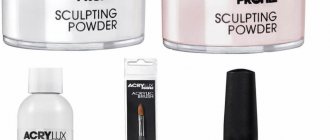
Where to buy liquid tips?
If you want to learn a new method, buying liquid tips for nail extensions will not be difficult. On the website of the Formula Profi company you can purchase a set of liquid tips, which includes 50 plastic tips. Its cost is about 1600 rubles. Or you can buy a complete set of materials, which includes everything necessary for the master’s work: a set of liquid tips, gel and primer. The price of such a set is from 4000 rubles. In addition to the manufacturer’s website, this product is sold in many online stores, but the price will be higher, a package of 50 forms will cost you an average of 2,500 rubles, and a complete set for work will cost you from 6,000 rubles.
The new technique allows the nail technician to do the job faster, while using less materials. It is universal and easy to learn. What do you think about this? We look forward to your comments and feedback at the end of the article.
Advantages of the Liquid Tips technology:
- Reusable forms (economic benefits);
- Ease of use (even novice craftsmen can quickly and easily learn and work using this technology);
- The ability to create the perfect arched jacket;
- Possibility of modeling artificial nails for problematic natural nails;
- Expanded capabilities for complex designs;
- Elimination of material fluidity;
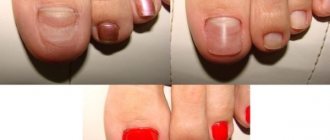
- Possibility of modeling toenails (pedicure);
- The use of the most toxic material – glue for tips – is excluded;
- The correct architecture of the nail is immediately formed, with an organic arch;
Nail extension on tips with acrylic
The step-by-step process of a correctly organized process of nail extension on acrylic tips should look like this:
- Before carrying out the preparatory activities preceding the main part of the nail extension process, it is necessary to select tips. In this case, you should pay attention not only to the width and shape of the nails, but also to their convexity.
- Next, you need to prepare the nail plate for further extensions.
- It is necessary to spread a thin layer of glue over the inner surface of the selected tip, and then press the artificial plate to the nail.
- After making sure that the tips fit tightly to the nail, you should adjust the free edge.
- For the best adhesion of the varnish to the tip, the surface of the artificial nail must be sanded to a translucent white color. Small particles of the sawn layer must be removed with a brush or brush.
- The working brush with which the extension will be done must be moistened in liquid, and then dipped in acrylic powder.
- Having placed acrylic powder in the center of the nail plate, you need to distribute it over the entire surface of the nail in accordance with the shape the future nail should have.
- Having adjusted the resulting shape, it is necessary to sand it and lubricate the cuticle with oil.
- Create a design.
Instructions: extensions on the upper forms
Extension algorithm on the upper forms:
- According to the scheme described above, the usual nail preparation is carried out.
- Choose shapes similar in size to the biological nail. The most appropriate blank is selected for each nail. A small difference is sharpened with a nail file. The finished forms are laid out in order so as not to confuse and repeat the selection process.
- The nail is covered with base gel.
- The smile area and the edge of the form (free) are filled with gel.
- The mold is polymerized for 20 seconds. in the lamp.
- The area of the form that will be in contact with the nail is filled with gel, adjusted and pressed firmly.
- 30 sec. polymerize.
- Excess gel protruding around the edges is removed.
- For 3 min. fingers are placed in the lamp.
- The form is removed.
- Use a file of no more than 100 grit to file the nail.
- Cover the nail with a finishing layer.
Don't miss the most popular article in the section: How to extend nails with gel polish. Nail extension instructions for beginners. Photo.