Rhinestones - what kind of decor is this?
One of the most popular decorative elements is rhinestones; if glued correctly, they will last more than 3 weeks. You can buy them in stores with manicure supplies.
To make your manicure look expensive, don’t skimp on consumables. Many beginners order stones on AliExpress, but this is not worth doing. It is quite difficult to find quality products in Chinese stores. Better pay attention to famous Russian stores:
- ru,
- Odiva.ru.
On these sites you can purchase diamond chips, voluminous rhinestones, and even special sets for beginners. Rhinestone sizes vary from 0.8 to 8.4 mm.
Important: Only decorative cold-fix rhinestones are suitable for nails. They can be made from various materials.
What are rhinestones made from:
- Acrylic is the most common and cheapest material, but it fades quickly.
- Glass is more reliable than acrylic, but is inferior to crystal in shine.
- Crystal rhinestones are very expensive, but they are worth it, because they are durable, shine well and are not afraid of chipping. Swarovski rhinestones are made from crystal, mined and cut using a special technology, they are already approaching precious stones.
Such manufacturers of rhinestones have proven themselves well:
- TNL,
- Lianails,
- Konad,
- Preciosa.
For an unusual design - the shape and size of rhinestones
Classic rhinestones are round, but other shapes can be found on sale: oval, drop, triangle and square.
Other options for shiny elements:
- broths are small metal beads of different colors. It is more convenient to distribute them over the entire nail with a fan brush;
- pixie - crystal chips imitating broken glass;
- hemispheres look like pearls or cat's eyes;
- charms are more complex designs for design in the form of various figures, such as snowflakes, bows and stars.
All these decorative elements are glued in the same way as rhinestones.
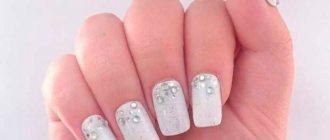
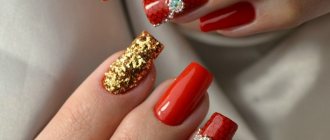
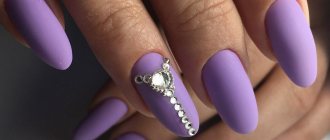
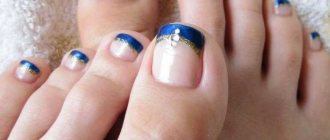
Photo of manicure with rhinestones
Look: Classic manicure - 125 photo examples of stylish design and a review of current designs
Help the project, share on social networks 
0
1
What pattern should I use with rhinestones?
Before you start covering, think through the smallest details about the future pattern. It's better to start with the classics:
- French - you can simply decorate the strip with stones or make a double French;
- chain mail is a variant of the pattern in which the entire nail plate is covered with rhinestones. But decorate only one nail, otherwise the manicure will turn out vulgar;
- a pyramid of rhinestone elements at the base of the nail;
- shirt - rhinestones arranged like buttons on clothes;
- geometry - lines of sparkling details that intersect or run parallel - looks impressive on nails;
- crown - rhinestones are laid out in an arc along the edge of the nail hole.
There are many options; in general, the placement of rhinestones depends only on your imagination. The main thing is not to combine several large elements of the same size in one composition; it is better to arrange them with smaller elements.
What is the best way to attach rhinestones?
There are several ways to properly glue beads to nails coated with gel polish.
- The simplest option is a gel polish top coat, but it is difficult to work with. Due to increased fluidity, stones can “slip”. In addition, he is not able to hold large and figured jewelry. It comes with or without a sticky layer; when working with rhinestones, it is better to give preference to the latter. The effect of the top can also be different: glossy, matte, pearlescent and creamy. This information is indicated on the label. When purchasing, give preference to well-known brands such as CND, UNO and Kodi.
- The finish for attaching rhinestones is more flexible and does not have a sticky layer, which makes the work process easier. After all, this means that you don’t have to scratch the stones and subject them to mechanical stress, removing the sticky layer.
- A 3:1 mixture of acrylic powder and topcoat is suitable for bulky and large stones. This composition has high plasticity and firmly attaches the element to the nail. The drop is applied directly to the place where the rhinestone is glued. It should be slightly larger than the decoration so that it can be reliably immersed in this mixture.
- Regular glue can also be used. But without experience it is quite difficult to handle it, because it dries quickly and does not give any chance for error. But even if you attach rhinestones with glue, still go over the sides of the decoration with a brush dipped in topcoat and dry the varnish in a lamp for 2 minutes. If you use transparent rhinestones, then the glue should also be colorless.
How to glue rhinestones to gel polish
Geometric shapes, waves and stripes - all this can be created using rhinestones. But to make it look beautiful, prepare your nails properly.
Step by step instructions:
- Remove the cuticle with tweezers or a special softener.
- Give your nails the desired shape.
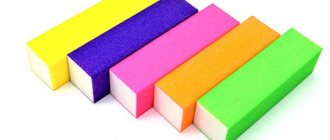
- Polish them with a buff and degrease them.
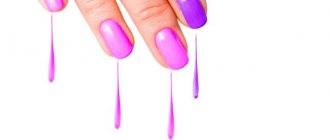
- Apply base and two layers of gel polish. Stir it before use, but do not shake the bottle, otherwise bubbles will form. Be careful not to touch the cuticles and skin around your nails. Dry them in an ultraviolet lamp.
- Cover the nails that do not have a design with top coat.
- Apply the finish to the plate where the pattern will be located, but do not dry it.
- Using glue, apply it pointwise to nails or rhinestones. Experiment to see what works best for you.
- Start distributing the beads step by step in the desired order. The rhinestones should be pressed well so that they sink deeper into the top. Finally, dry the gel polish under a lamp.
- When decorating your entire nail with rhinestones, start from the middle of the top. Take your time, do everything carefully and make sure that the rows are even.
- Take a thin brush and coat the sides of the rhinestones with topcoat and dry it again in the lamp. But, under no circumstances cover the stone itself with the finish, otherwise it will fade and stop shining.
- If the top has a sticky layer, remove it with a special product or alcohol.
Important: Dry each layer for 2 minutes. If the varnish or top coat is cheap and does not harden well, increase the time, but if the coating does not harden even after 4 minutes, throw it away and buy a more suitable material.
Proceed step by step and before gluing, place the rhinestones on your nails and make sure that all the beads match each other. Before you begin, practice on paper or tips, which can also be purchased in specialized stores. This way you can check the quality of the top and see how the manicure on your nails will look.
Tool:
- toothpick,
- tweezers,
- special pencil with wax tip,
- fan brush - to distribute glitter throughout the nail.
A wax pencil that holds the stone better than other tools and does not leave scratches on it.
How to glue rhinestones: laying methods and calculating the number of rhinestones
Improvisation is exactly what gives birth to the most incredible things! It is important that it is based on a knowledge base and experience. When starting to work with rhinestones, many people unknowingly make mistakes: they lay out the rhinestones chaotically, and then it turns out that they don’t fit, and everything starts again... To prevent this from happening when working with rhinestones, you need to know how to lay them out correctly.
There are two main types of rhinestone display:
- straight;
- "honeycomb".
In the first case, rhinestones are applied to the surface in a straight line, with equal intervals between them. In this case, the crystals of each next row are located exactly under the elements of the previous row. This method is used to make straight lines, rectangular and square shapes, large surfaces with smooth edges.
The method of laying out the “honeycomb” differs in that the rows are shifted: the center of the rhinestone of each next row is located clearly under the middle of the space between the rhinestones of the top row. The distance between elements of the same row and between different rows should be the same. This method is used to make trapezoids, polygons and diagonals, as well as filling irregularly shaped surfaces.
To achieve a complete “filling” of the surface, you can use crystals of different sizes, filling the space between large rhinestones with smaller ones. This technique allows you to create a continuous sparkling canvas in which no clear rows can be traced.
Layout of geometric shapes
In addition to the basic layout methods, there are general recommendations for creating geometric shapes such as, for example, a circle and a triangle.
A round-shaped ornament should be laid out from the center to the edge: the central element is glued first, and circles are laid out around it at an equal distance with rhinestones. The triangle, on the contrary, should be laid out from the edges to the center: first, the elements of the outer frame are glued, and then the rhinestones are laid out in inner rows in the same order.
Calculation of the number of rhinestones
Before starting work, it is useful to calculate the required number of rhinestones for work, based on their size and the area of the surface to be filled. In order not to waste time on calculations using geometric formulas, you can use an automatic calculator to calculate the need for rhinestones. It is posted in sections of the site with cold- and hot-fix rhinestones, as well as semi-pearls.
Using the calculator is very simple: select the layout method or type of figure you are going to create, enter their parameters in millimeters, the desired size of rhinestones, and... An approximate calculation is ready! Now you know how many packages of rhinestones to order for your work, and you don’t have to count anything.
How to remove rhinestones correctly
After a few weeks, you will get tired of the design, the cuticle will grow back, and the gel polish will have to be filed off. Doing this correctly is quite simple if you follow the technology. For this you will need:
- nail polish remover;
- orange stick;
- file;
- napkins;
- foil.
How to easily remove gel polish without damaging your nails:
- File off the top layer to remove the shine.
- Then soak cotton pads in remover, apply them to your nails and wrap them in foil.
- After 15 minutes, carefully remove any remaining polish with a wooden stick or manicure pusher.
This method is the safest and suitable for beginners. If you have experience, you can use a special tool - a clipper; a milling cutter is also suitable, but mechanical stress will lead to rapid damage to the device.
Manicure plays an important role in creating a fashionable look, so make sure that the pattern matches your outfit harmoniously. Painting your nails with gel polish is very simple and profitable, because the need to spend a lot of money on visiting expensive salons will disappear by itself. Choose high-quality rhinestones, proceed step by step and then the result will please you.
What are rhinestones, what are shiny stones for nails made from?
The highly refractive glass composition invented in the 18th century marked the beginning of a new era of decoration. The French jeweler G. Strass succeeded in this, whose name became a household name for rhinestones of all shapes and sizes.
At the end of the 19th century, D. Swarovski invented a cutting machine, and the production of shiny stones rose to a new level in quality and volume. Swarovski crystals are sold to stores and boutiques all over the world.
The latter are a budget option with not always smooth edges. They are convenient for beginners to practice on. Plastic pebbles wear off within a few days and lose their color and shine.