Start
Before applying the coating, you need to give yourself a manicure. Of course, if you have time and you haven’t carried out a similar procedure for a long time.
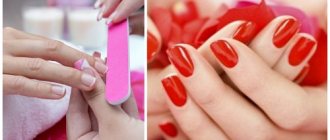
- Wipe off the old varnish, and then cut the nails to the desired length and file them with a file with an abrasiveness of 180-200 grit.
- Use an orange stick or spatula to slightly push the cuticle away from the nail bed.
- Afterwards, apply a cuticle remover, which is a special tool for softening the cuticle. Leave for 30 seconds.
- Then go over the nail again with the spatula.
- Afterwards, if you have hangnails, you need to cut them off with tweezers.
- Wipe the nail with acetone again to remove any remaining dust from the nail.
- Apply the base coat.
- Next we paint the nails.
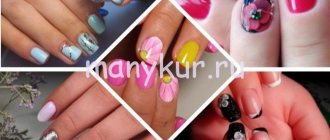
But you can find ideas for coverage below.
DIY European manicure at home
Do-it-yourself home manicure is performed using traditional tools: a file, a polisher, and nippers.
To begin with, the nails are cleaned of the old coating. After this, a suitable nail shape is created. Files are used for these purposes. Next, remove the cuticle. It can be removed quickly and without problems if it is initially treated with a special softening liquid. Use pliers to carefully cut off the dead skin and wipe each finger with a cotton pad.
Nails are treated with a polishing file. After which the base is applied. As soon as the base has dried, the nails are covered with colored varnish.
Any girl can do this manicure at home. After all, the technique is very simple.
Step-by-step photo of performing a home European manicure
Homemade European manicure is suitable for girls with fairly soft cuticles.
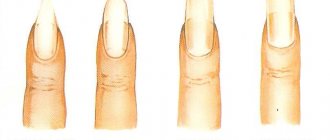
At the first stage, the nails are given a shape.
To carefully and quickly remove cuticles and pterygium, a special cosmetic composition is used - remover.
The product is applied to the cuticle and side ridges. Exposure time from 30 seconds to 2 minutes (see recommendations on the label of your remover).
To work with the cuticle, use a pusher or an orange stick.
First, the cuticle is gently pushed back with a pusher.
Then the pterygium is cleaned with a hatchet.
Remains of the product are removed with a napkin.
Additionally, you can prepare a bath with essential oils and salt.
Keep your nails in it for 10-20 minutes.
Walk the stick along the cuticle again.
At the end of the manicure, rub in wax or nail oil. Do-it-yourself unedged manicure is ready. Instructions for materials from the Beautiful illusion channel.
Simple polka dot manicure
There is nothing easier than creating a polka dot manicure. You can cover your nails with any varnish and apply a polka dot design on top. To do this, simply dip a match into the varnish and make an imprint on your nail.
Nail care
In addition to the fact that you need to file and shape your nails in a timely manner, you also need to take good care of them. First, give up the habit of gnawing on them. Even during times of extreme stress. Secondly, remove the cuticle in a timely manner. The more it grows, the slower the nails themselves grow. Thirdly, do not neglect nail protection. For example, various kinds of strengtheners and masks.
- What you need for a manicure at home to ensure proper nail care:
- hardener (for example, from the “Smart Enamel” series);
- nail sanding block;
- orange sticks.
Using sticks, the cuticle is moved, but not removed. After this, the surface of the nails is polished. It is very important that all movements are uniform, unhurried and strictly in one direction - from the cuticle along the growth line. There is no need to press on the grinding block, otherwise there is a risk of removing too large a layer of the upper epithelium. The resulting dust can be washed off with running warm water. After this, a hardener is applied to the nails in the same way as a simple varnish.
Stylish monochrome
A great choice for every day, without a fancy print or complex decoration. You simply choose your favorite polish and carefully paint each nail. But you should know that the hardest varnish to apply is white. Therefore, you should be very careful with him.
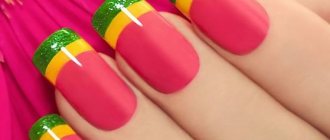
Laconic two-color
An interesting choice of coverage that is suitable for every day and even for holidays. This is the use of two colors of nail polish on one hand. Varnishes can have achromatic colors: white and black. Or they may differ from each other by one tone.
Shiny manicure
You can add shine to your manicure without using rhinestones using glitter. Glitter is very easy to work with; you just need to immediately apply it to the wet varnish and fix it on top with a top coat.
DIY manicure with gel polish at home
It’s a little more difficult to do a manicure at home with gel polish. This requires at least minimal practice and, of course, the presence of a UV lamp, which will allow you to quickly and reliably dry the material. If you wish, you can learn any design, especially since all detailed lessons can be watched in online videos. To do this, just enter the query “do-it-yourself manicure for beginners” into a search engine.
The first stage always includes preparing the nail plate. Treat the cuticle and, if desired, remove it using special nippers. Also, for a beautiful gel manicure you will need to purchase the following consumables:
- Top for gel polish;
- Gel polish of the required shade;
- Finish coating;
- Cuticle softener;
- Liquid for removing the sticky layer.
How the procedure itself is performed is shown step by step in the photo (based on materials from the ArtNail Cafe channel).
How to properly apply gel polish on your nails with your own hands
To prepare the nail plate you will need a file and a buffer.
It is also recommended to coat your nails with an acid-free primer before applying gel polishes.
The three-phase system consists of a base, gel polish and top coat. For thin and brittle nails, it is better to use a rubber base coat.
Each master selects gel polish individually for himself. The main thing is not to take coatings that are too cheap, so that during the training stage you do not become disappointed in the procedure or your abilities. A high-quality manicure depends not only on skills, but also on the materials used.
You can also choose a rubber top, it is thicker and easier to work with.
Additionally, you will need cuticle oil.
As well as a liquid for degreasing and removing stickiness.
First of all, you need to lightly walk over the nail plate with a buff to give the necessary roughness. You don't have to work too hard to avoid damaging your nails.
Next comes the degreasing stage. It will require lint-free wipes and a special product, as in the photo above.
Before applying the base, it is recommended to cover all nails with a thin layer of primer. Remember that this product dries in the air.
To apply the base coat, you can use a brush from the bottle, or you can purchase a wider and more convenient one in the shape of a spatula. The base should be applied in a very thin layer, while rubbing a little into the nail. Most gel polishes dry in a UV lamp for 2 minutes; in an LED lamp, the time is reduced to 30 seconds. Each layer of gel coating must be thoroughly dried.
The first layer of color is applied in a very thin layer.
The end must be sealed. To do this, use the edge of the brush to carefully walk along the edge of the nail.
The second layer of color may be slightly thicker than the first.
Three-phase coating involves applying a finish. The top, as a rule, has a more liquid consistency, so you need to work with it carefully but quickly. If necessary, you can do interlayer drying.
If you used a topcoat with a sticky layer, you need to remove the stickiness from it with a degreaser.
At the end of the manicure, you can apply care oil to the cuticle.
As you can see, doing a manicure with gel polish yourself is not so difficult.
Universal strips
With a simple stripe print, you can create a beautiful, stylish and versatile manicure. Universal because this print will suit different looks, even a strict work dress code.
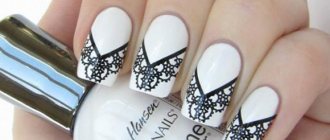
Manicure with stickers
And here comes the most interesting part. Thanks to stickers, you can make the most beautiful and original print on your nails by simply sticking them on your nail. The sticker is very easy to apply, and the rich print and colors will help you choose different options.
Nail baths
There are tons of nail care tutorials out there. And many of them are videos “How to do a manicure at home,” which shows how the hands are pre-soaked in a bath. However, it is not entirely true to say that this is exactly how a great manicure is performed at home. There are two techniques for tidying up your nails as described above: dry and wet. In the first case, the nails are not pre-soaked in baths; in the second, nourishing baths cannot be avoided. The dry technique is suitable for those whose cuticles grow slowly, move back easily, are soft and well-groomed. That is why there is no need to pre-soak your nails in baths; they are easy to process and tidy up.
Nail bath
The wet technique is used when the nails are in a very neglected state. In warm water, the skin steams, becomes softer and more pliable. This is why the wet manicure technique is irreplaceable if the cuticle is naturally hard and does not move well from the nail plate. If it is not possible to remove the skin without soaking, then a bath is necessary.
- It is worth remembering a few simple rules:
- The water should be warm, but not hot;
- You can add orange oil, lemon juice, iodine, and sea salt to the bath. But you should avoid regular food, as it dries out the skin greatly;
- First, the fingers of one hand are soaked and processed, then the other, if the manicure is done by yourself, without assistants.
Manicure stamping
A slightly more complex technique for applying designs to nails than stickers, but much easier than drawing patterns by hand. Special stencils are used here, through which you can apply beautiful curls, intricate patterns, complex openwork and more to your nails.