Matte top is another interesting and simple option to make your nail design original. It gives it a velvety feel not only in appearance, but also to the touch. I have already written about a matte topcoat for regular varnish with design examples, and how you can make a varnish coating matte without using a topcoat. Here I will tell you about the matte top for gel polish, how to apply it, show several of my design examples with a matte finish and a review of my tops.
Types of matte top
There are two types of matte top: with a satin effect and with a corduroy effect . The first creates a light matte finish on the nails, which to the touch is hardly distinguishable from gloss and may begin to shine over time. The matte corduroy top not only looks like velvet, but also feels very similar to this fabric. The downside is that it can get a little dirty.
It is recommended to use a matte top on dark gel polish colors, since on light colors the velvet effect is barely perceptible. The matte finish also looks interesting on gel polishes with cat eye effects, glitter or shimmer. It muffles their shine, making it more restrained, but at the same time unique.
Ideas for matte manicure
The number of designs based on velvet nails is huge. All plates and some of them are coated with matte varnish. It is used to make French coats and create beautiful designs with glossy drops. Lace looks elegant and feminine against a velvet background. Girls looking for holiday manicure ideas will love designs with rhinestones, sand, beads, and stickers. The main advantage of velvet nails is that they look great in any color.
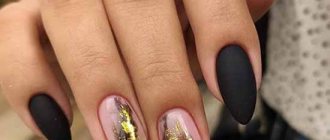
Black matte manicure
Nails made in this color look luxurious, it seems as if they are covered with velvet. Black manicure is suitable for creating an evening look. Decorative elements look beautiful on it: rhinestones, sparkles, gold casting. It is better to perform decorative elements only on some nails, for example, on the ring finger. Black color will look good in moonlight manicure and ombre effect with dark or light shades.
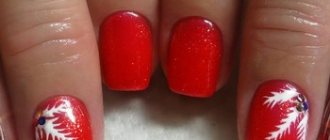
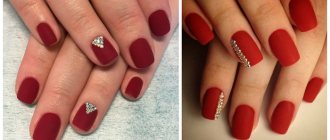
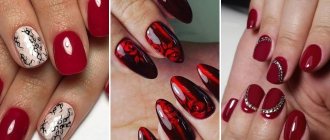
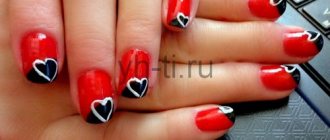
Red manicure
There are a number of nail polish colors that never go out of style. The undisputed leader among them is red - a symbol of love and passion. It attracts attention and emphasizes the sexuality of a woman. Now the most popular shades of red are burgundy, marsala, scarlet, cherry, and chocolate. In manicure, the color can be combined with white, pink, gold, black.
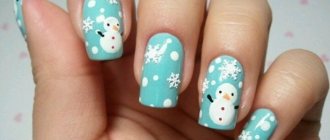
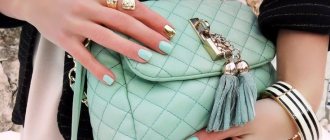
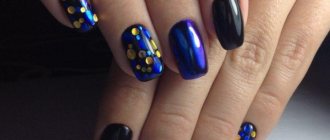
This color is one of the most advantageous for a velvet covering. The most beautiful manicure will be with a matte finish in a rich, juicy blue shade. You can choose almost any tones. For the cold season, nails in blue-black, cobalt, sapphire, and ultramarine are suitable. Deep colors look attractive and elegant. If you need a summer blue manicure, take a closer look at turquoise, blue, azure, cornflower blue, and sea green.
This color is a symbol of femininity and tenderness. It has a very wide range of shades: marshmallow, fuchsia, dusty and many others. Thanks to this, you can create a huge number of different designs. Pink goes well with white, is great for a moon manicure, a French manicure, and even looks great in a single color version. It will be an ideal background for the following drawings:
- delicate floral painting;
- black lace and other stencil designs;
- graphic origami;
- geometric print;
- terry white monograms.
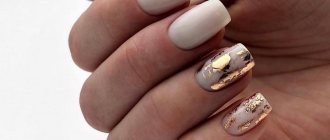
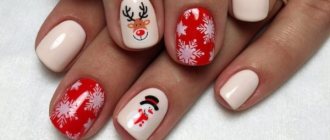
This color is the best choice for a gentle everyday manicure, especially if a woman works in an organization with a strict dress code. Beige shades are light and romantic. They are good not only on their own, but also as a base for drawings. Beige is often used for wedding manicures and French manicures. It looks great in combination with white and in an ombre effect. The alternation of beige and black also looks elegant.
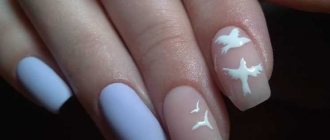
Pure color on its own looks a little boring even in velvet, so it is better to use it as a base for drawings and combine it with other shades. Difficulties arise from the fact that white is one of the most difficult varnishes to apply. It often lays down in stripes rather than in a uniform layer. It is advisable not to skimp on white varnish.
With an image
Coverings with patterns are very popular, especially in spring and summer, when you want something unusual. With the help of a drawing, you can turn an ordinary, discreet nail design into an original one, adding a touch of uniqueness. If you prefer the classics, choose laconic patterns in the style of minimalism: stripes, small curls and monograms, dots of different sizes, lace, floral patterns. If you like bolder and larger designs, then do them on one or two nails, it is very fashionable now.
The smooth transition from one shade to another looks charming. The gradient can move from one finger to another. This option uses 3-5 shades. In another case, the transition is made directly on the nail plate. The technique is a little more complicated, but the result is worth it. The most popular ombre options: yellow-orange, burgundy-black, lilac-violet, white-blue.
With glitter
By highlighting a few nails with sparkling material, you will create a manicure that is suitable for a special occasion. Sequins can be taken in any color. In most cases, gold and silver are used because they are universal and go with everything. A design with sparkles or sequins to match the varnish will also look very beautiful. It is very easy to work with them, and the results will be impressive.
Sources:
https://vplate.ru/gel-lak/sozdanie/matovyj-top/ https://1gellak.com/cveta/matovyj-gel-lak https://zen.yandex.ru/media/id/598cabe49d5cb38d8e2e1ed7/5b1ff89ac3321bddc7a0618a
How to apply matte top over gel polish
The process of creating a matte finish is no different from when you use a glossy topcoat:
- We will prepare your nails for coating by performing a trimmed, European or hardware manicure, removing the cuticle and correcting the shape and length of the nails.
- Remove the gloss from your nails using a file or buff.
- Degrease the nails with a special product and, if necessary, apply a primer.
- We will cover the surface of the nails with a base for gel polish and polymerize it in an ultraviolet (2 minutes) or LED (30 seconds) lamp.
- Apply 2 layers of colored gel polish to your nails, drying each in between under a lamp.
- Next, you can complete the design, or you can immediately apply a matte top coat over colored gel polish and draw on it. It dries in the same way as the glossy finish: 2 minutes under UV rays and 30 seconds under an LED lamp.
- Remove the sticky layer and get a beautiful matte effect on your nails.
Secrets of perfect coverage
However, the result may not always be as smooth as expected. There are still some nuances to applying a matte top:
- Before using, you should roll the bottle with top a little with your palms (do not shake, otherwise there will be bubbles in it) to make its composition more uniform.
- The matte top is thicker than the glossy one. Perhaps it can be compared to a rubber top, but again, the thickness depends on the manufacturer. When applying, you should take this into account and do not put too much top on the brush, stretch it with slow and smooth movements.
- To make the coating more even, hold the nails with the applied top upside down for 30-60 seconds before drying in the lamp - this way it will self-level a little.
- It is very difficult to work with a matte topcoat near the cuticle, and often after drying a glossy streak is noticeable there. Sometimes it’s a feature of the top that it rolls off from the edges, and sometimes it’s simply not noticeable that you didn’t apply it there. Therefore, I recommend applying a matte finish in 2 layers: the first is to tint the cuticle line with a thin brush, and the second is to apply it to the entire surface of the nail.
- Don’t forget that the matte top has stickiness, so immediately after drying it may look like a glossy one, but after removing the dispersion and literally instantly drying the liquid to remove it, you will see the same effect!
Application technique
The application process is classic for all types of topcoats.
Preparing the nail plate for manicure.
Treatment of the outer stratum corneum using an abrasive file.
Cuticle removal, processing of side rollers.
A degreaser is applied to the nail, then a primer, if required by the instructions.
Applying the selected base for gel polish.
Polymerization of the base in a UV or LED lamp.
Applying colored gel polish in one or two layers, depending on the chosen system.
Each coating layer undergoes polymerization in a lamp.
Seal the manicure with a matte finish. The gel is applied in a convenient way to the colored coating and fixed by drying in a lamp for several minutes.
Removing the sticky layer, if indicated in the instructions.
The most common design today is to cover several fingers of the hand. Nails with a matte finish can be placed one after another or across several fingers.
- Reverse moon French. Original design for lovers of the classics. It looks interesting and unusual on dark varnishes. A matte finish can be applied to the tips of the nails, as in a French manicure, or vice versa, by painting the nail bed.
- Matte backing. A universal method for any colored varnish. The coating is used as an independent effect or complemented by various designs: a pattern of glitter, a pattern of glossy varnish, sand painting.
- Graphic arts. Lightweight and attractive design. Simple geometric shapes, fine lines and animal designs. This theme allows your imagination and ideas to run wild.
- Drop effect. An interesting design imitates dew drops on a matte base. Easy to create at home. Drops are created with a glossy top coat or colored gel polishes.
- Drawing with rhinestones and bulbs. The use of these products creates a solemn and festive manicure on your nails. Bulbs are small balls of various colors that serve as decoration. Together with rhinestones, they are laid out in various patterns and monograms on all or some nails.
Fans of interesting textures note that matte finishes add variety to the boring routine of manicure. Corduroy and satin tops can visually smooth out problematic nail polish colors. Add saturation and depth of shade to them, hide bald spots or bubbles.
Masters also prefer to use matte finishes in nail decoration. But the heterogeneous consistency of the product and the difficulty of painting the cuticular zone cause some difficulties in the work.
The coating does not have good durability; over time, due to mechanical stress, the top layer begins to wear off or becomes blurred. The finishes of some brands quickly turn yellow when in contact with light colored gels.
Despite the minor shortcomings of matte tops, girls enjoy using them. The soft and “fluffy” texture, the ability to create new original designs, make matte topcoats no less popular than glossy topcoats.
How to create matte nails using gel polish in the next video.
How to make gel polish matte without topcoat?
Yes, a matte effect can be achieved on gel polish not only using a top coat, although this is the easiest and fastest way, as for varnish. Let's consider other options:
- Sanding with a file. Remember how we remove the gloss on our nails before applying gel polish? In the same way, glitter can be removed from the finished coating. To do this, you simply need to apply the finish and then sand the surface and remove dust. But there are some nuances: It is better to apply the top in two layers, so that when sanding you do not remove too much along with the colored gel polish.
- It will be very difficult to properly work out the curves of the cuticle and side ridges with a file. A sanding cutter can help here, but it will still take longer than using a matte topcoat.
- The file can scratch the top and leave marks, so it is important to choose the right abrasiveness for these purposes.
- It is advisable to apply this sprinkle several times so that the powder is well absorbed, and only then dry it, otherwise you may get a wet, rough effect instead of a matte one.
Matte manicure with glitter and sparkle
Here's another win-win option for both the holidays and every day. It's simple: mix a matte finish with shiny glitters. You can do the same as in the case of gloss: cover several nails with matte, and cover one or two completely with glitter. You can draw designs on the matte surface with silver, gold or colored glitter. You can do the same in French. Do you want everything at once? Then combine matte and glossy finishes on one color, and add glitter to it!
Matte nail design with gel polish
I’ll show you several design options that I made using a matte topcoat (click on the pictures to watch the tutorial):
Pros and cons of matte design
Advantages:
- The incredible alluring velor texture on the nails is very impressive;
- Possibility of using a variety of decor;
- You don’t need any special tools for application, just a matte top coat;
Flaws:
- This coating can highlight the unevenness of the nails, so the texture and color must be chosen correctly. Make sure that the gel polish (base and color) does not streak during application. This will help make your manicure perfect.
Before applying matte varnish, careful preparation is required. The cuticle is removed, the nails are given the desired shape and the gloss is removed using a buff. Carefully align the nail plate. This is the only way to avoid unexpected effects.
To make a matte manicure at home, you need:
- Base;
- Matte top;
- Gel polish of the selected color;
Instead of a regular gel polish top coat, apply a matte (velor) top coat. A simple trick and a matte, long-lasting manicure is ready.
- Velvet top Bluesky, Velvet Top, 10 ml for only 195 rubles.
- ruNail, Velvet top for gel polish, TopCoat Velvet, 15 ml — 385 rub.
- Grattol, Matte Top Velvet, 9 ml — 395 rub.
- In'Garden, Matte top without sticky layer, Cosmovelvet, 11 ml — 450 rub.
Review of matte tops
A matte top is not as popular as a glossy one, so I only had two of them: Nogtika (satin) and Patrisa Nail (corduroy). As the collection grows, I will update this post. For now about them.
Matte top Patrisa Nail Velveteen
Bottle volume – 8 ml
Polymerization time in a UV lamp is 1.5 minutes, in an LED lamp – 30 seconds
The top coat is very thick: even if you take out the brush without wiping it on the edges of the bottle, not a drop will fall off! The finish itself is translucent and virtually odorless. Due to its thickness, it is a little inconvenient to apply; you need to adapt to do it carefully. When applied, the brush leaves grooves, but self-levels quickly enough. It’s simply impossible to flow somewhere with such density!
The brush is wide, for such a consistency I would make it a little narrower.
It does not roll off from the edges of the nail plate. The coating is incredibly velvety to the touch and super matte in appearance, which does not “wear out” over time. The wearing period of the top is up to 3 weeks.
There is no stickiness in it, but I noticed that if you apply a degreaser after drying, the effect will be visible much better.
Patrisa Nail Velveteen matte top on colored gel polish:
Cat's eye on gel polish
Matte finish products
There are many ways to perform a gel polish manicure. They are relatively simple to perform. The nail art master chooses one or another method taking into account the client’s wishes, personal convenience and preferences. Options for making the coating matte:
- Gel polish. Manufacturers produce lines of matte coatings in different shades. This gel polish is applied to the nails in one layer and dried in a lamp.
- Special top. Glossy colored gel polish with a finished design is dried in a lamp. The nails are carefully covered with a matte top coat. The coating is dried again in a UV lamp, then the sticky layer is removed. The matte top behaves capriciously, appears with bald spots, and spreads. To avoid this, it is applied in a very thin layer and immediately dried in a lamp.
- Grinding. A glossy top coat is applied to the nails, dried, and the sticky layer is removed. After this, the surface is carefully processed with a fine-grained buff or milling cutter. It is important to periodically change the direction of movements and not to press too hard. As a result, the surface of the nail plates becomes matte and slightly rough. After the procedure, each nail plate should be thoroughly treated with a disinfectant.
- Acrylic powder or dust. After applying the colored layers, the nails are covered with a glossy topcoat, but are not dried. Each of them is generously sprinkled with transparent acrylic powder. Then they are dried in a lamp. Excess powder is brushed off with a special brush. Matte dust is applied not on a wet top, but on a sticky layer. It is better not to pour it in, but to distribute it evenly with a brush. It is worth noting that a manicure performed in this way is short-lived.
Home methods
Ordinary varnish is given a matte effect independently, using improvised means. There are the following ways to do this:
- Steam. This method is not suitable for gel polishes, but for ordinary ones that dry without a lamp. Place a saucepan or kettle of water on the fire to heat up. When the liquid boils, apply two layers of varnish of the desired color, dry slightly and hold over steam at a height of about 15 cm for a minute. Dry thoroughly. To ensure an even manicure, paint 2-3 nails at a time.
- Starch. Apply your manicure with polish of your choice. Let it dry. Pour cornstarch into a plate, apply to a brush and apply wet varnish. Wait a minute. Using a dry brush, carefully brush off any remaining starch so as not to touch the coating. Some girls drip varnish onto the palette. Then add a little cornstarch to it and quickly mix thoroughly. The resulting product is used to paint your nails.
- Grinder. The nails are covered with several layers of varnish and then with a fixative. When this has thoroughly dried, carefully brush over the surface with fine-grained buff.
How to make matte gel polish yourself
If you have firmly decided that you no longer want to see this bottle of glossy varnish on your shelf, but would like to have exactly the same one, but matte... then this method is just for you. You will need:
- half a bottle of gel polish;
- matte monoshadows;
- toothpick;
- paper.
You will need to pour matte shadows onto paper, knead them well and pour them into the bottle. Form a funnel with the paper and push the shadows into the mouth with a toothpick. Shake the bottle well. Your glossy gel polish has turned matte. In order not to make a mistake with the color and not get an unpredictable shade, choose shadows that match the color of the varnish; in extreme cases, use white ones.