Foam manicure is a type of textured design that, with its simplicity, fits perfectly into the general trend of nail minimalism. As soon as they call it: snake skin, crocodile skin, mermaid tail, lava, lunar craters. Masters agree on only one thing - it’s fast, simple, incredibly stylish and, best of all, suitable for absolutely all ages and occupations. Today we will tell you about all the subtleties and life hacks of bubble nails manicure, which has become so popular that it threatens to seriously displace traditional winter design methods and become the most popular New Year's nail outfit.
Photo author: @_teodora_atanasova_/Photo author: @sheva.nail
Textured foam manicure: history of the trend
Original nail decoration with imitation of natural textures or animalistic textures (reptile skin or fish scales) is not a new topic in nail art. But foam nails are the simplest and most accessible technique for beginners to create a spectacular and trendy look. If previously experienced craftsmen used natural snake skin, imitated lava and mermaid tails using 4D gels, combined thick tops, gels and sprinkling with acrylic or glitter to create patterns (and beginners with little experience resorted to stamping or thematic sliders), now the most A simple mono manicure takes a minimum of time and effort, and looks just as attractive as painstaking work that takes many hours.
Photo by: @dze_manik
The general theme in the nail industry in 2021 is a return to naturalness, simplicity, minimalism, as well as a move to combine techniques (using several trendy ways to decorate natural or extended nails in one look). And the trend for manicure with improvised means - the most common soap foam, which in the form of soap for cleansing the hands of a master or client is present in the office of any nail artist - fits perfectly into these two contradictory directions. Depending on the artist’s inspiration, the client’s imagination and the availability of the necessary varieties of decorative materials at hand, nails in any state of health can be presented with a unique outfit that will give not only a lot of good mood, but also a sea of compliments.
Photo by: @stylowypazur_official
Like any other technique, bubble nails have their advantages and disadvantages, important points and life hacks that you need to know about before offering this design to a client or trying it on yourself. Let's take a closer look at the features of the new trend.
Secrets of the perfect water manicure
As in any other matter, creating a flawless water manicure has its own subtleties. Watching a video on how to properly do a water manicure at home, you may not always notice the following nuances:
- when developing a water pattern, you should not completely immerse the skewer/knitting needle in water - just dip the tip;
- it is important to carefully ensure that your finger is immersed in water no higher than the level where the tape/plaster is located;
- You should paint your nails one at a time: after dipping and removing one finger, you need to wait until the varnish on it dries, and then move on to painting the second finger;
- when creating water designs on nails at home, it is recommended to paint the nails on one hand first, and after all the nails have dried, start designing on the second hand;
- mixing varnishes in water is enough for one minute - long movements of the paint can mix it too much into a uniform tone, then no pattern will work;
- When performing a water-based manicure with gel polish or a regular coloring compound, after each dipping of a skewer/knitting needle into water with paint, it is recommended to wipe the stick on a cotton pad or cloth - this way you can prevent unwanted mixing of varnish colors;
- the answer to the question of what varnishes are suitable/needed for water manicure is clear: only liquid paints should be used, as they spread better over the surface of the water;
- you should not resort to using thick varnishes, as well as diluting them with various thinning agents - this will only spoil the result;
- varnishes involved in the work should preferably be from the same manufacturer so that their quality characteristics are the same;
- Another secret of how to paint your nails using water and varnish is its thickness: if you have a composition on hand that is too thick and does not want to spread, you can add a couple of drops of nail polish remover to the water. Professionals do not advise doing this, but, as they say, for lack of fish there is cancer;
- if the water temperature exceeds room temperature, the varnish may curl; if, on the contrary, the liquid is too cold, then the paint in it simply will not disperse.
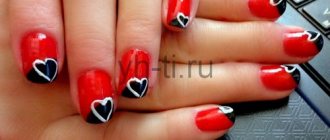
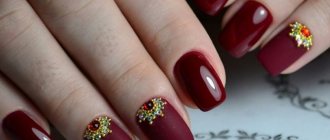
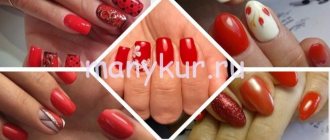
Scarlet tones
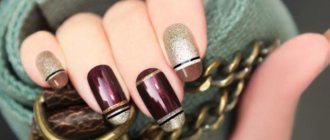
Black and white drawing
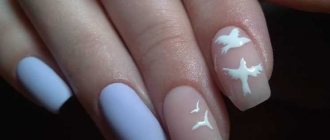
Blue colors
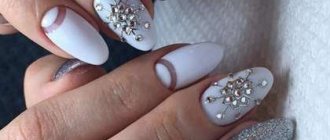
White and pink manicure
Pros and cons of textured bubble nails
The trend for bubble nails has spread so rapidly and contagiously precisely because it has a lot of advantages compared to other nail techniques.
Let's look at the advantages of this new and at the same time well-forgotten old design:
- This decoration option is perfect for nails of any length and shape.
On short nails, the design looks like textured stone beads, which will appeal to clients who prefer the unity of manicure and favorite jewelry made from natural materials. However, this image looks most impressive at a length of medium and above. If the client’s natural nails cannot boast of flexibility, strength, or strong length, it is worth resorting to strengthening (base and acrylic powder or a duo of rigid and elastic bases, such as Structure Rigid element base and Structure Elastic element base from the ONIQ brand). Another way to flaunt good length and trendy nails is to get nail extensions using acrylic, gel or polygel. If you choose colored polygel or acrylic with glitter for extensions, the artist will no longer need to use additional decorations, and the final design will look modest, elegant and quite office-appropriate;
Photo by: @asiagrandinelli/Photo by: @karpinchik_paris
- The design, made in compliance with technology, does not cause discomfort when worn and does not cling to clothing.
Despite the fact that the surface of the nail is ribbed and not completely smooth, foam nails are easy to care for, maintaining the beauty of the manicure right up to correction. Contaminants that get into the design/pattern are easily washed out with water, regardless of whether they are made with a matte or glossy topcoat;
- When performing a manicure, the master is not limited in the choice of tools in order to polish the nails quickly and at the same time beautifully.
Tips-sticks for applying foam, bottles of foam for washing with a special dispenser, cups for acrylic liquids for diluting the soap base in water are used. It is also possible to apply foam with a fan brush (makeup brush). And if the foam turns out to be as dense as possible, then to save time you can apply it directly with gloved fingers.
Photo author: @anastasia_nails48/Photo author: @usti_na
As for the downsides, these include the following:
- foam nails - a design involving about 4-5 layers of material on the nails.
This means that the client’s nails must either be in good condition initially, or prepared for wearing a multi-layered look, so as not to suffer at home or at work;
- if you forget the stage of “combing” the texture (when the prickliness of the dried top is removed with a buff or nippers), such a design will be uncomfortable for the client to wear (it will cling to clothes, hair, and may leave scratches on the skin;
- Despite the apparent simplicity, you need to maintain a balance of correctly applying foam to the almost finished design.
Photo by: @kittycia_/Photo by: @za_anneta_nails_ridder
The beauty of foam nails is ensured by the even distribution of foam. It should lie in a uniform layer, covering the area both at the cuticle and at the free edge. If the foam does not reach the cuticle, you will end up with an unaesthetic indentation. And if the free edge is not covered, the visual integrity of the textured surface is violated. In this case, the indentation should be no more than a millimeter so that the top with foam does not flow into the subcuticle pocket when drying in the lamp.
- the master works at speed. It is better to create a foam texture one nail at a time, since the bubbles quickly collapse and there is a risk of not having time to dry them in foam form.
How to create this beautiful design quickly and correctly, avoiding possible disadvantages and experiencing only the advantages? Let's look at a step-by-step manicure using the simplest options - foam nails stylized as frozen lava and rubbed foam.
How to do water nail art at home: step-by-step instructions
An important component of the image is style, so it would not be amiss to mention colors. So, what kind of varnish do fashionistas need:
- For lovers of bright manicures, varnishes of contrasting colors are recommended; patterns with them have clear transition lines and a more pronounced pattern.
- For those who prefer “marble” coatings, shades of the same color scheme are suitable. For example, the use of blue, turquoise, and emerald gives a delightful malachite tone. An interesting manicure is also obtained by mixing pink and powdery shades - you get very delicate, romantic designs.
After checking the water temperature again and opening the bottles, you can begin to study the principle of creating a manicure:
- Protect your skin in any way convenient for you. In most cases, a thick layer of thick cream or Vaseline is used. Using tape is also effective, but labor-intensive, and even after removing it, sticky marks remain on the skin. Russian fashionistas apply glue, which provides a dense, elastic film and is then easily removed. It is important that the protective agent does not flow onto the nail plate, otherwise the varnish will not lie evenly.
- The next step is to apply a transparent base or white varnish, which will emphasize the brightness of the main pattern. Wait for the coating to dry completely.
- Start creating your own unique water manicure at home: place the first drop in a container of water and wait a little. After it spreads, drop a varnish of a different color into the center of the stain. Repeat the procedure another 5-10 times.
- Use a toothpick or the tip of a wooden stick to create a pattern. In this case, after each dipping of the instrument, it must be wiped with a cotton pad or cloth.
- By bending your hand and finger so that the nail plate falls parallel to the water surface, dip your nail. Pull it out slowly so that the pattern lies evenly, while the remaining varnish is removed with a toothpick while still in the water. Do this with all the nails one by one.
- After the coating has completely dried, remove the protective layer from the skin around the nail and clean it with a cotton swab slightly moistened with nail polish remover.
- If desired, glitter and rhinestones are applied to the manicure, and additional details are added to the resulting pattern. When finished, the nails should be coated with a fixative.
Lava foam manicure technology
Photo author: @kirichenko_nails/Photo author: @markelova__darina
- Complete preliminary preparation of the nail is performed: a hardware manicure with a machine or a combined manicure using clippers. If lengthening is not intended, a degreaser and then an acid-free primer are applied to the nails with the gloss removed;
- Nails are covered with a base. Depending on the intended image, this can be a camouflage tint base (used as an independent color coating), a strengthening rubber base, or a duo of hard and elastic classic bases. The material is applied in one layer and polymerized in accordance with the manufacturer’s recommendations for the prescribed time in a hybrid, UV or LED lamp;
- The selected color gel polish coating is applied to the nails in 1-2 layers. This can be a monochromatic manicure in a dark color palette, or a delicate lava in a nude color palette (chocolate stylized with bubbles), or a daring disco-neon lava. When choosing a material, you should give preference to the most pigmented material (ideally, use a dense single-layer);
- After drying the gel polish in a lamp, the sticky layer is removed from it, and a matte top coat without stickiness is applied in one thin layer to ensure the wearability of the finished design. The top is dried in a lamp;
- Apply the second layer of matte top very thinly with a semi-dry brush. Doesn't dry out! Soap foam is applied to the selected nail (or to all nails in turn), after which the nail is immediately placed in a lamp for polymerization;
- Use a paper towel to blot off any remaining foam. A lint-free cloth soaked in cleanser is used to treat the surface of the nail with a foam pattern;
- There is no need to cover the design with a third layer of topcoat. If, after drying, particles of the top coat remain with sharp edges or there are flaws in the polymerized top foam in the area of the cuticle and side ridges, this can be removed with nippers or smoothed out with a soft buff. The buff needs to be strictly soft, so as not to cut off the entire textured effect, and so that the nail is slightly smoothed and not scratchy. Movements of the buff on the nail should be light and smooth;
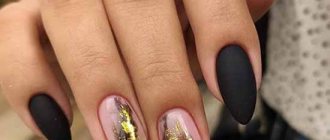
- The classic version of lava nails does not require the use of additional decor. But if desired, matte lava nails (if only part of the nail is decorated with foam) can be supplemented with rhinestones, broths or “Spiderweb” gel paint.
Photo author: @korkhovam/Photo author: @manikur_v_pushkino
Foam manicure technology - rubbing under foam
- Repeat steps 1-3 of the previous design. We choose a dark (black) gel polish to make the design look as spectacular as possible;
- Such a spectacular image as a foam rub looks most expressive when the base (gel polish) is applied using the “under the cuticle” technique. This allows you to wear such manicured beauty longer without losing aesthetics while the natural nail grows smoothly;
- The selected mirror rub is rubbed onto the dried top without stickiness - with a gloved finger or an applicator. Depending on the type of rubbing, the top can be cold (completely cooled) or hot (immediately after the lamp) at the time of rubbing. In this case, the rub can be applied both to gel polish (and then the nails are covered with foam) and to foam bubbles after drying in a lamp. Before applying the foam and drying the top with foam in a lamp, the manicure should be completely prepared: brush off the rub-in with a brush (brush), buff the ends of the nails to seal the rub-in with a second layer of top coat;
- After polymerization of the foam in the lamp, the remaining foam is blotted with a napkin, the nail is wiped with a cleanser, and the surface with the pattern is carefully buffed. If the client wishes, the design can be supplemented with additional decorative elements.
Photo author: @karrina_bg_nails/Photo author: @natalykashtanova
While practicing to create one or another type of foam design, nail artists noted several important recommendations, following which the chances of creating absolutely irresistible foam nails increase significantly. Here are some of the most significant lifehacks when performing a Bubbles Nails manicure.
Performance technique
To create beautiful patterns on nails, the fair sex should not strive to carefully draw the curves with a thin brush. The properties of the varnish composition and water will do their job themselves. Girls just have to choose a combination of polishes so that it looks harmonious, because for a manicure you will need more than one color. The main feature of water design is that every time you end up with an original pattern that makes your nails unique and unique.
The principles for creating this manicure are simple. You just need to alternately add varnishes of different shades to a cup of water. A colored film forms on the surface of the water. And by drawing on it with a toothpick, you can create fancy patterns and stains. You are allowed to come up with completely different patterns: abstraction, images in the form of petals, flowers and spirals.
Water-based manicure with gel polish is not a complicated, but quite labor-intensive process, since the most important thing you will need is time. At first you will do this for about two hours, but as soon as you get the hang of it, the time will decrease to 40-60 minutes. A very big plus of this manicure is that you don’t need any additional equipment to do it. All you need are tools for regular nail painting and something you can easily find at home. But you don’t need to run and pour water into a bowl now - to get a good result, you need to learn some secrets and answer the main question: is it possible to do a water manicure with gel polish?
How to choose the right materials for foam design
- Selecting a top
.
The top used in this manicure should not be very thick, otherwise the design will turn out to be in the form of huge lunar craters, which are not comfortable to wear and tend to cling to everything. A top of medium consistency or liquid is better, but do not forget to apply the finish in a very thin layer. If you go too far with the thickness of the top layer, the resulting rough edges from drying the foam in the lamp will cause discomfort in life;
- Choosing color gel polish
.
When choosing a color base, it is better to choose single-layer coatings, since the design ends up being multi-layered. The lighter the final look, the more comfortable and pleasant it is to wear;
- Selecting foam bubble size
.
To obtain a pattern with small cells (bubbles), the foam base, diluted in water, must be shaken for a long time and vigorously until small, dense bubbles form. If you shake lightly and briefly, large air bubbles will form. The most stable and uniform bubbles are obtained if they are diluted from water and ordinary ready-made soap bubbles.
Photo by: @macanailart/Photo by: @maniilandia
Features of choosing a suitable varnish
To apply a beautiful design at home you will need at least four varnishes - two colored, white and one transparent. To obtain the desired pattern, you should first decide on varnishes, because not all will suit.
White varnish serves as the base for the main nail art, so in this case any high-quality varnish will do. But when choosing varnishes that will be used to create a unique pattern, you should pay attention to a number of nuances.
To create a water manicure at home, varnishes with a thick consistency or varnishes with glitter are absolutely not suitable. They will not spread over the water and will sink to the bottom under their own weight. Therefore, fresh liquid varnishes are best.
But even if the varnish of your favorite shade thickens at the wrong time, you can use it if you add a couple of drops of solvent to the jar and mix the contents thoroughly.
Types of bubble nails. Top 10 most spectacular variations of trendy manicure
Fashionable foam manicure allows the master to create without limiting the flight of imagination. You can use absolutely all decorative coatings, bulk decor and materials for painting, casting, sculpting, as well as to create the effect of volume and depth. Let's look at the most popular options for making foam nails according to Youtube and Instagram craftswomen.
- Lava nails (pumice nails)
. This design involves the use of only a matte topcoat. Additionally, the image is not decorated with anything and, for greater stylistic similarity, is executed in a monocolor version. The top of the marigolds is not additionally fixed with a top, so that the effect of the textured natural surface does not disappear.
Photo by: @alla_nails/Photo by: @shimmer_beauty_studio
Photo by: @lolka_nail_art/Photo by: @marafet_nails_art
- Foam rub
. At the request of the client (and the inspiration of the master), absolutely any rubbing can be used. Rubs that imitate precious metals or stones look especially chic. But if the idea allows, you can use the most delicate options (pearl rubs) or creative decor (rubs “”). Have you accumulated rubs in your decor arsenal that are not pleasing with their visual graininess? Don't be afraid to use them for this look! With additional fixation with a top and foam, the shortcomings of dry decor will be reliably hidden in the original image.
Photo author: @lidiya_wownails/Photo author: @nogti_service_05
Photo by: @nastroenie.nails/Photo by: @rknails___
- Foam "cat"
. This type of bubble marigold is the second most popular after rubbing! Because the look combines one of the most favorite coatings - “Kitty” gel polishes (with even a 5D effect), and 2 trendy techniques at once - “foam manicure” and “volumetric highlight”. If you want to perform a manicure using the combination of 2 techniques, do not forget to acquire powerful magnets for playing with metal particles in the thickness of the gel polish coating. And if you don’t have ready-made “cats”, mix your favorite gel polish with magnetic rubbing!
Photo author: @victoria_ikki/Photo author: @legeyda.olga
Photo author: @aksenova_toma_nails/Photo author: @elena_muzika_nail
- Foil under foam
. Another spectacular nail decor that goes well with foam (and evokes associations with molten or solidifying lava) is glossy or matte foil. It is preferable to use a one-color decor without a pattern, since the pattern under the bubbles will be difficult to distinguish. If the image allows you to complement the textured design with drawing gel paints or gel pastes, this can be done either on neighboring fingers, or done using the same beautiful product as the “Cobweb” gel paint (in the classic version, or “cobweb” metallic ").
Photo author: @tatarnikova_kogalym/Photo author: @heavenlynailsbypatrycja
Photo by: @_nails_mary_/Photo by: @heavenlynailsbypatrycja
- Colored foam on a contrasting base
(“canvas” is made of contrasting gel polishes applied in layers). The foam is applied in this way not on the top covering the selected gel polish, but on the second color of the gel polish (not dried). This flirty design evokes associations with openwork lace (veil) and is perfect for those who do not like to combine texture with additional decor, but want to see an interesting twist in the finished design. Such “foamy” nails look attractive both in a rough lava design and with the perfect highlight of a glossy top.
Photo author: @nails_elena_od_ua/Photo author: @olesianails_korolev
Photo author: @nail_shellac_minsk/Photo author: @jal.nailartist
- Foam and rhinestone inlay
. With a certain selection of colors, bubble manicure is visually very reminiscent of sea corals, which love to show off on nails paired with artificial pearls, bright broths and a fashionable girl’s best friends - artificial diamonds. Rhinestones can be either flat or conical. The main thing is that they combine beautifully with the texture of the foam, do not draw attention to themselves, and match the color of the main shade of the gel polish.
Photo author: @liza.kushnarevich/Photo author: @goodilina_anastasiya
Photo author: @_nailslabelle_/Photo author: @nailstylist_ninakonnik
- Neon foam
. In a certain sense, foam nails are a kind of shocking nail art, and therefore bold natures choose the daring duo of lava foam and neon coatings (or neon pigments). With such an explosion of color and its spectacular frame, your hands will definitely not be left unnoticed! And they will lift your spirits for a long time with their beauty.
Photo by: @pro_nails_berezoof/Photo by: @katrin_beauty_style
- Smooth foam
(aquarium bubble nails). Girls who cannot imagine their image without a breathtakingly beautiful perfect highlight on their nails, as well as those who prefer ease of wear in nail design, choose foam under the reliable fixation of a glossy top. This image loses its natural originality (texture), but gains in durability and wearing comfort. Quite often, this type of foam on nails is supplemented with sliders, flexible tapes, and 3D decor.
Photo author: @tatiana_paraso4ka/Photo author: @nataliavolkova_nail
Photo by: @sokol_nails_master/Photo by: @vilutevilute
- French foam, “moon” foam or foam patterns
. Both modest women and fashionistas will find the ideal option for themselves in the variety of foam looks. Include foam in your favorite nude or creative French manicure, use it to make painting on your nails voluminous and “alive”, play with abstractions, ethnicity and geometry (decorating the hole or side edges of the nail with foam)! A soapy “trick” in your favorite design will help you fall in love with it with renewed vigor, and the master will not sigh when you meet: “Well, they’ve come for a French jacket again!”
Photo by: @eolin.nails/Photo by: @aseevanail24
Photo author: @nailolgasaenko/Photo author: @mani_maniaczka
- Foam with 3D decor
. Molding and three-dimensional painting, a recent hit - the “Tear of a Unicorn” design, also coexist perfectly with foam in one design. Openwork bubbles in a contrasting color or the same color as the gel polish base will beautifully highlight liquid metal, 3D sliders, and favorite figures/flowers/ornaments. In such a manicure, the main thing is to ensure that the accent smoothly balances between the two leading nail decoration techniques. Otherwise, the newest trend will not be revealed in all its charm.
Photo author: @darya_kamenskih/Photo author: @irinakaraustova
Photo author: @_ekaterina.zhukova_/Photo author: @ok.sana3676
Water manicure ideas
This design is unique in itself, because with the help of an ordinary toothpick and colored stains, each nail can be decorated with an unusual pattern.
You can diversify your water manicure with simple glitter. Add a little glitter to a glass of water; it will spread well over the varnish film. After imprinting the design, iridescent patterns will appear on the nails.
An iridescent summer water design is created using bright neon shades. Juicy pink, purple, green, blue and yellow are mixed into original patterns.
Water manicure can also be done in classic black and white colors, as shown in the photo.
Foam nails and classic nail polishes
Unfortunately, not all nail fashionistas can constantly wear gel polish without interruptions, or are generally forced to make a choice in favor of weekly gel polishes or classic nail polishes due to an allergy to gel polish.
But even such restrictions will not prevent you from being on the crest of manicure fashion and delighting yourself with a foam manicure. Is it possible to decorate polishes with foam, and will such a manicure be wearable? Find answers and options for lacquer-foam design in the video master class presented below. Video author: Nails Nails
As for the wearability of such an image, this can only be known in practice. A mixture of varnish, water foam without fixation with a top coat and even with the most reliable finishes for weekly gel polishes, of course, will not show the same phenomenal durability as a gel polish manicure. However, it will allow you to change your look more often and “bring to light” your entire arsenal of varnish coatings.
Armed with theory and choosing an image you like, reinforce your knowledge with visual learning. We have selected for you the most informative reviews of the new manicure trend that will help resolve all possible difficulties and questions when trying to perform foam nails.
Photo author: @tatyana_nailsmaster/Photo author: @nogotochki_saratov64
Possible mistakes when creating a manicure
Sometimes things go wrong at first, especially if you have never done nail art at home before. Here is a list of common problems and how to fix them:
- A drop of varnish does not spread, but sinks. The reasons for this are unsuitable water temperature or the brush is located above 2 cm from the surface of the water.
- Spreading stains do not form patterns well and are difficult to apply. The problem is that the composition dries quickly, so it is easier to work with liquid varnishes. It is difficult to make drawings on the surface of too warm water, but at cold temperatures any varnish will dry out very quickly.
- Unsuitable container. When doing a water manicure yourself at home, it is more convenient to use wide bowls, but in this case the consumption of varnish increases. However, it is difficult to carefully place your finger into a narrow glass.
- Fuzzy drawing lines. The reason for this is a poorly cleaned toothpick, on which particles from the previous mixing remain. Just make sure to thoroughly clean your instrument before each dive.
- Uneven distribution of varnishes of different colors. The reason is the different structure and density of the varnishes used. To get a high-quality manicure with water, you will need fresh varnishes, preferably from the same manufacturer.
Find out what European manicure is.
- Serum for cucumbers and tomatoes
- How to treat obsessive-compulsive disorder and fears
- Eggplants with tomatoes and garlic in the oven - recipes for the table and for the winter
Unique execution technique
Manicure on water is quite difficult to perform. The first time you will need about 2 hours of free time. In the future, you will be able to do nail art in an average of 30-60 minutes. You will need a little skill, a set of necessary tools and additional accessories, including:
- set of nail polishes: transparent, white, several colored;
- container with water;
- scotch tape or thick cream;
- toothpicks (wooden skewers will do);
- cotton swabs or disks;
- nail polish remover.
If you decide to perform a manicure using water, you should remember an important rule. Compliance with it largely determines the success of the entire procedure. The water in the glass should not be cold or hot! The optimal temperature is room temperature or slightly higher, at which the varnish spreads best over the surface.
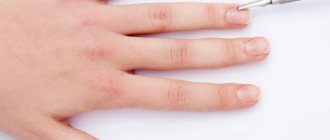
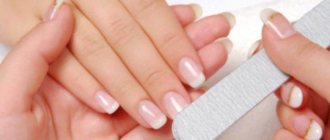
Step 1. Preparing your nails
Treat your hands with antiseptic. Tidy up your nails with a classic (trimmed), European (untrimmed) or Brazilian manicure. Pay special attention to the cuticle. After all, to make a beautiful manicure using water, you need to achieve a smooth and even surface of your nails.
Apply the first coat of clear polish and wait for it to dry. The water version of the manicure involves a contrasting combination of different colors. To make the composition brighter and more saturated, we recommend applying a base coat. You can use white or colored varnish that will be included in your nail art.
Before the procedure, cover each finger with tape, leaving the nail plate open, as in the photo, or lubricate the skin with a rich cream to protect against bright pigment. Manicure has a very unusual technology, and these simple steps will make your task much easier.
Step 2: Creative Process
Place a container of water in front of you. A regular plastic cup will do. It is important that it is not too small, otherwise your nails will cling to the walls and it will be difficult for you to create high-quality nail art. If the container is too large, the consumption of varnish will increase significantly. Since manicure is performed using water, the liquid should not contain foreign components or air bubbles.
Open all the jars of colored varnish slightly and prepare simple toothpicks. Let's assume that you decide to get a manicure in two tones. Open the first varnish and hold the brush over the glass at a distance of no further than 2 cm. A droplet should fall into the water. You will see how the varnish spreads. Take the second color and drop it into the center of the resulting stain. Repeat 6-8 times, alternating varnishes.
Each circle of water should spread towards the walls of the glass. You can help this process by running a toothpick from the first streak to the side of the container. Do not immerse the stick too deeply; it should glide through the water.
It's time to get creative! Swipe the toothpick over the rainbow several times, as in the photo. Be sure to clean the stick when it gets dirty. You are literally painting your future nail art on the water. Once you get carried away with the process, don’t forget about time. From the first drop of varnish to the finished drawing should take no more than 40-60 seconds.
When the water pattern is ready, smoothly lower your nail into a multi-colored rainbow parallel to the plane of the table. The finger should be completely immersed in the liquid. Using a toothpick, use a quick twisting motion to remove excess polish from the surface of the water. Carefully remove your finger. Repeat the procedure with each nail separately. To get the most out of water nail designs, you need to be patient. Any rush can ruin your manicure.
Step 3. Final chords
You're almost done with your water-based manicure. Remove the tape or remaining cream and clean the skin with a cotton swab soaked in nail polish remover. Apply the top coat to your nails, but first make sure that your “water” design is really dry.
Several water manicure lessons will help you consolidate your knowledge. The wonderful Alexandra demonstrates step by step the process of creating nail art on water. A visual reinforcement of the theory will help you understand all the intricacies, so the video will be extremely interesting and useful for you.