Issues discussed in the material:
- What is a hardware pedicure
- What are the advantages of a hardware pedicure over a classic one?
- How to choose cutters and attachments for hardware pedicure
- How is the hardware pedicure procedure performed?
- What mistakes should beginners avoid when performing a hardware pedicure?
Modern girls, who are attentive to their appearance, are increasingly choosing hardware pedicures. Maintaining the result without special efforts for at least two weeks encourages female representatives to use this service. After the procedure, the skin of the feet, cuticles and nails acquire a well-groomed and healthy appearance. An experienced specialist will tidy up your feet and get rid of problems such as ingrown toenails or fungus. Due to the great demand for the service, more and more girls are learning how to perform it. In this article we will talk about hardware pedicure for beginners, we will analyze the nuances and subtleties.
Recommended articles on this topic:
- Beauty salon automation: effective control of your business
- Where to buy quality nail materials wholesale
- What are branded nail files and how are they produced?
Features of hardware pedicure
Among all the ways to maintain beauty and take care of the body, pedicure is far from the least important. The procedure done professionally differs from a similar one performed at home in a number of features:
- in less than an hour, the legs acquire an aesthetic appearance;
- the procedure is performed by a professional who will not cause harm to health;
- hygienic treatment of the skin of the feet;
- preventive measures to prevent the formation of fungus;
- proper nail treatment to provide protection against ingrown nails;
- getting rid of calluses;
- a measure to prevent flat feet and foot deformities;
- nail cleaning, providing protection against the proliferation of germs and dangerous bacteria.
There are two types of pedicure: classic and hardware. Each is aimed at caring for the nails and skin of the feet and preventing dangerous fungal diseases. Based on these two types, many techniques have been created, each of which has its own distinctive features.
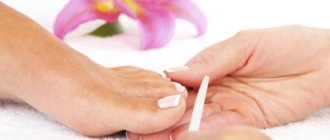
Girls with thin skin, especially in the cuticle area and between the fingers, prefer to have a hardware pedicure. This is a procedure during which the feet and toes are treated using a dry method, unlike the classic version. The hardware technology uses an electric machine with special attachments that have a variety of effects on the skin. Devices from different manufacturers and types of models differ in speed. Some are equipped with a vacuum cleaner to collect loose small particles of skin. A hardware pedicure also differs from a classic one in that it eliminates the need to cut off the skin from the feet. Instead, using wide attachments, the skin on the feet and heels is first treated, and then using thin cutters, excess cuticle is removed. The second stage is sanding the skin on the treated areas.
What is a hardware pedicure
Hardware pedicure is a mechanical treatment of the skin of the foot, nails and toes using a special grinding tool with cutters and various attachments. The device, due to the rapid rotation of the cap, safely removes keratinized epithelium, corrects the nail bed, polishes the nail plates and removes cuticles.
The pedicure device has several operating modes, adjustable to different power and speed depending on the condition of the skin. After each session, removable attachments are treated with an antiseptic, ensuring absolute hygiene.
Pros and cons of hardware pedicure
This skincare procedure has many benefits:
- The gel used to soften the skin has a non-aggressive effect and affects only the stratum corneum. This eliminates the risk of damage. In addition, it has good disinfectant properties.
- The cutters are able to process the skin on the feet from different sides, which allows them to give them a healthy and well-groomed appearance.
- Longer retention of results compared to trim pedicures.
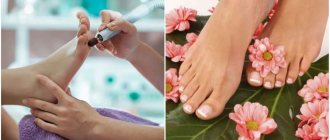
- A good bonus to the service is a foot massage.
Hardware pedicure can be done for both women and men. The benefit of this procedure lies not only in a good result from an aesthetic point of view. It has preventive value in the fight against leg diseases associated with diabetes.
Hardware pedicure has many positive aspects, but minor disadvantages also need to be mentioned. These include the following:
- High price. Due to the use of expensive equipment and high demands on the level of skill of the performer, the procedure is distinguished by an appropriate price.
- The chance of getting to an unqualified specialist. The most minimal unpleasant consequence is the need for a new procedure in a short time.
- Severely rough skin, cracked heels, corns, calluses and other foot problems will require repeated visits.
Device for hardware pedicure
Hardware pedicure is carried out with a special device, which includes several cutters and silicon carbide attachments. For repeated and regular use, a novice craftsman should purchase a machine with the following characteristics: power from 40 watts, cutter rotation speed - at least 15,000 rpm, reverse reverse. 1. Attachments for hardware pedicure. In the modern beauty industry, hardware technologies are in demand by most clients due to time savings and minimal risk of skin injury. Special devices during the procedure significantly facilitate it and speed up the process. There are attachments that are designed to perform specific functions - they specifically help treat rough skin, nails and cuticles.
Read material on the topic: Files for polishing nails: types and features of use
Hardware pedicure is performed with cutters, which are divided according to type and technical characteristics. Extended and natural nails are treated with different types of attachments, as are the cuticles and skin around the nails. They differ in rotation speed, rigidity, diameter and abrasiveness.
According to the type of material from which the nozzles are made, they are divided into:
- Ceramic.
This type of cutter is one of the safest. They are suitable for home use or for beginners in hardware pedicure. The cutter contains corundum particles that do not injure the skin. Ceramic nozzles differ in the degree of granularity of the coating. They all work in different directions: coarse-grained cutters remove rough skin, medium-grained cutters are designed for cutting cuticles, and with the help of fine-grained attachments the master polishes nails or skin. A significant disadvantage of this type of nozzle is its short service life - about two months.
- Diamond.
They have greater wear resistance compared to ceramic cutters. Also, these attachments solve many problems. Sintered cutters, which contain artificial diamond chips mixed with an adhesive base, are considered lower in price. Diamond bits can also be precipitated. In this option, high-quality diamond chips - natural or artificial - are applied to the metal tip. Different diameters and shapes of cutters determine their functional purpose. So, to give the desired shape to the nail, a large nozzle is used. When working with the cuticle and skin around the nail plate, it is preferable to work with a small diameter cutter. The nozzle rod, depending on its hardness, is marked in different colors. The rigid cutter has a black or red stripe. Medium hardness is indicated in blue or green. The soft nozzle has a yellow stripe.
- Metal
Milling cutters are made of hard metals. On their tip you can see straight or oblique notches. Metal attachments are used to file away the acrylic layer from nails, remove rough skin, and calluses. Their undoubted advantage is the absence of dust during operation and insignificant heating compared to other materials.
- Silicone
The ideal solution for grinding and polishing skin and nails are silicone attachments. Their tips are made of silicone mixed with abrasive particles. The nozzle is used until it is completely worn out. Depending on the hardness and size of the abrasive particles, the nozzles vary in color. For final treatment of the skin on the feet, dark attachments are used. Medium soft cutters for working with gel and acrylic coatings are painted blue. Final polishing is performed with white nozzles.
- Natural
Discs or brushes made of felt, cotton or suede are designed to add intense shine to natural nails.
2. Caps for hardware pedicure. Abrasive caps for pedicure are made in the form of attachments with a rubber tip and special notches that prevent slipping.
They are also called silicon carbide or sand. The caps resemble sandpaper of varying grits and hardness. They are designed to treat rough skin. Depending on the particle size, abrasive can be fine, medium and coarse. The shapes are divided into cylindrical, pointed and round caps. Recommended articles on this topic:
- European manicure: features and technique
- Fashionable winter manicure for the 2018-2019 season
- Manicure options for long and short nails
These consumables have a short service life and an affordable price. A novice master needs to stock up on caps for future use if he plans to do hardware pedicures regularly. This type of attachment works on dry skin. The caps are not disinfected. After each client, used nozzles are disposed of. When choosing nozzles, you must be guided by what types of work will be carried out and in what volume. They are also selected individually for each device. When purchasing, it is better for a novice master to seek help from a consultant.
3.Cutters for hardware pedicure. Hardware pedicure is performed with cutters equipped with cutting teeth or blades at the end. Steel, abrasives or rubber are used in the production of tips. The cutters can be made in the form of a cylinder, rotor, cone, or ball. They are fastened using a conical or cylindrical tail. Pointed and ball-shaped cutters are coated with diamond coating. They provide care to the nail grooves. The cylindrical nozzle has notches located transversely, the flat end ensures the removal of rough skin, calluses and corns. An ellipse with longitudinal stripes - this is what a rotary cutter looks like. It is used in working with core calluses. For procedures requiring the removal of rough skin, attachments with a diameter of 16 mm are suitable. Work that requires precision and the greatest care is performed with cutters of 5 mm in diameter, medium abrasiveness. Cone nozzles can be large or small. Large cutters are designed to remove dead skin, calluses, and cracks. Small ones are suitable for working in hard-to-reach places, for example, when removing an ingrown toenail. The use of various disc cutters in hardware technology helps to perform such stages of pedicure as polishing the nail and processing the nail edge. Included with any pedicure device are the main attachments, with the help of which all necessary procedures are performed. The technical characteristics of the device affect the result of the work. Before purchasing, a novice master needs to evaluate the convenience and weight of the device. He must also know the purpose of the nozzles and caps in order to make the right choice.
Pedicure at home step by step for beginners
If you've never done a pedicure yourself before, follow this beginner's technique as a guide.
- Estimate the length of your nails. Despite the fact that when performing a pedicure, it is customary to soak the feet, nail treatment should be done “dry”. This way they can be carefully trimmed and given the required shape. If varnish is applied to the nails, it must first be removed and only then processed.
- Trim your nails. To do this, use wire cutters. You need to “bite off” your nails in two or three approaches, under no circumstances trying to remove the entire length in one cut. In this case, the nail may bend in the opposite direction and crack in the center. If this happens, it will look damaged, sloppy, and cause discomfort. The shape of the cut also matters.
“Never round your toenails,” advises Anna Shevchuk. “This leads to the fact that the nails begin to grow incorrectly and grow into the skin. This happens especially often in people with high fingertips. Ingrown nails are painful and can result in inflammation and bleeding. To avoid this, cut your nail only in a straight line. And then lightly file around the edges, giving it a soft square shape.”
- Soak your feet. To do this, pour warm water into a basin or bath. You can add bath salts or pebbles there, and then steaming will turn into a particularly pleasant procedure with a light massage. Choose the steaming time depending on the condition of your feet. If you haven't worked out your legs in a while, increase the duration to 10-15 minutes. During this time, the stratum corneum will soften, loosen, and can be easily removed with a file. If you regularly treat your feet, five to seven minutes in warm water will be enough to prepare your feet for further care.
- Treat heels and rough areas with a file. Use double-sided with varying degrees of abrasiveness. First, use a rough grater to remove most of the stratum corneum. And then sand the treated areas with soft sanding.
- Treat the cuticle. Gently push it away with a wooden stick and remove excess with nail scissors and tongs.
“Working with the cuticle largely distinguishes a home pedicure from a professional one in a salon,” explains Anna Shevchuk. — The cuticle on the legs is thin, it is easy to damage it and cause injury to yourself. Not every woman, especially older women, is able to bend or raise her leg so that it is convenient to work with the cuticle. You need to have a clear view of the treated area. Otherwise, the legs will look sloppy, and after the procedure there will be unpleasant, painful sensations.”
What types of foot skin will you work with?
Foot work should not scare you, it will not take much time if you correctly determine the scope of the procedure for your client. Correct assessment of the skin condition is the key to a positive result in the work of a novice specialist. You need to carefully examine your feet for the presence of difficult areas - calluses, corns, cracks. In addition, it is necessary to assess the general condition of the skin of the feet. After this, you can easily determine the correct set of cutters for the job and achieve the desired result.
- Normal foot skin.
As a rule, calluses can form on fair skin in problem areas (heels and toes). Skin that is not prone to dryness may become rougher in the summer due to dust getting into shoes. Minimal roughening is not a problem for a hardware pedicure. Sometimes polishing alone is enough. The interval between procedures is about three weeks.
- Medium foot skin.
This type of skin requires more careful care, as it has a greater tendency to dryness. As a novice pedicurist, you need to know the nuances of working with such skin, since incorrect actions can lead to cracks and damage. This type is found in most clients. Rough skin has a yellow tint because its layer is thicker than normal. The heel area is the most problematic and requires special attention. Such clients need pedicures every two and a half weeks or more often.
- Problematic skin of the feet, prone to damage.
Skin prone to damage due to increased dryness. This type can only be restored with proper care, which must be provided constantly. After carrying out the hardware pedicure procedure, the novice master must give the correct recommendations to the client on home care. The layer of skin that needs to be removed during the procedure must be optimal. You should not leave excess stratum corneum on your feet, and you should also be careful not to remove more than necessary. Both options will make the problem worse. Removing a larger layer of skin will increase the depth of the cracks, while removing an insufficient layer will quickly restore excessive dryness. One and a half weeks is the optimal period between pedicure procedures for clients with problem feet.
Step-by-step instructions for a hardware pedicure
Any girl can learn hardware pedicure. Mastering a new profession is not difficult. For a beginner, it is enough to remember the purpose of all the cutters and practice using them on different parts of the legs. Next, we will take a step-by-step look at performing a hardware pedicure for beginners. A high-quality procedure for treating skin and nails is a guarantee of excellent results that will last for a long time. The correct algorithm of actions presented below is a necessary condition for performing a hardware pedicure. 1. Apply antiseptic to the skin of your feet and the area between your toes. 2. Carefully bending the side rollers, adjust the shape of the nails. Next, you will need an inverted cone shaped diamond cutter to shape your nails. To do this, you need to set the device to 10,000–12,000 rpm mode. 3. The cuticle must be treated with a spherical bur, moving from the center of the nail. The rotation of the nozzle should be in the opposite direction to the movement of the hand. It is important to constantly move the machine to avoid burning the skin. Strict adherence to this rule is the basis of a high-quality pedicure with a hardware treatment method. 4. The corundum attachment will help you polish the cuticle and the area around the nails. Among novice masters, there are those who prefer a combined pedicure. They choose processing with a machine and hand tools, combining them at their discretion. 5. Using a cotton pad, remove any remaining gash, and clean the dirt under the free edge of the nail with a scraper. 6. Hold the needle cutter as you would hold a ballpoint pen. Treat the side ridges and sinuses of the fingers. 7. Set the rotation speed to 10,000–15,000 rpm and, using a rounded end, perform final sanding of the side rollers and front pad. 8. Using different silicone attachments, polish the nail plate. Perfect polishing is ensured by three or more cutters that are equipped with a professional machine. Pedicures begin with a rough cutter and gradually move on to soft polishers. At a speed of no more than 12,000 rpm, you cannot stop in one place. The hand should always be in motion. A quality pedicure is impossible without following this golden rule.
9. The foot is treated with carbide nozzles or special sand caps. They treat rough areas of the foot. 10. At a speed of 18,000–20,000 revolutions, the metatarsus and heel are processed. In this case, you need to move in the direction opposite to the rotation of the cutter. You cannot hold the cutter in one place for a long time; movements must be intermittent. 11. The sawn area of the foot should be sanded using a softer attachment. 12. Finish the heels with a coarse abrasive polisher, then take a softer cutter to complete the procedure. 13. If there are cracks on the foot, the skin needs to be treated more carefully and delicately. For the problem area you will need a carbide cutter. After this, you need to get rid of excess leather, sand it and polish out the cracks. At the end of the hardware pedicure, you need to moisturize your feet with cream and apply nourishing oil to your fingers and nail plate. If learning is fun, it always gives positive results. To remove doubts, before mastering a new skill, you can watch videos on hardware pedicure for beginners. The materials we offer will introduce you to the professional technique of performing this procedure in a salon using special equipment. Video: https://www.youtube.com/watch?v=0GQtw_T8mY4
Step-by-step procedure (with photo)
The cosmetic procedure from the golden brand can be easily performed by both a pedicurist and self-administered at home.
The step-by-step method, together with preparation, consists of the following steps:
- Use a cleanser to remove dirt from your feet and degrease them.
- Apply softening jelly or spot elixir for seals or calluses to rough areas.
- If there are inflamed areas, lubricate them with a regenerating preparation.
- Apply bandages or cotton pads to the treated areas. Wrap your feet in film and leave for 20-30 minutes, depending on the degree of keratosis.
- Treat your feet with files suitable for hardness and remove cuticles using a softening gel. If you have a special device, use attachments for hardware pedicure. For a more gentle method, use enzymatic peeling.
- Apply the cleanser again, then rub the moisturizer into the skin.
Step-by-step Golden Trace pedicure
Upon completion of these manipulations, the skin becomes smooth and completely treated. Next, you can carry out a standard pedicure, which involves filing the nails, treating them with lotion against ingrown plates, and applying a softening solution. The surface is degreased and disinfected, after which the design can be done with gel polishes or thermal films.
Final stages
Where to buy high-quality and professional nail files
Among the huge number of online stores offering manicure accessories, we invite you to our “WORLD OF NAILS”! You should choose our services because:
- “MIR FILOK” – own production of nail files.
- "WORLD OF FILES" is the main supplier!
- The showroom is located in Moscow.
- Delivery throughout our vast Motherland!
Why is “WORLD OF FILES” the best option for purchasing a product for you?
- Our store is built on our own production of saws. Thanks to this, you get: minimized cost of service, tested and confirmed product quality, fast production, attractive conditions for distributors.
- Our nail file is made only from materials that have repeatedly proven their quality (South Korea).
- Wide variety of product. Thus, a manicurist with any level of professionalism will be able to satisfy his interests.
- You can figure out which file is right for you. We carry out individual orders.
- Another advantage is the application of your brand logo on the working surface of the files.