What do you need to draw dots on your nails?
Manicure with dots has been one of the most popular and relevant for several seasons in a row. You can do it not only in the salon, but even without difficulty at home. This does not require any special skills, abilities or materials. You will need regular nail polish, a toothpick or a special dots tool.
Dots (from English “dots” - dots) are a small stick with a wooden handle and an iron tip on which there is a small ball, comparable to that of a ballpoint pen. If you purchase a set of dots, you get about six sticks with balls of different diameters.
dots tool kit
set of dots for painting on nails
Dots leave a neat ball on a varnish base with a different contrasting varnish color. Some technologies also involve drawing various patterns and monograms with dots.
In the absence of a tool such as a dots, you can also use either a toothpick or a regular needle. Of course, these tools do not leave such a clear pattern, but nevertheless, they are necessary. To do this, they are also dipped in varnish and an imprint is applied to the base.
dots drawing on nails
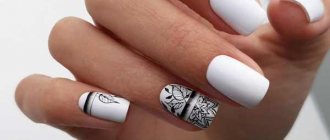
Drawings with lines, stripes
A manicure with dots, photos of which can be found in many variations, is not the only fashionable solution for beautiful nails. Lines and stripes are a simple and very effective way to decorate your nails. The most popular are patterns based on longitudinal lines - they make nails visually longer and narrow wide nail plates.
Video about nail design in minimalist style:
Patterns of diagonal stripes have the same visual effect, but you need to choose a suitable pattern very carefully - incorrectly chosen lines can ruin the appearance of your nails rather than decorate them. Transverse stripes are rarely painted - they make the nails appear shorter and wider than they actually are.
But for those with very narrow nail plates and very long nails, they will help them look great.
Drawings on nails with dots step by step at home for beginners
No matter how difficult it may seem to you, drawing with dots is very simple. For this you will need:
- dotting tool (or toothpick)
- two contrasting varnish colors
- fixative varnish
Step-by-step drawing of dots on nails:
- Paint your nails after a thorough manicure with the base color of the polish, choose any color you like
- Wait until the base coat of varnish is completely dry; if necessary, apply a second layer of varnish and also wait for it to dry completely.
- On the work surface (a piece of paper, plastic or oilcloth) apply a drop of varnish of a different color, contrasting with the base one.
- Dip the dots into a drop of fresh varnish and transfer it to the base layer, making an impression
- As a result, you will get an even circle, each of which can be placed in a clear or chaotic order
- Using dots you can create polka dots, flowers, lace patterns, fades and much more.
- Also, by changing the diameter of the dots, you can make a variety of drawings, each of which will be different in size
If you draw dots with a toothpick, then you should know that this tool quickly wears out: the tip of the wooden stick becomes flat, soft and saturated with varnish. For this reason, it is necessary to constantly change toothpicks.
dots drawn
dots drawn with a toothpick
Drawings on nails dots schemes
To draw a beautiful design on the nails, both a novice artist and a professional master need not only desire, but also knowledge of some particularly advantageous patterns. Using such schemes, you can create a stylish and very beautiful design that will surprise others.
Scheme No. 1 for drawing with dots
Scheme No. 2 of applying dots to nails
Dotted patterns should only be applied with fresh varnish. This will give you a clear, even and very round dot. If the varnish has dried out, it is better to apply a new drop to the work surface. If the varnish has dried on the working tool (dots), wipe it with a cotton swab dipped in nail polish remover and continue working.
Rules and nuances of design using dots
To make your nail design with dots come out perfectly smooth, you need to familiarize yourself with simple rules:
- varnish is applied to the metal ball in such a way that it is coated evenly on each side;
- when working with acrylic dyes, before applying the material, the dots are moistened in water;
- when working as a palette, it is most convenient to use a plastic or cardboard surface; it is most convenient to mix varnishes on it;
- To ensure that the nail design with dots is always neat, the tool should always be wiped with a napkin before applying dye;
- Dots are also used to apply rhinestones and bouillons.
Experienced nail design masters know some tricks and use them in their work to make the design beautiful and neat:
- It is recommended to choose no more than two colors for the design - this option will be the most harmonious. They do not have to be in the same color scheme, but in order for everything to be clearly visible, you should choose bright colors.
- For the background you need to choose a shade in which everything will be visible. The appropriate color is white.
- When using dots, the dots are decreasing in size. If the drawing requires circles of the same size, then you can dip the tool in the varnish a second time and place another larger dot on top.
- To clean the metal ball, it is best to use a lint-free cloth.
- Slow movements allow you to apply long elements on the nail - commas, stripes.
Nail design with dots, ideas and options for dotted manicure
With the help of dots, you can create a very diverse and beautiful manicure every time, which will easily match any style and occasion. Try to choose colors for the drawing wisely: contrasting and bright.
dots manicure version “reptile”
Black varnish is an excellent base for applying designs with light varnish colors. You can change the shades of varnish and apply them completely randomly with tools of different sizes.
drawing with dots and a needle “flowers”
chaotic dots drawing
dots drawing, design options
dots drawing "polka dots"
colorful dots pattern
lace dots pattern
original spot manicure
feminine dotted manicure
dotted manicure “Mickey Mouse”
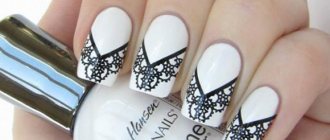
French manicure with dots, photo
You can make a beautiful French manicure (that is, a “French manicure”) in a completely unusual way, using a dot pattern. Use the tool that is convenient for you: dots or a regular toothpick. The dots should be applied on the usual part of the nail - on top, where there should be a white stripe.
Such dots must be applied close to each other so that at a distance your manicure is perceived as an ordinary French manicure. You can vary the diameter of the circles and change their location, as well as the color palette. You can also do a beveled French manicure or a moon manicure.
the simplest version of French manicure with dots
black and white original French manicure using a dot pattern
beveled French using a dot pattern
unusual French manicure made with a dot pattern
Pink manicure with dots, photo
Pink manicure is always distinguished by its special femininity and tenderness. When making a bitmap, you should decide on the color policy of the design in advance. Pink nail polish goes best with:
- white
- black
- blue
- beige
- burgundy
It is best, of course, to choose a light base and draw pink dots on it, but pink can also serve as a base color on which you can draw white and black dots. You can decorate such a manicure with fixative varnish, silver or gold sand, and rhinestones.
pink spot manicure
Contrasting pink and white polka dot manicure
avant-garde dotted manicure in pink tones
Red manicure with dots, photo
Red polish is a classic color for manicure. He gives the hands a special femininity and always speaks of the lady as a passionate person. One of the most successful dotted manicures is white polka dots on a red background. He always looks very advantageous and attractive. This manicure can easily be called summer. It should be combined with the same elements in the wardrobe and image, complementing:
- scarf or handkerchief
- hair tie
- dress
- beads and bracelets
- red lipstick
- shoes in the same style
red manicure with blue dots
red manicure with white dots and rhinestones
red manicure with small and large dots
very feminine red jacket with polka dots
Zodiac signs
Manicure with symbols of the zodiac signs is an original trend in nail art. In addition, it is believed that such a manicure is a kind of amulet - it enhances the positive qualities of its owner’s sign and helps fight negative ones.
Stylists advise painting the zodiac sign on only one nail, painting the rest with a single-color varnish , because a sign of elegance is not to overdo it with decorations. Sometimes women prefer to decorate their nails not only with their astrological symbol, but also with the zodiac sign of their husband or boyfriend.
It looks very romantic, and in case of separation it will not be an eternal reminder of the breakup.
White manicure with dots, photo
White varnish is the best base for applying any tones and colors. Both light and dark shades go well with white. White polka dots will look just as good on any dark nail polish color (or even bright one). The neatest pattern is one that consists of small peas, so try to choose a tool with the smallest ball diameter.
white dotted manicure options
white manicure with large black dots
white manicure with multi-colored dots
original white manicure with dotted snowman pattern
delicate manicure with a pattern of multi-colored dots
Ideas for patterns with circles
Circles of the same or different sizes can be combined in different designs, of which there are many in modern nail art. By combining contrasting colors, light and dark shades and using sophisticated patterns, you get unique nail design options and, accordingly, a beautiful manicure. You can decorate your nails with dots using special tools, both professional and improvised.
Polka dots
A simple, but at the same time easy-to-perform dotted type of manicure is a polka dot design. Traditionally, dots of the same size are used, they are placed in a certain sequence (diamond, cage shapes); chaotic placements of balls of the same and different diameters are also acceptable.
Among the favorite color combinations are the following:
- classic (using “classics”: black, white, red);
- tint variations (pastel shades: pink with mint, blue with peach, etc., dark and light shades of the chromatic circle);
- classics + shades and non-standard colors (white and marsala, black and turquoise, etc.).
People do manicures with polka dots for various occasions, but they should not decorate their nails if an official event is planned or a strict dress code is required.
Polka Dot Nails
Semicolon figure
Starting from the point, you can make its continuation - a comma. This technique is typical for creating small monograms that can be easily combined into one beautiful pattern. Creating a comma is not a complicated process, but rather is similar to how this punctuation mark is written on paper. When pointing the dots at a point, you need to slightly “move” off it in the desired direction. Then you can add one comma to another, a third, etc.
"Commas" in manicure
Round gradient
Gradient design is always interesting and unusual. By combining shades with a smooth stretch of color, an unusual effect is obtained, which is complemented by painting and decor. But in the case of a dotted design, the gradient is created a little differently. There can be several options for this nail design:
- one large point (circle) in which the gradient transition is performed. In this embodiment it is called radial;
- many dots that are made in one color, but the shade transition occurs vertically on the nail plate.
In a certain design, the effect will be original and unique, and for the best effect you should choose a contrasting background for a point gradient.
Round gradient
Heart made of dots
Combining dots of different sizes into one heart-shaped figure is a very good solution for an unobtrusive and romantic manicure. It is difficult to create a heart-shaped figure with dots of the same size, so circles of different diameters and possibly different shades are used.
It is acceptable to draw one large heart on the nail, as well as several small ones. Accordingly, the size of the dots in such images will be different. To clearly see the design on your nails, it is better to choose contrasting color combinations. This manicure is suitable for both study and leisure.
READ ALSO: Lipoma (fat): causes, removal, treatment – NaPopravku
Hearts made of dots
Flowers
A dotted manicure with flowers looks at least extraordinary, and at maximum – incredibly impressive. Therefore, you should decide on such a design if you want to change your usual flowers to something more unusual.
To create spot flowers, you can use simple colors and shades to make the images seem realistic, or you can go the clip art route and paint flowers in one color. It is popular to place flowers on the nails in a section (half a flower or a certain part of it), as a whole, or several pieces on one nail.
A trendy design in a floral style for everyday manicure. If you use chromatic colors, then flowers in this design can decorate even the most austere and laconic manicure.
Spot flower manicure
Mosaic
A dot mosaic on nails always looks mysterious and interesting; it can recreate a complex pattern or simply imply a simple, uncomplicated pattern (diamonds, circles, stripes, etc.). For mosaic design, dots of the same diameter are used (any, but most importantly - the same).
Mosaic often uses variegated colors, combined with more laconic ones - black and white. On short nails it is better to make a dot mosaic with small circles, and on long nails you can use larger diameter balls (dots).
Dot mosaic on nails
Manicure with stripes and dots
A very fashionable manicure in different styles can be created with stripes and dots. By intertwining these geometric elements in one design, you can create different patterns and achieve different visual effects. Contrasts in color are welcome; if necessary, foil tapes can be used; playing in shades will also add boldness and extravagance to the manicure.
With the help of stripes and dots, it is convenient to create patterns on the tips of the nails, throughout the entire nail, using techniques in the difference in the diameter of the circles and the thickness of the lines.
Manicure with stripes and dots
Bitmaps
Any image can be applied using dots. The bitmap contains basic shades for realism, and can also be done in one color. It is popular to depict dotted faces of animals, flowers, symbols, letters, etc. They look impressive against a contrasting background, but similar shades also look original in a manicure.
Bitmaps
Zodiac signs
Depicting a purely symbolic zodiac sign on a nail is stylish and interesting. The dotted application technique is especially relevant for this topic, as it resembles small stars that create constellations. To guide the theme of zodiac signs, appropriate color schemes in the “space” style are popular: purple, dark blue, splashes of yellow, white, etc.
Zodiac signs dotted
Black manicure with dots, photo
Black polish is another classic solution for a manicure base color. Almost any shade will look great on it. Apply peas using a dot or toothpick of any diameter, draw patterns and repeat patterns.
black and white jacket with dots
simple black manicure with white dots
black manicure with multi-colored dots
Moonlight glare
A photo of a manicure with dots is no less an art than creating patterns on nails. Creating reflections from a lamp that resemble the reflection of the moon in water is one of the fashionable trends in nail art. To achieve this effect, you need to put in a lot of effort.
In the beginning, you should achieve a smooth surface of the nails using a rubber base for varnish, uniform application of varnish, and the use of a glossy finishing coat. The glare itself is created by the lamp - its light is reflected in a perfectly smooth nail.