- August 16, 2018
- Nail care
- Olya Bodrova
Today every girl can have a beautiful and high-quality manicure. Even if you don’t have the money or time to visit a professional craftsman, the materials for the work are freely available in specialized stores and you just have to get used to them. You can make a bright and unusual design by gluing foil onto gel polish. How to apply this material depending on its type? In what styles can it be used? The answers to these questions are given in the article.
Foil selection
In order for the manicure to turn out exactly as intended, you should purchase special foil - for nail design. It is easy to work with, and the choice of colors and shapes is very rich.
Regular household foil is denser because it is intended for other purposes, so it is more difficult to work with and design choices will be limited. So, before using foil for nail design, you need to decide on the option for your future manicure. The choice of style and further appearance of the nail determines which material is best to choose for the job.
Transfer foil
Making a beautiful manicure with foil on gel polish in this case is the easiest and most convenient, which is why this type of material is used most often in work. In addition, the advantage is a huge selection of colors and patterns. Such foil can be sold in rolls, packaged in small jars, or in the form of small notebooks, packaged in polyethylene.
The material allows you to cover the entire nail plate with color, only part of it, or create any patterns. Features of the application are that the foil is transferred only to specially prepared areas of the nail, and the remaining material remains on the protective film until the next use. It is very easy to control the area of coating; the main thing is to apply the material to the nail with the matte side.
Is it possible to replace the foil?
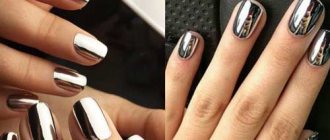
Mirror and metallic manicure is usually performed using foil film. But if for some reason you cannot purchase the material, you can resort to other methods.
As an alternative, use:
- glitter – pieces of foil ranging in size from 0.1 to 1 mm;
- glitter polish;
- liquid or dry mica;
- mirror rub.
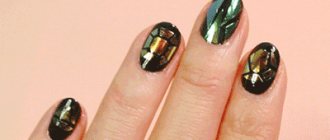
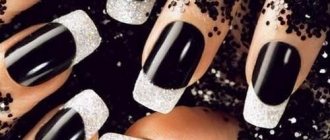
Foil enhances any manicure design.
It gives it shine and originality. Nails with metal inserts look well-groomed and expensive, despite the low cost of the material and ease of application. The main thing is to be careful in your work, and the rest is a matter of technique. We recommend: How to remove odor from a plastic container? This method has never let me down!
Non-transfer foil
Before applying tear-off type foil to the gel polish, you will need to cut out the required pattern from it. Tear-off foil is sold in gold leaf. It can be torn off in a chaotic manner and create a mosaic-like pattern on the nail. To cover the entire nail plate with this material, you will need to trim off the excess foil or file it off along the entire perimeter at the end of the manicure.
Potal is sold in the form of notebooks in sheets or small pieces in jars.
Nail foil: how to use?
Foil for manicure is available in a wide range. Thus, a comprehensive range of coating types is available for purchase at special points of sale and online stores on the Internet.
The choice of each type depends on which design variations a particular material is used for. To make a specific manicure with a metallic effect, you should understand the principle of using each individual type. Before using nail foil, study the individual working conditions for each type of nail art accessory.
Embossed
This foil product comes in the format of small sheets. It can be either traditionally shiny or with a matte finish. Its surface is mostly textured, and even somewhat rough.
In most cases, this material is combined with other subspecies. It is also used to draw a design on one of the nails.
In sheets
Sheet foil nail products are positioned as the most common. They are supplied to retail chains in the form of compact leaves. A special feature of the products is the absence of a special adhesive layer. Sometimes, before sticking the foil on the nails, craftsmen use scissors to cut a variety of patterns from the material.
This material requires a certain type of glue, with which it can easily be attached to the nail. It is often used to design manicures in a mirror or metal style. In general, sheet foil is an ideal option for those who like to experiment and create something truly original and unusual.
Transferable
A product such as transfer foil for nails is considered one of the most original subtypes among materials for manicure. Its main feature is the ability to copy a design onto a nail.
Produced in the form of a miniature roll. The main material for its manufacture is tracing paper, onto which a special coating of various colors is applied. In particular, you can find variations with popular drawings, emoticons, etc. The roll width is about three centimeters and the length is a meter.
To understand how to use nail foil with a transfer effect, just read the short instructions. The main advantage of the material is considered to be ease of use when decorating nails at home. In addition, this is an extremely fast way to decorate your nails:
- First, a layer of varnish or glue is applied to the nail. The prepared foil material is pressed firmly, but carefully, onto the nail plate.
- After this, the sheet must be removed and a finishing layer of clear varnish applied on top to secure the finished image.
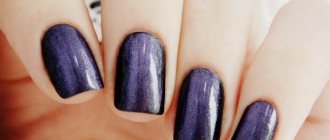
Liquid foil
A separate category of this product is liquid foil for nails. It comes in the form of a special varnish that has a pronounced metallic sheen.
It must be applied in the same way as ordinary gel polish, and dried in a special lamp. The advantage of this material is that it can be used to create not only plain metallic nails, but also intricate designs.
Zhataya
Crumpled foil is very similar in appearance to gold leaf and is supplied in special closed containers. Due to the product being released in a compressed form, the material itself is extremely thin. Therefore, working with it should be carried out with extreme care.
It will be the best solution for creating an aquarium-type manicure on extended nails. Using it at home is very problematic, but in nail salons it has become a fairly common decorative element. How to use nail foil is clearly shown in the video instructions:
Thermofoil
Foil material with a thermal effect is characterized by ease of use, because it does not require a lot of auxiliary accessories. In the process of decorating nails with thermofoil, everything is as simple as shelling pears:
- the sheet of foil needs to be carefully lifted by one of the corners (preferably the top one);
- then transfer it under a light bulb to warm up.
The heated film is immediately attached to the nails, without using an adhesive base. As you can see, this type is one of the simplest and fastest ways to perform an original express manicure.
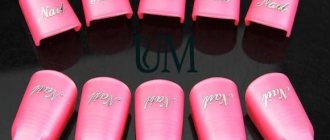
Stickers and adhesive tapes
If you are not sure that you have sufficient skill to stick sheet or apply liquid foil, pay attention to stickers and special adhesive tapes. They are very easy to use and are often used by beginners at home.
Such stickers and tapes are supplied with an adhesive layer already applied, so attaching them to the surface of the nail will be completely easy. For this reason, these types of accessories are an excellent start for beginners in the art of manicure and pedicure.
Materials for work
If you apply gel polish yourself at home, then you will definitely find everything you need for the job and will already be familiar. The list looks like this:
- lamp for drying varnish LED or UV;
- orange sticks;
- buff (a file for creating a rough surface on the nail);
- degreaser;
- primer;
- base coat;
- the gel polish itself is the desired color;
- finishing coat - top;
- foil;
- cotton buds;
- lint-free wipes.
In addition to all of the above, before work you need to prepare your nails - shape, clean, file and remove the cuticles.
Working with translation material
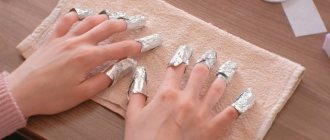
Before applying foil to gel polish, you need to do several standard procedures for such a manicure, since shiny tape is applied only to the colored coating. So:
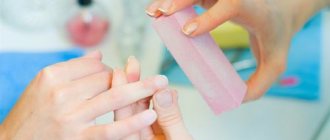
- The prepared nail is lightly sanded with a buff to remove the natural shine.
- A degreaser is applied to the nail.
- After the latter has dried, the plate is treated with a primer. If this material is not available, you can skip this step, but you should remember that the longevity of the manicure in the future depends on the quality of nail preparation.
- Now the base coat is applied. Depending on its consistency, manufacturer and quality of the lamp, the drying time of the base will depend. This can be a period of 30-240 seconds, but usually 1-2 minutes is enough.
- The required color is applied in a thin layer to the dry base. If the shade turns out to be too pale, you need to apply a second layer, after drying the first. Applying a large amount of varnish at one time will lead to “flooding” of the nail and the manicure will be ruined.
- For better adhesion to the foil, the last layer of color can be left a little dry.
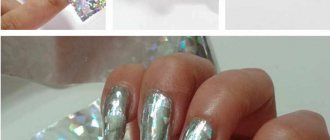
- Now foil is applied to the entire nail plate, carefully straightened along the edges with an orange stick and pressed against the nail over the entire surface with a cotton swab.
When the material is well straightened and pressed over the entire surface, the protective film should be removed with a sharp movement. If there are gaps left on the nail, the procedure should be repeated in a certain place. - A topcoat is applied to the transferred foil and dried. For better fixation, the time under the lamp can be increased 2-3 times or several layers of the finishing coat can be applied, each one being dried beforehand.
- At the end of the work, the sticky layer is removed with a degreaser and the manicure is ready.
It is important to remember that this option is easier to implement, but achieving a perfectly smooth foil coating will be difficult.
How to use nail foil?
Nail foil is very easy to use as a decorative element. You just need to know a few nuances:
- It is applied to the varnish coating, with the exception of minx thermal film and liquid foil.
- If there is no sticky layer on the foil film, you will need special glue: Jina, HONGYI, Rio Profi, Global Fashion. Or you can glue it to a sticky layer of gel polish. The result is approximately the same. Each girl chooses what is more convenient for her to work with.
- The transfer foil must be ironed for an even print, paying special attention to the areas on the sides and at the cuticle. For smoothing, use an orange stick, an ear stick or a pusher with a rubber tip.
- Fixation with glue is carried out after it dries a little and becomes transparent. Different companies have different drying times. On average they wait 2–3 minutes.
- After applying the foil, a finishing coat must be applied. Otherwise, the decor will wear out very quickly.
A high-quality “metal” design retains its presentable appearance for 14–17 days. The homemade version does not last as long - 3-5 days. If you want to prolong its existence, you need to do household chores with gloves. You can also cover your nails with a fixative on the 3-4th day.
When using transfer foil, wait a while before applying the finishing layer, otherwise it may shrink and crack. It also cracks when pressed repeatedly, for example, when they try to print the spray several times. You need to work with the material carefully.
Fixation with glue
Before using the glue, the nails are covered with the main color of the varnish. You need to wait until the base is completely dry. Only then is the adhesive composition applied in a thin layer to the surface of the nail plate. The foil is glued at the moment when the glue changes its color.
How to properly glue transfer foil:
- Get your nails done. Use a nail file to give each nail the desired shape.
- Polish the nail plates with a buff with an abrasive level of 300 grit.
- Use a degreaser and then apply the base.
- Place your nails under a lamp to dry the gel polish.
- Remove the sticky layer from the gel polish with a special napkin.
- Apply a base color coat.
- Dry the gel polish and remove the sticky layer.
- Apply a thin layer of glue to your nails. Apply it to the entire surface or to individual areas, depending on what design you plan.
- Wait a few minutes until the glue becomes clear.
- Place the foil with the matte side on the nail and smooth it with a rubber pusher or a cotton swab.
- After 15-20 seconds, quickly remove the foil.
- After 2-3 minutes, apply the topcoat.
When using sheet foil, decorative elements are first prepared. To create the “broken glass” effect, the foil film is randomly cut, and then the “shards” are laid out with tweezers on the nail surface coated with glue.
Some types of glue are dried under a lamp. HONGYI glue is suitable for use without a lamp. It holds not only foil, but also rhinestones perfectly. Dries within 5 minutes.
Foil for gel polish without glue
If you don’t have glue on hand or don’t want to spend extra money on it, you can make a beautiful design with adhesive-based foil. It is glued to the dried gel polish with the sticky layer removed. Sheet and transfer films, on the other hand, are applied to an adhesive layer.
How to properly use transfer foil without glue?
- Get a manicure and then buff and degrease your nails.
- Apply base and dry.
- Cover your nails with the main color of gel polish and place under the lamp for 2 minutes.
- You need to apply the foil to your nails immediately, without removing the sticky layer.
- Level the film with an orange or cotton swab.
- Remove it quickly.
- After waiting 2 minutes, apply the finish.
- Dry your nails under the lamp and remove the sticky layer.
Foil always adheres well to special glue. But you need to get used to using it without glue. It may print poorly and fall off. Dense and textured layers are not glued to gel polish.
Fixation with regular varnish
To make a manicure with foil, you don’t need to have a lamp - you can glue it to regular nail polish. Sliders and adhesive tapes are torn off from the protective layer, glued to already dry nails and immediately covered with a fixative. You can also use transfer foil, but you need to take into account that it is difficult to print the entire design on regular varnish. But chaotic prints and patterns come out quite well.
How to use transfer foil?
- Get your nails done.
- Polish the nail plate and degrease.
- Apply nail polish and wait until it hardens but is still sticky.
- Place the matte side of the foil on the varnish and straighten it out.
- Remove it by moving away from the nail bed.
- After 5-10 minutes, cover your nails with 1-2 coats of clear sealer.
Experts advise choosing a type of foil with “gasoline” stains for home application. It is translucent, shimmers in different colors, and thanks to this, defects are not noticeable.
Another option
There is another technology for applying foil to gel polish and making the coating smoother. For this you will also need transfer material; only the method of its application changes. Nail preparation is carried out in a similar way until the color is applied. Each layer is dried completely, after which the finishing coat is applied. The foil is glued to the “wet” top, straightened out and sent under the lamp. Only after drying is the protective film removed and the transfer coating remains on the nail. It should be secured with a topcoat and dried well, after which the stickiness should be removed.
Partial coverage
In order for a design with foil on gel polish to be made in the form of a specific pattern or French manicure, it is necessary to clearly define the boundaries of the coating. For this purpose, the nail preparation technology remains unchanged until the application of colored varnish. After it dries, the nail should be treated with a buff so that the foil does not stick to the rough surface. The required pattern on the nail is drawn with a colored coating using a brush and dried a little. After this, you can press the foil onto the entire surface of the nail; it will only transfer to the drawn pattern. The protective film is removed and the gel polish with foil is covered with a top coat, dried and degreased.
If, after careful pressing, the pattern is not imprinted on the nail, the varnish may not provide the required stickiness and the pattern should be applied with a base coat.
What is the advantage of “liquid foil” gel polishes?
- Fashionable manicure with “liquid foil” does not belong to seasonal manicure designs.
- Today, such decor can be worn all year round, decorating the nails separately.
- Gel polishes “liquid foil (mica)” have good density (1-2 layers), self-leveling, which allows you to quickly and easily get a sparkling outfit for your nails. Lasts up to 4 weeks!
- Beginners like it for its ease of use and the ability to create designs on nails.
Working with permanent foil
Since such material must first be cut to shape before being applied to the nail, in addition to the materials and tools listed above, you will need to prepare nail scissors and tweezers. How to apply foil to gel polish in this case? The technology changes slightly:
- You need to cut out the desired shapes from the foil in advance.
- After this, treat the nails with a buff, apply a degreaser and other base coat.
- Apply several layers of colored varnish and dry them one by one.
- Apply top coat to the nail and place foil on the wet layer in the required order using tweezers.
- Prepared nails should be dried under a lamp and secured with a layer of topcoat.
Pedicure with foil: 25 different options
A good pedicure is one of the most important components of a successful female image. That is why many women pay special attention to pedicure issues.
https://www.instagram.com/panibratova/
Among all the existing new products and brands, every fashionista tries to choose something special and extraordinary for herself. One such type of design is one that is based on the use of foil. At the moment, nail artists have created a lot of different designs using foil, and experts were able to highlight several of the best ones.
Pedicure with transfer foil
Transfer foil is an excellent addition to gel polishes of various shades, ranging from nude to bright. That is why designs with it always look very bright and attractive. When choosing a pedicure design for the summer, you should pay attention to richer colors. Winter design can be darker and deeper.
https://www.instagram.com/pedicurchik/
https://www.instagram.com/pedicurchik/
https://www.instagram.com/panibratova/
https://www.instagram.com/pedicurchik/
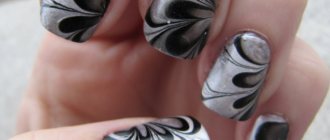
Pedicure “Broken glass”
The “Broken Glass” design has not gone out of fashion for several seasons. The bright holographic effect of broken glass makes any nail art very extraordinary and rainbow-colored.
https://www.instagram.com/panibratova/
https://www.instagram.com/panibratova/
At the same time, pieces of foil laid out in the shape of broken glass look best on a pedicure made in pastel colors.
https://www.instagram.com/panibratova/
https://www.instagram.com/panibratova/
Pedicure using colored compressed foil
Compressed foil (potal) is produced in small jars and can be used as a separate design element, or as part of a complex composition. With the help of such foil you can depict various patterns and thereby make the pedicure very bright and unusual.
https://www.instagram.com/pedicurchik/
https://www.pinterest.ru
https://www.pinterest.ru
Pedicure with thin foil tapes
Recently, nail artists are increasingly using various adhesive foil tapes to create beautiful pedicures.
https://www.instagram.com/panibratova/
https://www.instagram.com/panibratova/
With their help, you can create a fashionable design in a minimalist style by arranging shiny ribbons in the form of various geometric shapes.
https://www.instagram.com/panibratova/
https://www.instagram.com/panibratova/
https://www.instagram.com/pedicurchik/
https://www.instagram.com/panibratova/
https://www.instagram.com/panibratova/
https://www.instagram.com/pedicurchik/
https://www.instagram.com/panibratova/
https://www.instagram.com/panibratova/
Pedicure with foil stickers
Stickers made from foil look very good on nails. Various patterns, presented in gold and silver colors, will make any pedicure unforgettable. In this case, both bright shades and pastels can be used as a basis, depending on this, the design will look either delicate or defiant.
https://www.instagram.com/pedicurchik/
https://www.instagram.com/pedicurchik/
Pedicure with foil is a trend that has not left its leadership position for several seasons now. Moreover, such a design would be appropriate at any time of the year and at any event. That is why all fashionistas should pay special attention to it.
Source
Useful tips
The article describes in detail how to make foil on gel polish, but in order for each of them to delight you with its durability and special beauty, you should remember:
- You can also attach the foil to the base coat layer if it provides sufficient stickiness and is not too thick in consistency.
- It is recommended to dry the coating with foil 2-3 times longer than usual.
- It’s better not to remove the sticky layer from your nails right away at the end of the job. It is recommended to wait 30 seconds, then the shine will be more pronounced.
- The quality of a manicure directly depends on the quality of the materials chosen for the job, so saving is not always the right idea.
How to do a manicure with transfer foil: instructions
A more complex decorative element in manicure is transfer foil for nails. Let's look at the question of how to use nail foil correctly so as not to have to do the work again.
Design using this material is considered quite labor-intensive. Not every novice master can really handle it.
Therefore, for a successful nail design, follow the step-by-step instructions:
- remove the remnants of old varnish from the nail;
- We do a manicure, using a nail file to give the nail plate the desired shape;
- polish the nails and then degrease their surfaces;
- apply the base and dry under a lamp;
- using a napkin, carefully remove the remaining sticky ball on the nails;
- Next, you need to cover the nail with shellac in a color similar to the foil (instead, you can use a special transparent base);
- dry under an ultraviolet lamp and remove the sticky layer again;
- coat the nail with glue, wait until it dries until transparent;
- We place a piece of material on the glue, carefully and evenly distributing it over the desired area with a cotton swab or pointed tweezers;
- After two or three minutes, we tear off the product quite sharply with a side tug to make an imprint with varnish.
Only after two hours do we apply the finishing polish, preferably gel, to the nail. You cannot coat it in advance, otherwise the product may shrink.
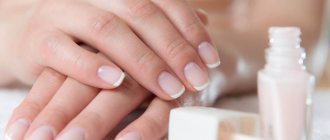
Lunar and regular French using foil
Let's look at how to use nail foil to create the most popular moon design. In this manicure, the main focus is on the lunula - a small distance from the root of the nail to its central part. In this case, the hole can be of different shapes: convex, round, triangular, etc.
Before you do a lunar manicure, you will need to think about not only the shape of the hole itself, but also the color design of both the varnish and the foil. In this case, it is recommended to play with contrasts: a great solution would be a bright hole on a dark background, or a dark one on a bright one.
You need to cut holes of the required size from the foil. To do this, it is recommended to use special stencils or make a preliminary sketch on paper, carefully transferring it to a piece of foil.
Before using nail foil, degrease the treated nail and cover it with a starting base. Dry the plate and apply the main shade of the varnish coating. After it dries, remove the sticky layer and apply a hole to the nail. Next, you should carefully level it with pointed tweezers or a cotton swab. Apply the finishing coat on top.
French is created in much the same way. Only instead of a hole at the root of the nail, a neat strip is applied to its beginning. In this case, it is also recommended to use special stencils to make the nail truly flawless.
Beautiful manicure with foil, gel polish and glue
It's no secret that foil designs on gel polish can be very diverse. In this matter, you are limited only by your imagination.
Another good solution is to design one nail, for example, on the ring finger. To apply a more original design, you can cut out various elements from foil and stick them in a specific or chaotic order.
On the Internet you can find many interesting videos or photographs that will become a source of ideas for creating an original manicure. For example, if you want to shine in all its glory, you can simply cover all your nails at once with a continuous strip of foil.