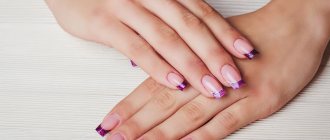
What is it like?
Magnetic varnish is a decorative coating that contains small metal particles. When exposed to a magnet, metal shavings move. The result is a drawing with a 3D effect. It’s not difficult to create nail art yourself. There is no need to acquire special skills.
Using varnish with metal shavings, different designs are obtained. The result depends on the magnet, or more precisely on its shape. The principle of creating a manicure is practically no different from using a regular coating. Only immediately after applying it, you need to bring the magnetic block to the nail plate and hold it for a few seconds. No UV lamp is required for drying.
In addition to magnetic varnishes, gel varnishes are produced that contain metal particles. This coating can only be dried with a UV lamp. Polymerization without it is impossible. They last longer than regular formulations.
Varnish manufacturers offer magnetic varnishes in a wide range of colors. Among the popular ones this season: burgundy, silver, deep blue. Magnets are included and sold separately. For one polish, you can purchase several magnetic blocks and your nails will not look monotonous. Magnets have a specific pattern:
- rays emanating from the center;
- longitudinal stripes;
- transverse lines;
- waves, etc.
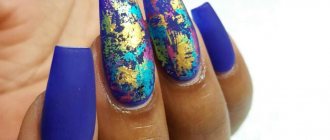
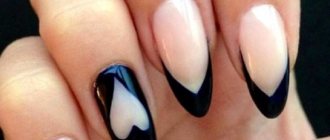
The 3D effect can be appreciated by moving your hand. At different angles, the drawing takes on a new shade, shimmers, and blurs. The coating looks like natural stones, for example, tiger's eye, cat's eye.
Manicure "Cat's eye"
Cat eye nail designs have been in demand for quite some time.
But it got its name only a few seasons ago. After artists using gel polish with a metal base and magnets noticed that the patterns looked like a cat's eye. Indeed, intricate lines form into bizarre shapes that imitate the eyes of felines. Cat eye manicure
You can create a beautiful, mesmerizing and unusual design using both gel polish and varnish. Naturally, magnetic. This requires only two main components:
- green gel polish or polish;
- magnet (flat, thin, without a pattern).
In the video, the master shows the most basic rules for working with magnetic gel polish and its magnet. However, a special magnet can be replaced with a regular flat and thin one, which is sold in any hardware store.
First, the nails are covered with a base (base) for gel polish, which is dried in an ultraviolet lamp. Then green gel polish is applied, which is also dried. There is no need to bring the magnet right away. In the video, the master describes this moment. The photo shows a beautiful, deep emerald shade that is very similar to a cat's eye.
When the first layer of gel polish has dried, apply the second one. Now they are bringing a magnet to it. To get the pattern exactly as in the photo, a magnet is placed edgewise on all fingers except one - you get an elegant stripe. On the selected finger it is done differently.
The magnet is approached edgewise and then scrolled clockwise. The result is an intricate and vague pattern. After this, the marigolds are dried in an ultraviolet lamp for several minutes. The finished design is covered with a top.
This elegant pattern adorns any nails - short, long, natural and artificial. The green color is really as close as possible to what kind of eyes felines have in nature.
Cat eye manicure is traditionally performed using a special magnet. It is this that provides the original pattern and distribution of metal particles of the material along the nail plate.
In video recordings of professional salon technicians, they usually show special magnets - on a comfortable handle. The magnet is held strictly above the nail, without scrolling, for a few seconds.
The photo shows a design made in two colors, each of which is beautiful in its own way. Magnetic gel polish is applied in exactly the same way as regular gel polish.
In the video, the wizard shows the easiest way to create a design using a magnet. Of course, this is not considered a classic cat look, but rather a domestic variety.
The photo shows an example of a classic manicure in this style. A special magnet distributes metal particles so that an interesting shade is formed from one base color. It is impossible to achieve the same effect without a magnet.
It is noteworthy that tiger (cat) manicure does not use patterned magnets - they do not give the same effect as simple flat or special “cat” magnets. Therefore, it is worth purchasing at least one of the example tools.
The color scheme of the manicure can be any. Sometimes, this doesn't quite fit the traditional perception of feline design. But it looks very impressive and stylish.
Often craftsmen offer a combination of technologies. For example, tiger manicure with lunar nail art. Or a fan-french coat with magnetic gel polish and cat technology. Often masters combine French manicure with magnetic manicure.
First, a French polish is performed on all nails, except those where gel polish will be applied completely to the entire nail plate. French manicure is dried in an ultraviolet lamp and secured with a top coat. After this, they begin to perform the cat's eye on the other two fingers.
The procedure is standard: apply a base, dry it, then apply magnetic gel polish. The first time it is dried in a lamp, the second time it is decorated with a magnetic pattern. And only then they fix it with a top coat. There is no need to dry all your nails together in an ultraviolet lamp, so as not to dry out the material.
The moon cat eye is also popular. Especially on extended nails. Lunar manicure allows you to slightly delay the correction time, since the growing nail is not as noticeable as with any other design. With gel polish the same principle - the highlighted lunula as the nail grows is not too noticeable
And the “cat” design distracts all attention due to its unusual appearance
Combining technologies allows you to achieve the most unusual result: the design is interesting, original, unique and inimitable. It can additionally be decorated with painting or rhinestones if desired.
How to use it correctly
The process of creating nail art using magnetic varnish is simple, but there are still some nuances. The main attention is paid to maintaining technological sequence.
The preparatory stage includes:
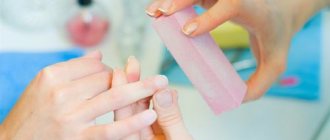
- removing old coating from nails;
- degreasing the plate surface.
The sequence of creating a manicure using a magnet:
- Apply base coat to prepared nails. This will help level the surface of the plate and protect it from the negative influence of coating components.
- After drying the base, apply a thin layer of magnetic varnish. The number of layers can be increased to two if the nail is visible.
- Without allowing the coating to dry, bring the magnet as close to the plate as possible to get a clear pattern. The distance is approximately 3 mm.
- After fixing for 10-15 seconds, remove the magnet and proceed to designing the next nail.
To obtain the same pattern, you need to keep the magnet in its original position in relation to the nail. You can change the effect of nail art by changing the angle of the magnetic block.
When using magnetic varnish, no fixative is required. The coating hardens well after air drying and lasts a long time thanks to the metal particles.
In the process of creating a manicure, it is recommended to follow the advice of experienced masters.
- A magnet is sometimes installed in the body of a nail polish brush. This makes the application of the coating convenient.
- Different manufacturers have different manicure design technologies. It is recommended to start the procedure by studying the instructions.
- Experts do not recommend keeping varnishes near magnets due to the possible demagnetization of metal particles contained in the coating.
- Before applying the varnish, you should shake the bottle to mix the components. Otherwise, metal shavings, having settled to the bottom, will not fall on the nails. As a result, the desired drawing will not work.
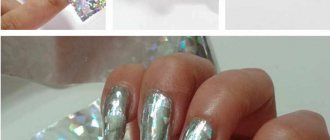
Cat eye manicure design with stickers and drawings
The truly unique properties of cat eye gel polishes provide inorganic creative design opportunities.
If, after covering your nails with gel polish, you do not use magtite, but instead make some lines using dots, then the manicure will look like some kind of natural stone. If you draw the lines beautifully and carefully, you can achieve the effect of snake skin.
The design will look very beautiful when a cat’s eye is applied to accent nails, and on some nails a matte finish with lines drawn with the same cat’s eye gel polish is applied.
If you drop topcoat on your nail, you will end up with dew drops, like after rain.
You can combine artistic painting with a cat's eye. Velvet ornaments that resemble frosty patterns look beautiful on the blue surface of the marigold.
You need to draw patterns on this gel polish not on the entire surface, but only from the edge or near the base of the nail. This is done in order not to hide the effects of gel polish. When designing nails, you can also use stickers and sliders. This is a great option for creating chic murals, even if you don't know how to draw.
When using sliders, don't overdo it. They should only accentuate some fingers. The main thing in this manicure should remain the cat's eye effect. If you overdo it with sliders, you will lose the main effect.
Cat eye gel manicure has unlimited creative solutions
Just use your imagination and you will get a gorgeous manicure that will attract the attention of everyone around you.
We advise
Dry cuticles around nails - how to deal with them?
How to do hybrid nails?
Wedding manicure 2021 - the most fashionable designs and trends!
Nail accessories - the secret of a beautiful manicure
Top 5 popular brands
Masura Polish Magnetic Pearl, 11 ml
A delicate caramel shade combined with small metal particles creates the effect of a natural pearl after exposure to a magnetic block. The coating is stable, applied in 1-2 layers. Without waiting for the varnish to dry, bring the magnet closer to the nail and hold it at a distance of 1.0-0.8 cm for about 10 seconds.
- consistency – viscous, dense;
- presence of a base layer - yes;
- applying top coat for varnish - yes;
- drying method - in air;
- The peculiarity of the product is that it contains components of natural origin.
The cost of the bottle is 439 rubles.
Gel polish “TNL – magnet lux” No. 01 – sapphire with glitter (10 ml.)
The coating has a liquid texture, but even one layer is enough to obtain a dense color. This is achieved thanks to the rich pigment. After exposure to a magnet, it forms the effect of a natural precious stone - sapphire. The surface of the marigold shimmers with blue, blue and green shades.
- the product has increased resistance to external influences;
- manicure remains intact for 2-4 weeks;
- the effect is magnetic sapphire.
The cost of the bottle is 189 rubles.
Gel polish Runail INDI laque classic shades, 9 ml
The coating is applied to the nail in a thin layer, creating a dense, color-rich and glossy surface. The varnish has the ability to self-level without running around the edges during application. Thanks to this viscosity, you can make manicures of different designs and realize the most daring decisions regarding combining the product with other nail art decor.
- type – gel polish;
- manicure durability – 3-4 weeks;
- compatibility with other coatings - with all top and base coatings, including Lasting gel, Laque, Shaper, VitaBase;
- polymerization time – LED lamp – 60 seconds, UV lamp – 120 seconds;
- coating removal time – 15 minutes.
The cost of the bottle is 122 rubles.
Gel polish PNB Meteorites 9D, 8 ml
A special feature of the coating is a long light flare, which moves at different angles when you move your hand. The effect of the varnish is cat's eye. The color is rich monochromatic purple. Manicure retains its original appearance for more than 3 weeks. Another advantage of the product is its ideal consistency, thanks to which it is possible to avoid smudges and a thick layer.
- type – gel polish;
- texture – dense, medium viscosity;
- the need for polymerization with a special lamp - yes;
- drying time – LED lamp – 60 sec., UV lamp – 120 sec.
The cost of the bottle is 480 rubles.
Gel polish Nika Nagel LUNA, 5 g
The product is part of the collection of super new magnetic coatings from the famous Nika Nagel brand. The rich tonality is maintained even when applying one layer due to its dense texture. The magnet provides the effect of a lunar path. The three-dimensional drawing will not go unnoticed by the environment.
- type – gel polish;
- effect - lunar path;
- texture – medium viscosity, dense;
- drying time – LED lamp – 60 sec., UV lamp – 240 sec.
The cost of the bottle is 440 rubles.
Gel polish “Cat's eye”: how to use and apply, secrets of mastery
In order for the nail polish to look beautiful and the patterns to be clear, but not overly clumsy, you should follow a few simple rules that will just help you cope with this task. First of all, you need to prepare your nails for coating, that is, do a simple trimmed manicure, without which the appearance of your nails will remain untidy. This should never be allowed, because hands look better without a manicure at all than if it was done somehow.
Proper application of Cat's Eye gel polish implies that everything will be done in accordance with the instructions. First, you need to figure out what it takes to make your nails unsurpassed.
- Protective primer for nails.
- A standard set for trimmed manicure, which almost every girl or woman has.
- A bottle of “Cat's Eye” gel polish itself.
- A special ultraviolet lamp, preferably with a power of 35 Watts, so the coating will dry much faster. You can use a less powerful one, even up to nine watts, but the drying time needs to be doubled or even tripled.
- Base, as well as fixing varnish for finishing.
- A magnet included with the varnish or purchased separately.
- Alcohol or a standard, special degreaser.
As you can see, with the exception of the magnet, the set practically repeats everything that is needed to apply any gel polish. Having collected everything you need, you can also acquire a variety of decor, such as rhinestones or appliqués. But for the first time it is better to limit yourself to a simple coating in order to find out exactly how it “works”.
Treatment and protection of the nail plate
After the manicure is done, you need to treat your nails with a file with a fine abrasive. This is necessary in order to remove the gloss of the top layer, thereby ensuring better adhesion of the varnish to the nail. This must be done very carefully so as not to allow any cuts on the nail plate, easily and superficially. Grinding should also not be confused with polishing. Using a polishing file you can make the surface even smoother, and your coating will last much less than you would like. Finally, apply a special primer to your nails, which is sold in any cosmetic or hairdressing store.
Apply base for durability and beauty
By the way, on the surface of the nail treated with primer, if this is not the case, then you shouldn’t worry too much, you need to apply a base coat that is completely transparent
The base is applied exclusively in a thin layer; it is important to avoid sagging and errors, as they can be visible later even on the surface of the final layer. Don’t forget to coat the end of the nail, fixing the varnish and send your hands under the ultraviolet rays with the lamp turned on ahead of time
After holding your nails in this way under the influence of UV rays for half a minute or a minute (at low lamp power, it is advisable to triple the time), you can move on to the next stage.
Coating the nail with colored varnish “Cat's eye”
You need to know that polish always looks better and dries better if you apply it to your nails in the thinnest layer. However, some gel polishes from the “Cat's Eye” series have a rather thick consistency, so it may simply not be possible to make a thin layer of such polish. In this situation, it is better to limit yourself to one layer.
Carefully paint your nails with three strokes from the base, that is, from the cuticle to the edge. Try not to move the brush back and forth too much, so as not to spoil the appearance, although gel polish does not harden without a lamp, and it is possible to correct any imperfections. If you managed to make the layers thin, then after the first application you need to put the nails under your lamp again, for about 2-5 minutes, again, depending on the power of your lamp. If there is only one layer, then real witchcraft will follow.
Applying patterns to gel polish with a magnet
It is worth knowing that you can make unique patterns on your nails after applying “Cat Eye” gel polish only if it is damp and has not yet dried. Moreover, it is worth doing this on the last, not dried layer. Gently hold the magnet to the painted surface and hold for a few minutes. Moreover, you can immediately see how the varnish at the site of exposure becomes pearlescent, as metal particles accumulate and “float” out. Next, you need to bring your nails back to the lamp to complete the drying process.
The final touch: adding shine
At the end of the entire process, you need to apply a fixative to the nails, that is, a finishing, completely transparent coating. This way we get perfect gloss, shine, as well as greater durability for a long time. The main thing is not to forget to paint the end parts of the nails so that your brilliant manicure will last much longer.
Nail polishes that don't need a lamp
The rating of popular decorative coatings that air dry in a few minutes includes the following products.
Magnetic nail polish “Magnetic” aquamarine
A coating containing metal shavings in an aquamarine color is ideal for creating a nautical-themed manicure. In the deep color, a radiance is visible, which acquires an intricate pattern under the influence of a magnet from the Magnetic nail art series. Using varnish without a magnet produces a beautiful metallic shade.
Magnetic varnish Dance Legend in the Magnetic collection
The product of the domestic brand OLBO is an ideal combination of price and quality. The Magnetic palette consists of more than 10 shades. The set includes magnets with which you can create original manicures with different effects. The texture of the varnish is dense, the rich color is obtained after just one application.
AVON magnetic varnishes
Varnishes with magnetic particles can be purchased from company representatives individually or as a set with magnets. The magnet is available in the form of a spatula with 4 patterns. Its design facilitates the process of creating nail art. The line of magnetic varnishes is presented in 8 tones. The coatings are harmoniously combined with each other, which opens up many possibilities for a creative person.
Magnetic polishes Nail Inc
The British brand Nail Inc produces a separate line of magnetic varnishes among manicure coatings. The magnet used to create the design is built into the cap. There is no need to select the distance from the magnetic block to the nail plate. It is enough to bring the cap closer to the nail (slightly below the cuticle) on the side where there is a protrusion. After a 5-second exposure, an interesting three-dimensional picture appears on the surface.
Pupa
The products of a well-known brand are regularly updated with new products. A series of magnetic varnishes has been released that do not require special lamps for drying. The composition does not contain aggressive substances (formaldehyde, toluene, dibutyl phthalate, camphor). The coating is equipped with two magnets, which force the metal shavings to take on interesting shapes: vertical lines and diagonal stripes.
Required materials and tools
Before you start creating this manicure masterpiece, you need to make sure that everything you need is at hand.
The following materials and tools will be required:
- base and top coat;
- buff;
- primer;
- a special magnet in the form of a pen or spatula;
- degreasing agent;
- gel polish;
- LED or UV lamp;
- soft, lint-free wipes.
Varnish selection
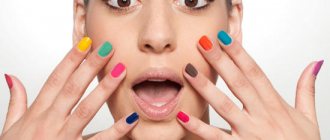
A spring look will be perfectly complemented by a pink manicure with a pearlescent accent. Green gel polish looks noble and gorgeous on nails in tandem with rhinestones.
Red manicure does not lose its popularity among ladies; it is considered the most popular nail design. It is perfectly complemented by gold or silver designs, as well as rhinestones. The burgundy shade looks very modern and cool, which is suitable for a more formal look.
Particularly trendy colors this season include blue and light blue. Varnishes from turquoise, azure to deep sapphire will decorate both long and short nails.
When choosing a varnish for magnetic manicure, it is important to consider the following criteria:
- content of hypoallergenic components in the composition;
- rich color palette;
- correct texture - moderately liquid and not thick enough;
- the convenience of the brush, which should be sufficiently elastic, wide and elastic.
It is recommended to pay attention to the following brands that have proven themselves to be excellent. Bluesky Shellac is rightfully considered the standard composition
According to the manufacturers, it contains no allergenic components. The Chinese product is presented in beautiful and rich shades that do not fade or distort for three weeks. The product applies easily and evenly to the nail plate without bleeding.
Bluesky Shellac is rightfully considered a reference composition. According to the manufacturers, it contains no allergenic components. The Chinese product is presented in beautiful and rich shades that do not fade or distort for three weeks. The product applies easily and evenly to the nail plate without bleeding.
Lianail from a German manufacturer is characterized by high pigmentation and optimal density, thanks to which it is possible to obtain a uniform, beautiful coating when applying varnish in one layer. The palette contains 12 shades that combine perfectly with each other.
South Korean shellac TNL Magnet Effect has a low cost and excellent quality. Ideally combined with base and top coats from any manufacturer. Due to its moderate thickness, a single layer application will be sufficient.
Kodi Professional is a high-quality professional varnish with a liquid texture and good hiding power, that is, the ability to well cover the color of the base on which it is applied. The flat brush has medium hardness, so it covers the nail evenly. For the best effect, the product is applied in two layers.
Magnet selection
The beauty of the nail design depends on the quality and type of magnet used. The main criterion by which you need to choose a given item is the force of attraction: the higher it is, the more effective the result will be.
Professional magnets for manicure are available in the form of rectangles, handles, and also blades, which can have a one-sided or double-sided design.
The most common:
- vertical or horizontal lines;
- stars;
- crescents;
- circles;
- Christmas trees.
The principle of using the tool is simple: the plate (blade) is rotated from one side to the other, forming a given pattern.
A pen-shaped magnet is suitable for creating unique, complex and miniature designs.
Its main advantages are:
- maximum convenience and the ability to tilt in any direction to change the depth of the decor and intensity of magnetization;
- thin tip, thanks to which even the smallest patterns can be easily applied in any direction.
Using magnets, a galaxy effect, a kaleidoscope and many other interesting options are created. If you don’t have a professional tool, you can replace it with a pen for drawing on a children’s magnetic board. The effect will be similar. You can also use any flat and thin magnet - the main thing is that it is powerful enough.
How to remove magnetic varnish
Decorative coating with magnetic particles differs not only in its specific application method, but also in its unusual removal method, which is unusual for varnishes. The technique is similar to removing biogel for nail plates.
Means used to remove magnetic varnish:
- acetone (nail polish remover);
- orange stick;
- foil;
- sponge, cotton pads.
Sequence of procedure:
- soak a cotton pad in acetone;
- attach it to the nail plate;
- wrap the nail in foil;
- perform identical manipulations with each finger;
- stand for 5-10 minutes;
- remove foil twists;
- using an orange stick, push the exfoliated particles of varnish to the edge;
- after cleaning the surface, treat the nails with iodine-water solution;
- Finally, it is necessary to apply a fungal remedy to prevent infection.
When working with an orange stick, you must be careful not to injure the skin around the nail plate.
How to do a cat eye manicure
You can make a “Cat Eye” with a magnet both in the salon and at home. If you decide on the second option, then first select the right materials, and only then get down to business. We will tell you which varnishes and magnets are of the highest quality, and then give instructions for use.
We select materials
Choosing the right Cat Eye polish so you can actually use it is extremely important. No one is safe from fakes and low-quality products
Here we will talk about the brands that produce the best paints for this manicure.
- This is an excellent quality gel polish. It is made in the USA. The product is able to distribute itself over the nail plate; the technician doesn’t even need to touch it up. There will be no bald spots left.
- Bluesky Shellac. Despite the fact that this is a Chinese brand, it still produces quite high-quality products. This “Cat's Eye” shellac will last about three weeks. The manufacturer promises that the product will also protect nails from brittleness.
- This is a German brand that has already been appreciated by many craftsmen and amateurs. Very durable gel polishes are produced under it. They apply evenly even in one layer. In addition, the color scheme is well thought out.
- TNL Magnet. A good option for making a cat eye on your nails. The products from this South Korean brand are thick and well pigmented. They fit well with bases from other companies.
The above gel polishes are best used, but not necessary. You can use something else, as long as you like it.
It is best to buy varnish and magnet from the same manufacturer. This way they will fit together well, which will ensure the best effect.
It is worth noting that the pattern you get depends only on the magnet. It is he who determines what will form on the gel polish: stripes or intricate stains.
How to make a cat eye with gel polish
At the very beginning, you should prepare your nails for the procedure. To do this, you need to follow standard measures:
- Wash the hands;
- shape the nail plates with a nail file;
- remove or push back the cuticle;
- degrease the surface of the nail.
When all this is already done, you can get to work and apply the Cat's Eye shellac.
Step 1
Apply the base coat. This is a required step. This layer will even out the nail plate, smoothing out any unevenness that may be on it. In addition, this provides better adhesion to the varnish and increases the durability of the manicure.
The base layer must be dried under ultraviolet light. This item is also required.
Step 2
Let's start painting. How to apply Cat's Eye gel polish correctly? To do this, shake off the bottle of product so that the metal particles are evenly distributed. You want them on your nails, not at the bottom of the bottle.
After this you can paint your nails. Do this in one or two steps. The number of applications depends on the color you want to achieve and the thickness of the shellac.
Dry the first layer (if there are two) under ultraviolet light.
Step 3
It's time to use the special tool. How to apply cat eyes with a magnet? We apply it while the gel polish is liquid. Place the device over the nail and hold for 15 seconds. Exposure of this duration will be enough for a pattern to form on the manicure.
After the procedure, be sure to dry your nails under ultraviolet light.
Step 4
Use a top product. With its help you can fix the varnish and the design. This layer should also be dried.
Step 5
Finally, you need to remove the sticky part of the top product. This can be done using a degreaser.
This is how you need to do a cat eye with gel polish. There is nothing complicated about the procedure.
Reviews
Larisa, 38 years old
A friend gave me magnetic nail polish (full name: El Corazon Kaleidoscope “Duo SuperMagic Cats” No. Mur-82) for my birthday. After using the coating and manipulating with a magnet, I realized that this is an ideal manicure option that can be mastered for doing it yourself. The pattern in the form of blurry stripes when moving the hand creates a 3D effect.
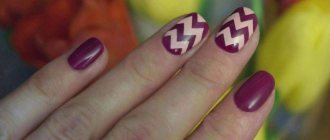
Marta, 24 years old
I bought nail polish “Golden Rose” MAGNETIC (Magnetic) 8 to try. I really liked the coating, the zigzag pattern obtained using a magnet looks original. It takes a few minutes to dry. Unlike regular polishes, magnetic mini-cures last longer on your nails.