Why is the procedure useful?
Natural nails are prone to brittleness and flaking, so manicurists recommend strengthening them with gel.
This procedure is useful for the following reasons:
- The nail plate does not deteriorate; on the contrary, under the influence of the gel it thickens and becomes even.
- Not only the nails, but also the cuticles receive care, since the trimming manicure procedure is performed less frequently.
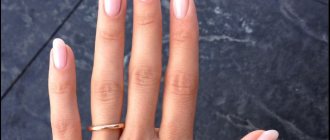
- Nails look natural, strengthening with gel preserves the natural shape of the plate.
This procedure can be done both in the salon and at home, if you have the necessary knowledge and tools (experience will come with time).
Advantages and disadvantages of gel nail coating
The material in question is widely used in beauty salons, as it has the following advantages:
- nails become strong and difficult to break when hitting hard objects;
- the material does not allow them to delaminate and preserves the structure of the plates;
- the plates become smooth, shiny, neat;
- The manicure remains beautiful longer and does not require daily correction.
Among the disadvantages, experts note that the strengthening has its own service life: the procedure will last for 2-3 weeks (it all depends on the individual characteristics of the nails and the speed of their growth), then a correction must be made: the gel grows along with the nails, which makes the manicure not aesthetically pleasing .
Hence the second drawback: correction takes the same amount of time as the primary procedure. For an experienced master – 1–1.5 hours, at home – 2–2.5 hours.
What is better to use gel or biogel to strengthen nails?
Under gel polish, nail plates can be strengthened with both gel and biogel. These materials differ primarily in their composition, and they also have different effects on the treated areas.
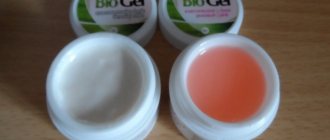
Gel is a synthetic (artificial) material - a glass-like polymer that hardens under the influence of a UV lamp. Biogel is a more natural product - a rubber polymer, very elastic and easy to use.
Biogel is used to improve the health of nails, it has a positive effect on them and does not spoil them at all. When using this material, there is no need to cut down the plate; it is applied in a thin layer, retains the natural elasticity of the nail, and does not chip. The biogel lasts no more than 2 weeks and is removed with acetone-containing liquid.
The gel has more possibilities: it can also be used for extensions if there is a desire to change the length of the nails. This material lasts longer, but due to the lack of elasticity it is susceptible to chips and cracks and does not require complete removal before correction. It does not have healing properties, although it helps to thicken the natural plate.
Acrylic reinforcement
Acrylic coating, like gel, strengthens nails and prevents the formation of cracks. The only difference is that gel nail strengthening is much easier to do on your own, since the procedure does not require quick action. Acrylic powder thickens very quickly, reacting with the liquid, so it must be applied very quickly. If you want to emphasize the naturalness of your nails, cover them with as thin a layer of acrylic as possible, otherwise your nails will look very much like the result of extensions.
Necessary materials:
- Manicure tools;
- Manicure brushes;
- Primer (base coat);
- Monomer (liquid, or liquid);
- Acrylic Powder.
Sequencing:
- Nails are prepared for a strengthening coating: the cuticle is removed, the nails are given the desired shape using a nail file, the nail plate is degreased and polished;
- Primer is applied to the nails;
- The brush is dipped into the liquid, then into the powder, after which a thin layer is applied to the nails;
- Drying of manicure is carried out under the influence of a UV lamp.
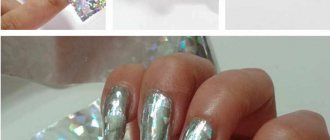
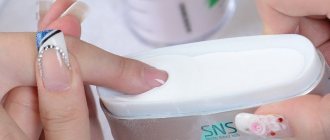
In the first image you can see the variety of colors of acrylic powder for strengthening nails. In the second photo, the colored powder reacts with the liquid, and in the third, the master covers the nail plate with acrylic.
Contraindications to strengthening nails with gel
Strengthening nails with gel (under gel polish or other coating) requires taking into account the following contraindications:
- the presence of fungal infections of the nail plates and skin;
- the presence of cracks and open wounds in the area where the gel is used;
- the presence of an allergic reaction to the components of the product used;
- increased humidity of the skin of the hands;
- individual rejection by the body of the material in question.
In addition, it is necessary to take into account the general condition of the body, since the following factors may cause the gel coating to adhere poorly, peel off and break:
- diabetes;
- circulatory disorders;
- hormonal imbalances;
- taking antibiotics;
- chemotherapy.
Sudden stressful situations, expecting a baby or feeding him can also cause the gel not to last the required 3 weeks.
Don't miss the most popular article in the section: How to draw monograms on nails step by step for beginners. Instructions with photos.
How to strengthen nails with gel under gel polish
Long-term decorative manicure is obtained using gel polish.
It is characterized by advantages:
- The nail plate becomes thicker;
- The procedure is simple and safe;
- The color palette is varied. Wanting to get a new shade, several colors are mixed for the final result.
The strengthening process consists of three stages:
- Includes nail strengthening with a base. It is characterized by a transparent color and is applied in a thin layer. Dries in an ultraviolet lamp. When using gels of a single-phase system, all stages are performed with one gel.
- After the base coat, the base coat is applied. The technology does not provide for building the structure of the nail. The material is applied to the base in a dense layer, but not thick. To avoid detachments and chips, the gel should not get on the cuticle or side ridges. Then dry. If it gets on the skin, the material is removed with a cotton swab, which is moistened with a degreaser.
- At the last stage, the finishing gel is applied. After drying, the sticky layer is removed.
How to strengthen nails with gel under gel polish, the video shows in detail all the steps. By using it you can create a wonderful manicure yourself.
Materials and tools
In order to carry out the strengthening procedure efficiently, it is recommended to stock up on the necessary tools and materials.
To prepare your nails and perform a manicure you will need the following:
- file, buff (help to give the desired shape, level the surface of the plates);
- orange or metal stick (pushes back the cuticle);
- remover (used for unedged manicure) or nippers (for classic manicure).
To apply the gel coating, you must purchase the following:
- only gel (if it is single-phase), gel+base+finish (if the product is three-phase) or biogel;
- primer to remove excess oil (acid-free for normal nails, acidic for wet nails);
- dense synthetic brush (used to apply the material);
- UV lamp (to dry each layer).
Design tools are chosen taking into account what is planned: it can be gel polish, rubbing, decorative elements, glitter.
Nail preparation
Before the strengthening procedure, nails must be treated, which, firstly, will allow you to perform a high-quality manicure, and secondly, will provide your hands with a well-groomed, aesthetic appearance. Experts distinguish three main types of manicure: classic (edged), European (unedged), hardware.
A classic manicure involves removing the cuticle with special nippers, where it is first moved back and then removed. Before the hand procedure, it is recommended to take a bath, which will soften rough skin and simplify the entire manicure process.
European manicure involves removing nail polish using a special softening agent - remover. The procedure goes as follows: first the remover is applied, and after a while the softened cuticle is moved with an orange stick.
Hardware manicure is the most gentle; it not only removes the cuticle, but also gives the plates the desired shape. Such a device can be bought in specialized stores; it includes all the necessary attachments and instructions for use.
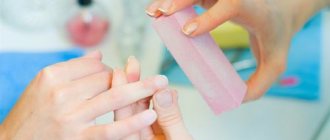
Next, give the nails the desired shape: square, almond-shaped, rounded or sharp. In this case, it is recommended to move the file in one direction, so the plates are less injured. To ensure that the gel adheres well, the nails are treated with a soft buff; however, you should not overdo it; the plate should not be too thin.
The last step in preparing the nails is degreasing them with a special composition; this procedure will also help the gel to firmly take hold. After removing excess shine, the nail plates should not be touched. If biogel is used for the strengthening procedure, then experts do not recommend sanding the nails with a buff; it is enough to just degrease them.
Strengthening nails with gel. Instructions
Strengthening nails under gel polish using gel can be done with a single-phase or three-phase agent. If the product is single-phase, then only this gel is applied to the prepared nail plates; if it is three-phase, then three different products are used: base, constructor and finish.
Experts also pay attention to other necessary conditions:
- In order for the gel coating to last longer, it is not recommended to use any moisturizer on the skin of the hands before the procedure;
- if a bath was made before processing the plates, then it is better to carry out the strengthening procedure the next day;
- An additional product – a rubber base – will help achieve a perfectly flat surface;
- To avoid chips and cracks, at each stage of strengthening it is necessary to carefully seal the end of the marigold.
The most important thing is that for the result to be pleasing to the eye, and for the manicure to last at least 3 weeks, you should complete the following three mandatory steps.
Step 1: base
Base is a transparent material from which the strengthening procedure begins. Apply the product with a thick synthetic brush in a thin layer. Dry the base in a lamp, the exposure time is from 30 s to 1 min (this depends on the quality of the lamps used and the manufacturer of the material).
If a single-phase product is used, then the gel is also applied in a thin layer and dried in a lamp.
Step 2: Base Layer
When the base has dried, they begin to work with the main layer, it is also called construction or sculpture. Since strengthening does not involve the process of changing the shape and length of the nail, the product is applied quite densely, but not in a greasy layer.
Instructions for strengthening nails with gel under gel polish in photo
In this case, the gel should not be attached to the cuticle and side ridges, which can subsequently lead to peeling and chipping of the material. If the product does get on areas close to the nail, it should be removed with a cotton swab dipped in a degreaser. Drying the sculpture layer in a lamp.
Step 3: Finish
Top Coat is the last, final layer. Before applying it, you need to make sure that the previous layers lay flat; if this is not the case, then you should make a sawdust of the unevenly distributed material with a soft buffer. The finish is applied with the same dense synthetic brush and polymerized in a lamp. The final touch is to remove the sticky layer (if there is one) with a special napkin.
The procedure is completed by applying gel polish or other coating. When choosing gel polish, do not forget about the top coat, which will allow the product to last much longer.
Benefits of strengthening nails with acrylic
Strengthening your nails with acrylic has many benefits:
- If acrylic is used not for extensions, but for strengthening, a very thin layer is required. Therefore, manicure time is reduced.
- Strengthening your nails with acrylic can be done yourself at home using gel polish.
- The manicure looks perfect within 3-4 weeks.
- The original shape of the nails will be preserved. This eliminates many problems during regrowth.
- The polymer is easily removed with solvents.
- The substance is applied in a thin layer, so the nails look natural.
- The coating prevents your own nails from breaking and protects them from external damage.
The difference between acrylic and other types of coatings
Acrylic is usually compared to gel, which is also used to strengthen and extend nails. The table shows the main differences between the two materials.
| Criterion | Acrylic | Gel |
| Strength | Very durable and does not require special care. | Brittle material, susceptible to cracking. |
| Shrinkage | Due to slow hardening, it practically does not shrink. | Gives significant shrinkage. |
| Removal | Easily removed with a solvent, your nails are practically not damaged. | You need to remove it mechanically, and your nails become even more brittle and weak. |
| Design Possibilities | The material is very plastic and can take any shape. Therefore, it is often used to create three-dimensional designs. | Has a glass effect. The gel is used to create large designs. |
| Smell | Liquid products may have an unpleasant odor due to the addition of monomer. This is usually dichloroethane. | Has no smell. |
| Time until complete hardening | The surface of the nail becomes hard within 5-7 minutes. But polymerization is completely completed only after 1-2 days. | 3-5 minutes. |
| Possibility of repair | To be repaired. | A damaged nail cannot be repaired, you can only remove the coating. |
Strengthening nails with acrylic is not a medical procedure. It does not affect the structure of the nail or the quality of its own plate. On the contrary, due to lack of air access, your nails may become worse. The coating only protects the manicure from external damage.
Acrylic is an excellent material for repairing both your own and extended nails. It fills all the cracks and irregularities.
Strengthening natural nails with biogel
Biogel can also be used as a base for gel polish, however, this material is safer for nails, in addition, it is odorless, therefore it is approved for use by expectant and nursing mothers and allergy sufferers. Like gel coating, the material in question can be single-phase or three-phase.
Strengthening nails with biogel is carried out according to the same scheme in three steps: a base is applied, then the main layer and finish, each layer is dried in a lamp.
Don't miss the most popular article in the section: How to extend nails with gel polish. Nail extension instructions for beginners. Photo.
Strengthening nails with biogel under gel polish
Nails need rest, which they don’t always get. If extensions are being done, there can be no talk of any rest, but biogel is a completely different remedy. What does it do to nails? Strengthening nails with biogel has advantages. After reading them, you will immediately see the answer to the question:
- The product is applied directly to the surface of the nail plate;
- Low material consumption;
- Contains natural ingredients that have medicinal properties and prevent brittleness and splitting of nails.
- The surface becomes smooth, the manicure shines and takes on a natural look.
Additional Information! Women with allergies, pregnant women, nursing mothers, girls with sensitive skin have found a real boon in biogel. It does not contain dangerous chemical compounds that can cause protein allergies. Therefore, strengthening with biogel under gel polish is the safest way to perform a manicure for pregnant women.
The strengthening technology is carried out step by step:
- The surface is prepared for applying the base. Maximum accuracy and caution is the first rule of the procedure. The plate is processed with a cleaner. Using a special tool, the cuticle is pushed back, the nail is filed with a nail file and takes on the desired shape. Using a soft buffer, the surface is sanded and re-processed with a cleaner.
- It is necessary to strengthen the nails with a gel polish base. Manufacturers of varnishes do not share secrets about the composition of their products. Therefore, carefully studying the instructions will not harm a novice specialist. The composition must contain strengthening substances. Otherwise, a primer is used before applying the base coat. Nails are covered with biogel after thorough drying.
Note! The exfoliated ends of the nails are removed, the damaged edges are shortened so that the gel polish that adheres to the scales does not peel off.
- The main points of the process are carried out. Drying must be of high quality. If the base layer is not sufficiently dried, the base layer will begin to peel off quickly. Different manufacturers indicate their quantity of the base layer, which must be taken into account when applying. Drying is carried out after each application of a layer for up to two minutes, the topcoat dries for up to 5 minutes.
The quality of the manicure improves when coated with gel polish and strengthened with acrylic powder. It is applied before the main layer. The nails become stronger and their rigidity increases. Using colored powder will only enhance your manicure.
The skin around the nail should not come into contact with the cosmetic product. Otherwise, the biogel will peel off ahead of time.
- The final step involves applying a finishing coat, which must be dried under a lamp. Upon completion, nail design is performed according to the client's wishes.
How to remove artificial material
The material in question cannot simply be removed with nail polish remover. Experts recommend filing off the gel; a glass or metal file with notches will not work; it is better to use a buffer with an abrasiveness of 100–150 grit, designed specifically for artificial materials.
You need to file off the gel coating carefully so as not to hurt the natural nail. The dust generated during the procedure should be periodically brushed off and the nails moistened with liquid, then the layer of artificial material and natural coating will be clearly visible.
Cleaned nails are sanded and polished, and the surface is treated with a moisturizing component. The final touch is the application of a strengthening base.
If biogel was used as a base for gel polish to strengthen nails, it is removed with a special product or regular acetone. Cotton pads are soaked in the existing liquid, applied to the nails and wrapped in foil for 15–20 minutes. When the material dissolves, it is carefully removed with tweezers. The plates are then polished and lubricated with a nutrient.
You can strengthen natural nail plates with the help of modern materials - gel or biogel. The procedure can be carried out both in the salon and at home, the main thing is to follow the instructions exactly, then beautiful nails will delight you for at least 3 weeks.
Reinforcement with acrylic: step-by-step instructions
Acrylic has established itself as an excellent material for strengthening nails. The procedure can be done in a salon, or you can do it at home. If you want to strengthen your nails with acrylic yourself, you will need:
- disinfectant liquid;
- primer;
- acrylic powder;
- means for hardening the material;
- professional brushes;
- ordinary manicure tools;
- step by step diagram.
Step-by-step instruction:
- Prepare your nail by disinfecting it and treating the cuticle. Give the required shape. Degrease the surface of the plate and sand it.
- Apply primer. Using a thin brush, coat each plate with acrylic powder. Model the required shape. To dry this coating, you do not need an ultraviolet lamp: use a hardening agent.
- Polish the surface of the plate. If desired, use varnish or decorate it with drawings.
- After 3 weeks, make a correction. To remove the coating, use a liquid containing acetone.
Strengthening nails with acrylic, ecogel or gel is a simple procedure that allows you to keep your hands in a well-groomed and healthy condition.
In order for the coating to last longer, you should apply the material only to the base, treat your manicure with care, and remove the coating only with a special lotion. Strengthening nails with biogel, acrylic or gel requires regular correction. You will find how to properly correct extended nails on our website.
