Preparatory stage
To do even the simplest manicure, you need to prepare your nails for painting:
- Using nail polish remover, you should remove the previous layer of the product.
- Then wash your hands and dry them thoroughly.
- Remove the cuticle softened with oil or a special product using a special tool or push it aside.
Manicure before and after cuticle removal - Apply a degreaser for better adhesion of the polish to the nail.
Tip for beginners: apply a base first. This step is optional, but it helps to level the plate and prevent it from yellowing and preventing paint pigment from penetrating into it. Also, in order for the polish to always lie flat on the plate, it is necessary to moisten it regularly using wax, oils and special moisturizing nail pencils.
Step-by-step instruction
Before you begin the process of applying varnish, you should consider that the girl has 40 minutes of free time, eliminate or minimize distractions, and also think through the design. In addition, you need to check the shape of the brush; it should not be narrow and dense. Instructions for creating the perfect manicure:
- Apply wax or oil to the periungual area without touching the plate. This will help you subsequently easily remove excess material from the cuticle and rollers.
- It is recommended to apply a coat of base to facilitate subsequent application of colored varnish.
- Take a brush of colored varnish and wipe it on the edge of the bottle so that very little varnish remains on it, literally on the tip. This way it won't bleed onto the skin.
- We paint our nails with regular polish, starting with the little finger. You should place a drop in the center of the plate, then carefully “adjust” the varnish with a brush to the base.
- Then, with slow movements, holding the brush confidently, you need to apply the varnish to the side surfaces of the plate. Thus, the varnish does not flow onto the cuticle.
- You need to complete the manipulations with the brush by sealing the end of the nail. Thanks to this, the varnish will last longer.
- Apply another coat of varnish to deepen the color.
- When performing movements, the elbow should rest on the table and the hand on which we are applying the varnish should also lie on the table; you should not apply the varnish while holding your hand suspended.
- Apply a quick-drying top coat. This item is optional, but it will extend the wear time of the coating and make the manicure perfectly glossy.
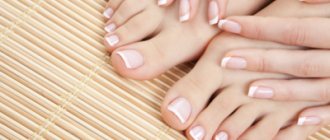
On the left is a top coat applied to the nail, on the right is a nail without a top coat.Ready-made manicure with regular polish
Advantages and disadvantages of regular nail polish
As we said earlier, regular nail polish is fading into the background. It is increasingly being pushed aside by gel polish.
Gel polish is a special nail coating consisting of a mixture of regular polish and gel. Thus, it has the strength of a gel and the shine and beauty of a varnish.
However, not everyone is ready to completely abandon manicures with regular polish. Here are some of the main advantages of regular varnish:
- Coating time. The application time for regular polish is several times shorter than for gel polish. Gel polish must be dried in a special lamp for at least 30 seconds, but this does not need to be done with regular polish.
- Freedom of choice. Here it lies in the fact that you are completely unattached to any particular style. A manicure with regular polish can be changed at least every day, unlike gel polish, the wear time of which is at least two weeks.
- Less damage to the nail plate. When manicure with regular varnish, as a rule, the surface of the nail is less damaged. Gel polish (especially the base coat) penetrates very deeply and literally connects to the nail plate. As a result, it becomes thinner.
Don't miss: How to remove extended nails at home
But of course, we must not forget about the disadvantages of conventional varnish. For some they will seem insignificant, but for others significant:
- Short wearing time of the coating. Of course, a manicure with regular polish lasts much less than a gel polish coating. However, there is one trick due to which the coating with regular varnish will last much longer: On the first day after applying the coating, try to exclude contact with water or reduce it to a minimum.
- Strong smell. Of course, this does not apply to all varnishes, but many of them contain components that emit this pungent odor.
Whether you use gel polish or regular nail polish is up to you.
https://youtu.be/https://youtu.be/fB0NS87sV6I
_
What to do if varnish gets on the cuticle
It often happens that varnish gets on the cuticle and ruins the entire manicure, but don’t be upset, now we will show you how to fix such a manicure.
To do this we need a lint-free cloth, a flat brush and nail polish remover or acetone.
We wet the brush in nail polish remover and move it over the area where the nail polish needs to be removed. We wiped off the polish, wiped the brush on a napkin, soaked the brush in nail polish remover, repeated, and so on until it was clean.
Removing nail polish on the cuticle
Result of work: before the varnish flows and after
Long nail plates
It is easier to paint medium and long nails than short ones. And absolutely any shade will suit here. We do everything as described above, but completely immerse the varnish in the bottle, and carefully run one side along the wall in order to remove the excess. It turns out that on one side of the brush there will be almost no varnish, but on the other there will be plenty of it - this side should be painted. Before painting each subsequent nail, you should renew the varnish on the brush.
Editor's choice: Pedicure summer 2021: color excess and artistic design in fashion
The varnish is applied to extended nails in exactly the same way as to long nails. The main thing to remember is that you should not use acetone on gel nails, as it destroys it.
Tips to help you paint your nails perfectly
The following tips on how to paint your nails correctly and beautifully will help you achieve a flawless manicure:
- Before you start applying colored varnish, you can practice using transparent varnish. Daily coating of the plates with treatment bases will help you get used to proper brush work.
- To ensure a dense and beautiful coating, the varnish should be applied in two layers.
- If the coating is damaged during drying, you can smooth it out with a damp fingertip. It is necessary to smooth the coating carefully in a circular motion.
- It is better to apply “loose” varnish on a layer of white. Thanks to this, the coating will be more saturated.
- To ensure a perfectly even coating, the varnish should be applied to the base.
- To make a hole on the plate, you can use strips cut from regular tape.
- If you only have clear varnish left at home, you can make it colored by adding blush particles and two beads that will help the materials mix.
- PVA glue will help prevent the area around the plate from getting varnished; it should first be applied with a cotton swab to the rollers and skin at the base of the nail, without touching the plate itself. When the glue dries and the nails are already painted, the film must be removed.
- If the product does not dry for a long time, you can resort to using ice water and dipping your hands in it; the coating will dry much faster.
- To remove the polish from one nail and not ruin the manicure on other nails, take a cotton pad soaked in acetone, you can use the following life hack: you need to place the sponge in a glass jar, pour acetone into it and immerse one finger in it. Thus, the manicure on other nails will remain the same. The jar should be tightly closed.
- A thick layer of cream will help prevent streaks in the area around the plate after erasing the varnish.
- If you bring your nails painted with glossy varnish to a pan of boiling water, the coating will become matte.
General Tips
Covering your nails with varnish, especially at home, is easier if your hands rest on a small stand. To do this, you can simply use a towel folded in several layers. Keep in mind that some topcoats may leave permanent stains, most often yellow in color. To avoid this surprise, always use a base coat.
Many companies now produce a special nanocoating that helps protect the plate from such troubles, as well as further strengthen it. Many varnishes that serve as a base contain special components that help care for the natural nail plate. This nanocoating allows regular polish to last longer, and the nail coating is easier to apply.
To make your manicure as beautiful as possible, there are a number of small tricks:
- To ensure an even topcoat, dip the brush into the polish before painting each nail.
- It is recommended to keep a cotton swab under your hands to immediately remove any remaining product that gets on the skin, without using a special product in the future.
- You can speed up the drying process at home as much as possible by dipping your nails in cold water, but it is not recommended to blow on them. This can make the top coat look dull.
- If unsightly grooves are formed during painting, they can be removed using an additional coating, for which a varnish base is used.
- You can extend the life of your manicure on the tips using clear varnish.
If you have very peeling nails, then the top coat should be done without colored varnish. It is better to use a special strengthening base or nanocoating.
Interesting ideas for manicure with regular polish
Newspaper manicure
When performing such a manicure, first you need to apply a transparent varnish to the plates, then white, after which you can also distribute holographic varnish, it will add shine to the nails. When the layers have dried, apply small newspaper clippings soaked in alcohol (10 seconds) to the nail. The paper must be pressed tightly, and then apply a transparent varnish or topcoat to the nail.
Lace manicure
For this you will need an orange stick, a brush, nail polish remover and varnishes. Apply two layers of the product to the plates and wait 7-10 minutes. Then use an orange stick to create drawings; this is especially easy to do with glitter. You need to draw designs on glossy varnish with a regular brush dipped in nail polish remover and an orange stick. Then the nails are covered with top. This way you get a beautiful nail design with regular polish.
Manicure with a pattern
For it you will need a thin needle and varnishes of different colors.
The first option: you need to apply three red vertical stripes on a layer of white varnish, after which you need to make a pattern with a needle using gentle movements, moving it from one side roller to the other, gradually moving towards the free edge of the nail.
Second option: on a nail covered with dark varnish, you need to apply three white drops so that they are located on the same line, then draw a needle along this line from the edge of the plate to the base.
Third option: place a few drops of pink on a white polish, and a smaller drop of white on them, then use a needle to connect the circles in a chaotic manner.
Volume manicure
Manicure for short nails can be voluminous. After waiting for the varnish layer to dry completely, you can begin creating a knitted manicure. It is necessary to mix white varnish and the one that was already used to cover the plate, and use a brush to create a pattern as in the image.