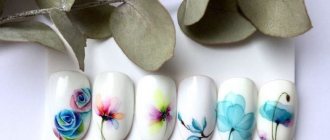
How not to remove gel polish
Some gel polishes begin to peel off near the cuticle after just a few days.
Usually the problem is either in the varnish itself, or in the fact that the nail technician did not degrease the nails enough before applying the coating. You want to tear off this shiny record, but you can’t do that. The gel penetrates into all the irregularities of the nail plate, so that by peeling it off, you can turn a small scratch into a full-fledged crack. A crack at the base of the nail is a very unpleasant thing. It's painful, very unsightly and simply unhealthy. And a healthy nail takes forever to grow.
Therefore, no matter how much you want, do not tear off the polish.
The exception is the gel that is not completely dried. You can easily peel it off and wash off the residue with acetone. How can you tell if the varnish is under-dried? It's simple: the nails smell unpleasant, they stick to everything, the polish smudges. You need to get rid of this as soon as possible, because the varnish can get into your food or stain your clothes.
You should also not wear the covering for too long. Due to heavily overgrown gel polish, the center of gravity shifts to the edge of the nail plate, so the nail can be broken.
How to remove strengthening gel polish
Removing reinforced gel polish yourself is much more difficult than a simple coating. Of course, it is best to contact a specialist, but if you have read this far, then you probably intend to do it yourself. We will try to help you with this.
To begin with, forget everything we told you about acetone removal. When strengthening, it is strictly forbidden to soak the coating. This will cause a lot of damage to your nails, and you will most likely end up with painful, tissue-thin nails. To remove the reinforcement, you will need a device or, in extreme cases, a file. Removing a simple coating using a dry method is no different from removing reinforcement. To remove the reinforcement, use our instructions above.
The only caveat is that it will take more time to remove the reinforcement. Also, we do not recommend removing the thin base layer. After all, if you apply strengthening, it means your natural nails are weakened. In this case, it is better to cover your nails with clear varnish or gel polish, leaving a protective layer.
How to remove gel polish using acetone and foil
Photo: familylifestyle / Depositphotos
An inexpensive way for those who do not want or cannot purchase special devices. However, keep in mind that your nails may be damaged. So you should resort to this method only as a last resort.
What you will need
- Cotton pads;
- scissors;
- nail file;
- Vaseline or fatty cream;
- nail polish remover with acetone;
- foil;
- nail buff.
How to remove gel polish
Cut triangular blanks from cotton pads that follow the shape of your nails so that the acetone has less contact with the skin. If the discs are double-layered, divide the triangles into two parts.
Shot: @Yuliya GoodNails / YouTube
File off as much of the varnish as possible with a nail file. This will make it easier for acetone to penetrate the gel, and the duration of the procedure will be reduced.
To protect the skin around the nail from acetone, lubricate it with Vaseline or fatty cream.
Shot: @Yuliya GoodNails / YouTube
Soak the cotton balls well with nail polish remover (you can use it without acetone, but the effect will be worse), apply them to your nails and wrap them with foil on top - this way the active substance will not evaporate.
Shot: @Yuliya GoodNails / YouTube
Wait 15-20 minutes, occasionally massaging your fingertips to speed up the process. When the time is up, pull the foil and cotton wool off your fingers. If the polish does not come off with the disc, carefully scrape it off with an orange stick.
Shot: @Yuliya GoodNails / YouTube
After this, sand the plates with a buff - a special file in the form of a rectangular block. This is done to make the nails smooth.
Here's the whole process:
Please note that the coating may be difficult to remove with a stick. Therefore, before buffing, you will have to use a hard file to remove excess. Because of this, there is a high probability of sawing through the top layer, and then the nail plate will become thin and weak.
Linda Zhuravleva
Author of Lifehacker.
I really don’t like removing the coating at home and am always ready to pay a few extra hundred rubles for it at the salon, but not so long ago I still had to “remove my nails” myself.
I didn’t remove the polish very well before the procedure, and then I forgot to apply cream to my skin. As a result, the problems began when pieces of cotton pads soaked in nail polish remover ended up on my hands: sensitive skin began to tingle unpleasantly due to the acetone. But I dutifully endured the allotted 15 minutes.
The coating turned out to be very durable, I had to sweat a lot before I finally removed it. The result was disappointing: the nails looked thin, weak, and bent at the slightest pressure (apparently, I was overzealous when polishing with a buff). To complete the picture, the skin around the nails burned, it was sore, it even peeled off.
After some time, everything returned to normal. Still, you need to be careful with this method. Before the procedure, carefully file off the nail polish and lubricate the skin around the nails with Vaseline. And after removal, try not to rub the surface of the nail with the buff as hard as I can, as I did - nothing good will come of it.
How to remove gel polish with a special device
Shot: @All about nail service / YouTube
A more reliable, faster and gentler method for nails and skin than soaking with acetone. But you will have to acquire a special device and experience in handling it.
You can also use nail files of different hardnesses, but this will take more time and you will have to try very hard to treat the areas near the cuticle. Plus there is a risk of severely rubbing the skin.
What you will need
- Nail polish remover.
How to remove gel polish
Gel polish removers resemble small drills or grinders. On AliExpress you can buy both expensive professional models and simpler ones. For home use, a cheap device is enough: you are unlikely to remove the gel every two days.
Typically, the device comes with several attachments: from harder ceramic or metal ones to those similar to thick cotton wool. Hard attachments should be used to remove the main part of the gel, and soft ones should be used to work near the cuticle, remove polish residues and polish the nail.
Before removing the polish, practice on something you don't mind ruining - false nails or a piece of plastic. This way you will understand at what angle it is more convenient to work.
When you are confident in your abilities, move on to your own nails. All you need to do is gradually, layer by layer, file off the gel from each nail, positioning the cutter horizontally. At the same time, keep your elbows on the table so that your hand does not tremble.
Move as smoothly as possible from the cuticle to the edge. Try to keep the pressure as even as possible. But do not press too hard on the nail to avoid damaging it. Simply iron gently with the rotating attachment until the polish comes off.
When removing nail polish with your non-working hand (for example, the left hand for right-handers), you need to switch the cutter to reverse mode, that is, twist in the opposite direction. This is necessary so as not to damage the nail plate. If your device does not have a reverse function, turn your hand over with your fingers facing up.
The process of removing gel polish with the device is shown in great detail in this video:
All ways to remove gel polish at home
You can remove gel polish in different ways, and they all have their own characteristics. We will look at each of them.
Removing gel polish with acetone
This is the simplest and most common method of removal. But it has its drawbacks. First of all, this has a negative effect on the skin. With prolonged interaction with liquid, nails, cuticles and the skin around the nail lose moisture and become dry and dehydrated. Also, sometimes the liquid can cause itching and an allergic reaction in the form of a rash. Another disadvantage is that if removed incorrectly, it is easy to damage the nail plate by removing not only the coating, but also part of the nail itself.
One of the advantages of removal using liquid is the availability of the method. Everything you need can be easily purchased at your nearest store.
How to remove gel polish yourself using liquid:
- Using a 100 grit coarse abrasive file, cut off the top layer of the coating. If the gel polish is applied thinly, you can only remove the shiny glossy layer before the color coating. If the nails are leveled with a base, then you need to cut off the glossy, colored and partially base coat. It's important not to overdo it. To do this, periodically brush off the dust with a brush and be careful whether you are sawing artificial turf or natural nails.
- Cut three cotton pads into 4 parts and soak each one in liquid.
- Cut 10 pieces of foil into different pieces. They should be enough for 2 turns around your finger. The pieces must be at least 10x10 cm.
- Place cotton wool soaked in the liquid on each nail and wrap it in foil so that the finger is completely covered.
- If there are caps or clips, secure the foil to your fingers.
- Time it for 15 minutes.
- After 15 minutes, start unrolling. Start with the little finger of one hand, don't remove everything at once.
- After removing the foil, carefully scrape off the gel polish with a stick or pusher. Do not try to remove all the unevenness, as this risks damaging the natural nail.
- Repeat the action on all fingers.
- Let your nails dry slightly for 5 minutes.
- Take a 180 grit file and use light, barely touching movements to remove any unevenness.
- Then, using a buff, moving from the edge of the nail to the cuticle, complete the removal.
- When your nails are more or less smooth, shake off the dust and polish your nails first with the green side of the polisher, then with the white side. You can use force. The presence of a squeak will tell you when the nail is ready.
- After the coating is removed, apply cream or wax to the hands and nails using rubbing movements.
- Then coat your nails with regular clear polish.
How to remove gel polish without acetone
You can remove gel polish from nails without special liquid and without foil. You can remove it with a nail file. The advantages of removing without a product include the fact that if removed correctly, the natural nail will not be damaged, and the skin near the nails will not lose moisture.
This method has a relative disadvantage. If you have not previously had experience in removing with a file, then it will be difficult for you to see where the coating ends and the natural nail plate begins. This means there is a risk of cutting off the excess, thinning the nails. Another downside is that when removing with a file, it is easy to scratch the cuticle. You need to act extremely carefully so as not to injure the delicate skin.
How to remove gel polish with a nail file at home step by step:
- File away the top gloss and color with a 100 grit coarse abrasive file. The file should be strictly parallel to the nail. In order to simplify the task, you can first file off the length of the nail. This way you can see how thick the coating layer is on the nail. The work area will also be reduced.
- When you reach the transparent base layer, visually assess the thickness. Turn the file over to 180 grit and, using gentle movements, begin filing down the base layer. Stop every few times and brush off the dust with a brush. It is important to see whether you are filing a gel polish or a natural nail.
- Stop when you reach your natural nail. If there is gel polish left in certain areas, remove the residue point by point, barely touching it, with a soft file or buff.
- Shake off all the dust and go over all the nails with a buff.
- Then buff your nails with the green side of the polisher. After this, turn the polisher over to the white side and repeat the process.
- Apply cream or wax by rubbing into nails and finger skin.
- Cover your nails with clear polish.
Manicure machine
The optimal method of removal is the device. But the removal will be successful only in skillful hands, or if the technology is followed. Therefore, we strongly recommend visiting a specialist who has the skills to use the device. If this is not possible, then follow our recommendations.
One of the disadvantages of removal with a device is that the cutter heats up, and removal can be quite uncomfortable, causing a burning sensation. But if used correctly, this should not happen. If there is a strong burning sensation, then most likely the removal is not happening correctly. Also, if you use the device ineptly, you can seriously damage the nail plate. Due to incorrect pressure, you can saw through grooves on the nail plate.
The undeniable advantages include the speed and convenience of the method.
To remove the coating with a machine, you will need a powerful machine and a carbide or ceramic cutter for removal.
Left-handers will need a special reversible cutter.
How to remove gel polish with a machine:
- Insert the cutter into the handle of the device and close the clamp.
- If you are left-handed, switch the device to left rotation, if you are right-handed, switch to right rotation.
- Turn on a low speed of 5-7 thousand revolutions and bring it to the surface of the nail. Check to see if the cutter is sliding on the nail. It should kind of stick. If it slips, switch rotation and check again.
- After the correct rotation is established, turn on the device at 30-35 thousand revolutions. To do this, you need to turn the speed regulator almost to the maximum.
- With barely touching, confident movements, move from the cuticle to the edge of the nail. Do this at a moderate speed. If the nail gets very hot, it means your movements are too slow. Or it could mean that you are in one place for a long time.
- Follow the above steps on all nails until a thin layer of base gel polish remains on the nails.
- When a thin layer remains, you have a choice: remove it or leave it. If you are planning further coverage, you do not need to cut off the remains. And if you want to take a break from the coating, you can carefully remove the layer with a file, or leave it to grow on its own, simply covering it with a clear varnish.
- If you decide to let the base layer grow out, buff your nails with a buff and polisher before applying regular polish. And then degrease the nail plate with alcohol or a special degreaser.
Gel polish remover wipes
Wipes are not much different from a foil compress with a soaked cotton pad. Well, maybe just convenience. Their downside is that they are less effective and often only work on very thin surfaces. By the way, they will cost more than removing liquid.
One of the advantages is that the gel polish will still be removed from the nails. And also ease of use. For this method, you do not need to cut, measure, or soak anything. You just need to tear off a piece and place your finger inside the bag of liquid. The greenhouse effect is achieved due to the foil layer inside.
How to remove gel polish using napkins:
- File off the glossy finish with a 100 grit file.
- Place the marigolds inside the napkins for 15-20 minutes.
- Take out the nails one at a time and remove the excess with a tool convenient for you.
- Let your nails dry for 5 minutes.
- Sand your nails with a buff and then with a polisher. First with the green side, and then with the white side, until the characteristic creak.
- Moisturize your nails and skin with cream or wax.
- Cover your nails with clear polish.
How to remove gel polish with special wipes
Shot: @Art Simple Nail / YouTube
Such wipes can be easily found in cosmetic stores or on the Internet, and then carried with you and used, among other things, to remove regular nail polishes. However, gel polish is not always removed on the first try and there is a risk of drying out your nails.
You will need
- Nail wipes;
- file;
- fatty cream or Vaseline;
- orange stick.
How to remove gel polish
Each package contains several individual bags, each of which contains a lint-free wipe soaked in acetone. The inside of the bag is made of a material resembling regular foil.
First, cut off the top layer of gel with a nail file. Treat the skin around your nails with a rich cream. Cut off one edge of the bag, put it on your finger and press gently so that it does not fly off. Wrap all your nails in the same way.
Wait 10-15 minutes and remove the polish with an orange stick. If some areas are stubborn, remove them with a file. Or soak your nails using new wipes.
How to make gel polish removal easier
Use oil
The less oil in the nails, the longer the gel lasts. Therefore, before applying varnish, nails are treated with a special drying agent. If you skip this step or do something more radical and apply oil to your nails half an hour before the manicure, the gel will be removed much faster and easier. True, a manicure can go bad at the most inopportune moment.
Use a special database
It will be even easier to remove gel polish if you treat your nails with Peel Off Base Coat (translated into Russian as a peeling base layer) before applying it. It will protect your nails and eliminate the smell of acetone. But the gel will last less: after 2-3 days the varnish will begin to break off in large pieces. Especially after a hot shower.
If you don't mind, apply a coat of base and wait until it dries completely. This usually makes it clear, but it's best to check the instructions on the package. Afterwards you can apply gel polish.
To get rid of the colored coating, just pick it up with an orange stick. Depending on the quality of the base, the gel will be removed either entirely or in large pieces.
Liquids for removing gel polish
Purchase professional shellac removers. Let's look at the most effective ones that have received a lot of positive feedback.
No. 1. "Perfect"
Price – 150 rubles. The composition in question is easy to use. Hence the relatively low cost. The product is produced in Korea.
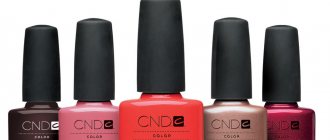
No. 2. "CND Shellac Power Polish Nourishing"
Price – 1150 rubles. The product acts quickly and is non-toxic. Made in England.
No. 3. "Yoko"
Price – 370 rubles. The composition includes a large number of useful enzymes. After use, shellac can be easily removed with a paper towel. Made in America.