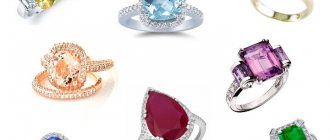
In order to mark their territory, animals pee in the corners, howl loudly, hiss threateningly, but humans can’t do any of this. So it occurred to him to simply hang a piece of metal with an inscription. Oddly enough, this also works, and very effectively. I hope you guessed that I will talk about how to draw a ring, and I will also tell you some of its secrets. As an example, let’s take not a wedding ring, but an ordinary one; it seemed more beautiful to me: What is a ring? Essentially, this is a geometric figure made of metal. Outwardly, it resembles a bagel, only it is not edible and very small. It is classified as an element of clothing, although, unlike clothing, it is not removed and changed as often. The cost of such a product ranges from not worth a penny to wow, what a lot of money. It all depends on the skill level of the jeweler and materials. It’s the same here as with artists. Some paint and end up in the Tretyakov Gallery, while others are like me.
Remember that your drawing is also a piece of jewelry! And depending on how much effort and skill you put in, this will be the result! I recommend that you work hard, and then you will get a real masterpiece. To get started, you can take a look at my instructions a little:
How to draw a ring with a pencil step by step
Step one. Let's make a rectangular shape into which we will inscribe a circle. Step two. Let's sketch out a sketch of a ring and a special stand for a diamond, or diamond, or whatever. Step three. Let's outline the contours more clearly, draw a brow. Step four. Let's remove the excess and add shading. It should look something like this: Show off your jewelry below in the comments. And for especially curious ladies, there is also a list of drawing lessons for other gadgets, for example.
Many people want to know how to draw the Olympic rings correctly and beautifully. This symbol was invented by Pierre de Coubertin, the founder of the games, which take place every four years in different countries. Symbolic circles should be painted in different colors: blue, yellow, black, green and red. They mean five different ones and the intertwining is a symbol of all the athletes coming together. Each of them defends their country and makes the dreams of fans come true, taking prizes. I would like to get a little involved in such competitions, because we are all patriots and therefore we always carefully prepare for the Olympic Games. Some people go to the Olympics venue, while others draw emblems at home and worry about it near their TVs and computers.
How to draw a ring
In this article we will talk about a very popular accessory that is worn by women, men and even children. We will talk about how to draw a ring. It has a fairly simple form, so you shouldn’t have any particular difficulties. So, get your art supplies ready, let's get started!
articles:
- With diamond
- Side view
- Magic
- Wedding
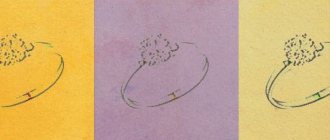
With diamond
The first example we'll look at will show us how to draw a diamond ring step by step. An important point in drawing this accessory is that all lines must be smooth and neat, otherwise the drawing will look awkward and very strange.
The first stage of drawing will be the image of two ovals of different sizes. They form the side part of our drawing.
Since our ring is at an angle, we must draw it in volume. Therefore, we draw a line at the bottom inside the circles. Thus, we have drawn the inner side, which is always in contact with the finger.
Now we draw the outer part, but since we still need to insert the diamond, we do not draw the lines to the end and leave an empty space approximately in the middle.
We fill the empty space with the contours of our diamond.
Draw a web of edges.
The last stage will be the image of chiaroscuro. We will draw chiaroscuro in the form of stripes; as a rule, the more often the stripes go, the darker it is in a given place, and the less often, the lighter.
Side view
In the previous example, we looked at a complex half-turn view. This time we will look at how to draw a ring with a pencil from the side view. And if you mastered the previous method of drawing, then you will master this one even easier.
Let's make a simple sketch. To make it neat, use a compass or a round glass. Our ring will have a diamond, so we will draw the contours of the fastening on one side and the other.
Don't press the pencil too hard, because some lines are auxiliary and we will erase them in the future.
We have already drawn the outer contours in the previous step, now it’s time to work on the inside. We draw a circle, and work on attaching the diamond above it.
Let's detail our gemstone by depicting its edges.
We take an eraser and erase all the auxiliary lines with it; we no longer need them. Also, let's color our ring. We chose an unusual color, namely, sea green. If you want, you can choose more popular colors such as gold or black.
Magic
This time we will draw a magic ring from The Lord of the Rings. It has an interesting feature: if you erase all the hieroglyphs from it, it will look like a wedding ring.
Despite the fact that we will draw a complex perspective in half a turn, it is depicted very simply. Just six simple steps and your ring will be ready!
First, let's draw an oval.
Inside, along the edges from different sides, we will draw two lines. Together they form the inner side, which is in contact with the finger, and the outer side, which is visible to everyone else.
To make the ring look just like in The Lord of the Rings, we must depict incomprehensible hieroglyphs on the outside and inside. As we said earlier, if we do not depict them, then we will get a regular wedding ring.
Now take colored pencils and color the resulting drawing.
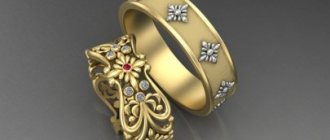
Wedding
During the wedding ceremony, it is customary for newlyweds to exchange identical wedding rings. In the previous example, we already looked at something similar to them, but this time we will learn to draw wedding rings lying on top of each other. So, don't put your art supplies away because we're about to start!
So, draw a long oval with sharp edges. Below it we will draw an unfinished oval. You should definitely step back a little from the top, because we will still need the empty space.
Draw the outer side lines. Now everything falls into place and it becomes clear why we left so much empty space. Our drawing begins to look like two pieces of cut sausage. This needs to be corrected and we will fix it at the next stage.
We draw lines inside our sausages. When you lead them, make sure that your hand does not jump up and down. This is important, otherwise the drawing will look too sloppy.
Let's draw another row of lines almost closely to somehow display the upper part of the rings. You can, of course, skip this moment, but then the drawing will not look so professional.
The last step is very, very difficult and is not suitable for everyone; we apply chiaroscuro. If you do not have experience in chiaroscuro, then most likely you will not be able to apply it the first time and you will ruin the drawing. Well, if you decide to do this, we recommend that you first watch a video tutorial in which you can see the live process of applying light and shadow.
Share a good article