Pros of matte nail texture
The enormous popularity of matte manicure is due to a number of advantages:
• Compatible with any image and wardrobe (suitable for everyone without exception). • Easy to apply designs (monograms, stripes, dots do not spread). • Long lasting (2-3 weeks). • Possibility of combining glossy and matte motifs in the design. • Marigolds are pleasant to the touch. • The technique is applicable for any colors. • Owners of matte manicure are always in trend.
Interesting fact : you can paint on a matte finish not only with professional gel paints or do stamping. It is permissible to use the means at hand, for example, a gel pen or marker.
Matt dust
You can purchase it at any nail art store and use it not only to cover the entire plate, but to decorate individual elements. The technique is quite simple, and the result lasts like standard shellac:
- the base is covered and dried in a lamp;
- then matte dust, topcoat and colored varnish are mixed separately on a tablet, you will have to experiment a little to obtain the desired shade, it is worth remembering that this volume should be enough for all nails, with secondary mixing it is difficult to obtain an identical tone;
- quickly apply the resulting liquid, fix for 3 minutes in the lamp.
Required materials and tools
To create an attractive and fashionable matte manicure, you must have the following tools:
- Ultraviolet or LED lamp for UV polymerization of gel polish (minimum power 36 W).
- Base coat, colored gel polish.
- Matte top.
- Manicure accessories (nippers, scissors, pusher, nail files, orange stick).
- Liquids for dehydration, degreasing and dispersion removal.
- Lint-free wipes.
- Cuticle oil.
Review of matte tops
A matte top is not as popular as a glossy one, so I only had two of them: Nogtika (satin) and Patrisa Nail (corduroy). As the collection grows, I will update this post. For now about them.
Matte top Patrisa Nail Velveteen
Bottle volume – 8 ml
Polymerization time in a UV lamp is 1.5 minutes, in an LED lamp – 30 seconds
The top coat is very thick: even if you take out the brush without wiping it on the edges of the bottle, not a drop will fall off! The finish itself is translucent and virtually odorless. Due to its thickness, it is a little inconvenient to apply; you need to adapt to do it carefully. When applied, the brush leaves grooves, but self-levels quickly enough. It’s simply impossible to flow somewhere with such density!
The brush is wide, for such a consistency I would make it a little narrower.
It does not roll off from the edges of the nail plate. The coating is incredibly velvety to the touch and super matte in appearance, which does not “wear out” over time. The wearing period of the top is up to 3 weeks.
There is no stickiness in it, but I noticed that if you apply a degreaser after drying, the effect will be visible much better.
Patrisa Nail Velveteen matte top on colored gel polish:
Cat's eye on gel polish
How to choose a quality matte top?
Purchasing a top finish for a matte manicure should be taken very seriously. The final result will depend on its properties. Unfortunately, not all brands represent quality products. When choosing a top, you need to pay attention to how it fits on the nail. If the product does not stretch well over the surface of the nail plate or lies with bald spots, this finish is not worth buying.
It is important to know! The texture of the matte top should be thick and flexible, the color should be slightly opaque. The brush must pick up and hold a large drop, the consistency cannot be very liquid.
Acrylic Powder
It allows you to get not only the desired effect, but the created structure will be rough, like velvet fabric. This method will help hide the unevenness of the plate, but, unfortunately, you won’t have to admire such a manicure for long, due to the lack of a finishing agent at the last stage. You also need to choose a material without glitter, and the color palette of acrylic does not limit decor ideas. The technology is as follows:
- the base is applied and dried;
- then a turn of gel coating, preferably in 2 layers, each is fixed in the lamp separately;
- distribute the top varnish, carefully evenly distribute the acrylic powder with a fan brush; if you want to get a deep shade, choose the appropriate colored powder; plain white will help to tone down the shellac;
- when all the nails have been treated in this way, you can send them to a lamp for fixation, 3-5 minutes is enough;
- then go over it lightly with a clean brush, removing excess acrylic material.
It is advisable to perform such a manicure immediately before the celebration; it is not suitable for daily wear.
Stages of applying a matte finish
To achieve the desired result, when creating a manicure, you must strictly adhere to the following steps:
1. Hygienic preparation of the nail plate.
Before the main painting procedure, it is necessary to first shape and clean the nails. Be sure to remove the cuticle and polish the edges of the plate near the matrix well. Most often, fatty impregnation remains in this area, which will prevent the gel polish from adhering well to the nail. Next, the plate must be carefully polished with a fine-grained buff so as not to damage or disrupt the structure of the nail.
2. Applying gel polish.
Dry prepared nails must be wiped with a lint-free cloth soaked in a degreasing liquid. This will dry the plate and give the future coating good adhesion. In the absence of lint-free wipes, you can use regular cotton wool, but in this case you need to wipe the nail in only one direction - from the base to the tip, so that the lint bristles as little as possible.
The base is applied in one thin layer. You should evenly distribute the product with a brush, first from the middle of the nail to the tip, then from beginning to end. This way the coating will be easily leveled and there will be no hump at the base. The base does not have to be painted very close to the cuticle - this does not affect the quality of wear. The first layer is dried in a UV lamp for 2 minutes, in an ICE lamp for 30 seconds.
The color coating is applied in 2 layers, each dried in a lamp. The first layer should be thin; it also does not have to be very close to the cuticle. The second can be done thicker and as close to the skin as possible, but you need to make sure that the varnish does not flow under the cuticle. Otherwise, the manicure will turn out sloppy.
On a note. If the color of the gel polish turns out to be unsaturated in 2 layers, triple coating is allowed. This does not affect the functional features of the manicure, but brightness and contrast will be added.
3. Stage of covering with a matte top.
The final layer is applied with a matte finish in one layer and cured in an ultraviolet lamp. It is better to shake the bottle before using the product. After drying, the dispersed layer is removed with a de-sticking liquid. If the top has satin properties, the coating will be pleasant and velvety to the touch. The final touch of the manicure is moisturizing the cuticles with oil.
Who are matte nails suitable for?
Matte shellac is suitable for any girl. But the point is how to wear it: matte shellac can be plain or decorated with additional decor. The following are used as decorations:
- glossy texture;
- shades of different colors;
- rhinestones, patterns.
How to apply the decor depends on the event for which matte shellac is used.
For everyday use, a choice of discreet colors of gel polish and the absence of additional decorations, or their simple design, is suitable. This is how a manicure is created for any occasion for any style of clothing. In addition, it will last more than 3 weeks.
Additional Information! For greater restraint, it is advisable to decorate only a few nails.
Dark tones of matte shellac look more advantageous in the cold season. They are ideal for girls with pale skin who like to wear leather or fur. In summer, a light-colored coating looks more harmonious.
Other ways to achieve a similar matte effect
What to do if there is no matte finish available, but you want to get just such a nail surface? Salon professionals use several options to achieve a similar result. For this purpose you can:
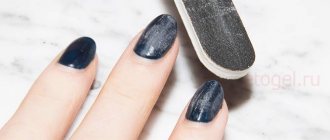
- Cover your nails with a glossy topcoat and go over the plates with a polishing file in different directions. It is better to use a buffer with a spray abrasiveness of 400*400 grit.
- Use transparent acrylic powder. To do this, powder is sprinkled onto a glossy, undried top coat and the excess is shaken off. With this option, you need to dry the nails in the lamp for 4 minutes rather than 2. The coating will not be as smooth as with a matte topcoat, but a little rough.
How to apply matte top over gel polish
The process of creating a matte finish is no different from when you use a glossy topcoat:
- We will prepare your nails for coating by performing a trimmed, European or hardware manicure, removing the cuticle and correcting the shape and length of the nails.
- Remove the gloss from your nails using a file or buff.
- Degrease the nails with a special product and, if necessary, apply a primer.
- We will cover the surface of the nails with a base for gel polish and polymerize it in an ultraviolet (2 minutes) or LED (30 seconds) lamp.
- Apply 2 layers of colored gel polish to your nails, drying each in between under a lamp.
- Next, you can complete the design, or you can immediately apply a matte top coat over colored gel polish and draw on it. It dries in the same way as the glossy finish: 2 minutes under UV rays and 30 seconds under an LED lamp.
- Remove the sticky layer and get a beautiful matte effect on your nails.
Secrets of perfect coverage
However, the result may not always be as smooth as expected. There are still some nuances to applying a matte top:
- Before using, you should roll the bottle with top a little with your palms (do not shake, otherwise there will be bubbles in it) to make its composition more uniform.
- The matte top is thicker than the glossy one. Perhaps it can be compared to a rubber top, but again, the thickness depends on the manufacturer. When applying, you should take this into account and do not put too much top on the brush, stretch it with slow and smooth movements.
- To make the coating more even, hold the nails with the applied top upside down for 30-60 seconds before drying in the lamp - this way it will self-level a little.
- It is very difficult to work with a matte topcoat near the cuticle, and often after drying a glossy streak is noticeable there. Sometimes it’s a feature of the top that it rolls off from the edges, and sometimes it’s simply not noticeable that you didn’t apply it there. Therefore, I recommend applying a matte finish in 2 layers: the first is to tint the cuticle line with a thin brush, and the second is to apply it to the entire surface of the nail.
- Don’t forget that the matte top has stickiness, so immediately after drying it may look like a glossy one, but after removing the dispersion and literally instantly drying the liquid to remove it, you will see the same effect!
Design features with matte top
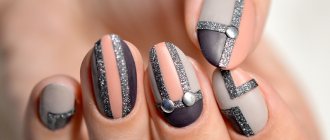
The velvety coating of nails allows you to show your imagination and bring your wildest whims to life. Here you can use sparkles, rhinestones and all kinds of glitter.
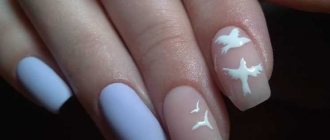
The combination of a matte effect with gloss is very contrasting.
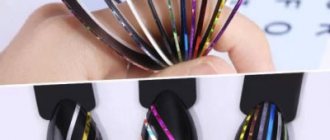
Sometimes special tape, strips or a brush are used for this. The necessary elements are drawn on top of the matte coating.
The “invisible jacket” turns out especially beautiful. To do this, apply a glossy top coat to the tips of the nails.
How to make matte nails?
1st method – matte varnish
Yes, no matter how trivial, but the easiest way is to buy matte nail polish. They are sold in almost any stall with manicure accessories and varnishes and their palette is very diverse. According to some reviews, these varnishes dry a little longer than usual, but I didn’t notice a difference. The main thing is not to confuse the effect with dried varnish, so as not to inadvertently spoil the coating when it has not actually dried yet!
Method 2 – matte top
To do this, you will have to buy a special matte coating for nails or a matte top (finish). When applied over any varnish, the gloss loses its shine and the nails become matte. The downside of this method is the additional cost of coating, but with it you can make any of your varnish matte, not just a certain color. There is also a matte finish gel that can be used to create this effect on extended nails, as well as a matte top coat for gel polish.
3rd method - folk
This is a very original and simple way with which you can apply any of your nail polishes and make the coating matte. To do this you will need only 2 things:
- pot of boiling water
- any nail polish
Step 1 – polishing the nails. Before applying varnish, it is advisable to polish your nails, since unlike glossy varnish, which hides all roughness, matte varnish makes them more noticeable.
Step 2 – applying varnish. Cover your nails with a thin layer of polish. When it dries, apply a second coat to 1-2 nails. While they are still wet (which is why the procedure is done one at a time), hold your nails over boiling water: not too high so that the steam gets on them, but not too low so as not to get burned. Hold your nails over the steam for about a minute - during this time the polish will dry and become matte.
Repeat the described procedure on the remaining nails. It won't take you much time, and the result will be very pleasing.
Fashion trends
The world's nail studios develop thousands of designs, but avid lovers of new products still predetermine some rules and canons of manicure fashion.
Shades of ripe cherry or burgundy in combination with gold and silver are considered consistently sophisticated and modern. For the New Year holidays, shimmer glitter and Christmas motifs are popular on nails.
Black color on nails remains invariably trendy. The symbiosis of white and black is a sign of adherence to the classics, which always remains in demand among clients.
The “nude” style in manicure has confidently reserved its place in the popularity rankings for several years. It emphasizes the femininity and tenderness of its owner.
Conical metal elements on nails are now used not only by designers and their models on the catwalks. With the advent of matte manicure technologies, any girl can express such a decisive challenge to fashion.
Matte manicure appeared relatively recently; it allows you to implement your wildest desires to give your hands an even more well-groomed look. This coating is a great way to express your individuality, and it’s not difficult to make.
Grinder
A special device or buff for regular hygienic manicure is also useful for creating a matte finish from a glossy one. It may not always work out right the first time, it is important not to remove too much material. The manicure lasts for about a week, and if treated with care it will last longer.
It is carried out according to this plan:
- the standard trinity is applied - base, gel, top, the latter for insurance is better in 2 layers;
- after fixing in the lamp, remove the sticky coating with a lint-free cloth;
- Use a nail file or machine with an abrasiveness of 120-160 grit to carefully process the plate, removing the glossy sheen;
- brush to clean the dust.
Ideas for matte manicure
There are many original ideas that can be realized using this nail decoration technique. The most interesting include:
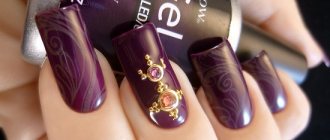
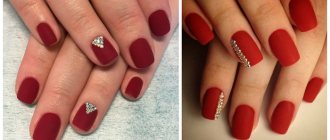
- Manicure with crystals. Matte varnishes can serve as an excellent background for rhinestones attached to the nail. This combination will provide you with increased attention thanks to the contrast of shiny crystals with the matte surface of the nail. You can lay out the crystals in the form of an original pattern, which will add even more unusualness to the design.
- Multicolored. If you want to emphasize your originality, you need to know how to make a matte manicure with gel polish in different colors. The main thing is to choose well-combined shades that will look good in a single design.
- With strips of foil. Decorating your nails with small strips of foil is one of the increasingly popular modern trends. The material goes well with the matte surface and makes it easy to create a unique nail design.
Don’t be afraid to experiment with different techniques and ideas, this will allow you to create a high-quality and original nail design even at home.
News MirTesen
