A flawless manicure is the key to the beauty of your hands. Some girls prefer not to experiment with nail coating themselves, but turn to an experienced nail technician, but many fashionistas are not afraid of difficulties and do their own manicure. There is nothing difficult about painting your nails with gel polish yourself. To do this, you will need a base, top and color coating and a lamp for drying gel polish. And our recommendations will help you do a smooth and beautiful manicure with gel polish at home.
Impeccable DIY manicure
How to paint your nails beautifully and neatly?
Of course, it is very important for a woman to always look beautiful and impeccable. Particular attention is paid to the condition and appearance of the nails. Every detail is important: from the well-groomed ends to the quality of the coating. Unfortunately, not all girls manage to paint their nails perfectly - without streaks and unnecessary strokes on the skin. However, we dare to assure you that a neat manicure can be done at home. We will tell you how to paint your nails correctly for flawless nail art.
To make your manicure look perfect, it is not enough just to apply the coating carefully. It is very important to properly prepare your nails, starting with the cuticle and side ridges. You can use our recommendations, covered in articles about classic and European manicure. In them you will find a lot of useful information, supported by useful photos and video instructions. Be sure to align all ends to the same length. Next, we will talk about how to carefully paint your nails yourself at home. Believe me, this simple skill will be very valuable to you. You can constantly improve your skills, making every future nail art flawlessly beautiful.
Benefits of long-lasting manicure
Surely many girls will wonder - why do you need to use gel polish at all? And in vain: it has several important advantages over both regular varnish and persistent gel.
Unlike simple varnish, gel polish is extremely stable, does not lose its color and shine until removal, and does not require frequent repainting. This will be a big advantage for girls who don’t like to spend a lot of time on manicure: gel polish can last for almost three weeks! Of course, provided that the nails grow slowly.
And gel polish differs from gel manicure in ease of use, safety, hypoallergenicity and the absence of contraindications. In addition, gel polish does not need to be adjusted, and after it the nails do not require rest: only after removing one manicure, you can immediately replace it with another.
As you can understand, this product has a lot of advantages. It is only important to learn how to use it correctly: not everyone succeeds in applying gel polish evenly and beautifully the first time.
IMPORTANT TO KNOW: Which brushes for acrylic are better to choose: little secrets of the right choice
Tips to help you paint your nails correctly
To ensure that the polish applies easily and evenly and stays on your nails for a long time, consider the following points:
- A high-quality varnish, with which you can beautifully and even perfectly paint your nails yourself, cannot be cheap
- Instead of liquid to degrease the nail plates, you can use alcohol or alcohol tincture, this is absolutely not harmful
- Instead of the base, you can paint it with regular clear varnish. However, remember that in this case the nail will not receive the necessary moisture and nutrition, and the varnish will only become an obstacle to the penetration of pigment into the layers of the nail plate
- You should not immediately correct the bad spots or wipe off the varnish that gets on the cuticle. During the manicure, fats were applied to the skin in the form of a special oil or nourishing cream, which will prevent pigments from settling on the skin. At the very end, the excess is carefully removed using a cotton swab dipped in liquid
- To make it look beautiful, all layers should be thin, but cover the nail without gaps
- The varnish should be allowed to dry naturally: do not wave your arms or put your hands in the oven - this is harmful to both your hands and the coating itself. Bubbles will appear on its surface and the varnish will come off very quickly.
These are not all the nuances. To get a feel for how to properly paint your nails with regular polish, you need to try this process.
How to paint your nails with gel polish
Of course, a hybrid of gel and polish is one of the best achievements in the nail industry in recent times. Nowadays, almost all nail technicians provide decorative gel polish services. Why is it so in demand and is it possible to learn how to paint your nails with gel polish at home?
What is gel polish and what are its features?
Gel polish quickly gained popularity due to its simple application principle and durability. In fact, this is a varnish of a peculiar structure that needs to be dried with a UV lamp in order to firmly fix it and prevent mechanical damage. Today there are many different shades of such varnishes to suit every taste. The coating becomes especially durable due to the application of a finishing layer. It is transparent and does not affect the color of the base varnish.
Advantages of gel polish:
- convenience and ease of use;
- high speed of polymerization in a lamp;
- maximum color stability;
- gloss intensity of the coating until removal;
- safety of exposure to the nail plate;
- no need for correction;
- hypoallergenic materials;
- no contraindications.
If you follow the correct application technology, shellac lasts up to 20 days.
Devices for applying gel polish
To properly paint your nails with shellac you will need:
- The base is a means for good adhesion of the varnish to the nail surface;
- Actually, colored varnish;
- Fixer - strong protection of the coating and its shine;
- A special degreaser for cleaning the nail (can be replaced with acetone);
- Alcohol for final removal of the top layer of varnish;
- UV drying lamp with a power of 36 W and above, which is capable of efficiently drying several layers of varnish.
Shellac application technology
Before applying the coating, do a regular manicure by immersing your nails in warm water and filing them all to the same length. Lightly file the surface. You need to paint your nails with gel polish according to the following algorithm:
- Degrease the surface with acetone;
- To ensure that the varnish holds firmly, remove the glossy layer from the nail plate using a highly abrasive buff;
- Apply base coat and place hands to dry for 2 minutes;
- Apply the first coat of colored varnish very thinly. Dry your nails under the lamp for 2 minutes;
- Apply a second layer - and again under ultraviolet light;
- The final stage is the application of a protective sealing coating. Dry thoroughly under the lamp;
- Wipe the nail plates with a cotton pad soaked in alcohol to remove any remaining polish and sticky layer.
As you can see, there are no particular difficulties in the technology of applying shellac, so after just a couple of training sessions you will be able to do this manicure at home yourself.
Decorative coating technique
In fact, painting your nails carefully at home is not at all difficult. All you need is a little patience and skill. Since the good condition of the nail plates is very important for an ideal manicure, you may be interested in thematic articles about vitamins and nourishing baths for nails. All materials on our website are supported by useful video lessons and colorful photo galleries. Let's return to our topic. How to paint your nails beautifully so that people admire you?
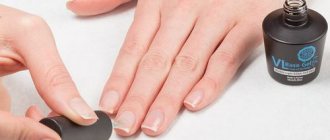
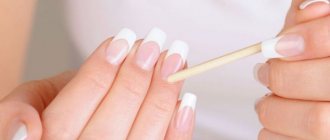
Step 1: Applying Foundation
The first step towards a perfectly executed manicure is a base coat. It is very important to pre-paint your nails with a clear base. Firstly, the base protects the nail plate from aggressive pigments of colored varnish. Secondly, the base evens out the surface, making it much easier for you to do a neat manicure at home. You can use a varnish from the strengthening series or apply a regular transparent base.
Step 2. Applying color coating
Before painting your nails with color, prepare cotton swabs, discs, toothpicks and nail polish remover to correct possible errors. Apply the first coat. To successfully paint your nails at home, use high-quality varnishes that spread more easily over the surface. Dip the brush into the bottle and remove excess by running it along the edge of the neck. Start painting from the central part of the nail plate, stepping back a little from the cuticle, as shown in the photo, and then distribute the polish to the sides.
What is the second layer for? Since it is almost impossible to paint your nails accurately the first time, re-coating will mask all the imperfections. In addition, only two layers of varnish will allow you to reveal the full depth and richness of the shade. You can re-paint your nails only after the first color layer has completely dried. Otherwise, the varnish will take a very long time to dry. Sometimes you can get by with one layer of decorative coating: the exception is working with varnish of a very thick consistency.
Step 3: Top coat
The stage of painting nails with a top coat would correctly be called optional, especially at home. Of course, protective coating has many advantages, but not everyone likes it. Make sure the colored polish is dry before applying topcoat to your nails. Considering the fact that the protective coating is already 3-4 in a row, not all girls are ready to wait 30 or more minutes for complete drying. The exception is “drying”, which can be applied even at home using a pipette, spray or brush.
The advantages of the top coat include a glossy shine to the nails and a longer lifespan of the manicure. When applying a protective layer at home, do not forget to properly paint the ends of the ends. After the nail polish is dry, remove excess polish from the skin. To consolidate your knowledge, we invite you to watch an interesting video lesson. From it you will learn how to properly paint your nails at home, without the help of specialists. To ensure that the procedure gives you only positive emotions, we have prepared useful recommendations for you, which you will find immediately after the video.
A very interesting question: how to paint your nails without staining your cuticles? Many representatives of the fair sex do not even think that this is really possible. The “hated” cuticle then grows around the nail like a real “bush”. It’s as if she’s deliberately reaching under the brush, wanting to smear the varnish. How to paint your nails without staining your cuticles? There are some extremely interesting tricks that can help with this. The “prankster” will no longer be able to ruin a woman’s manicure. Handles will always look neat and well-groomed. The main thing is to have a little patience, then everything will definitely work out.
How to choose the right varnish?
If you don't have a good hammer at hand, it will be extremely difficult to hammer in a nail. The same goes for manicure. If a girl bought a low-grade, sticky, maybe even drying varnish, it will be like a red rag to a bull for the cuticle. It is necessary to choose the product that has the optimal consistency. How to do it? The verification consists of three steps:
- unscrew the cap of the bottle with varnish;
- the brush is pulled out;
- All that remains is to observe.
If the varnish is good, it will flow evenly from the brush in dense droplets. It is strictly not recommended to purchase a product that is too liquid. It will spread over the entire nail plate and will definitely get under the skin and stain all your hands. Too thick varnish is also bad. It will be extremely difficult for a representative of the fair sex to achieve an even, uniform coating.
In order not to encounter a low-quality product, it is best to buy yourself not 10 varnishes, but 2-3, but from a proven brand. They will cost a little more, but you don’t have to worry about getting your hands dirty. Such varnishes fit perfectly on the nail plate and create a uniform surface. Bubbles, stained cuticles - all this is behind us.
How to choose the perfect brush for yourself?
The classic thin and long brush is very inconvenient to work with. Marvelous? However, this is a fact. A neat manicure simply won’t work with such an assistant, especially if your nails are short or of medium length. Painting will take a lot of time and will literally “squeeze” all the juice out of the girl.
To avoid such unpleasant situations, it is recommended to buy varnish with a wide semicircular brush. It evenly covers the nail plate without touching the cuticle.
An important nuance: prepare a working surface for yourself.
While applying a manicure, a girl should feel as comfortable as possible. It is necessary to prepare the work surface. It's best if it's a table.
1. If it is more convenient to paint the nails on your left hand first, place your left palm on the edge of the table.
2. At the same time, the right hand should confidently rest on the tabletop with the elbow so that the brush is held firmly in the fingers and does not slip off.
3. It is recommended to place a lamp on the table. Even if it’s day outside, additional lighting will not be superfluous. This is just another “precautionary measure” to avoid staining your cuticles.
Correct movements in manicure.
Work begins with the little finger on the left hand, then carefully move to the right. Why does the sequence have to be like this? The fact is that it minimizes the risk of smudging nails that are already painted. If regular varnish is used for a manicure, the main female task is to make a minimum of movements with a brush. It would be ideal to apply the polish in 3-4 touches to the nail plate. If a lady works with gel polish, there are no restrictions on what she can do. It is permissible to “fidget” in different directions with the brush for longer. Advice! It is always necessary to apply varnish in two layers. The first one will become the foundation. The second is the ability to hide some of the unevenness of the first.
Manicure technique: apply the polish correctly.
Under no circumstances should you shake a bottle of varnish - this is a categorical mistake. The bottle must be carefully turned upside down and “rolled” between your palms several times. These steps are enough to mix the pigment to the required consistency.
1. The brush is wetted in the varnish, the excess is carefully removed on the neck of the bottle.
2. The first line must be drawn from the middle of the nail plate to the end.
3. Then the brush is placed a little closer to the cuticle; you need to “adjust” the varnish a little so that the layer becomes uniform.
4. Slowly paint the side surfaces. You should never rush, otherwise no additional means will help you avoid getting your hands dirty.
It is very important to press the brush tightly onto the nail plate. It should straighten out as if it were holding a fan. Following this technique, the varnish will be evenly distributed over the nail without staining the cuticle.
Alternative option.
If a woman doesn’t like the first option, there is an alternative. The difference in the second method is that now it is the lower part of the nail, the one near the cuticle, that is initially painted over.
1. Using small strokes, paint 1/3 of the nail plate from below, at the point where it joins the cuticle.
2. The second step is to make a stroke from the center to the edge.
3. The side parts are carefully tinted.
The secret weapon against dirty cuticles.
If both options do not help, do not despair. The cunning female nature found several “trump cards” that give 100% results. Knowing these little secrets, you can be sure that the cuticle will definitely not get dirty.
1. Skin Protector. This is a regular liquid tape designed specifically for manicure. The product dries almost instantly. The point is that it forms a thin film in the areas of application. The “protector” is distributed onto the cuticle - you can apply the varnish, forgetting about any precautions. The resulting film is removed when the manicure dries. This is done extremely simply.
2. PVA glue. If you don’t have time to go to the store for special protective equipment, you can use classic PVA. It works on the same principle. Using a cotton swab, the glue is distributed over the cuticle; you need to leave it to dry for 10 minutes. After this, the woman can safely start manicure. When the job is over and the nails are already dry, simply wash your hands with warm water and the glue particles come off on their own.
3. Liquid cream. It is necessary to treat the cuticle with it so that the layer does not turn out to be too thick. Even if varnish accidentally gets on the skin, it will be very easily washed off with the dermis treated with cream, without leaving a trace behind.
A neat manicure at home is possible. Knowing the basic secrets of the technique of using varnish, you can forget about nerves and repeatedly repainting your nails. Trumps will always help. How to paint your nails without staining the cuticles - the information presented will be useful for every representative of the fair sex. The main thing is to always remember the little tricks and take your time.
Without a good polish there won't be a perfect manicure.
You can’t skimp on your beauty. Therefore, when you go for your next bottle of varnish, take its purchase seriously. We do not urge you to overpay for a well-known brand, because many good products are also in the budget category. However, you should definitely avoid buying cosmetics in passages, dubious stores and on trays in the middle of the street. The likelihood that you will be given a very low quality varnish is huge.
To paint your nails accurately, the polish must be uniform, fresh, and sufficiently liquid.
- The thick coating lays down unevenly, forming stripes
- The presence of small lumps in the varnish can ruin any manicure.
- If the varnish is expired or has lost its original appearance, feel free to throw it in the trash.
Remember that bad polish will not only leave uneven marks on your nails, but will also significantly deteriorate their condition.
Preparatory stage
Before painting your nails, you must carefully prepare their surface. Only a few people can boast of an ideal nail plate. In most cases, there are small cracks that will be clearly visible under the glossy finish. Simple manipulations will help you carefully paint your nails:
- Give your nails the desired shape using scissors and a nail file. Make sure all nails are the same length.
- Now it’s time to take care of the cuticle. We recommend steaming your hands in a warm bath with oil, and then pushing back the cuticles with an orange stick. It is better to do a trim manicure in a salon. If you don't get rid of the cuticle, the varnish will cover it and it will look terrible.
- Using a polishing block, thoroughly polish the surface of the nails.
- Degrease the surface of the nails with a soap solution or nail polish remover.
- Be sure to apply a base coat, because this is the key to an amazing manicure. The base heals nails, protects them from the effects of decorative varnishes and evens out the surface.
Don't forget to make masks for your nails to improve their health and bring them into proper shape.
How to paint nails under the cuticle with gel polish with an unedged manicure
Before painting your nails under the cuticle with gel polish, some people perform an unedged or European manicure:
- The peel is peeled back with an orange stick to reveal the “pockets.”
- The shape of the nails is corrected with a file with an abrasiveness of 180 grit, and the length is adjusted if desired.
- The side rollers are ground with the same tool.
- It is necessary to lightly walk over the surface of the plate, especially if the old coating was cut off from it.
- The file is placed edgewise and the sinuses are cleared, removing the pterygium.
- Then you need to take a ceramic file or euro-pumice and use it to process the side pockets of the nail with its edge.
- Use the flat surface of the tool to polish the cuticle.
- When it lifts, use the edge of a ceramic file to remove the layer of rough skin.
- Remove sawdust using a cloth moistened with a degreaser.
- The skin around the nail is treated with the soft side of the buff to get rid of hangnails.
- Once all the plates are finished, they are wiped down again with a degreaser, and you can proceed with the coating as usual.
This method of performing manicure is good for dry and thin cuticles, practically absent. At stage 8, you can use the orange stick again if the skin has not lifted well as a result of the previous action.
Subtleties and secrets of applying varnish
- Before painting your nails, be sure to degrease them or simply wash your hands with soap . This will extend the life of the manicure.
- To better remove the polish from the skin, first apply cream to it without touching your nails.
- The workplace for manicure should be well lit. It is very important to position your hands correctly on the table. Please note - elbows should not hang !
- Before you learn how to paint your nails, make sure that the varnish is of high quality and not old. Before use, warm the bottle in your palms and shake it.
- Start painting your nails from your little fingers. If you move in the opposite direction, you may accidentally touch the fresh coating on other fingers.
- To paint your nails at home not only correctly, but also beautifully, use our recommendation. When applying the coating, leave the edges of the nails unpainted on the sides. This little trick will help you visually make your ends longer.
- For short nails, it is better to use a polish with a liquid consistency. It will be easier for you to apply it. You can dilute thickened varnish with a special agent, but remember that after this it will quickly become unusable.
- Before painting each nail, re-dip the brush into the bottle. If suddenly the varnish is not enough, immerse it in the bottle again. However, you should not allow excess, since in this case you will not be able to paint your nails beautifully.
Gel polish flows onto the cuticle: what to do
If the gel polish flows onto the cuticle, you need to do the following:
- Take an orange stick, a flat or thin brush, and a toothpick, dip them in degreaser and wipe off the stain. The choice of tool depends on the size and location of the problem.
- If the previous option does not help, it is better to erase the coating completely and then reapply. For the procedure you will need a lint-free cloth and a degreaser.
- If a streak appears after polymerization, you can try to remove it with a pusher and an orange stick. Sometimes cuticle nippers or scissors help. But you can’t use them often; the tools quickly become dull.
- You can cut out the streak with a hardware attachment. Use a diamond cutter with a thin tip.
- If the side rollers are stained with gel polish, the polymerized product is removed with a file with an abrasiveness of 180 grit. Then you need to go over the skin with a soft buff.
Painting under the cuticle with gel polish is not easy for those who have taken courses. But with experience and the use of different techniques, choosing the appropriate one, this skill comes. And if errors occur, there are many ways to eliminate them. The main thing to do is to perform a good hygienic manicure.
Execution steps
A manicurist needs to know the structure of the nail very well and understand exactly what movements, tools and substances can damage the nail plate. If you study the anatomical structure, many questions will disappear on their own. So, at the first stage, you should understand that the area under the cuticle is very sensitive, so you should not get into it with any piercing or cutting objects. Otherwise, the integrity of the nail is damaged, and in the future the client will have problems with the evenness of the nail plate.
The correct technique looks like this:
- The client's nails are being processed. This can be done in different ways: wet and dry. Be sure to remember that you cannot apply gel polishes to wet nails, otherwise the material will peel off. Therefore, you should either reserve time or perform a dry, unedged manicure.
- The cuticle may be cut or moved. In any case, the entire pterygium underneath must be removed. Removal of pterygium is possible using cutters. Since cutters can create cuts on the nails themselves if handled incorrectly, the manicurist must undergo appropriate training in working with different types of cutters (hardware manicure courses).
- When working with nail files and cutters, it is extremely important to turn on the manicure vacuum cleaner - it instantly draws in all the dust from filed nails and cut artificial material. Pay attention to Max manicure vacuum cleaners, as well as manicure rollers and pedicure stands from this Russian manufacturer.
- After processing the nails and moving the cuticle to the base of the nail, you can apply gel polish (in the usual sequence - after the primer and base). Movements should be smooth, and the cuticle should be pulled back so that as much as possible of the free space under it is exposed for applying gel polish.
- After the first layer has dried, the second layer is applied. In this case, the gel polish is applied to the brush from above, which allows you to paint the space under the cuticle more easily. Once a smooth edge has been outlined, the gel polish can be quickly and easily spread over the rest of the nail plate.
- After drying the second layer in the lamp, you can begin to apply the top and remove the sticky layer (if necessary).
Another way to apply gel polish under the cuticle is that the master works with an almost dry brush. The movements are performed at an angle of 45°, and the cuticle is also retracted. In this case, you can avoid the most important problem - gel polish wicking. If at least part of the pigment gets on the cuticle or forms an uneven edge, it will be much more difficult to correct the mistake. Therefore, novice artists choose the method of application with an almost dry brush, and if necessary, apply 3 layers of gel polish, drying in a lamp after each application.
Pros and cons of applying gel polish under the cuticle
When performing a manicure on their own, most girls and, of course, nail technicians tend to apply gel polish under the cuticle, since the method allows:
- give your nails a more attractive look, make them visually longer and more elegant;
- Wear the design longer and it will seem fresh for at least 2-2.5 weeks;
- your nails will look beautiful and neat when they grow noticeably;
- save time and money on manicure.
It also has disadvantages:
- difficulties in implementation; not everyone immediately masters the technique even after the training course;
- the likelihood of streaks appearing, which are then difficult to correct;
- the need to perform high-quality hygienic manicure, which not everyone can do, especially at home;
- the danger of damaging the nails in the matrix area and deteriorating their appearance, causing further disease;
- the sloppy appearance of the hands as they grow back plates, if the coating was done poorly.
What should be on hand
First of all, these are sharp manicure scissors and a nail file. No woman's cosmetic bag should be without them. Try to choose a glass or plastic file; they are less damaging to your nails.
For trim manicure, metal tweezers are simply necessary. With their help, we will subsequently remove the cuticle. When purchasing, be sure to pay attention to what material they are made of. Surgical steel will remain sharp for a long time.
How to choose a tool for manicure and pedicure
We will need a metal spatula Some people use an orange stick instead.
We will also need various bath products. Which ones specifically are up to you to decide. These can be various oils, sea salt and much more. Choose nail polish remover without acetone. This way we will damage the nail plate less. You can add a little glycerin to a regular liquid containing acetone and save your nails from dehydration. Cotton pads (balls, just cotton wool) are indispensable assistants when removing polish from the nail plate and around. For more “jewelry” work, you can use cotton swabs. In stores you can easily find a special correction pencil. It's a pleasure to use.
We will also need cuticle remover, cuticle oil, hand cream, base coat and nail polish fixer.
Cuticle removal
This stage always follows the bath while the cuticle is still soft. We push back the cuticle with a metal spatula or an orange stick and begin cutting. To cut it off, use tweezers or curved nail scissors. Remove any remaining skin from the surface of the nail plate with a spatula.
In the process of moving and cutting, try to ensure that your actions are as careful as possible. Otherwise, you may damage the skin or the base of the nail.
If you decide to do an unedged manicure, you won't need scissors or tweezers. Apply a special product to the cuticle and remove it with a stick.
Trim manicure when painting nails under the cuticle with gel polish
With a trim manicure, painting nails under the cuticle with gel polish turns out to be of better quality if you follow the procedure correctly:
- First, shape your nails using a nail file. You should not file them after soaking; this will lead to delamination and weakening of the plates.
- Place your fingertips in a bath of warm water so that your nails and cuticles are completely submerged. After a few minutes, take your hand out and blot it with a napkin.
- The previous stage can be replaced by using a remover. It is applied to the cuticle and side ridges, left for the time specified in the instructions and washed with a napkin.
- Push back and lift the cuticle with an orange stick or silicone “hoof”. They also need to clean the pterygium from the surfaces using movements without strong pressure on the plate.
- It is necessary to remove the cuticle before applying gel polish using scissors or nippers designed for this purpose. If possible, it is worth pulling it up during the process so that the removed part is not pressed against the plate again.
- When all the plates have been processed, wash your hands and dry with a towel. Nails and the skin around them are treated with an antiseptic.
- The surfaces of the plates are polished with a soft buff to remove roughness. Then they are wiped with a degreaser, and the base can be applied.
Let's get to the main point
The preparatory work is over and we begin to create beauty on our hands.
First, let's apply the base. The base layer strengthens or vitaminizes the nails (depending on which one you use). In addition, it provides an even coating.
We begin to apply varnish. It's better to paint the nails of your dominant hand first. And that's why. If you are right-handed, then painting your right hand will be awkward. As a rule, in this case the layer turns out to be thick, and the color, accordingly, is more saturated. Starting with your dominant hand, you can adjust the layer thickness with your second. Thus, the manicure on both hands will not be different.
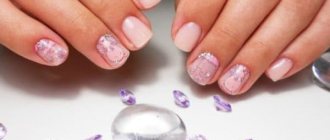
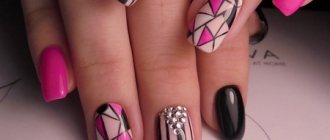
Lace manicure
Fashion trends for this type of manicure have been relevant for several seasons. If you want to create a romantic look, this nail design will be the perfect finishing detail.
- This manicure can be created with varnish and stamps, but there is another way. First you need to prepare 10 small pieces of thin lace. Their size should match the size of your nails.
- Apply a base coat of varnish – light colors work well. But to create a dramatic and fatal image, you can also use a dark shade.
- Place the prepared lace on your nail and straighten it using a toothpick.
- Apply several layers of clear varnish over the lace and wait until it dries.
Fashionable lace manicure with regular varnish
Interesting : Fashionable manicure and pedicure in the same style
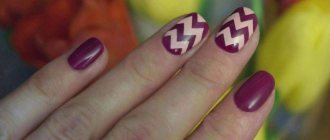
How to paint your nails fashionably without the help of a manicurist
Special occasions don't come along every day, and when they do, you probably want to look and feel your best.
Unusually colored nails (for example, a manicure for a wedding) are a great way to stand out from the crowd and emphasize that you follow the latest fashion trends.
These tips will help those who are interested in how to paint their nails in a fashionable way.
- Paint your nails the base color and let dry.
- Cut thin strips of masking tape and place an X on each nail, making sure the top and bottom centers of the X line up on each nail. Press the tape firmly onto your nails.
- Apply an accent color (contrasting or complementary) to the top and bottom of the nail. You may need two coats of varnish.
- Let the varnish dry almost, but not completely. Carefully remove the top of the tape and then the bottom.
- Apply 1 or 2 coats of clear varnish to seal and smooth out any unevenness. And voila, now you know how to paint your nails in a fashionable way! A few more days of a new manicure.
How to paint your nails beautifully and correctly
There are so many ways to do your own manicure that it’s impossible to list them all – you’re bound to miss one. However, the rules for preparing hands for the procedure and applying varnish are the same. Before you begin the process of coating the nail plate with varnish, make sure that you have gone through all the preparatory stages and the result of applying varnish will be a perfect manicure that can only be compared with salon manicure procedures.
Before opening a bottle of colored varnish, you need to remove the old coating, shape it, level the plate, remove the cuticle and finally treat the skin around it with nourishing oils:
- To remove old coating, try to choose high-quality products that do not contain acetone.
- The nails are shaped using a nail file. Everyone determines for themselves which type of this tool is more convenient to use at home.
- A nail file is also used to level the entire surface. A more convenient way is a manicure device with a special attachment, which in a matter of minutes will make the plate perfectly flat without damage.
- The cuticle needs to be removed very carefully using tongs or a special trimmer, which is often included in a manicure set.
- You need to treat the skin with vegetable oils (apricot, almond, olive) or special creams.
How to carefully apply varnish
The first thing worth noting is that before applying any type of varnish, it is necessary to cover the nail plate with a transparent base, especially for manicures for children. It will not only protect your nails from the harmful effects of the coating, but will also allow it to last much longer without chipping. To avoid having to worry about how to paint your nails evenly, there are simple step-by-step instructions for applying polish:
- Step back 3-4 mm from the base of the nail, draw a center line to the tip of the plate with a brush with varnish.
- From the same place, draw another line to the tip of the nail, but this time painting one of the sides.
- Repeat on the other side.
- Finish the procedure by drawing a horizontal line along the tip of the nail, thereby securing the polish.
- Let the coating dry on its own or use a hair dryer to speed up the process.
Gel polish
Shellac is a new way to give your nails a new look, while maintaining it for up to 1 month. The coating is so durable that you will not see chips or cracks for a long time, and the color of the gel polish will remain until the very end of wear. If you do not know how to apply shellac correctly, then the instructions above will help you, the only difference is that drying occurs under an ultraviolet lamp, the light of which causes the coating to harden in a few seconds.
Simple varnish
When purchasing nail polish, choose a quality manufacturer, otherwise you risk using paint from an unknown manufacturer. In addition, varnishes from well-known brands are easy and even to apply. You will no longer have a question about how to beautifully paint your nails. They allow you to enjoy the results of your manicure longer. Good coatings are often more harmless than their cheaper counterparts. Application brushes also have a certain shape, which contributes to a smoother and faster application.
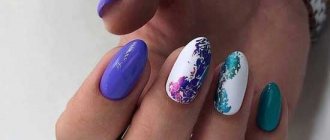
Color combination on nails
Recently, girls often choose multi-colored manicures. This trend has already firmly entered the fashion world, so the most famous brands specially produce sets of nail polishes so that you don’t have to think about which colors look best together. There are several types of combinations of varnishes that will help in the question of how to beautifully paint your nails in two colors:
- contrasting: yellow with purple, red with blue, etc.;
- monochrome: combinations of color shades, for example, pink with pale pink;
- related: similar colors, for example, blue and green, orange and red, etc.
Preparing nails before painting
In order for the varnish to last longer, and most importantly, for the hands to have a well-groomed appearance and attract attention, creating your positive image, you simply need to carefully prepare your nails for applying varnish.
Today there are many types of manicure, so everyone, even the most fastidious young lady, can choose the ideal method for herself. If we talk about salon conditions, then a competent master himself can clearly determine what type of manicure is right for you. Well, for home use, we recommend using a preparation or Japanese type of manicure. These are unedged methods, which means the technology is performed quickly, easily and safely.
If you want to know how to learn how to paint your nails, then you can’t avoid studying the theory.
Go through all stages of manicure carefully. The instructions also apply to those who have extended nails. In its simplest form it looks like this:
- Cleaned nails are given the required shape and length using a file.
- The cuticle and periungual tissue are softened using a special oil or soap bath
- Using an orange stick, the cuticle is carefully pushed back to the side ridges and base of the nail.
- The nails are polished with a special nail file.
- Apply a strengthening serum or nourishing cream to your own or extended nails.
It is very important to polish your nail plates well so that the polish lasts longer. But if you decide to do a shellac manicure on your nail extensions or your nails at home, then the process looks completely different, more on that a little later.
Why does gel polish run under the cuticle?
Gel polish flows under the cuticle for several reasons:
- The manicure was done poorly, the cut was uneven. The remaining skin particles may be difficult to see, but are revealed when a flower bed comes into contact with them.
- Primer applied too much or poorly dried. Or there is a lot of base on the nail, it lies incorrectly, “humped”, which contributes to the flow of the flower bed.
- An excessive amount of gel polish was taken. It may end up not only on the rear cushion, but also on the side ones.
- The hand on which the coating is being performed is lying incorrectly. If it is on a flat surface, or your fingers are raised up, the gel polish will inevitably stain the skin at the base of the nails.
- Incorrect hand position in the lamp. You should not lift your fingers up even a little bit, as undried gel polish may partially flow down to the cuticle.
- The base is poorly applied. The clear product is difficult to detect on the skin until it dries. But if the base is there, the gel polish will also flow.
- The flower bed has a liquid texture. Such funds spread even in small quantities.
- The work of the master is too slow. In this case, even thick products will move from the plate to the skin.
Video: how to make a beautiful manicure at home
Doing a manicure yourself is not difficult, especially when you have video tutorials from the best masters at hand, where the process is described step by step. By following all the recommendations from the video instructions, you will learn how to carefully paint your nails at the cuticle, how to beautifully paint short nails, and others. Photos of manicure options will help you quickly decide on a color or style, and you will see how to properly paint your nails in different colors. A little patience and everything will start to work out for you.
Easy manicure
Smooth and neat around the cuticle
On short nails
Beautiful painted nails
What should be on hand
First of all, these are sharp manicure scissors and a nail file. No woman's cosmetic bag should be without them. Try to choose a glass or plastic file; they are less damaging to your nails.
For trim manicure, metal tweezers are simply necessary. With their help, we will subsequently remove the cuticle. When purchasing, be sure to pay attention to what material they are made of. Surgical steel will remain sharp for a long time.
How to choose a tool for manicure and pedicure
We will need a metal spatula Some people use an orange stick instead.
We will also need various bath products. Which ones specifically are up to you to decide. These can be various oils, sea salt and much more.
Choose nail polish remover without acetone. This way we will damage the nail plate less. You can add a little glycerin to a regular liquid containing acetone and save your nails from dehydration. Cotton pads (balls, just cotton wool) are indispensable assistants when removing polish from the nail plate and around. For more “jewelry” work, you can use cotton swabs. In stores you can easily find a special correction pencil. It's a pleasure to use.
We will also need cuticle remover, cuticle oil, hand cream, base coat and nail polish fixer.
Cuticle removal
This stage always follows the bath while the cuticle is still soft. We push back the cuticle with a metal spatula or an orange stick and begin cutting. To cut it off, use tweezers or curved nail scissors. Remove any remaining skin from the surface of the nail plate with a spatula.
In the process of moving and cutting, try to ensure that your actions are as careful as possible. Otherwise, you may damage the skin or the base of the nail.
If you decide to do an unedged manicure, you won't need scissors or tweezers. Apply a special product to the cuticle and remove it with a stick.
How to protect your nails and skin when applying gel polish under the cuticle
Gel polish application under the cuticle should be performed with clean hands and nails, treated with tools and following the following precautions:
- for thin and brittle plates, it is better to use not a metal pusher, but a plastic one or an orange stick;
- perform sliding movements with the tool along the surface, rather than cutting into its depths;
- use the device only after a training course, or at least use the softest cutters possible;
- Before coating, apply protectors to the skin around the nails, which will prevent the gel polish from staining it;
- remove streaks before drying in the lamp;
- If the problem is discovered after polymerization, apply remover to the stain to soften the cuticle, then clean off the gel polish with a pusher.
And there is no need to strive to literally flood the flower garden under the skin. You should paint in such a way as not to feel pain or discomfort.
How to properly treat cuticles before gel polish
To properly treat the cuticle before gel polish, there are 2 ways:
- Hardware manicure.
First, lift the cuticle with a pusher and use it to clean the nail near the skin. You can do the same with a “short flame” router. Next, the cuticle is lifted and cut off with a cylindrical cutter. In some cases, it is better to use the classic “flame” with a red notch. - Manually.
The cuticle is pushed back with a pusher or an orange stick. Using the second tool, the pterygium is cleaned dry, working along the space of the nail near the skin. Then a remover is applied to the cuticle. It is kept for the required time, blotted with a napkin and once again cleaned with a pusher all the previously passed places.
The keratinized but soaked part of the cuticle is cut off with special scissors or nippers. Lightly go over the side rollers with a buff, removing small burrs.
Is this manicure harmful?
If all stages of the procedure are followed correctly and the nails and skin are handled carefully, a deep manicure is not dangerous. But if you put too much pressure on the plates and try to cut off as much “extra” as possible, problems may occur:
- wounds on the skin that can become infected;
- damage to the growth layer of the nail, after which the plate becomes uneven, layered, brittle, or begins to move away from the bed (this is onycholysis).
After the coating has dried and when you continue to wear the manicure, you should take care of your skin. Emollient oils and creams are applied to the cuticle daily.
Let's get to the main point
The preparatory work is over and we begin to create beauty on our hands.
First, let's apply the base. The base layer strengthens or vitaminizes the nails (depending on which one you use). In addition, it provides an even coating.
We begin to apply varnish. It's better to paint the nails of your dominant hand first. And that's why. If you are right-handed, then painting your right hand will be awkward. As a rule, in this case the layer turns out to be thick, and the color, accordingly, is more saturated. Starting with your dominant hand, you can adjust the layer thickness with your second. Thus, the manicure on both hands will not be different.
It is advisable to start painting your nails from the little finger. This way you won't smear the polish on the rest of your nails.
Finally, you must apply a sealing layer to your nails. In this case, the manicure will please you longer. And don't forget to apply cream and moisturizing cuticle oil to your hands.
Doing a classic manicure
Step-by-step instruction
Before you begin the process of applying varnish, you should consider that the girl has 40 minutes of free time, eliminate or minimize distractions, and also think through the design. In addition, you need to check the shape of the brush; it should not be narrow and dense. Instructions for creating the perfect manicure:
- Apply wax or oil to the periungual area without touching the plate. This will help you subsequently easily remove excess material from the cuticle and rollers.
- It is recommended to apply a coat of base to facilitate subsequent application of colored varnish.
- Take a brush of colored varnish and wipe it on the edge of the bottle so that very little varnish remains on it, literally on the tip. This way it won't bleed onto the skin.
- We paint our nails with regular polish, starting with the little finger. You should place a drop in the center of the plate, then carefully “adjust” the varnish with a brush to the base.
- Then, with slow movements, holding the brush confidently, you need to apply the varnish to the side surfaces of the plate. Thus, the varnish does not flow onto the cuticle.
- You need to complete the manipulations with the brush by sealing the end of the nail. Thanks to this, the varnish will last longer.
- Apply another coat of varnish to deepen the color.
- When performing movements, the elbow should rest on the table and the hand on which we are applying the varnish should also lie on the table; you should not apply the varnish while holding your hand suspended.
- Apply a quick-drying top coat.
This item is optional, but it will extend the wear time of the coating and make the manicure perfectly glossy. On the left is a top coat applied to the nail, on the right is a nail without topcoat. Finished manicure with regular varnish.
How to apply gel polish under the cuticle: step-by-step technology
The step-by-step technology for applying gel polish under the cuticle is as follows:
- After drying the base, the peel is pushed back again with an orange stick.
- Then you need to position the light correctly so that it falls on the space under the cuticle.
- The finger is positioned so that the free edge of the nail is below the base.
- Apply a minimum of varnish to the brush and place it on the plate close to the cuticle.
- Then you need to go down 1-2 mm.
- Using pushing movements of the brush, the material is sent closer to the cuticle and under it.
- The tool is led down to the end.
- Then they return to the base of the nail, but place the brush slightly diagonally, fluff the pile with pressure on the surface, and paint the next strip along the side roller.
- The same is done on the other side of the plate.
- Then add more material to the brush and paint the nail to create a dense shade using long strokes from the base down.
- After drying, cover with a second layer of flower bed following the same steps as the first.
To apply gel polish evenly at the cuticle, you should use your finger to pull the skin away from the nail at stages 6, 8 and 9.
Working with a separate brush
To simplify the process, you can use a thin “hair” brush designed for making drawings:
- First, a flower bed is applied along the center line and side ridges with a tool from a bottle. This is done as close to the cuticle as possible.
- Apply gel polish onto a hair brush so that part of the bristles near the applicator remains clean.
- Pull the cuticle away from the nail with your finger and use short strokes to paint the remaining light stripe on the base and at the side ridges.
- Then use a brush from the bottle to coat the surface again.
- After drying, a second layer of the flower bed is applied, but without using the “hair”.
You should work with a thin brush in literally dotted strokes. Otherwise, instead of covering, she will make bald spots, pushing the already applied flower bed away from the surface.
The first thing you can do is paint the space under the cuticle with a thin brush and dry this layer. And only then apply the flower garden to the rest of the nail with a regular tool from the bottle.
Tactile method of subcuticular application
Subcuticular application of gel polish is possible in another way:
- Most of the material is removed from the bottle brush by wiping it on the edges of the container.
- The instrument is placed 2-3 mm from the cuticle, slightly moved down, then pushed up as far as possible.
- The nail is painted in the center to the end and sealed.
- Turning the pile slightly, apply gel polish to the sides of the plate.
- Wring out the brush again.
- The skin is pulled away from the nail and held.
- Place the brush with the edge of the bristles towards the sinus and fluff it up strongly.
- The lateral villi move along the cuticle, painting the space.
- Using the same sides of the brush, apply the product close to the side rollers, also alternately pulling the skin away from the plate.
- Then another layer of gel polish is applied over the wet one and dried.
The second time they paint without fluffing the brush.
Watch the video on how to properly apply gel polish under the cuticle:
Secrets of applying close to the cuticle
Good masters know the secrets of applying close to the cuticle, which can also help when doing a manicure yourself:
- High-quality nail preparation is necessary. The excess part of the cuticle should be trimmed evenly, and the pterygium should be thoroughly cleaned. If tiny fragments of skin remain on the plate, streaking is inevitable.
- When doing a trim manicure, you should cut the cuticle with a continuous strip, not in pieces. Only in this way will the remaining part be smooth, and therefore the border of the gel polish will be neat. But for this you need to have good scissors or nippers and work with them correctly.
- Move back the cuticle after drying the base, before the first application of the flower bed. This is done using an orange stick on each finger immediately before using the material, and not on all of them at once.
- Set the light correctly. Its source should be located below the master’s face, and the radiation should fall on the area under the cuticle, but not on top of it.
- Choose high-quality bases, gel polishes and tops. They usually have a thick consistency, spread less, and it is easier to avoid coating defects.
- Even when performing a manicure yourself, keep the hand on which it is being done with your fingertips pointing down. This will prevent the varnish from spontaneously spreading onto the cuticle.
- Have support for the arm in which the brush is located, even when applying the coating to yourself. It is better to place your elbow on the table. And rest your little finger on the palm of your other hand or on a stand.