Home page » Beauty » Nails
Author of the article
Svetlana Pavlikhina
Reading time: 5 minutes
AA
Rubber coating is a new direction in creating manicures. The varnish is durable and resistant, allowing you to quickly restore the surface of the nail plate.
General information
Rubber nail gels are products consisting of elastic natural material. This base has a thick, dense consistency; when applied, it has a preventive effect, strengthening the nails, preventing brittleness and splitting.
The coating does not form cracks, does not chip and lasts up to 4 weeks.
The active components in the gels protect the plates from damage, allow you to grow your own nails under a layer of shellac, and enhance the tint characteristics of colored gel polish.
A rubber base for manicure differs from a universal base or top. Dense gels require careful preparation of the plate before application and compliance with all necessary recommendations.
Advantages
Advantages of an elastic base for shellac compared to other coatings:
- Creates a durable layer that is not damaged, cracks and chips do not form on it.
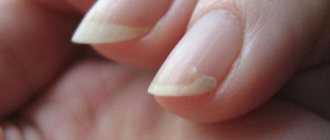
- Strengthens nails, preventing them from splitting and brittleness.
- Allows you to create a coating of any thickness due to its elastic consistency.
- Forms a smooth and stable surface. Due to the elastic fibers, gel polish fits well even on thin and damaged nails.
The benefit of rubber products is their durability.
Flaws
Rubber gel also has disadvantages:
- Due to the dense material, bubbles and swelling sometimes appear on the surface of the plate when dried in the lamp.
- After air enters the package, the gel thickens, and the material then does not fit well on the nail plate. A base that is not completely screwed in may become unusable.
- Gels must be applied with careful, precise movements, otherwise bumps and streaks will appear on the surface of the plate.
The main feature of elastic manicure bases is the obligatory sticky layer after applying the gel . This principle allows the layers of shellac to be firmly bonded.
The disadvantages of rubber products are minor, but for a high-quality result you need to have experience in applying such products.
The difference between a rubber base and a regular one
The base coat is necessary for tight adhesion of the layers of gel polish and top coat. Without it, the manicure will not last long and will be fragile. There are several types of foundations, each of them has features and disadvantages.
Rubber products have become popular in recent years. Manicurists prefer to work with just such coatings.
The elastic base differs from conventional products in the following qualities:
- The dense texture of the rubber gel allows you to create any nail shape and fix the thickness of the surface. Conventional bases have a more liquid consistency and do not have similar properties.
- The rubber base fits tightly onto the surface and does not spread, facilitating the process of creating a manicure.
- Gels with rubber contain active substances that protect the coating from staining, abrasions and cracks.
- Rubber provides dense coverage, while traditional bases apply in a thin layer.
- Rubber manicure products have a preventive effect, strengthening the surface of the nail; simple ones do not have this property.
- Products dry faster in a lamp - up to 1 minute. It takes about 5 minutes for a regular base to harden.
Gels with elastic components allow you to wear a manicure for up to 1 month without damaging the nail plate.
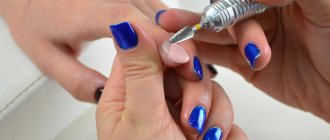
How to apply rubber base
I talked about the intricacies of applying and distributing a base with rubber above. And here I would like to talk about the preliminary manipulations to prepare the nail plate for gel polish coating.
They can be divided into stages:
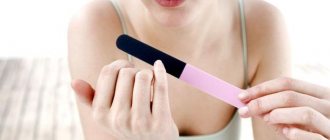
- Using a file, we even out the shape and length of the nails.
- Soften, push back and remove the cuticle.
- We remove the natural shine from nails using a polisher,
- We use a degreaser or disinfectant.
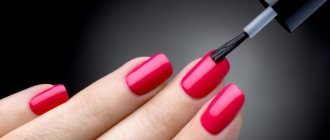
- Apply the base for gel polish.
Well, then the nails are usually covered with gel polish, if desired, a drawing is made and covered with a top coat.
Next, I propose to consider all this in practice using the example of several rubber bases I have: UNO, In'garden and Premiere.
Kinds
There are two types of rubber products, which are suitable for different nail conditions. They are selected after examining the hands.
Leveling base
The base helps to give the nail a certain shape; it is able to level the surface of the stratum corneum.
This base hides unevenness, cracks, and creases. Its distinctive feature is its thick, dense consistency, forming a thick layer on the surface of the nail.
Leveling bases are suitable for brittle and damaged nails.
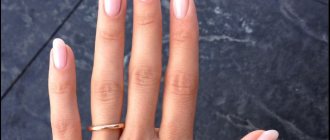
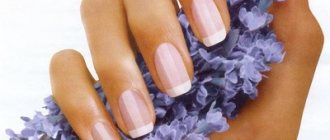
Colored
The product has a barely noticeable pinkish tint and is used primarily to create a French manicure. The colored base is not durable or dense, so it stays on your hands for no more than a week.
Features of the application technique
Liquid rubber can be applied at home. There are recommendations that must be followed, otherwise the coating will be uneven and bubbles will appear.
How to do a manicure correctly:
- Before applying the gel, it is recommended to carefully prepare your hands and hold them in a special soap bath, then treat the cuticles and give your nails the desired shape.
- The surface of the nail must be degreased with a special product to better secure the base. If you don’t have a specialized product at hand, nail polish remover will do.
- After the plate is processed and filed, an acid primer is applied to its surface.
- You can start with the rubber gel. Correct application is based on the application of two layers: the first thin, the second dense and leveling. It should be smooth, without cracks or streaks. To avoid unevenness, you need to turn your hand palm up and hold it in this position for 5-7 seconds.
- Treated hands are placed in an LED lamp for 50 seconds. After drying, degreasing is not necessary; you can immediately proceed to colored gel polish.
In an ultraviolet lamp, the gel polish dries a little longer - about 2 minutes.
The base is also used to strengthen nails. To do this, it is applied in several layers to the nail plate, dried and degreased.
Rubber is also used for nail extensions. This technique makes the coating durable.
Recommendations from professionals: how to remove gel polish correctly
Aggressive manicure can permanently damage the integrity of the surface of the nail plates and even lead to the appearance of unwanted relief, so before removing gel polish at home, it is better to familiarize yourself with the following useful recommendations:
- If the gel polish coating peels off prematurely, you must contact a specialist. It is strictly forbidden to remove the elastic polymer layer from the nails piece by piece, since thanks to the adhesive bond with the natural nail, the natural top layer of the nail will also be removed. This will lead to weakening, splitting and brittleness of the natural nail plate.
- It is better to remove gel polish with nail polish remover one at a time, starting with the finger that was first wrapped in foil. It is better to unfold each finger as you go, so that while you are processing one nail, the rest do not interact with the air.
- The safest tool for removing softened polymer material is orange sticks. They delicately remove the remaining layer from the nail without damaging the nail plate.
- If the gel polish was applied in several thin layers, 20 minutes in gel polish remover may not be enough to completely dissolve the polymer coating layer. Then you can use a steel pusher to remove particularly dense areas of the coating; it is better to remove the rest with orange sticks.
- It is not recommended to soak your fingers in the remover liquid to avoid the aggressive effect of the product on the skin of your hands, especially if you have sensitive thin skin.
- After removing the gel polish, it is necessary to lubricate the nails and the skin around them with nourishing cuticle oil to restore the water-fat balance and avoid dehydration of the nail plate.
How to remove shellac
The main advantage of a rubber base is the ability to be easily removed. This coating is bonded with other means and removed in one piece. Beginners often have questions about how to remove shellac.
To do this, you need to use a solvent and follow the instructions:
- Cut off the top layer using a hard file.
- Apply shellac dissolving agent to a cotton pad, apply tightly to the gel surface, repeat the action with all fingers.
- Hold for 1 minute, wrap the areas of the fingers with the disks in foil.
- Wait 20 minutes, remove the coating using an orange stick.
When removing shellac, it is necessary to perform actions on each finger in turn: due to the entry of air, the gel polish can harden again and become dense.
To remove the coating, you need to use sticks or a file that can easily pry off the shellac.
How to remove gel polish with foil
When removing gel polish, the main advantage of foil is the comfort and convenience of the client, since it does not pinch the fingers.
However, if you decide to remove gel polish yourself at home, then by wrapping each finger in foil, you may not wrap the napkin soaked in removing liquid tightly enough on your finger and the vacuum environment will be disrupted. Previously, foil was more often used in professional beauty salons by experienced craftsmen. Today, many manufacturers offer foil in the form of special envelopes that can be easily and quickly attached to your fingers, even with one hand. Step-by-step instructions for removing gel polish with foil:
- We carefully saw through the top glossy layer of the coating with a hard nail file (from 180 Grit).
- Apply a lint-free cloth soaked in gel polish remover to the surface of the nail.
- Wrap your fingers tightly in special foil for 20 minutes, creating maximum interaction between the surface of the coating and the gel polish remover.
- Use orange sticks (pusher) to remove remaining areas of the gel polish coating from the nails.
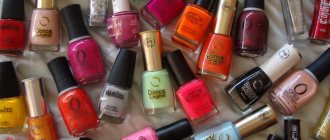
Popular means
Based on the results of surveys, a rating of the most popular rubber products was compiled.
Kodi
Kodi tops and bases are popular products for creating manicures. Regular users note the strength of the base, durability, and gentle effect on the nail plate.
The manufacturer took care of the packaging of the gel and made it durable and protected it from air.
This approach allows you to keep the product in a usable form for longer.
The Kodi base does not sag and has a thick consistency that allows you to smooth the surface of the nail.
The disadvantages of the product include the rather complicated process of removing the coating. Due to its dense consistency, shellac is difficult to dissolve.
Uno
Uno gels have a thinner consistency and can be removed using solvents. You can use the base on brittle, damaged nails; the product provides a durable and long-lasting coating.
TNL
The base and top from TNL have a medium density consistency. These products allow you to level the nail plate and protect it from brittleness .
TNL products have a specific smell and dry in a lamp for about 2 minutes.
Rubber base In'Garden Ideal Nails
You won’t find the words “rubber” on the bottle; it simply says “leveling.”
I have a large 30 ml jar. I do not recommend using the material directly from such a jar; it is better to pour it into an empty one: if you frequently open and wipe the brush on its edges, the base will accumulate there, the lid will begin to open poorly and bubbles will appear in the base. In addition, the lid itself springs back and tends to slam shut, which is inconvenient to use. This volume is, of course, an economical option, but it is worth considering these subtleties.
As for the base itself, it is a little thinner than UNO, but it also holds a drop well and is applied thinly. But, again, I couldn’t evaluate her original brush; I used an ordinary flat one.
This is how the base shines after drying in a lamp: