Why does the top coat swell after application and what to do about it
Bubble formation can accompany any stage of the nail coating procedure. The pros and cons of Max Factor lipsticks are revealed here.
Let's summarize the probable reasons why nail polish bubbles after application:
- Insufficient or insufficient nail preparation. Before coating with gel polish, the nail plate needs careful preparation: sanding with a buff or nail file, and treatment with a degreaser.
- Coating with a thick layer has a lot of negative consequences, including bubbles. To avoid their appearance, the varnish should be applied in a thin layer in 2-3 passes. When applying, the brush should be pressed tightly against the nail; after application, carefully hold the manicure with gel polish under the lamp for the required time.
- Improper storage of manicure materials. Store bottles of varnish away from sunlight and heat. After coating, screw the lids on tightly.
- Expired product expiration date.
- Hard brush.
- Incorrect mixing of varnish. Do not shake the bottle of product with vertical movements, as this promotes the accumulation of air inside. It is better to rub the bottle between your palms and warm it slightly in warm water.
- Moisture gets into the bottle.
A premium product at an affordable price – Pupa lipstick.
Poor quality treatment of the nail leads to its bumpiness and roughness, and violations in the treatment with dihydrate (degreaser) lead to subsequent deformation of the coating.
How to avoid bubbles in gel polishes?
How should you apply bases, top coats and gel polishes to avoid bubbles? Here are the basic rules for selecting and using gel coatings:
- Try to avoid using bases, color coatings and topcoats from different manufacturers. Incompatibility of base/color/top binders from different manufacturers can lead to problems such as bubbles, cracks, and detachments.
- When removing the brush from the bottle, do not wipe the brush on the neck of the bottle. Try to remove excess gel polish on the inside of the neck, minimally deforming the bristles of the brush. You can use a third-party flat brush to apply the coatings.
- Store bottles upright to prevent brush exposure during storage.
- You need to apply the rubber top slowly with the brush, going through each area once, without changing the direction of the brush bristles.
- When removing and inserting the brush into the bottle, you need to make sure that air does not get between the hairs of the brush. This is especially true for a new bottle, when it is full, and when immersed, the brush rests on thick material and can fluff up.
- Do not shake or shake bottles with gel polishes, bases, and top coats. When shaking, bubbles may form, which then come out very slowly.
- If bubbles have already formed on the coating applied to the nail, and you noticed them before drying in the lamp, then you can drive them out with a thin brush (for example, for painting) to the free edge of the nail.
- If there are already air bubbles in the base, top, or color coating, then you can put the closed bottle in warm water no higher than 38 degrees for 10 - 15 minutes. The consistency of the material should become thinner, which promotes the release of bubbles.
Do you have a proven way to combat bubbles in gel polishes?
After drying
It happens that the coating procedure is not accompanied by the appearance of bubbles, but they form during drying. This article will tell you whether it is possible to anoint your hair with sunflower oil.
What is the reason for this and why does nail polish bubble after drying:
- Exposure to water and household chemicals. Shortly after the manicure there was contact with cold water and cleaning products. Hand washing and wet cleaning are prohibited for 1 hour after the varnish has completely dried. Otherwise, the manicure will be ruined.
- Exposure to hot air. A strong stream of hot air (for example, when using a hairdryer) can penetrate into under-dried deep layers, thereby causing blistering.
A proven remedy for shine and healthy curls is fir oil for hair.
To avoid troubles with manicure, you need to use base and varnish from the same line of cosmetics, or (at a minimum) purchase products from the same manufacturer.
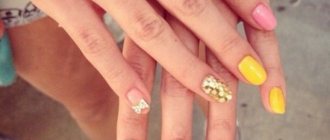
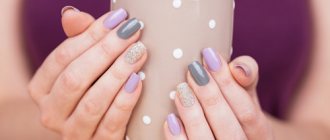
Tips and tricks for manicure
An independent manicure procedure requires compliance with some rules that modern professionals adhere to.
Such tips help make the cosmetic procedure much easier, as well as ensure an elegant and successful result.
Important ! You need to do a manicure once a week. This is exactly the period of time that a high-quality varnish can withstand.
Let's look at the basic tips and tricks that allow you to create a spectacular manicure at home:
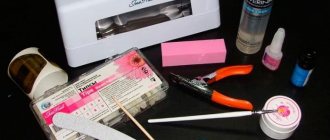
| Correct selection of tools | For good nail decoration you will need not only special varnishes, but also a nail file, scissors, tweezers, cotton pads, bath products and emollients. |
| Technique of the procedure | Consists of several stages: bath, cuticle removal, nail plate correction, application of coloring composition |
| Correct coloring | To ensure that the polish applies evenly, before each application of it to the nail, dip the brush into the bottle. |
| Correction during the procedure | It is necessary to have a cotton swab on hand so that in case of accidental contact with the skin, quickly eliminate the defect |
Do not forget that when applying nail polish there should be no hangnails or ingrown elements. This greatly complicates the work and contributes to poor-quality manicure.
Useful video
Share this post
- Related Posts
- How to grow long eyelashes, create visually thick ones with mascara, as well as warnings and tips
- Coffee scrub for body and face at home
- Using castor oil for eyelashes and eyebrows
- How to paint your nails according to Feng Shui to attract love, wealth and luck
- Lightening hair with chamomile at home
- Makeup for a red and burgundy dress
After drying
Mistakes in a manicure performed at home can be attributed to a lack of professionalism. Moreover, a gel polish kit with a lamp can be stored in unsuitable conditions, due to which the products have become unusable.
- Air bubbles can form after drying the gel in a lamp, which is due to the use of materials of different densities, for example, from different manufacturers of cosmetics. The base and top product from different brands may react with each other.
- Conventional varnish can bubble if its storage conditions are not followed, which leads to thickening, drying out and other metamorphoses of this product. Before coating, you should wipe the neck of the bottle, removing dried fragments of the composition from it.
Nail polish corrector EssenceThis material will help you learn about the advantages and disadvantages of Mary Kay lipsticks.
The reasons why nail polish bubbles during forced drying carried out in a salon should be sought in the quality of the materials used.
The varnish is not shaken up and down, but rolled in the palms. Before a manicure, you can warm it up under running warm water.
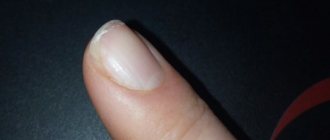
Reasons for the formation of defects
Why does gel polish swell after drying or during drying? The phenomenon can be triggered by:
- Using a lamp with insufficient power. Devices that emit ultraviolet radiation become such lamps if the bulbs in them are not changed for a long time. The power of the device is not enough to dry the overly pigmented coating, and it will soon swell.
- Poor degreasing of the plate. To prevent the polish from swelling the next day, it is not recommended to apply a softening or caring cream to your nails.
- Incorrect placement of the finger under the lamp. Most often, thumbs are affected when nail salon clients try to dry their entire hand under a lamp.
- Violation of plate degreasing technology. Inexperienced and novice nail technicians may not properly degrease the nail surface.
- Gel polish is too pigmented. A coating containing too many colored pigments does not have time to dry in the usual 1-3 minutes.
- Poor quality of materials used. If one of the substances involved in the process of manicure with gel polish is expired or low-grade, it is pointless to expect a reliable and long-lasting result.
Poor quality gel polish
Why can gel polish bubble on nails?
Defects of this kind may appear suddenly the next day after coating. To avoid them, you need not only to trust the procedure to professionals, or to carefully monitor the quality and freshness of materials if the manicure is carried out independently. Why gel polish on nails cracks is described in detail here.
For the longevity of an ideal manicure, you need to use a fixer. It’s very disappointing if you’ve just learned how to do ombre on your nails, and such a chic manicure starts to bubble.
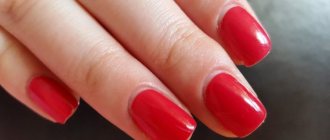
Gel polish bubbles after application
There is another problem when air bubbles appear after the coating has dried in the lamp. There are other reasons here:
- The gel polish is applied too thickly. At the same time, it can not just bubble, but shrink, especially in an LED lamp, where everything dries quickly. Bubbles may burst during the drying process and holes may form. In this case, there is only one solution - file away all the irregularities and try to correct the situation with a new layer. Leaving a coating with bubbles is not only not aesthetically pleasing, it will not last long on the nails due to the defect.
- If the gel polish bakes in a lamp and you remove your hand in the first seconds of drying, this can also lead to bubbles. This does not mean that you need to endure - under no circumstances! Here you need to find out why it bakes. Usually the main reason is the same - too thick a layer of gel polish.
- On the base layer, bubbles may appear after drying due to insufficient preparation of the nails for coating, namely poor degreasing of the surface. If your nails are prone to oiliness, then it is better to add a layer of primer in addition to the usual degreasing agent.
- If natural nails have unevenness, then it is necessary to level them first, otherwise the formation of blisters is also possible.
- Neglecting the drying time of layers can come back to haunt you in the form of bubbles on the coating. It is better to dry highly pigmented colors, dark shades, and compositions with impurities a little longer.
- Small fibers that you did not notice before drying can also lead to the formation of air under the coating.
- There is an opinion that incompatibility of the base and top coat with colored gel polish can lead to bubbling if you use materials from different brands. I very often use different combinations of tops and bases with flowers, but I have never seen this before. Perhaps this is just a rare exception, so I won’t rule it out as a reason.
Write if the problem is relevant to you and how you struggled or are struggling with it. I hope I was able to help you deal with the bubbles and they won’t bother you in the future!
Is it possible to remove bubbles?
To neutralize bubbles, you can use special means. A familiar brand, decent quality - Maybelline lipstick.
Available, very popular and with many positive reviews options:
- Avon, Smudge Nail Polish Corrector. Contains a strong solvent, helps to even out the coating, smoothing out blisters.
- ProStrong, ProFix Smudge Corrector.
Avon, Smudge Nail Polish Corrector, cost – 320 rubles.
The action of these products is to dissolve the top layer of varnish, then self-level the coating and harden it. There is room to embody any image - the L'Oreal Color Riche lipstick palette.
Air bubbles can be removed with special cosmetic unevenness correctors.
Insufficient lamp power
Today, online shopping is very common, and many craftsmen have discovered the vastness of Chinese online stores. Manufacturers from the Middle Kingdom never tire of delighting our compatriots with manicure products at affordable prices. Lamps with a power of 3-9 watts have gained unprecedented popularity due to their cost - in the range of 100-1500 rubles.
This is a great solution for travel or in case of a power outage. But such a baby cannot compete with a full-fledged lamp. It is especially important to understand this for those who plan to work on the stream.
This power may not be enough to fully dry some materials. And although reviews often contain beliefs that low-power lamps dry even gel perfectly, this can hardly be taken seriously. Manufacturers of materials for gel modeling categorically deny this information. But you can only find out whether a low-power lamp can handle gel polish, base and top coat by experimenting. It dries some materials well, others not, even with a threefold increase in time. And you can find out that the polymerization was unsuccessful immediately by discovering that the gel polish is bubbling after drying. The reason for the failure is that the lamp power is simply not enough.
How to avoid the problem
To make your manicure more durable, just follow these simple recommendations:
- Store varnishes in a dark, not hot place. Before use, warm it in your palms and warm it in warm water for a while. Remove dried fragments from the necks of the bottles.
- Monitor the expiration date of products. It is a spoiled product that can cause harm from gel nail polish.
- Use products from the same manufacturer for coverage.
- Apply in layers, pressing the brush firmly onto the nail. Give each new layer time to dry.
- Apply the coating to clean, prepared, dried and grease-free nails.
- Use a fixative.
Maybelline Color Sensation lipstick has a special attitude towards texture and color.
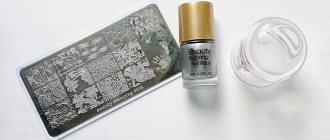
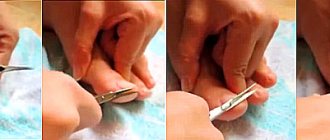
Step-by-step application of gel polish.
What to do about it
If defects appear, but there is neither time, nor desire, nor energy for redoing, then I advise you to use proven life hacks:
- Cover it with rhinestones, beads or stickers and pretend that it was intended that way.
- Apply a relief design.
- Stock up on concealer for such cases. They dissolve the top layer without damaging the base.
- Place the bottle in warm water and stir with a brush.
- Open the lid slightly without removing the brush and let it sit for an hour in a secluded place without light. Then mix, close and twirl in your hands.
- Puncture a large bubble before drying.
- Try to push small defects to the edge with a brush.
- Sand the surface with a special file.
The main thing is not to get lost and not be afraid to show your imagination! The result will be an amazing manicure with patterns and rhinestones.