Gel nail extension technology at home
You can apply artificial material to your nails at any nail salon. But this can also be done at home. This is especially easy to do for those who have the necessary practical knowledge, a set of materials and tools:
- a special lamp (usually drying with uv radiation so that the polymer hardens);
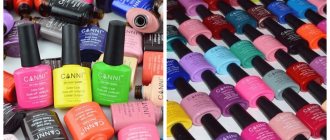
- gel (the type is selected individually; single-phase, two- or three-phase can be used);
- tools (a basic manicure set or a router with the necessary attachments when choosing a hardware type of manicure, buffs, nail file, etc.).
Using the gel extension procedure, you can achieve nails of any length. You can decorate them with any designs (there is much more room for creativity than on your own nails). Extended nails (if necessary) can be easily coated with any regular varnish. Removing the varnish is as easy as applying it, but the original design will not be damaged.
It is easy for a manicurist to navigate among the materials and choose exactly what is needed in a particular case. How to work with it is also not a problem for a professional. But if the gel is chosen for home use, then all stages of extension must be taken into account in order to obtain a high-quality result.
- Preparation. Here, good preparation of the nail for the subsequent coating is necessary: the cuticle, hangnails and rough skin are removed. The top layer of the nail is sanded to remove the pterygium. Part of the free edge of the nail is cut off so that no more than 1 mm remains. This can be omitted if the gel is applied to strengthen it on a natural nail. Then an antiseptic is applied, and after it dries completely (a couple of seconds), a thin layer of primer is applied.
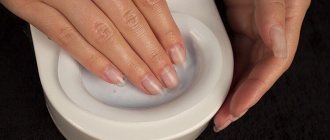
- Coating. Having chosen the shape or base for the nail, apply the gel in layers with a brush. The first stage is a thin layer of base gel, then it is well baked (this is basic and important for gel nails to last a long time). The second stage is a thick layer of sculpting gel (it is necessary to give the nail plate the planned shape and thickness). This layer must be thoroughly dried so that there is no possibility of deformation during further work. Remove the sticky layer (a popular method at home is the usual nail polish remover).
- Modeling. At this stage, artificial nails begin to take on a more aesthetic appearance. Nails acquire the originally intended shape using a file or a special cutter. Excess material is cut off, requiring careful control of the length and shape of the nails, thickness and the presence of an apex (“mound”).
- Design and completion of work. This stage is more creative in nature than technological. A variety of materials are used: painting, appliqués, inlay with stones, etc. After completing the work, apply protective gel and remove its dispersion layer.
Result of extension
When growing your nails at home, you should pay attention to the quality of drying each layer of gel so that the final result is not disappointing. Also, do not apply the coating too close to the nail bed, so as not to injure it during the coating and modeling process.
And here is the video of the master class:
Gel extension technology
You can grow your nails in two ways: with a form or with tips.
- The shape is a kind of template with transverse lines, using them to conveniently determine the length of the future nail. It can be attached to the nail plate or under it. Using this template you can give your nails any shape. For good fixation, it is better to use material with wide ears.
- Tips are plastic plates that are glued to the nail plate with special glue. For each finger you need to individually select a tip according to shape and size. The width of the edge of the plate should correspond to the width of the nail, and the inner notch should coincide with the free edge.
Types of gels
You can get beautiful nails if you choose a high-quality coating material and use it correctly. Nails are extended according to the same pattern both in beauty salons and at home. The main thing is not to skip any of the stages.
Among artificial coatings, you can choose those that injure the nail plate and those that restore. They also differ in the duration of the extension.
Single phase
A beautiful manicure without additional bottles and jars is possible if you extend your nails with single-phase gel. It has the properties of both a base and modeling layer, and a finishing (top) layer. Single-phase products allow beginners not to worry about the sequence of applying layers, but to fully engage in nail modeling and design.
In order for artificial nails to have a decent appearance when using single-phase gel, you need to know some tricks and not neglect them. To form an attractive “hump” on the nail (apex), at the formation stage you need to turn your finger over with the nail down. This is necessary so that a certain amount of liquid gel accumulates in one place, and the apex area has a convex shape. The result can be recorded by exposing the gel to an ultraviolet lamp.
Two-phase
The procedure and technique for extensions with this gel does not change at all. Only the number of required bottles is added: now you need two of them. One product serves as a base, and the second as a sculptor and top layer.
Two-phase gels are more reliable and durable to wear, but have the disadvantage that the protective function must be performed by the sculpting gel. It is applied in a very thin layer for the third layer - the “finish”. He often fails to cope with his duties, and a beautiful long nail simply bursts lengthwise.
Since the consistency of the two products is different, for two-phase extensions you need to have two brushes.
Three-phase
This type of extension is considered professional and the most durable. Three special tools are used here that have a specific purpose.
- The first product, the base, is applied to the nail surface prepared in advance. It is this that will firmly “adhere” the natural surface of the nail plate with the artificial coating.
- After drying, the sculptor is applied. This layer can be either transparent or colored gel. It is thick enough to slowly create the intended shape of the nail.
- Having gone through a complex procedure of nail formation and design, everything is eventually covered with a special product, which preserves an excellent manicure. It protects against everyday “provocateurs”: detergents, hard objects, impacts on a hard surface, etc.
Natural nails are coated with three different products, which is why the gel is called three-phase. The advantage of such gel nails is durability, but there is also a drawback - during the removal procedure and subsequent extension, the nail plate becomes thinner.
It is difficult to remove such nails on your own without special tools at hand. It is difficult to file extended nails with three-phase gel due to their high strength, and “tearing” them off the nail is completely prohibited.
Gel polish application technique
1. Remove the natural gloss from nails using a buff. This will improve the adhesion of the material to the natural nail.
2. Degrease the nails with a lint-free cloth soaked in a special liquid.
3. Apply a thin layer of primer to the entire surface of the nail plate and wait until it dries in the air (about 1 minute).
4. Apply the base and dry in a UV (LED) lamp for 30-60 seconds.
5. If necessary, use a second layer of base to level the nail plate. It is convenient to use a rubber base for this. Before drying it, the nail must be turned over for literally 30 seconds to self-level.
6. Apply the color coating in two thin layers. Dry each layer in a lamp for 30-60 seconds. If the gel polish is highly pigmented, applies evenly and without bald spots, you can apply it in one layer.
7. The desired design can be made on top of the color coating.
8. We cover the nails with a finishing topcoat and also polymerize it in a lamp.
9. Remove the sticky layer, if there is one on your top.
10. Apply nourishing oil to the cuticle area and rub it in with massaging movements.
Gel polish manicure is ready. After the procedure, prolonged contact with water is not recommended for two to three hours. Correction should be carried out when the coating becomes unpresentable or the nail grows too long. The most optimal time is three weeks.
Extension methods
Beautiful, well-groomed nails bring joy to their owner and are a source of pride to others. But among the people who admire aesthetic manicure, no one even realizes the efforts of a good master to achieve it. It happens that the nail is not suitable for applying any gels on top of it. Then tips come to the rescue, which are glued to the nail with special glue.
On tips
Although this method of extension is no longer considered a popular technology, it is used for self-extension. This is convenient, since there is no need to use sticker forms, and the shape of the nail is almost ready and will only need a slight correction. Tips are also used in the following cases:
- the nail plate is wide and short;
- the surface of the nail is severely depleted and cannot be re-extended;
- there is an allergic reaction to the gel (then tips are selected that completely cover the nail from the nail bed itself).
In order for the nail to end up looking attractive, you need to choose the right material for extensions: the tips should best suit the width of the nail and the shape features (flat, convex). It is also better to choose a color that is close to natural.
The procedure for applying the gel has its own characteristics if you use tips as a base instead of your own nail, but many stages are the same. Any type of gel can be used.
- Trim your nails, do a hardware manicure, after removing the cuticle - degrease, glue the tip to a certain notch on it.
- Form it as intended using a cutter (type cutter). To create a durable manicure, clean the surface of the tip with a nail file or cutter until it is rough. Treat the nail with a buff.
- Further, the extension technology does not differ from that inherent in one or another type of gel.
- After growing your nails, use cuticle oil and hand cream.
Any colored varnish can be applied over these nails. And it will last much longer than on your natural ones.
Using natural plates
This method of extension is one of the most successful in terms of manicure quality. The principle of this extension is to take your own nail as a basis and give it greater strength. In such cases, it is popular to use biogel. It ensures the health of natural nails, with its help you can create a fashionable manicure, and it also gives your nails a shine that is close to natural.
Biogel is recommended for use by those with fragile and depleted nails, as well as those who are afraid of spoiling their loved ones. Strengthening nails with biogel is a popular procedure among those who want to minimize trauma to the nail plate and at the same time have the goal of getting a wonderful manicure. The only downside of this gel is that it does not extend nails longer than 5 mm.
In very rare cases, two-phase and three-phase gel coatings are used, but they are not relevant for preserving the natural nail, as they destroy its structure. If biogel is used, it acts on the nail like a single-phase gel: it acts as a base. So is the top (finish).
Form extension (top and bottom stencils)
Shaped extensions are difficult for a beginner: we recommend that you first practice with type extensions, and, with the experience gained, switch to shaped extensions. The sequence of actions is described below:
- The beginning of mold extensions is no different from type extensions: disinfect your hands, remove shine from natural nails, degrease them.
- Apply the base coat , then cure it in a lamp for 180 seconds.
- Place the stencil on your nail. With the top extension, it is fixed on the nail, with the bottom extension, under the nail, respectively.
- Apply the gel composition from the tip of the free edge: make sure that the composition is distributed evenly. Dry.
- If you are extending onto lower shapes, form an S curve when reapplying the gel. Dry. With upper forms, this point can be skipped.
- Remove the sticky layer from the surface of the nails and remove the template.
- Sand the surface until the slightest imperfections are removed. Remove dust.
- Apply the finishing coat, dry for 2-3 minutes in a lamp.
- Degrease the finished result and rub nourishing oil into the cuticle.
Video instructions will help you better understand the extension process.
The article reveals in as much detail as possible the nuances of nail extensions, exposing all the pitfalls and difficulties. If you are ready to learn, are not afraid of mistakes and can survive a bad result without being disappointed, you should definitely try yourself as a professional hair extension specialist. We hope that the article on how to extend nails with gel at home was useful, and the step-by-step instructions improved your understanding of the process.
Advantages and disadvantages of gel nail extensions
Although extended nails look very attractive and provide an opportunity to elevate your manicure, they also have many disadvantages. The first of them is the restoration of nails after extensions. A fairly thin nail plate is reluctant to accept the effects of special extension gels. This makes the recovery course last longer than wearing artificial nails.
- Toxicity . Many ladies do not realize that they absorb many toxic substances along with the nail coating material. Although modern products try to enrich with a minimum of toxins, they still exist and are absorbed into the body through thin nail plates.
- Permanence of correction . Nature always takes its toll, even after extensions. Your nails will still grow. That is, constant corrective procedures will be needed, since proper care of artificial turf will not ensure a presentable appearance all the time.
- Burning sensation when building up . This uncomfortable moment during extensions is quite possible if low-quality material is used or the first layer of gel is applied in a very thick layer.
- Removing extended gel nails is not easy . This requires long-term cutting of material and a reserve of patience. Simply tearing off the coating is a dangerous action, which entails an unpresentable appearance of the nail and its unsuitability for future extensions.
- If you apply colored varnishes over a gel nail , they will look very unnatural.
In any case, when creating artificial nails it is very difficult to replicate the structure of natural ones. But even many negative facts about extensions do not make this procedure less popular.
Proper care of artificial nails
It would seem that, well, it has grown, the problems with constant nail care have been solved. But that was not the case. A careless attitude towards your gel nails can not only ruin the overall impression of a manicure, but also doom the owner to constant additional procedures.
- On the day when you decide to extend your nails, it is not recommended to use nourishing fatty creams. They can ruin the effect and create a large furrow between the cuticle area and the artificial turf.
- If the nail was already affected by a fungal infection before extensions, you should not expect long-term results. The nail will simply reject the artificial coating and aggravate the situation with the disease
- It is not recommended to extend nails if the period coincides with menstrual periods, lactation or pregnancy.
- You should not expect long-lasting manicure if daily chores include cleaning, hand washing, frequent ironing, washing, etc. daily.
If one of the nails is damaged (chips, cracks), full extensions are required. Correction in such cases is impossible.
Photo results
Different extension methods used give a priori different effects. But there are general aspects: the higher quality the material, the better the extension result. The experience of the master, the use of special brushes and good drying under ultraviolet rays will definitely give the expected result.
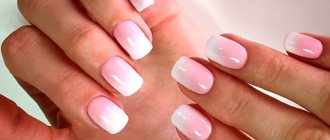
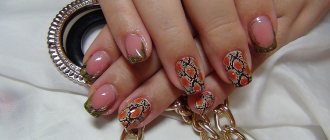
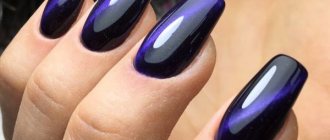
Photos of different nail shapes after extensions:
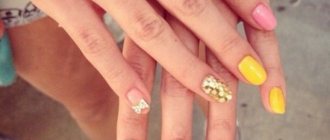
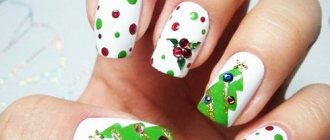
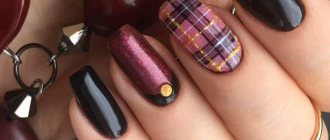
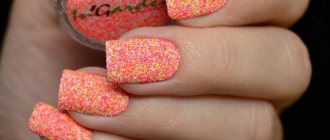
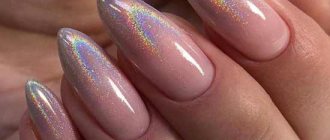
Nail designs after extensions using various techniques: rubbing, painting, foil, stone inlay, French, sculpting:
Fashionable design options for extended nails:
Interesting on the topic:
- How to make liquid stones on nails?
- What is needed for acrylic extensions?
- Step-by-step instructions for correcting gel nails with video