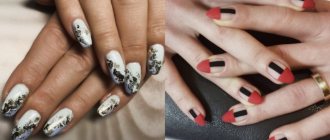
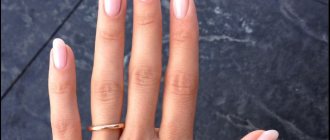
Long, well-groomed nails are a wonderful attribute of a beautiful and feminine look. Unfortunately, not every girl can grow her natural nails to the desired length, but sometimes you want it that way! It's good that there are nail extensions. This procedure requires accuracy, but at the same time anyone can learn how to do extensions. You can create a gorgeous manicure with long, flawlessly shaped nails at home. Are you ready to gain new knowledge and save on trips to the salon? In this article we will tell you how to make your nails longer at home and what materials you will need.
There are several ways to build up. You can lengthen your nails using acrylic, fiberglass in combination with other materials, or extend them onto forms or tips; in this case, gel is usually used. The last method is one of the simplest and most popular. This is what we will talk about today.
The choice of material depends on your individual characteristics and preferences. Both forms and types have their own advantages and disadvantages. Let's take a closer look at them.
Form extensions
Extension forms are stencils with markings and a window. The markings allow you to calculate the appropriate length and width of the nail. The templates are applied to natural nails, covered with gel and hardened. Unlike tips, the forms are removed at the end of the procedure, so the nails are less thick.
Forms are disposable and reusable. Disposable forms are also called soft forms and are made from paper or flexible plastic. The advantage of these forms is that they are very pliable and easily take the desired shape. On the other hand, they may become wrinkled during the procedure.
Reusable molds are made of metal or hard plastic. They are more expensive, but quickly recoup their cost. The convenience of these forms is that they do not deform during operation, gel does not leak through them, and they eliminate gaps. If you choose the most suitable shapes for each nail, you will not have any problems. It is important to remember that reusable forms must be disinfected before each use.
What is needed, besides shapes, to create a chic length?
Materials for extension onto forms
To apply nail extensions to forms, we will need the following set:
- Antiseptic is an indispensable item for any beauty procedures.
- Remover or other product to soften/remove the cuticle. You can also simply make a hand bath.
- Pusher or orange stick to push back the cuticle and pterygium.
- Nail scissors and tweezers to cut cuticles and side ridges.
- Files and buffs with varying degrees of abrasiveness for shaping and polishing nail plates, both natural and artificial.
- Brush for removing nail dust.
- Dehydrator for degreasing natural keratin and removing the sticky layer from gel polish.
- Primer to improve the adhesion of natural nails to artificial material.
- Gel coatings - base and top.
- Modeling gel for creating artificial nails.
- Brushes for applying gel.
- Colored or camouflage gel polish for creating a design, optional decorative elements.
- Lint-free wipes for removing the sticky layer and degreasing the nail plate.
- UF lamp.
Attention!
Nail modeling gel polymerizes only under the influence of UF radiation; an LED lamp is not suitable for extensions. You can use an LED lamp to design your nails with gel polishes.
At first glance, it seems that you need a lot of materials, but most of them are universal and, if you love manicure and do it yourself, they will be useful for other purposes.
Important!
You can't do without antiseptic! Remember to disinfect. Untreated nails, hands and tools are a risk for fungal infections. Medical alcohol, chlorhexidine or lotion with an antibacterial effect are suitable as an antiseptic.
So, we have everything you need for nail extensions on forms. It's time to figure out how to do this.
Extension on forms. Step-by-step instruction
Stage 1
Any beauty procedure begins with disinfection. We treat our hands and nails with an antiseptic.
Stage 2
We perform a manicure, trim the cuticle and remove the pterygium. We file the free edge, then use a buff to remove the gloss from the surface of the nail plate. Using a brush, remove nail dust.
Stage 3
Degrease your nails using a dehydrator. We apply a primer for better adhesion of the material to the plate.
Stage 4
Cover the nail with a very thin layer of base coat. Dry in a UF lamp for at least 2-3 minutes (depending on power).
Stage 5
This is the most important step, where you need to show skill and maximum accuracy. The final result depends on the installation of the forms. We install the forms using a metal plate and tubes to press the “arch”.
If you are completely new to extensions, we recommend using solid forms. When working with them, you just need to choose the right size and carefully adjust them to each nail.
If you are working with soft forms, first adjust the window to the size of the subungual arch. Make sure there are no gaps, otherwise the gel will leak into the holes, and this will be noticeable during regrowth.
What if you get very soft shapes? In this case, we recommend gluing the two forms together so that they are denser and do not wrinkle.
Important!
Extend your nails into shapes using the following pattern: 4 nails on one hand, then 4 nails on the other hand, then thumbs. If this is your first time doing this, the best option would be to work on each finger individually.
Stage 6
We form an artificial nail using modeling gel.
How to apply the gel? To do everything correctly, we divide the nail into 3 zones:
- cuticle zone (⅓ of the natural nail from its base);
- stress zone (if you press on the tip of the nail, part of the plate will turn white - this is the stress zone, it bears the main load);
- free edge (this is the remaining part of the form).
Next, we proceed to the direct application of the gel:
- Base layer .
Apply a thin layer of gel to the cuticle area, thickening it slightly where it approaches the stress area. Dry for 30 seconds. - Base layer. In the stress zone, we thicken the layer of gel, especially in the place of transition from natural to artificial nails - here we apply the gel very thickly. Dry for 3 minutes, if necessary, adjust with a buff and nail file.
- Final layer .
We form the future free edge of the nail with a thin layer. Dry in a UF lamp for at least 2-3 minutes. If stickiness remains after drying, you can remove the top film using a remover that does not contain acetone.
Stage 7
Now we remove the sticky layer so that the dispersion does not prevent us from adjusting the surface of the plate and the free edge. Next we remove the forms. We grind the resulting nail so that the surface is as smooth as possible, and correct the shape of the free edge. Usually, dispersion is needed for materials to adhere, but in our case, the materials will be fixed by grinding the surface.
Stage 8
Apply camouflage gel or colored gel polish in 2-3 layers (depending on the density of the pigment). Dry each layer in a UF lamp.
Stage 9
We decorate the nails in accordance with the chosen design, adding decorative elements if desired.
Stage 10
Apply top coat and cure. Preferably twice as long as in the previous stages.
Stage 11
Remove the sticky layer. We treat the cuticle and periungual ridges with oil.
Techniques that can help you grow your nails at home
There are only two techniques for gel extensions at home; they depend on the chosen device with which the artificial plate is shaped. Below we will look at each of them in more detail.
Preparatory stage
Regardless of what technique you choose to create the perfect gel manicure, you need to prepare your nail plates. Preparation includes a classic manicure:
- hand treatment with antiseptic;
- pushing back the cuticle with a spatula or orange stick;
- tidying up the side rollers.
Next comes the direct preparation of the stratum corneum for the modeling material.
- Your own nail is cut as short as possible. Its surface is cleaned (the top shiny layer is removed) with a bafo or a file with an abrasiveness of 180 grit. Dust is removed with a pre-prepared brush.
- The surface is processed:
- disinfectant to eliminate all bacteria and germs;
- a dehydrator, which dries and also thoroughly cleanses of possible contaminants. It is the basis for reliable bonding of the artificial coating to the nail;
- primer (degreaser), which is used to dehydrate the natural nail. It has the ability to prevent cracking and peeling of plates;
- Bonder is a kind of glue with a gel structure that serves as a bond between the natural nail plate and the artificial material. It is applied after establishing the tips or forms.
Having completed the preparation, you can begin to perform extensions.
How to extend nails at home with gel using extension forms?
Forms for extensions are a kind of paper pattern that helps to create identical plates individually for each nail. In order to build on tips, you need to perform the following steps:
- Attach the paper structure to your finger. Its edge is glued under the prepared nail.
- When the extension form is secured, you need to take a little building material from the jar with a brush and form the first layer of artificial turf. Particular attention is paid to the upper part that you form. There are markings on the forms that will help give all the nails on your hand the desired length.
- You can adjust the plate using tweezers, but before you put your fingers into the ultraviolet device. Since it is impossible to make drastic changes after the gel hardens.
- Having given the desired appearance and a certain length, dry the applied layer for 30–60 seconds under a lamp.
- Apply a layer of modeling coating again. Use it to smooth out possible unevenness and depressions. This layer dries for 3 minutes.
- Next, the sticky layer is removed from the surface. Carefully remove the paper pattern.
- Using a 100–120 grit abrasive file, you need to smooth out all the unevenness on the surface of the artificial turf, giving it a natural look.
- The last step will be to decorate the surface in the style of your choice.
How to extend nails using gel tips at home?
What are tips? Tips are plates that become the basis of the extended nail. They are glued to the top of your own nail plate. Extending nails at home using tips is quite simple, and the instructions below will help you cope with the process quickly.
- Initially, we select the types for each nail individually. Give them the same shape. At home, this can be done using a nail file.
- Apply glue to the prepared nail and glue the tip. It is pressed well, as the surfaces should stick together.
- In cases with tips, the first layer is applied to your own nail plate; a modeling coating is not applied to the tips. Let this layer dry for 30–60 seconds.
- The second gel coating is done along the entire length. Let it dry for 3 minutes.
- Use a degreaser to remove the sticky layer.
- As in the case of using molds, a 100–120 grit abrasive file smoothes out unevenness on the surface of the artificial turf.
- The surface can be decorated.
Now that you know how to grow your nails at home, you can show off the perfect manicure, and the need to find a specialist and visit salons disappears by itself.
Types of gels for nail extensions
Before considering the types of gels, we note that the extension can be single-phase, two-phase or three-phase.
- Single-phase thin coating. Contains three layers and has a liquid consistency. Great for beginners.
- Three-phase material. On the contrary, it is used by professionals. Includes base, sculpting and protective layers.
- Camouflage polymer. Used to hide imperfections of the nail plate.
- Gel chewing gum. Similar to plasticine, it is used to lengthen its own plate, as well as to create a colored stained glass manicure.
The result depends on the quality of the material, so approach this issue responsibly. The choice of extension gels is very wide.
How to prepare nails for extensions
First you need to do a hygienic manicure: remove the cuticle and clean the pterygium - a thin skin film that grows as the second layer of the cuticle.
Treat the area with remover, wait a few minutes, and carefully push back the cuticle with an orange stick or pusher.
Shorten all nails to the same length, about 2-3 mm. There is no need to shape the free edge, just slightly round it with a nail file. Then buff the entire surface of the nail, removing the gloss.
Pay special attention to the sides and the area around the cuticle. This will make the surface rougher, and the material will be able to adhere to it better.
Finally, brush off any nail dust with a brush.
Extensions with tips
Tips are plastic false nails that are glued onto natural nails. They can be transparent, white or colored and are selected individually for each nail.
Tips are ideal for short, narrow or irregularly shaped nails. Tip extensions can also be performed in one, two or three phases.
To make your manicure look truly natural and aesthetically pleasing, you need to choose the right tips.
How to choose suitable tips?
Here are some recommendations for wisely choosing tips:
• The plastic from which the tips are made must be elastic and thin. • The size should correspond as much as possible to the size of natural nails. • For convex and flat nails you need to choose special tips. • For uneven, wavy nails, it is recommended to use a gel adhesive that fills in the unevenness.
You can buy tips using our website with delivery throughout Russia.
Materials for extensions onto tips.
For extensions using this technique you will need the following materials:
- cuticle softener;
- orange stick or pusher;
- nail file or buff;
- the tips themselves;
- type cutter;
- glue for tips;
- lint-free wipes;
- UF lamp;
- modeling gel;
- brush for treating nails after filing;
- tassels;
- liquid to remove sticky layer;
- primer;
- degreaser;
- cuticle oil.
Extension with tips. Step-by-step instruction
Stage 1
We prepare the workplace, disinfect hands, tools, materials and surfaces. To make it more convenient to work, you can select tips and immediately arrange them in the order of gluing on each nail. Tips should not exceed 2/3 of the natural nail. The excess must be carefully cut off. You cannot glue tips that are narrower than the nail. It is better to choose the one that is wider and carefully file it to the size of the nail.
Stage 2
We perform a manicure, trim the cuticle and carefully remove the pterygium. If pieces of skin remain, this may cause the gel to peel off. We cut off the free part of the nail to 0.5 millimeters and process it with a file. Use a buff or file to remove the glossy surface from the nail plate. Clean it with a brush.
Stage 3
Apply glue to the tip up to the step line, which is applied to the edge of the nail. To improve adhesion, you can apply glue to the area where it joins the tip. Apply the tip to the middle of the nail at a slight angle and press the rest of the nail. The line of the step should coincide with the edge of the nail. For gluing, hold for 15 seconds. If you find bubbles between the tip and the nail, try to squeeze them out or re-glue the tips.
Stage 4
Using a tip cutter, we remove the excess length, giving the nail the desired shape. Using files with large cells, we file the tips for leveling. Using a buff or the same file, we treat the surface of the tips for better adhesion to the gel. We pay special attention to the junction of the tip and your nail. Using a file, we clean this place as thinly as possible so that the transition is invisible. Remove dust from nails and finger skin with a brush. We treat the nails with a degreasing solution, apply a primer and polymerize.
Stage 5
Let's start working with the gel. Apply the first thin layer. Be sure to retreat about a millimeter from the cuticle and side ridges. Dry in a UF lamp for 2-3 minutes. Apply a thicker layer to the middle of the nail, gradually reducing it towards the sides. Dry at this stage for at least 3 minutes! If you experience discomfort from heating your nail, you can take a break and then continue drying. When interrupting drying, turn the nail down so that the unformed layer of gel does not spread. After drying, remove the sticky layer.
Stage 6
Now we give our nails the final shape. Using a file or buff, we process the surface of the nail, removing any unevenness in the arch. We clean the sides and the area of the nail near the cuticle, reducing the coating to nothing as much as possible. We file the tips of the nails so that they are as thin as natural nails. We process irregularities on the free edge. We wipe off the dust with a brush.
Stage 7
We're almost done! Apply the final coat so that it lays on the nail in a thin, even layer. This time we also cover the places left earlier along the side ridges and cuticle. Dry in a UF lamp. Some manufacturers produce a topcoat that does not have a sticky layer. If there is such a layer, then it must be removed.
Nails are ready! We treat the cuticle with special oil.
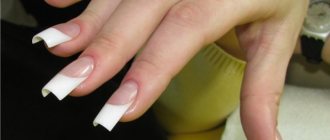
Tip extensions are also used to create a beautiful French manicure. A tip is attached to the base of the nail with glue, then gel is applied to the artificial material. The gel nail is dried in a UF lamp. Depending on your wishes, a smile is painted on top of the gel, or between layers. Beauty!
What you need for nail extensions
Here is a basic list of materials and tools that will be useful for any type of extension:
- Buff;
- File for natural nails (180-240 grit);
- File for artificial nails (100-180 grit);
- Pusher;
- Brush for brushing away nail dust;
- Degreasing liquid;
- Lint-free wipes;
- Set of brushes.
To apply nail extensions you will need: a buffer, a file for natural nails, a file for artificial nails, a pusher, a brush for brushing away nail dust, a degreasing liquid, lint-free wipes, a set of brushes.
Forms or tips – which is better?
Both types and forms have their advantages and disadvantages. First of all, it is worth taking into account individual characteristics. Tips are recommended for those who have short, narrow or irregularly shaped nails. And for nails that grow downwards and bend, shapes are more suitable.
Tips are easier to use and easier to handle at home. But the shapes look thinner and more natural.
In addition, forms have several other advantages:
- they do not cover the main part of the plate, so the natural nail has access to oxygen;
- extensions on forms strengthen brittle tips on short nails;
- with this method of extension, correction can be performed without the need to completely remove the extended layer;
- The cured gel polish perfectly complements the natural nail without any obvious transition.
Whatever you choose, in any case, when adding extensions, you need to take care of your nails and make corrections regularly.
What is the difference between acrylic and gel? What to choose for use at home?
Considering the two main materials from which plates can be made, it should be noted that the difference between them is small. The main options include solidification:
- acrylic hardens after the powder is mixed with the monomer;
- Helium material is purchased in liquid form and hardens under the influence of ultraviolet radiation.
Acrylic hardens instantly, and the gel, although it has a very thick consistency, requires additional exposure to an ultraviolet lamp. It is precisely because of the possibility of a lengthy adjustment process that a gel is often chosen for use at home.
The positive features of acrylic include the ability to achieve clear lines. As for the gel, it is much more difficult to do this using it. But acrylic belongs to a number of toxic elements. It is not advisable to use it at home. Even in specialized institutions, the procedure is allowed only if the room is equipped with a powerful hood.
How to make an aquarium nail design: manicure step by step
Now let’s look at the technique of how to make nail extensions with an aquarium design. The process consists of several steps:
- STEP ONE: preparing the nails - for this, the remaining coating is removed from the nails, the nail itself is treated with an antiseptic and degreaser. Next, the nails are filed, then the master treats the cuticle area, removing the keratinized layer of the epidermis. At this point, the preparatory stage is over and you can safely begin building up.
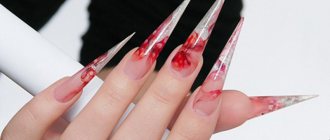
- STEP TWO: direct nail extension. To do this, the master applies a base layer of gel or acrylic. On it, a composition is created using a wide variety of techniques and accessories: flat acrylic modeling or three-dimensional, applications with foil, threads, lace, piercings, rhinestones, sparkles - the imagination is limitless and depends only on the master.
- STEP THREE: the final stage, when the drawing is covered with a finishing layer. This is what creates the glass effect.
Extending nails with an aquarium design is a rather complex technique that requires some skill, so it is better to entrust it to a specialist. And the more experience the master has, the more complex images he will be able to apply, and the more beautiful the masterpieces at your fingertips will be.


