Issues discussed in the material:
- What is gel nail extension?
- What types of gel extensions exist?
- What is the difference between types and shapes of extensions?
- What is silk extensions?
- Which is better: acrylic or gel coating?
- How to grow your nails yourself?
- What is the procedure for nail extension and correction?
Manicure is an important element that can complete a woman’s look. Salons offer different types of this service, and clients have to choose: get nail extensions with gel polish or the classic version. To do this, it is important to understand the types of coverage, know the differences and all the pros and cons of each of them.
Nail extensions with gel polish - what is it like?
One of the options offered by salons is today’s fashionable nail extensions with gel polish. The procedure itself is very simple, takes little time, is also absolutely painless and allows you to create a very beautiful manicure. This type of gel polish extension can last about a month on average. The marigolds have a very natural appearance, and the materials do not harm health.
Gel polish extensions are perfect for women with weak and brittle nails, as well as those whose nails are not very beautifully shaped. This procedure can be done continuously for 10–12 months. Then you need to let your nails rest for a couple of months. With regular correction, the gel will help you grow your own nails to the desired length, as well as strengthen them.
Extensions with gel polish have many advantages, thanks to which the procedure is in demand among women:
- artificially elongated nails look natural;
- gel polish perfectly hides the imperfections of your own nail plate;
- large selection of design types;
- the coating is durable and can be worn for a long time;
- no need to renew your polish every 2-3 days.
But this procedure also has a number of disadvantages that are important to know about:
- takes on average 2 hours;
- the cost of the service is quite high;
- worsens the condition of natural nail plates;
- you will need regular caring procedures to restore your nails;
- It is advisable to perform correction every 2-3 weeks so that the manicure looks neat;
- To remove gel polish, you need the help of a specialist.
The duration of the procedure depends on the experience of the extension specialist. A beginner and inexperienced specialist can spend up to 5 hours on this, while an experienced master can do it in 2–2.5 hours. Naturally, the time increases if you have chosen a complex design.
On average, the lower limit of cost fluctuates around 1,000 rubles, and the upper limit is approximately 4,000 rubles. But it should be borne in mind that a low price may also indicate a low qualification of the master.
Training on how to create a manicure and apply gel polish through video tutorials
Visual perception plays a very important role in our daily lives, helping in learning and making it possible to convey important information quickly and clearly. First we look, then we process what we see and in a matter of minutes we understand what needs to be done.
In the modern world, most women perceive visual information much better than huge canvases with many letters. Therefore, I suggest you watch a few video tutorials on how to create a manicure with gel polish . I tried to make for you a selection of the most useful video materials, which at one time helped me a lot in becoming a professional in the field of creating gel polish manicure.
Videos for beginners
Video tutorial No. 1 “Full review: starter kit for gel polish. Part 1"
Video tutorial No. 2 “Full review: starter kit for gel polish. Part 2"
Video lesson No. 3 “Removing the old coating and making a new one”
Video tutorial No. 4 “Gel polish manicure at home with a detailed discussion of all sorts of subtleties”
Video tutorial No. 5 “How to apply/remove gel polish”
Video master class from professional cosmetologists
Video No. 1 “Step-by-step instructions for applying gel polish”
Video No. 2 “Three effective ways to remove gel polish”
Video No. 3 “Removing gel polish with a cutter + hardware manicure. Part 1"
Video No. 4 “Complicated repair, extension and straightening of nails. Part 2"
Video No. 5 “Gel polish correction. Combined manicure for beginners with one cutter. Part 1"
Video No. 6 “Applying gel polish under the cuticle: leveling + strengthening + highlights. Part 2"
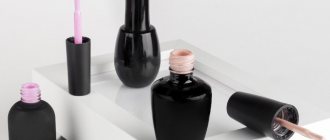
Materials and tools for nail extensions
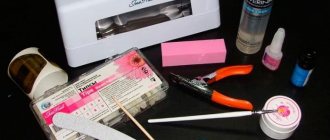
The necessary tools for nail extensions under gel polish are shown in the photo. These are brushes, tips, buffs for polishing, an ultraviolet lamp, containers for mixing materials, tweezers, manicure scissors, wipes for removing the sticky layer.
You will also need degreasing and antiseptic liquids, moisturizing cuticle oil, primer, base and top coat, and colored gel polishes.
Types of gels for nail extensions + lamp
There are different types of gels that are used depending on what type of extension you have chosen:
- Basic colorless gel - provides good adhesion of the material to the surface of the nail plate, used in three-phase extensions.
- Sculpting gel - also used in the three-phase method in the second stage. Serves to form the nail.
- Camouflage gel - gives a natural look to the coating. With its help it is good to do French nails, your nails look like real ones.
- Finishing gel - used to add gloss, serves to consolidate the result.
- Gel chewing gum is a new type of material used to artificially increase length. The extended nail is formed from the middle of the natural nail plate, and it hardens on its own after 2 minutes, so the use of an ultraviolet lamp is not necessary at all.
The simplest type of extension is using a single-phase gel, so this option is recommended for beginners. Single-phase gel performs all the functions of other gels used in three-phase extensions. It adheres the material to the nail plate, helps to form a new nail, and also gives it strength. The process goes like this: the nail is degreased, gel is applied and dried. It is possible to apply a second layer if the result is too transparent or the coating has streaked. But this is optional.
In three-phase extensions, three different gels are used: adhesion to surfaces, modeling and giving strength. Each product is applied separately and must be dried at each individual stage.
Biogel is the latest breathable material made on the basis of resins. Thanks to its natural composition and the vitamins and minerals it contains, it nourishes the natural nail and has a beneficial effect on its condition. The material is very soft and flexible, and can be removed using a special liquid without cutting. The biogel extension process itself looks like this:
- The nails are degreased, shaped, the surface of the nail is polished, and the cuticle is pushed back.
- Next, apply primer and bonder and dry.
- Special shapes are attached to the fingers.
- Biogel is applied to the mold, then the coating is dried under an ultraviolet lamp.
- Cover with a second layer and dry again.
- At the end, the nails are polished with buffs and a finishing gel is applied.
As for the lamps used in the process, their main characteristic is power, since the drying time of the gel polish directly depends on this. It is recommended to choose lamps with a power of 36 W. This will not only significantly speed up the procedure, but also improve the quality of work. Try not to skimp on equipment. A not very expensive kit may include a 9 W lamp, but this is very little to do a really good job.
In addition to power, attention should also be paid to the material of the case. If you often work on the road, it is recommended to purchase a lamp with a metal body. This will protect the device from damage and scratches.
Technology of applying gel polish to extended nails
It is not advisable to steam your nails; it is better to apply a special cuticle remover and push back or trim the cuticles.
- Use a special file for extended nails to file the free edge.
- Artificial nails do not need to be coated with primer, but degreasing the nail plate is essential.
- Some people recommend using a base. It is needed so that the gel polish adheres to the surface of the extended nails. When applied to natural nails, a base coat is necessary: it protects against negative effects and ensures adhesion of the layers. Covering artificial nails with a base is not critical.
Note! Extended nail plates must be impeccably smooth - only then will the gel polish look presentable. It is recommended to polish the surface of the nails before applying base.
- The base must be dried under a UV lamp for two minutes.
- Apply the first layer of gel polish without streaking to the side ridges and cuticle, sealing the free edge, and then polymerize. If a streak has formed, it can be removed with an orange stick (before drying in the lamp). Sealing is necessary to make nails aesthetically pleasing by hiding their thickness.
- If necessary, apply the thinnest possible second layer of gel polish and also dry.
Cover your nails with the finishing topcoat and place under the lamp for two minutes. Which top is better to use? There are two options:
- finishing top with a sticky layer for gel polish - will provide a high-quality coating without chips;
- finishing top with a sticky layer for hard gels (for extended nails) - perfect for such a coating and will last until correction.
A finish without a sticky layer will not work, as it will not preserve the integrity of the gel polish on artificial nails.
- Dry the top under the lamp.
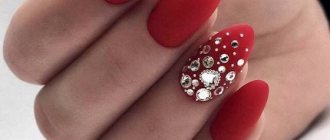
- If desired, make the design with rhinestones. Without removing the sticky layer, apply a single-phase transparent gel to the coating in the places where the rhinestones will be located. Place the rhinestones and outline with a thin brush with gel. If the rhinestones are small, you can apply them directly to the top before drying.
- Dry in a UV lamp.
- Remove the dispersion layer.
- Care for extended nails with gel polish
Girls, chasing fashion and practicality, sometimes forget that under layers of gel, real nails suffer from a lack of useful components and oxygen. On damaged nail plates, no extended nails or gel polishes will stick firmly and look aesthetically pleasing, which means that care is necessary.
Firstly, it is necessary to exclude any mechanical impact on the artificial nail plate. Simply put, stop mercilessly using your nails as a household tool. Gel is a very fragile material, which in case of unexpected destruction can ruin the natural nail.
For at least a couple of days after applying gel polish, it is recommended to do housework with gloves.
Secondly, making nail baths is not advisable, but rubbing valuable oils and vitamins into the cuticle is what you need. The nutrition of nails comes from the cuticle, which means that all useful components must get there.
Nail extensions with gel polish at home and correction
Many women do not go to salons, but perform the procedure on their own. In this case, it is important to follow the following rules:
- It is not recommended to use hand cream on the day of extensions, as it can penetrate into the pores and remain there. In this case, even if a degreasing liquid is used, the quality of the coating may suffer.
- It is imperative to pay attention to the treatment of the cuticle, this will prevent its premature regrowth, and the manicure will retain its neat appearance for a longer period.
- Before the procedure, you should take into account that medications such as hormones and antibiotics can affect the quality of adhesion of the gel to the surface of the nail plate. Also, the adhesion of the material may deteriorate during the menstrual cycle.
- The procedure should not be performed on sick, peeling nails, or if there is fungus. First they need to be completely cured.
- Make corrections in a timely manner, as long breaks in procedures negatively affect the condition of the nails.
On average, the wearing time for extended nails is from 2 to 5 weeks. This depends on the individual characteristics of the body, external factors and, of course, the quality of materials. As natural nails grow, which becomes noticeable after an average of 3 weeks, corrections need to be made. It is much easier to do than re-extending your nails. The following can be said in favor of the correction:
- the procedure saves your time;
- she can help you grow your own nails to the desired length;
- During the correction process, gel polish remover, which has harmful properties, is not used.
Thus, you don’t have to repeat the extension procedure, but perform corrections periodically. It is carried out as follows:
- At the beginning, as always, they do a manicure. The master removes the cuticle, files and shapes the nails.
- The shiny coating of the gel polish is removed using a buff, and the irregularities are sanded down.
- The nail is degreased and a primer is applied.
- Next, you need to hide the nail that has grown along the base using a base coat, which is applied to the entire surface of the plate.
- The base is dried under an ultraviolet lamp and the dispersion layer is removed with a special cloth.
- Then they paint it twice with colored gel polish, paying attention to the regrown edge.
- At the end, the finishing gel is applied and the coating is dried again in the lamp, the dispersion layer is removed.
Instructions for extensions using tips
Progress:
- Treat hands with antiseptic.
- The cuticle is being processed. It is moved or removed.
- The nail plate is sawed off under the tip hole.
- Using smooth movements, file down the shiny layer of the nail to a matte shade.
- Use a special wide brush to sweep away dust from the nails.
- Tips are selected. They should be the size of each nail plate.
- Using glue, the tips are attached to the nail.
- Using 2 files, press the tips to the nail plate and cut them to the desired length.
- Using a buff, the surface of the tips is polished.
- Degrease the surface.
- Apply gel polish, and periodically turn your hand over to even out the layer.
- Nails are polymerized.
- Apply a second layer of varnish and dry in a lamp.
- Remove the sticky layer.
- Use a file to level the top layer of varnish.
- Remove dust and apply a finishing coat.
IMPORTANT TO KNOW: Stiletto nail design 2021: photos of beautiful options, new ideas for manicure
How to restore nails after extensions
During the extension process and after removing the gel coating, the nail plates are damaged due to constant filing and exposure to chemical compounds. Here are a few simple rules to follow to restore their condition after the procedure:
- Only wear gloves when cleaning and washing dishes.
- Rub Vaseline into your nails regularly. You can lubricate them with iodine at night.
- Take vitamins.
- Eat and drink more dairy products.
- For some time you will have to give your nails a break from the extension procedure.
Many women prefer nail extensions with gel under polish, because this is the safest way to create a beautiful and neat manicure. The coating is durable, strengthens nails and allows them to breathe. Many representatives of the fair sex like that gel polish lasts at least 2-3 weeks, so they don’t have to think about updating it regularly. Women also say that the procedure helps to grow their nails to the desired length and make them more neat. Moreover, extensions are very simple to perform, and you can easily do it yourself at home.
Anna Klyuchko's network of eyelash extension studios is the largest in Russia.
Our experts already have 301 cups, including 74 victories in international eyelash extension tournaments. Such achievements cannot be called an accident or explained by simple luck, because:
- We are the largest eyelash extension chain in Russia. We have performed more than 50 thousand procedures.
- The main asset of the company is our craftsmen. Specialists are allowed to work only after passing a complex multi-stage exam.
- The extension is carried out taking into account the individual characteristics of each client.
- We use only the best materials from South Korea, proven by many years of experience.
- We want as many women and girls as possible to be able to create an attractive look using eyelash extensions. Therefore, it is important for us to provide a professional level procedure at affordable prices.
Nail treatments at Anna Klyuchko's salon
Extension methods
It's a rare girl who has naturally strong and beautiful nails. In most cases, they peel off, break, and at the same time it is not possible to grow them to the desired length. That is why the question arises: is it possible to grow nails and how exactly to do it?
Let's look at two methods of nail extensions. The first is how to extend nails using special overlays called tips. Their reliability depends on their quality, which can be checked by bending them in half. If there is no groove left, then the quality is perfect.
This method lengthens the nails, but it has both positive and negative sides.
The advantages include:
- very fast application;
- Ideal for brittle and peeling nails;
- acrylic and gel are used for extensions;
- Suitable for large size nail plates.
Disadvantages include:
- have a certain shape;
- not suitable for nail plates that widen towards the top;
- They don’t look natural with a thick layer of gel.
IMPORTANT TO KNOW: How to properly do a manicure at home: step-by-step technique for performing the procedure
The second method is to use forms for nail extensions on which gel polish is applied. Forms can be used either once or several times.
Advantages:
- nails are obtained in any shape and length, equivalent to real nail plates;
- strong enough, they cannot be broken;
- suitable for any nail plate and improve its shape.
Flaws:
- the procedure takes a long time;
- Only professionals in this field can do high-quality nail extensions.