Just 10 years ago, women had to cover their nails with colored varnish every 3-5 days, but today, thanks to gel polish, they have the opportunity to apply color coating once every 2-3 weeks, which significantly saves time.
What is gel polish? What other advantages are there? Is it possible to apply and remove it at home? Or do you have to go to a manicurist? Let's figure it out.
What is gel polish? What is good about gel nail polish?
Gel polish is a hybrid of regular nail polish and extension gel, which is why it has that name. The material combines the best qualities of both coatings: color and durability for up to 2-3 weeks.
It applies to the nail plate as easily as regular polish, which makes it easy to use it at home.
Due to the fact that the gel polish has absorbed the properties of a gel, it not only has durability, allowing you to wear the coating for 2-3 weeks, but also gives the nails additional rigidity. Gel polish strengthens the nail plate, which allows those with thin and brittle nails to grow longer.
In addition, women are well aware of the problem of smudged nail polish and long painful waits for it to dry, but with gel polish you can forget about this.
The gel polish is dried in a special lamp, which takes an average of 0.5-1 minutes. Of course, buying a lamp is associated with additional expenses, but it is worth noting that a lamp for curing gel polish will last you from 3 to 5 years! By purchasing it just once, you will have a flawless manicure for several years.
There is a myth that gel polish spoils nails, making them thin and brittle. But again, this is just a MYTH!
The gel polish itself does not affect the nail plate in any way. It can only deteriorate if the material is applied and removed incorrectly, and also if the owner of the manicure picks at the coating.
Stripes
If you are new to manicure, drawing from stripes can be done easily and simply. At the same time, there are many variations of designs with stripes that every girl will like. Using stripes you can create a checkered pattern.
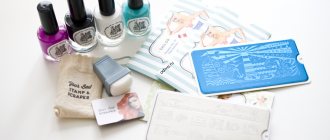
What additionally you will need:
- fine brush: number 0, 00 or 000;
- gel polishes;
- adhesive tape: the required width (optional).
A pattern with parallel stripes can be drawn freehand with a brush. To make the drawing more colorful, alternate matching colors, and also make lines of different thicknesses. If you cannot accurately draw an even line, then resort to using adhesive tape.
To do this, after applying the main background color, remove the stickiness from the gel polish with alcohol or a degreaser. Apply the tape and apply gel polish over it. Then dry the drawing and remove the tape. This can be repeated step by step many times.
Simple designs on nails with gel polish for beginners
Simple designs on nails with gel polish for beginners
Simple designs on nails with gel polish for beginners
Video “Stripes”
What is the difference between gel polish and shellac and which is better?
Let's go back to 2010, when the CND corporation created a revolutionary product - a hybrid of gel and varnish. But she didn’t call it gel polish, but “Shellac”.
Essentially, gel polish and shellac are the same thing. Simply “Shellac” is the name of a certain brand of gel polishes. But due to the fact that shellac became the world's first gel polish, a merging of concepts occurred. For example, the same thing happened with the Pampers brand: very often you can hear that diapers are called diapers.
Therefore, to the question: “Which is better – gel polish or shellac?” The answer is simple - there is no difference between them.
IMPORTANT!
Keep in mind that if you go to a professional manicure store and ask for shellac, the seller will most likely give you “Shellac” from the CND corporation. Therefore, if you want to get acquainted with the entire range on the market, and not just one brand, then ask for gel polish.
Vilux
A new product in the manicure industry is Vilux , which combines varnish and topcoat. Professional coating presented by the creators of shellac. It applies very quickly and lasts 7 days. Vilux was nicknamed “weekly varnish”. And if a UV lamp is required to apply shellac, then the Vilux coating when ordering a manicure is carried out without its participation. You can remove Vilux polish in the same way as regular decorative nail polish.
Studio photo
- Kuznetsky Bridge
- Novoslobodskaya
Gel polish systems: one, two and three phases
Today, gel polishes can be divided into coating systems. There are single-phase, two-phase and three-phase systems.
- A single-phase system
involves the use of just one bottle - “3 in 1” gel polish. It combines base, color and top coat; - The two-phase system
requires applying a top coat to the gel polish. The gel polish itself combines the properties of color and base coat, so the use of a base is not required. - A three-phase system
means that three products must be used to apply the coating: base coat, color coat and top coat.
What are the advantages and disadvantages of each system?
Using a single-phase or two-phase system can save time and budget, but it is worth noting that they are much inferior in durability to a three-phase system and are not suitable for soft and thin nails. The wearing period of single-phase or two-phase gel polishes is 1-2 weeks. When using two-phase gel polishes, special attention must be paid to the choice of top coat in order to give greater durability to the manicure.
In addition, two-phase gel polishes are quite rare products and are not particularly popular among the fairer sex.
Despite the need to use several means, the three-phase system is the most durable type of system! A base coat that is properly selected for your nail type reduces the risk of chipping and peeling. Also, using a base allows you to level it, thereby hiding the imperfections of the nail plate. And with the help of a top coat you can create perfect highlights and additional protection for gel polish.
Types of gel polishes
Well, if you don’t rely on coating systems, then you can distinguish the following main types of gel polishes:
- plain
- classic color coatings; - camouflage
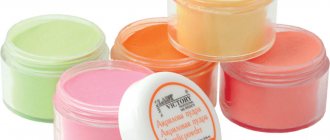
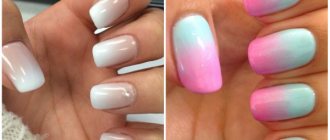
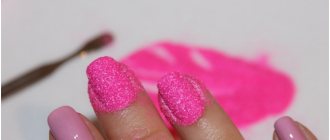
- the most natural and natural colors, close to the skin tone: flesh-colored, peach, pinkish. Ideal for creating a French manicure. Most often, such gel polishes are translucent; - with shimmer
- in other words, these are gel polishes with glitter. Manufacturers are experimenting and adding glitter of various colors and sizes to gel polishes; - “cat's eye”
is a gel polish that contains tiny metal particles. Thanks to this, using a special magnet, you can set the direction of the particles and create an iridescent pattern; - watercolor
- with their help you can create the effect of soft watercolor transitions between colors. These gel polishes have a special texture. Please note that to create a watercolor painting, a special base is required, on which you work without drying; - stained glass
are gel varnishes with a translucent texture that allow you to create designs in the style of mosaic glass and aqua manicure. In appearance, such gel polishes resemble color pigment diluted in water; - thermo
- gel polish that changes color depending on the ambient temperature. This coating contains pigments that react to a decrease or increase in temperature; - chameleon
- this gel polish contains particles that react to changes in lighting. It changes shade when exposed to light; - luminescent
- gel polishes that glow under neon or ultraviolet lighting.
We looked at the main types of gel polishes, although in fact more types can be distinguished.
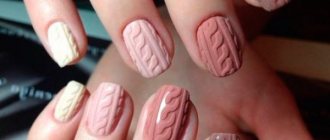
Fashionable pattern - stripes
Drawing on nails with gel polish: Photo 2
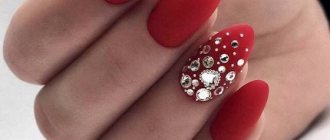
Quite simple, but very beautiful artistic painting on nails with stripes is a very fashionable choice in nail art. This design does not lose its relevance from season to season. Previously, such painting with gel polish on nails was considered summer, but today such interesting and unusual ideas from talented designers are ideal for autumn and New Year's holidays. This gel manicure is reliable, very neat and durable. The convenience of using the gel to create a striped design is due to the ability to use decorative elements, such as stickers, foil and rhinestones.
Nails with a rainbow manicure look interesting. In this case, there is no need to perform a gradient transition. Clear stripes that represent a rainbow look much more beautiful. To create this kind of decor, you can choose bright colors, and make stripes not only vertically or horizontally, but also in a chaotic manner.
Marine nail art is very interesting. However, the most popular design for nails is gel polish using foil. The easiest and most original way to make stripes is to use decorative foil. Marigolds with striped patterns and shiny decor will make your hands stylish and elegant.
How to store gel polish? Shelf life of gel polish
To ensure that the gel polish does not deteriorate, you must follow a few simple rules for storing it.
- Gel polishes are afraid of sunlight.
Due to exposure to ultraviolet rays, the material may thicken or lumps may appear inside it. To protect gel polishes from light penetration, manufacturers produce them in black (less often colored) bottles. Despite this, you should not place gel polishes near a window; it is better to store them in a dark corner or a special case away from sunlight. For the same reason, do not forget to tightly close the bottle cap after finishing the procedure.
NOTE!
The application of color coating most often occurs in close proximity to the polymerization lamp. Place the gel polish bottle so that the light from the lamp does not fall on it, otherwise the gel polish may thicken.
- Do not store gel polishes near heating or heating devices.
And also avoid sudden changes in temperature. All this negatively affects the structure of the gel polish. The ideal storage option is stable room temperature. - Don't shake gel polishes.
Due to shaking, air bubbles may appear in them, and this leads to the fact that the coating does not fit well on the surface of the nail plate. The adhesion between layers also deteriorates, and this can lead to detachments and chips.
If you often transport gel polishes, then do it in a special case with fixation for bottles.
The standard shelf life of gel polishes is 3 years. However, it may be different due to the textural features of the material (gel polish effect). The expiration date of a particular brand of gel polish is determined by the manufacturer and is indicated on the label accompanying the bottle.
How to choose gel polish?
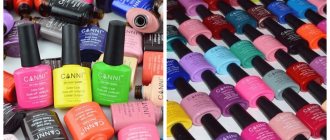
You went shopping for gel polish for the first time, walked into the store, your eyes ran wide from the variety of brands, and the question flashed red in your head: “How to choose gel polish so that it is of high quality and lasts as long as possible?” Which brand should I choose?”
It’s worth saying right away that the durability of a manicure does not depend on gel polish, but on proper preparation of the nail plate for coating and correctly selected base and top coats.
You can find out how to choose a base and top coat in the articles “Base for gel polish. What is it and what is it for?”, “Top for gel polish. What is it and what is it for?
For the most part, choosing a particular brand of gel polish depends solely on your preferences. But we will still look at what to look for when choosing it.
Density
Some people prefer a more liquid material, while others prefer a thicker one. It is worth noting that liquid material will have to be coated in several layers, while thicker material can be coated in one layer.
Brush shape
Manufacturers delight us with a huge range and try to satisfy all possible requests. There are fan and square brushes. Some brands have longer brushes, others shorter ones. Here again it all depends on your preferences.
NOTE!
Before purchasing gel polish, be sure to check the brush for defects! Sometimes the brush hairs may stick out in different directions or be completely absent.
Pigmentation
Well-pigmented gel polishes have a denser texture and most often apply in 1 layer. But it is worth noting that such gel polishes require a polymerization lamp with a power of at least 48 W. Lamps with a lower power, for example 24 W, will not be suitable - the coating simply will not dry out and will shrink.
Smell
Some gel polishes have a sharp chemical smell, while others, on the contrary, have a pleasant scent. If you are very sensitive to smells, then be sure to pay attention to this point, otherwise creating an amazing manicure will turn into real torture!
Bottle volume
When choosing gel polish, be sure to pay attention to the volume of the bottle. At first glance, it may seem that there are absolutely identical rows of bottles in front of you, but this is not so. At the same cost, the volume of some gel polishes may be smaller, while others may be larger. And if, according to all other parameters, 2 brands are ideal for you, then, of course, it is more profitable to purchase a bottle of a larger volume.
Composition and hypoallergenic coating
If you are allergic or are afraid of allergies, then purchase hypoallergenic gel polishes, for example “BeautiX”. And if you want to learn to understand the composition of artificial coatings, we advise you to take the webinar “Chemistry of acrylates: all about materials” from the ParisNail school.
These are the main points that you should pay attention to when choosing gel polish.
ADVICE:
In order not to buy a “pig in a poke”, buy gel polishes in professional stores that are official representatives of brands and give you the opportunity to test gel polish for free before purchasing. In such stores you can apply gel polish to the tip and see if you like its thickness, density, and brush shape.
Which lamp is better for gel polish?
Currently, there are several types of lamps for drying gel polishes:
- ultraviolet (UV);
- light-emitting diode (LED);
- cold cathode lamps (CCFL);
- hybrid (UV+LED, CCFL+LED).
Gel polishes usually have a mark indicating which lamp can be used to dry them. Most often, this mark looks like “UV/LED,” which means that the gel polish can be dried in an ultraviolet, LED or hybrid (UV+LED) lamp.
But, for example, hypoallergenic gel polishes “BeautiX” are marked “UV GEL POLISH”, i.e. This gel polish can be dried in an ultraviolet or hybrid (UV+LED) lamp. If you own a light-emitting diode (LED) lamp, then the coating of this company will not suit you. The lamp simply cannot dry this gel polish.
Read more about what to look for when choosing a lamp for manicure in the article “How to choose a lamp for drying gel polish?”.
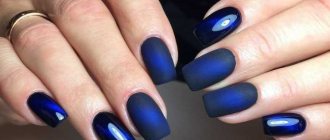
Bright nail design
This year, bright manicures are popular, as it is fashionable to create a rich and expressive design that emphasizes a woman’s image and sense of style. Using rich shades applied to gel polish is the best way to realize unusual fantasies.
The advantage of this design is its versatility. Despite its catchiness and contrast, it can be quite successfully used for different images, which helps highlight the originality of the beautiful lady.
In order for the artist painting on your nails to do everything correctly, you need to decide on the pattern in advance. For example, floral or fruit and berry themes are very fashionable. As a base, it is better to choose eggplant, herbal, lemon, turquoise, raspberry or orange varnish. Drawings in the form of blots and rainbow stains look interesting on nails. On matte varnish they are brighter and more expressive.
How to apply gel polish? Step-by-step technique
Below we provide a short list of all application steps. You can read detailed instructions in our article: “How to apply gel polish at home.”
- We treat the surface of the nail plate with a buff to lift the scales of the nail plate and improve adhesion.
- Remove dust with a special brush.
- Apply degreaser to a lint-free cloth and wipe your nails.
- Apply dehydrator to the entire surface of the nail and air dry for a minute.
- Then you need to apply primer to the free edge (tip) of the nail. The free edge is one of the most vulnerable places, and thanks to the primer, the adhesion between the nail plate and the artificial material improves, which contributes to longer wear of the coating. We also air dry the primer for one minute.
- Apply a base coat to the surface of the nail. Dry it in a lamp. We do not remove the sticky layer.
- Apply gel polish, if necessary in 2 layers. We dry each layer in a lamp. We do not remove the sticky layer.
- Apply top coat. Dry it in a lamp.
- If you are using a top coat with a sticky layer, then moisten a lint-free napkin with a sticky layer remover and wipe your nails with it.
If you nevertheless purchased a single-phase gel polish, then simply skip the steps of applying the base and top coats. And if you purchased a two-phase one, then skip the step of applying the base.
Gel varnish coating
A step forward in manicure was the invention of gel polish. Now every fashionista knows that coating your nails with gel polish allows your nails to look flawless for up to three weeks. The first product that combines the beauty of professional varnish and the strength of modeling gel was released by the American company Shellac. Since then, the gel varnish coating has been dubbed “shellac.” The mega-popular shellac is chosen by countless women around the world (especially those with thin and brittle nails) when ordering a manicure. And there is a completely logical explanation for this fact.
Shellac coating is valued for:
- ease of application of the material to the nail surface;
- rich color and shine;
- a wide palette of different shades;
- no odor;
- nail protection and strengthening;
- safety of the procedure.
Coating takes approximately 1 hour. Gel polish does not wear off and wears well. And remove shellac in the salon in several ways: using a special liquid or by cutting it off with a file or machine. For those who want to know how much it costs to remove shellac, below are the prices.
What should you not do after applying gel polish?
In order for the coating to be worn for the entire prescribed period without chipping or peeling, you must follow some rules:
- Do not wet the gel polish during the first 24 hours after application. To be more precise, it is long-term water procedures that should be avoided. For example, taking a hot bath or visiting the pool;
- also during the first 24 hours it is necessary to refrain from paraffin therapy and visiting the sauna, bathhouse;
- do not pick the nail plate;
- it is necessary to avoid mechanical damage: knocking with nails, opening jars with them, etc.;
- Household work with chemicals or detergents must be done with household gloves, since the aggressive components in these products can damage the coating. By the way, this particular rule will help not only preserve your manicure, but also the beauty and youth of your hand skin.
How long can you wear gel polish and why can’t you wear it too long?
Often, in order to save money, girls wear gel polish for a month or even more, not realizing that they can cause damage to the nail plate.
Technologists advise walking with the coating for no more than 2-3 weeks. Prolonged wear puts stress on the tip of the nail plate, its root suffers from the weight of the coating. All this can lead not only to breakage, but also to deformation of the nail plate.
Varnish coating
The fastest and easiest of the types under consideration is nail polishing . The procedure takes no more than 15 minutes, plus drying time. Ordinary decorative varnishes last on nails for about 5 days. In this case, the nail plate is not injured by filing. And the price for this type of coverage is minimal. Each salon offers varnish when ordering a manicure, because nail design is the final chord of the entire procedure.
How to remove gel polish?
As mentioned above, the wrong technique for removing artificial material can damage the nail plate, so special attention should be paid to this stage.
There are two ways to remove the coating: by soaking with a special liquid or napkins, and also by using sawdust.
Maceration
When soaking, it is necessary to file down the surface of the coating with a coarse file, the abrasiveness of which is approximately 80/100 grit. After this, you need to soak the napkins with gel polish remover, apply them to the nail plates and cover with foil for 15-20 minutes. During this time, the liquid will dissolve the coating. After this, you need to remove the remaining coating with an orange stick.
Boomerang file black UT-403 A 80-100 ZINGER
Beginners should not use metal pushers. An inexperienced person can damage the nail plate as it may be difficult for them to distinguish where the base coat layer ends and the natural nail begins.
NOTE!
Not all bases can be soaked, so ask the seller to choose the base that is suitable for this type of removal.
Sawdust
You can also remove the coating using sawdust, but this option is only suitable for those girls who are familiar with hardware manicure, because removal with sawdust is easiest done with a special removal cutter.
Of course, you can try to remove it using a rough file, but this method is quite problematic, will take too much time and can damage the natural nail. Therefore, at home, the easiest way to remove it is by soaking.
Benefits of gel manicure
The fact is that, due to its soft composition, there is no need to grind the upper part of the nail plate and cover it with components that contain acid. The lack of traditional preparation will allow your nails to remain unchanged.
On the contrary, Imen “soft gel” will help strengthen the nail structure, as it has a healing effect. After coating, you will not worry about breaking your nail. The healing properties have a positive effect on native nails. They will become healthier, the growth process of the nail plate will accelerate, and the appearance of the cuticle will improve. Even after applying the biogel, the nails do not stop breathing and do not become deformed. The question of how long gel polish lasts interests many. This is another advantage of gel manicure. He can decorate his nails for more than two months; correction is simply necessary at least once every two to three weeks. And you are again the happy owner of “breathing” bionails, which have a healing effect on the plate itself and the skin around the nails.
Now you know that within two weeks your nails will look brilliant. You just need to take care in advance about what shade you would like to see on your nails. The palette of modern biogels consists of a huge number of colors, which will delight women who, choosing bright shades of ordinary varnish, are forced to constantly repaint their nails because it is constantly worn off from the tips.
All you need is to give free rein to your imagination, go from the brightest to softest pastel colors and choose your favorite shade of gel. For an original manicure, you can use decoration products. The master will make all your wishes come true.
The assortment includes matte biogel; it can be used as a base for a colored coating. If you don’t want to wear the same shade for two weeks, the specialist will cover them with a base gel, which you can apply varnish on yourself or in the salon. By the way, a classic manicure with a gel coating looks more impressive and lasts longer.
To make not only our hands, but also our feet look well-groomed, we can do a gel pedicure, which is not only modern and aesthetic, but also copes with brittle nails. In conditions of constant lack of time, covering nails with gel polish helps us to be attractive and stylish.
Useful tips
And finally, remember a few simple rules that will help you maintain the durability of the coating and the health of your nails:
- There is a myth that gel polish spoils the nail plate. But this is just a MYTH. Nails deteriorate when the nail plate is not properly prepared for coating and when the technology for applying and removing gel polish is incorrect. Read about how to properly apply and remove gel polish in the articles: “How to apply gel polish at home?”, “How to remove gel polish at home?”;
- Do not pick or tear off the artificial turf under any circumstances!
- Long-term wear (a month or more) of artificial turf can lead to breakage and deformation of the nail plate. Technologists advise wearing the coating for no more than 2-3 weeks;
- Do household work with chemicals or detergents wearing household gloves, as the aggressive components in these products can damage the coating. This rule will help not only preserve your manicure, but also the beauty and youthfulness of your hand skin;
- During the first 24 hours after applying gel polish, avoid long-term water treatments, paraffin therapy, and visiting a sauna or bathhouse.
We hope that the article was useful and helped make choosing gel polish easier! We wish you pleasant and profitable shopping!
Drawing
You can draw a simple pattern on your nails using gel polish at home. If this is your first time trying your skills as an artist, then you should start with simple and uncomplicated images. Gradually, improving your technique, you will be able to create real masterpieces. The main thing to remember is that the drawing must, first of all, be neat! Gel polish with patterns in the photo will help you decide on the image you want to apply.
Simple pattern for manicure
In order to make a beautiful and original drawing, you must have at least basic drawing skills. The lines you apply must be even and smooth, otherwise you will end up with a manicure and a set of blots on your nails.
It's worth knowing! Before experimenting with your nails, it is better to purchase a set of artificial nails and practice your nail art skills on them.
It is better to divide the entire procedure into several stages and perform them gradually, slowly:
- Prepare the nail plate for application of the coating: sand, file, trim the cuticle;
- Apply the clear coat, when it dries, you can apply the base;
- It is better to start the pattern from the tip of the nails;
- After your masterpiece has dried, seal the result with a topcoat.
Applying a clear base coat
You can create a simple drawing by following the following step-by-step instructions:
- Apply base coat and dry nails;
- Cover the nail plates with base varnish;
- Place your nails under the LED lamp for a couple of minutes;
- Using dots, apply several dots using different shades. Place them in random order, but at a short distance, so you can get a more impressive design;
- After finishing work on the pattern, you again need to send your nails to dry under the lamp. To add shine to the finish, apply topcoat.
Drying nails after applying gel polish
Drawing a simple pattern on your nails with gel polish is not so problematic, but there are designs that are almost impossible to apply beautifully the first time. These include:
How to save money on manicure?
Do you want to perfectly master the art of manicure from A to Z and never spend 2,000-3,000 rubles in a salon again? Then learn how to do a manicure yourself and save money, time and nerves!
Come to our School for an online course from top teacher Tatyana Svoboda “Manicure for yourself,” which can now be completed for only 499 rubles !
The teacher will tell you all about the technique of applying the coating, removing it, modern designs, how to strengthen your nails, and much more. You will become a real pro and will be able to create your dream nail designs, and, if you wish, monetize your hobby in the future!
Course bonuses:
We give all students a 15% discount on ready-made manicure starter kits, as well as a 5% discount on purchases at ParisNail and 15% on any other online course. Upon completion of the training, you will be issued an electronic certificate of completion of the course.