Rules for perfect coverage
There are several main factors on which the final result depends - a high-quality and beautiful coating.
- High quality manicure . No matter how hard you try, no matter how many layers of material you put on your nails, until a clean manicure is done, there can be no talk of any beautiful coating. If the manicure is poorly done and there is pterygium or smooth, untreated areas left on the nail plates, then the material may flow along the surface. This means that there will be streaks, an uneven paint line, material will be poured into possible cuts, the color will be in a rut, and you will have to file the nails when removing them;
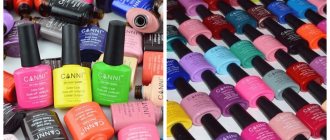
- Materials with suitable consistency . All the materials you work with should be familiar to you: their consistency, fluidity. Select the materials with which you are comfortable painting, drawing, modeling, etc.;
- Convenient coating tools . Again, you should be comfortable and comfortable working. Select brushes of the required length, the correct shape of the nail file and the rest of the tools;
- Knowledge of the architecture and capabilities of certain materials . It is important to understand how the material behaves on nails and what thickness of coating it can provide. And if during the manicure process you need to do leveling, then several layers in a decorative manicure, then you just need to know and regulate the placement of the material on the nail plate;
- Refined movement technique and coverage algorithm . Of course, everything needs to be done quickly so that the material does not flow down or accumulate on one side. It is also necessary to observe a strict sequence of layers. You understand, if you apply a top coat instead of a base coat or vice versa, then it is unlikely that such a manicure will have the correct architecture, be beautiful and last a long time.
Training on how to create a manicure and apply gel polish through video tutorials
Visual perception plays a very important role in our daily lives, helping in learning and making it possible to convey important information quickly and clearly. First we look, then we process what we see and in a matter of minutes we understand what needs to be done.
In the modern world, most women perceive visual information much better than huge canvases with many letters. Therefore, I suggest you watch a few video tutorials on how to create a manicure with gel polish . I tried to make for you a selection of the most useful video materials, which at one time helped me a lot in becoming a professional in the field of creating gel polish manicure.
Videos for beginners
Video tutorial No. 1 “Full review: starter kit for gel polish. Part 1"
Video tutorial No. 2 “Full review: starter kit for gel polish. Part 2"
Video lesson No. 3 “Removing the old coating and making a new one”
Video tutorial No. 4 “Gel polish manicure at home with a detailed discussion of all sorts of subtleties”
Video tutorial No. 5 “How to apply/remove gel polish”
Video master class from professional cosmetologists
Video No. 1 “Step-by-step instructions for applying gel polish”
Video No. 2 “Three effective ways to remove gel polish”
Video No. 3 “Removing gel polish with a cutter + hardware manicure. Part 1"
Video No. 4 “Complicated repair, extension and straightening of nails. Part 2"
Video No. 5 “Gel polish correction. Combined manicure for beginners with one cutter. Part 1"
Video No. 6 “Applying gel polish under the cuticle: leveling + strengthening + highlights. Part 2"
Layers of the natural nail plate
You need to understand which nails can be done with any type of manicure, which of them will take a little longer to work on, and with some you can’t do anything at all. It depends on the condition of the natural nails.
Dorsal - a layer that affects the adhesion between the polymer artificial material and the nail plate. Everything works out due to its presence.
If you degrease poorly, then poorly raise the scales of the dorsal layer, leaving shiny smooth areas, then most likely there will be no adhesion in places. The dorsal layer guarantees good adhesion of the material to the nail plate.
The presence of material detachments may be due to the following reasons:
- Improper preparation - poorly sanded surface with shiny areas;
- The nail plate can be very mobile, and the material chosen is too hard, so there is no shock-absorbing membrane between the nail and the hard material.
Intermediate or soft keratin . Nails with such a top layer will already have poor adhesion; nail strengthening is a must. If you have such nails in front of you, then do the following:
- Shorten the length;
- We use a primer;
- Strengthen your nails by straightening them.
Ventral . For marigolds with a ventral top layer, any type of manicure is in principle contraindicated. There is no coupling, it cannot be covered, a recovery period is required.
Learn more about the structure of nails, which affects their growth and healthy appearance.
Stages of preparation for coating
- The first thing you need to do is a hygienic manicure, which includes cleaning your hands, removing the old coating, shaping your nails, cleaning and treating the skin around the nails and the nail plates themselves;
- Degreasing nail plates . The lipid layer, this natural fatty film, must be removed with a degreaser. You cannot begin to lift the scales of the dorsal layer along the fatty layer. Be sure to degrease the surface first;
- Sanding the top layer the nail plate is produced in one direction. First, we identify the middle part of the nail, where the central plane is located, and two side slopes. Dense lipid plaque, which has settled into the porous structure of the dorsal layer, is lifted with a 180 grit buffer in the case of a dense nail structure, with a hard lipid layer, or 200 grit in the case of a thinner structure. We move the periungual roller and move the file strictly in one direction from one side to the other, first on the side slope from the roller to the center, then move to the central plane, and then to the other side slope;
- Dehydrator application . Apply liberally to the entire nail plate and draw out moisture and excess fat from the lower layers of the scales. You can even walk on the skin around the nail;
- Primer application. If the nails are healthy and problem-free, then we proceed immediately to applying the base. If there are minor problems, then we use a primer. To do this, squeeze out the brush, use a semi-dry brush from the bottle to the middle of the nail (from the smile line to the free edge), and rub the primer into the structure of the dorsal layer with trampling movements. It’s as if you want to fill all the areas and weak spaces of the natural nail. After application, polymerize in a lamp for 30 seconds. The primer works on the natural nail. Used when nails are damaged, hyperplastic, and heavily exfoliated. There is no point in applying primer over the base coat.
Technology for applying gel polish at home
If you have already had a manicure done by a professional, then visually the technology is already familiar to you, all that remains is to hone the practice.
So, the stages of applying gel polish at home:
- We do a hygienic manicure. You can't go anywhere without him. The stability of the gel coating depends on how well the nail plate is prepared. So we cut off the cuticle and lateral ridges as much as possible, and remove the pterygium. Shape the free edge.
The procedure for performing a hygienic manicure
- We prepare the nail plate. If necessary, remove the gloss from the nail using a soft buff. Some gel polishes do not require filing of the nail, for example, shellac brand gel polishes. We carefully degrease the nails and apply primer, especially paying attention to the end parts of the free edge of the nail. It is important that the time between applying the primer and coating does not exceed 15 minutes; if you do not meet the deadline, apply the layer again.
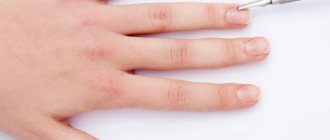
Preparing the nail plate: shaping the free edge of the nail
Preparation of the nail plate: degreasing
Preparing the nail plate: applying primer
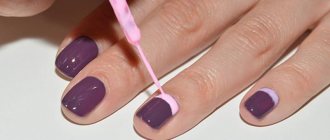
- Applying the base layer. Apply a very thin layer of base to the entire surface of the nail, not forgetting the end parts. The main thing is to ensure that the top does not leak onto the cuticle and side rollers. If necessary, correct leaked varnish.
Applying the base
Important
We follow the rules for applying gel polish: first apply the coating to four fingers of one hand, except the thumb. After which the varnish is dried in a lamp. The same is done with the other hand. Thumbs are painted and dried separately! If you apply varnish to your entire palm at once, there is a risk that the varnish will run off your thumb.
- Applying color. It is applied in two layers and each one is baked in turn in a lamp. The first one is very thin. Don't be afraid that it will turn out uneven, the second layer will fix everything. We also apply it very thinly. It happens that the second layer also colors the plate unevenly. Then apply the third one. It is better to dry the varnish three times in a lamp than to get a deformed or bubbling coating, as happens with a thick layer. We also make sure that the varnish does not leak onto the border of the skin. It is not necessary to paint the ends at this stage, but it is not forbidden.
Applying color
It is important to follow the technique of applying varnish. Pay attention to the diagram:
Scheme for applying gel polish to the nail surface
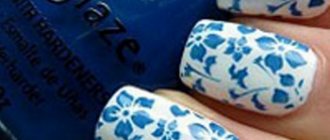
- Applying decor. There is complete freedom of imagination here. You can use glitter, stickers, sliders, rhinestones.
Important
We reduce the sticky layer only in the final phase. Because it is precisely this that ensures the adhesion of each subsequent layer.
- Consolidation. Top coat is applied. The layer is applied quite densely. After all, consolidation of the entire result depends on it. Don't forget to seal the ends. If you miss this moment, the manicure will come off your nails.
Applying top coat
- Removing the sticky layer. Everything here is elementary. Apply degreaser to a napkin and thoroughly wipe each nail.
Removing the sticky layer
- Apply moisturizer to the cuticle.
Moisturizing the cuticle
This is the sequence of applying gel polish at home.
You can learn more about the procedure for applying gel polish at home in the video.
Leveling technology
- First layer. The applied first layer of base coat must be cured in a lamp if:
Nails are thin or damaged, and applying too much material can burn them. Apply the base using trampling movements. When leveling healthy nails, there is no need to dry the first layer, it remains damp;Several bases are being connected: the plastic one is used first, and the more rigid one is covered on top;
- Drop installation. At an angle of 45 degrees, the drop is placed on the nail with a brush and pulled to the sides towards the lateral sinuses and downward according to the “left-right-center-down” pattern. The result should be a beautiful, even funnel;
- Contraction of volumes. As soon as a funnel is formed, we begin to pull the material from the funnel area to the free edge of the nail plate;
- Marigold flip at an angle of 45 degrees to the parallel of the table so that the distributed material is collected at the apex, the highest point of the natural nail.
- Polymerization in a lamp.
For the leveling process, you can replace the base coating with biogel and follow the same scheme. It is also important when distributing the material to move the brush over it gently, without pressing.
Biogel and its properties for strengthening, building, health and growth of nails