Gel polish correction without removal is a manicure update without removing the old coating. It is performed after 2-4 weeks, when the nails have grown sufficiently. Cover only the natural part of the plates, first filing the border of the flower bed. Then proceed in the same way as with a complete manicure update, using sequentially a cuticle remover, degreaser, primer, base, the same or a different gel polish and top coat.
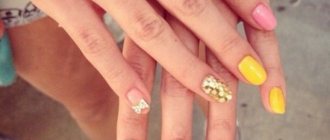
You can make a correction by partially removing the coating. Use a file to grind it down to the base and cover it with a new color. Or they decorate the overgrown part of the nails with rhinestones, foil, and sparkles. The broken plate is replenished with gel, and in case of small cracks, the entire coating on it is simply renewed.
Correction of gel polish without removing color
Correcting gel polish without removing the color saves time, as it is faster than a complete design update:
- First the cuticle is treated. You can remove the excess with a hardware cutter, then with nippers, and if you don’t have a device, with a remover and an orange stick. If the stratum corneum is small, it is simply moved using a softening agent and a pusher.
- The gel polish at the border with the regrown area of the nail needs to be filed down. This way, the convex transition line is removed - a step that will interfere with making the updated coating smooth and natural.
- The buff is passed over the entire surface of the plates. This is necessary to remove the glossy sheen, that is, better adhesion to the fresh layer of coating.
- After filing, the surfaces of the nail plates are wiped with a degreaser. All debris is thoroughly cleaned from the sinuses and removed from the skin.
- Apply primer to the regrown parts of the nails. This is done with a semi-dry brush. And you need to wait a few seconds for the liquid to dry in the air.
- The next product is the base. It is taken in a small amount and applied to the middle of the nail or to the entire nail, directly over the remaining layer of gel polish. The base is polymerized.
- Paint your nails with gel polish of the same color over the entire surface or to the middle, free edge. The choice depends on the design and thickness of the previous coating. But the renewed surface should be smooth.
- The layer is dried. And you can cover your nails with gel polish again for color density and polymerize again.
- Apply the finish to each plate entirely. Dry the last layer in a lamp.
With this method, you can reduce the length of your nails using a file or a hardware router. This is done at the very beginning, even before working with the cuticle. But there is a danger of compromising the integrity of the coating on the tips. Therefore, it will be necessary to apply a fresh layer of gel polish to the entire surface of the nails, including the free edge.
How to correct extended nails
If you do not want to contact a specialist, and you are confident in your abilities, then you can restore your manicure yourself at home. You will definitely need to order or buy in the online store all the necessary materials and tools. Nail correction at home is justified from a financial point of view if you do it regularly. The main advantages of this solution are that you can make corrections whenever you want and help your friends.
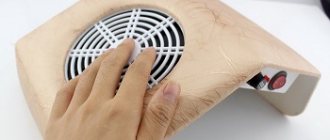
Those who are interested in how to correct nails should first watch the lesson or read the step-by-step instructions with photos so as not to spoil the manicure. In addition to modeling material, you will need to purchase a UV lamp. To simplify the process, you can buy a manicure machine, the only drawback is that you need to learn how to use it and understand the sets of attachments. You don’t have to buy the most powerful router; you definitely don’t need a professional one. Its cost is relatively low, and you will use it for a long time.
- Carp baked in the oven: how to cook fish deliciously
- Strengthening nails with acrylic powder for gel polish step by step
- Chicken in sweet and sour sauce: recipes
Correction of extended nails with gel
This is one of the material options that is used for extensions and modeling. Correction of gel nails involves the use of specific materials that you will have to purchase yourself. For the procedure you need to have:
- degreaser;
- gel;
- modeling gel;
- liquid for removing the sticky layer;
- acid-free primer;
- antiseptic;
- cuticle oil.
This is the most minimal set for correcting extended nails with gel. If you used a single-phase gel for the first time, you can use it for correction. In the case of a three-phase procedure, any system is suitable. Next, you need to have a minimum set of tools that will help you do everything easily and quickly:
- lint-free wipes;
- buff for polishing nails;
- Ultraviolet lamp
- pusher or orange sticks;
- brushes for modeling nails with gel;
- gel files, suitable for 150/180 and 100/100 grit.
- nail clippers for cutting cuticles or blades;
- artificial nail clippers.
Below is a step-by-step description of how to correct gel-based nails. It is very similar to the procedure when working with acrylic. The instructions consist of the following steps:
- Degrease, disinfect hands, tools, remove varnish and paint from the plate (it is better to use products without acetone).
- Use an orange stick to lift the cuticle.
- Using a nail file, correct the shape, first file off those parts of the gel that have begun to lag behind. Then, in the place where the old coating begins at the cuticle, remove all the gel, you should get an imperceptible transition to the natural nail.
- Treat the surface with primer so that the infection does not get under the nail, remove excess with a towel.
- The smooth part of the regrown plate is cut off using a buff. Next, the hole is immediately filled with gel and dried with a UV lamp.
- When the material dries, you need to remove the sticky layer and form the correct shape. Use a file to immediately correct any unevenness, if any. The base layer of gel is applied evenly over all parts of the plate. A little more material is needed for the stress zone (just above the middle of the nail), but do not overdo it. Then dry the material again in a UV lamp.
- Then you need to correct the shape, smooth out defects and unevenness using a nail file. Be careful not to accidentally wear off the base layer to the old coating.
- Remove dust regularly with a brush.
- Before applying the finish, you need to make the desired design (drawing, French).
- Next, apply the finishing coat in one layer and dry under a lamp. To make it smoother, then apply a buff.
- You need to treat the side rollers and cuticles with nourishing oil (rub in like a cream).
Correction of acrylic nails
This type of artificial material is very popular among girls. Correction of nails with acrylic is carried out according to a similar algorithm, as with the option described above. To ensure everything works out correctly, you can use the instructions described below:
- Treat your hands and work surface with a disinfectant.
- Remove the varnish layer with a non-acetone product.
- Treat cuticles with a softening agent. After 2 minutes, use a wooden stick/spatula to remove the pterygium from the natural plate.
- Remove any remaining product using a lint-free cloth. File down the free edge with a nail file and set the desired shape. It is necessary to cut down 2/3 of the thickness of the material.
- Remove shine from the natural nail for better adhesion of the plate to the acrylic.
- Treat the peeling areas with a fine-grain nail file.
- Next, you need to treat the part where there is no acrylic using a degreaser.
- Treat the nail plate with a primer, which connects the keratin of the natural part with the artificial material.
- Run the simulation. Make sure that the acrylic is applied evenly over the entire area and does not penetrate the skin or into the lateral sinuses. Extension brushes should only be made of natural bristles; do not press too hard when applying.
- Then place your hands under a UV lamp for 2.5 minutes.
- Apply special oil to the cuticle.
Nail correction with shellac
This is a new type of coating that is easier to apply and lasts as long as gel/acrylic ones. Nail correction with shellac is carried out in two ways: with or without complete removal. To carry out the procedure, a standard set of instruments is used. Correction of gel polish is carried out according to the following instructions:
- It is recommended to treat nails that are too dry using a special activator. it consists of essential oils and water, apply it to the sides and keep for 5 minutes.
- Use a pusher to pick up the shellac polish. Carefully remove the coating; this is easier to do using the same activator.
- Using a nail file, give the regrown edge the required shape.
- Next, get a manicure or use a special gel to soften the cuticle and push it back.
- Clean the plate with a nail polisher until a shine appears. This step cannot be skipped; then it will be easier to remove the layer if necessary.
- Degrease the surface.
- Coat the substance that replaces the base and finish, dry it under a lamp.
- Select a shade of shellac, apply one layer to the surface, and dry.
- Then another layer, and again you need to dry it.
- Apply finishing coat last and let dry.
- Apply cuticle repair serum.
Nail correction using tips
This procedure is similar in its algorithm to working with gel extensions. Restoring sealing, updating the coating, replenishing modeling materials, giving an aesthetic appearance - all this is the correction of nails using tips. Below is an algorithm for acrylic technology:
- Saw off the overgrown tips with a reversible nozzle and process to a thin substrate.
- File the surface of the nail with a 180 grit file, smooth out the transition from the tip to its own plate.
- Use a spatula to push back the cuticle.
- Use a diamond attachment to perform a hardware manicure.
- Degrease, disinfect the nail, wipe with a napkin (dry).
- Apply a small amount of acid-free primer at the base of the tip.
- Lengthen the nail bed with camouflage acrylic and shape using a brush.
- Model the cuticle growth area and apex with matte, one-time powder.
- Next, you should compress the stress area.
- Use a clothespin to secure the clamp.
- Model the free edge of the nail with white acrylic. You can put it on two tips at once.
- Form the free edges with the base of a thick brush.
- Use the drum attachment (reversible) to file the tip of the nail.
- Treat the inner, longitudinal arch in the same way.
- File the cuticle and apex area with the “corn” attachment.
- Use a 100 grit file to file down the nail plates.
- Sand the inner arch of the nail using the reverse corn attachment.
- Use a carbide tip to treat the hyponychium area (where the inside of the nail comes into contact with the skin).
- Treat the outer and side parts with a 100 grit file and remove dust.
- Coat the inside of the loose tips with finishing gel without sticky salt.
- Cover the outside with gel too.
- Keep your hands under the UV lamp for 2 minutes.
How to correct gel polish with color change
It is also possible to correct gel polish by updating the main shade of the coating:
- First, reduce the length of the nails using a file or milling cutter. You can change the shape if you wish. At the same stage, rough skin around the corners of the nails and side ridges are treated.
- Then remove the color coating to the base. It is permissible to preserve its layer and, if possible, leave it even. Use a file with an abrasiveness of 100-180 grit or a hardware router.
- They work with the cuticle. It is lifted using a pusher, softened with a remover and cut with scissors. If the stratum corneum has not grown enough, it is moved away with an orange stick.
- Apply primer to the regrown part of the nails. You need to let it air dry.
- Use another thin layer of base. It is needed to level the surface. The product is polymerized.
- Apply 2 layers of gel polish. Each one needs to be dried in a lamp.
- Use a finishing coat. It is also polymerized.
This method is possible if there are no peeling marks on the old base coat. They can be seen by swollen places or material raised above the surface of the nail, under which there are voids.
If a problem is detected, you will have to remove the entire coating completely. To do this, after removing the top with a rough file, use a special liquid. It is applied to pieces of cotton pads, placed on the nails and wrapped with foil on the fingertips. Silicone caps can be used for the same purpose.
After 10-15 minutes of exposure, the remaining coating is removed with an orange stick and the manicure is performed as usual:
- Correct the length and shape of nails.
- Treat the cuticle.
- Grind the surfaces of the plates with a buff.
- Wipe them and the skin with a degreaser.
- Primer is applied.
- Use a base with leveling, dry under UV or LED radiation.
- Apply gel polish in 2 layers, both are polymerized.
- Cover with finish and dry.
Correction of acrylic nails
Before correcting extended nails with acrylic, it is important to prepare all the tools :
- File with coarse grain (wide, optimally 100x100);
- Cap for monomer (a product is collected into it to avoid overconsumption);
- Powder;
- Degreaser, primer;
- Acrylic;
- Brushes and pipette.
You can use regular alcohol or any alcohol-based tonic as a degreaser - they have the same functions. Also, before correction, the old varnish is removed and the nail is slightly filed.
Nail correction and extension set for beginners
Step-by-step instructions for beginners with a video on how to correct nails with acrylic:
Video: Correction of gel nails (nail design lessons)
- The cuticle is moved to the very bottom of the nail, after which the filing is made. The technology is the same as for extensions. From the cuticle down to the hole, the file moves in a circular motion. This is necessary because the plate grows unevenly. The goal is to equalize the old acrylic to the level of the natural surface;
Removing old acrylic material - Next, a quick cleaning is carried out to remove the characteristic deposits after sawdust. A napkin, brush or towel is suitable for this;
- As when working with biogel, first the surface of the nail is degreased. Afterwards, a primer is applied to the dried plate;
- Now take a capsule for the monomer and the acrylic itself. Using a pipette, the required amount of product is collected. Next, a brush is dipped into the capsule; first it needs to be well moistened with acrylic. Afterwards, everything unnecessary is brushed onto the walls of the container with monomer;
Set of powder for brush with acrylic - A small amount of acrylic is collected on the tip of the brush, then it is lowered with the same tip into the powder and a ball is collected on it in a circular motion;
- The resulting ball must be distributed very quickly and evenly over the plate;
Stretching an aryl ball - When distributing the powder, special attention is paid to the place where there is a seam between the old acrylic and the natural plate. The brush is slightly pressed into this area;
- Before each next layer, be sure to wipe the brush on a napkin so that there is nothing unnecessary on it;
- Correction with acrylic is most often carried out on tips. To do this, you need to attach the form to the plate and select the desired length according to it. It needs to be placed under the nail and completely adjusted to the shape - so that there are no gaps or sharp transitions;
Forming an acrylic plate - The acrylic in the capsule is replaced and correction work is resumed. The system is the same as before. The brush is soaked in monomer and then dipped in powder. The product is applied over the staples; Fixation tips
- All that remains is to dry your nails and paint them. You can make bright long claws with plates or, conversely, a flirty French correction of extended nails.
Acrylic extensions with gel coating
Many modern ideas for correcting acrylic nails include the use of gel polish. Outwardly it looks very natural (if the correct length and shape are chosen).
Another interesting option for manicure correction with gel polish
Manicure correction with gel polish can be done by changing the design, but without removing the previous coating. In all cases, the cuticle is first processed, that is, it is cut or moved. Then you can use the following tools:
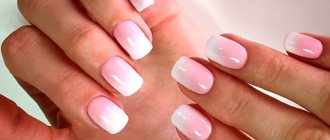
- Gel polish of a different color for the regrown part of the nail. You need to file down the “step” between it and the old coating, degrease it, and coat the open area with primer. After it dries, a base is applied to this area and polymerized. And then they paint it with gel polish. After drying it and covering the entire surface of the nail with top coat, you get a reverse French manicure. It is necessary that the border with the shade is even, otherwise it will have to be covered with some kind of decor.
- Rhinestones. Here, too, the transition between the natural plate and the coating is smoothed using a file, and the surface is degreased. Glue or a thick base is used as a fixative. In the second case, rhinestones are placed on a coated surface and polymerized in a lamp. Apply a topcoat around the stones and dry it.
- Glitter. You can tightly cover the entire strip of the regrown nail with them or stretch it with glitter. Prepare the surface as in previous cases.
- Strips of flexible foil or display material. Here, too, you should cover the entire natural part of the nails. The color of the foil is matched to the shade of the gel polish.
- Acrylic powder with decorative properties. You can take a colored or neon one with glitter, pour it onto a damp base layer and dry it. And then use a brush to get rid of excess grains and cover everything with top coat.
How to correct nails after gel polish
Correction of nails after gel polish may be necessary if one or more are cracked on the free edge, but you want to maintain the length. It's done like this:
- The entire coating is removed by first cutting off the top, then soaking it and removing its remains with an orange stick.
- Treat the cuticle and skin around the nails.
- If possible, carefully file them down, but so as not to enlarge the cracks on the free edge.
- Degrease and clean the work area with a special product.
- Apply ultrabond and allow it to air dry.
- Apply the base with leveling and polymerize.
- Make 2 layers of color coating, each one is dried in a lamp.
- A finishing agent is used and polymerized.
A coating consisting of 4 layers can maintain the integrity of the nails if there are small cracks on the free edge. For greater reliability, at the 6th stage, you can use acrylic powder on the wet base. Sprinkle it with a spatula, or dip your finger into the powder several times. And only after this should the coating be dried. And the flower garden is applied after shaking off excess powder with a brush.
Larger cracks or broken corners are corrected with polygel or extension gel. One of the products is applied to the defect after drying a thin layer of base, kneaded with a brush slightly moistened with a cleanser. Then it is smoothed so that the surface acquires a natural texture. After drying in the lamp, the shape is adjusted with a file. Then continue coating application as usual.
Watch the video on how to correct nails after gel polish:
Gel polish correction at home: what tools are needed
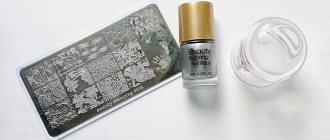
Correction of gel polish at home is performed using:
- manicure files with abrasiveness 100-180 and 240 grit;
- pusher and orange stick;
- scissors or cuticle nippers;
- remover;
- buff and brushes;
- degreaser and primer;
- base, gel polish of the desired shade and top;
- lamps for coating polymerization;
- lint-free wipes.
To paint the overgrown part of the nails, some people require a thin brush, but you can get by with the one that comes in the bottle. If your manicure is refreshed with the help of decorative elements (glitter, rhinestones, foil, etc.), you need to stock up on them too. After completing the procedure, it is useful to apply a little oil to the cuticle and rub.
What materials are needed for proper nail correction?
If you decide to do this procedure yourself at home, then you will need the necessary materials:
- Special liquid to remove acrylic
- Primer is a special adhesion agent
- Plate degreaser
- Acrylic
- Set of special files for polishing plates
- Tassels
- UV lamp
All these sets can be purchased in specialized stores or purchased separately.
Advantages and disadvantages of correcting grown-out gel polish without removing it
Correcting overgrown gel polish without removing it has many advantages:
- makes a 2-3 week old design fresh, making your nails look neater;
- saves time and money, as well as materials;
- allows you to “get your hands on” in applying a flower bed near the cuticle;
- protects nails from additional exposure to liquid for dissolving gel polish or cutters, which can injure them;
- makes it possible to grow the desired length;
- coating defects are quickly corrected;
- there are conditions for the manifestation of imagination in the search for a new design.
Some girls still prefer to completely renew their manicure, since the method of correction without removal is not without its drawbacks:
- it may turn out that there is too much material on the free edge, which increases the risk of breakage;
- It’s not always possible to do everything neatly and beautifully; surfaces may look “pot-bellied” or uneven, with flower bed overhangs;
- the old coating still wears out, that is, there is a greater risk of peeling and chipping;
- under the peeled layer, if the defect is not immediately noticed, an infection may develop;
- The color of gel polish gets boring when worn for a long time.
Is it possible to refinish the coating with regular varnish?
You can also renew the coating with regular varnish; you can choose the exact color or, conversely, use a different shade to create an original design. It will be easier, cheaper and faster.
To ensure that the thickness of the layer at the base of the nails matches the rest of the space, apply a base for regular polish, then a flower bed and a top coat. It is necessary to strive to ensure that these products are applied only to the regrown part of the plates. Otherwise, regular varnish will quickly chip.
But when updating your manicure this way, you need to consider two points:
- a product that dries in air will still differ in texture and appearance from gel polish, sometimes this is very noticeable;
- it does not last as long as a polymerizing coating, a maximum of a week.
Types of corrections
Depending on the neglect of the nails and the integrity of the extensions, various types of corrections can be used:
- small means that you need to correct small flaws - scratches, chips, small peelings;
- The middle one is carried out as a regular procedure after extensions. The regrown part is filled with gel and the shape is evened out;
- A major procedure is done in cases of nail breakage or severe peeling.
3 reasons for nail correction
There are several reasons why you may need to contact a specialist to perform this procedure or perform gel nail correction at home, if you have certain knowledge and tools:
- Regrowth results in a noticeable transition between the gel and the natural nail. The master fills in the regrown part and reduces the shape, which allows you to maintain the length and appearance;
- If the gel begins to peel off or cracks, you need to see a specialist. Never remove gel from injured fingers at home if you do not have the skills to do this. Most often, such manipulations result in serious injuries to the nail plate;
- A small crack in the gel will not take much time to repair, but if the procedure is not done on time, the scratch may increase and lead to breakage;
Regular manicure procedures for caring for extended nails take a lot of time and money, so many have switched to self-correction. Now you can find a huge number of video lessons on extensions and correction of gel nails, with the help of which anyone can understand the principle of these procedures and how they should be performed.
How often to correct gel polish
Correction should be done so often that the nails look neat, that is, every 2-4 weeks. It depends on the speed of their growth, it is different for everyone. If the hole is visible by 2-2.5 mm or completely, the overall appearance of the hands looks sloppy. And with strong growth of the free edge on which there is material, the architecture of the nails is disrupted. This area is overloaded, and there is a high risk of a crack or part of the plate breaking off.
If correction is needed precisely because of the formation of recent defects, it should be eliminated as soon as possible. Otherwise the problem may get worse. For example, a crack will extend beyond the free edge, and this is not only unsightly, but also painful.
Correction also includes caring for the cuticle and side ridges. If burrs, irregularities, or defects appear on them, you should get rid of them using scissors or a special file that grinds the skin. These problems can be avoided by regular use of emollient oil. When the cuticle grows, it is not necessary to cut off every millimeter. It is enough to regularly push it away with an orange stick.
If your nails grow quickly, so that you don’t have to correct them too often, you can cover them with shades of gel polish that are close to the natural color. Or use a camouflage base. You can put off the need for a design update if you do a manicure with negative space in the hole area.